Pause print on driver overheat?
-
SHORT STORY:
Is there a way to take some action when an over temp shut down occurs? Can I pause the job or wait to cool down etc?
BACK STORY:
I've been troubleshooting a problem on my custom build corexy, which involved many failed prints due to skipped steps, so I've upgraded to larger motors (link), and I've set up stall detection. So that will (hopefully) help, but it's not the whole picture.
This morning I made the mistake of rage killing (power off) the printer when I found it, because it takes too long to kill the print through the web interface (if I don't already have it up and running) - but doing so killed my chance of checking the console for other errors etc.
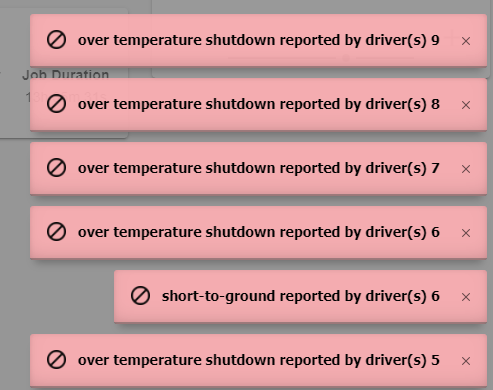
When I did unlock my PC I found that I already had the console open and some errors on the screen.

Drivers 5,6, 7 and 8 are my Z axis motors, driver 9 is not used, but not disabled.
The short to ground on driver 6 is a concern, but everything seems to be working - wiring looks OK, I'm not sure what to do here. If it happens again I'll replace the motor.
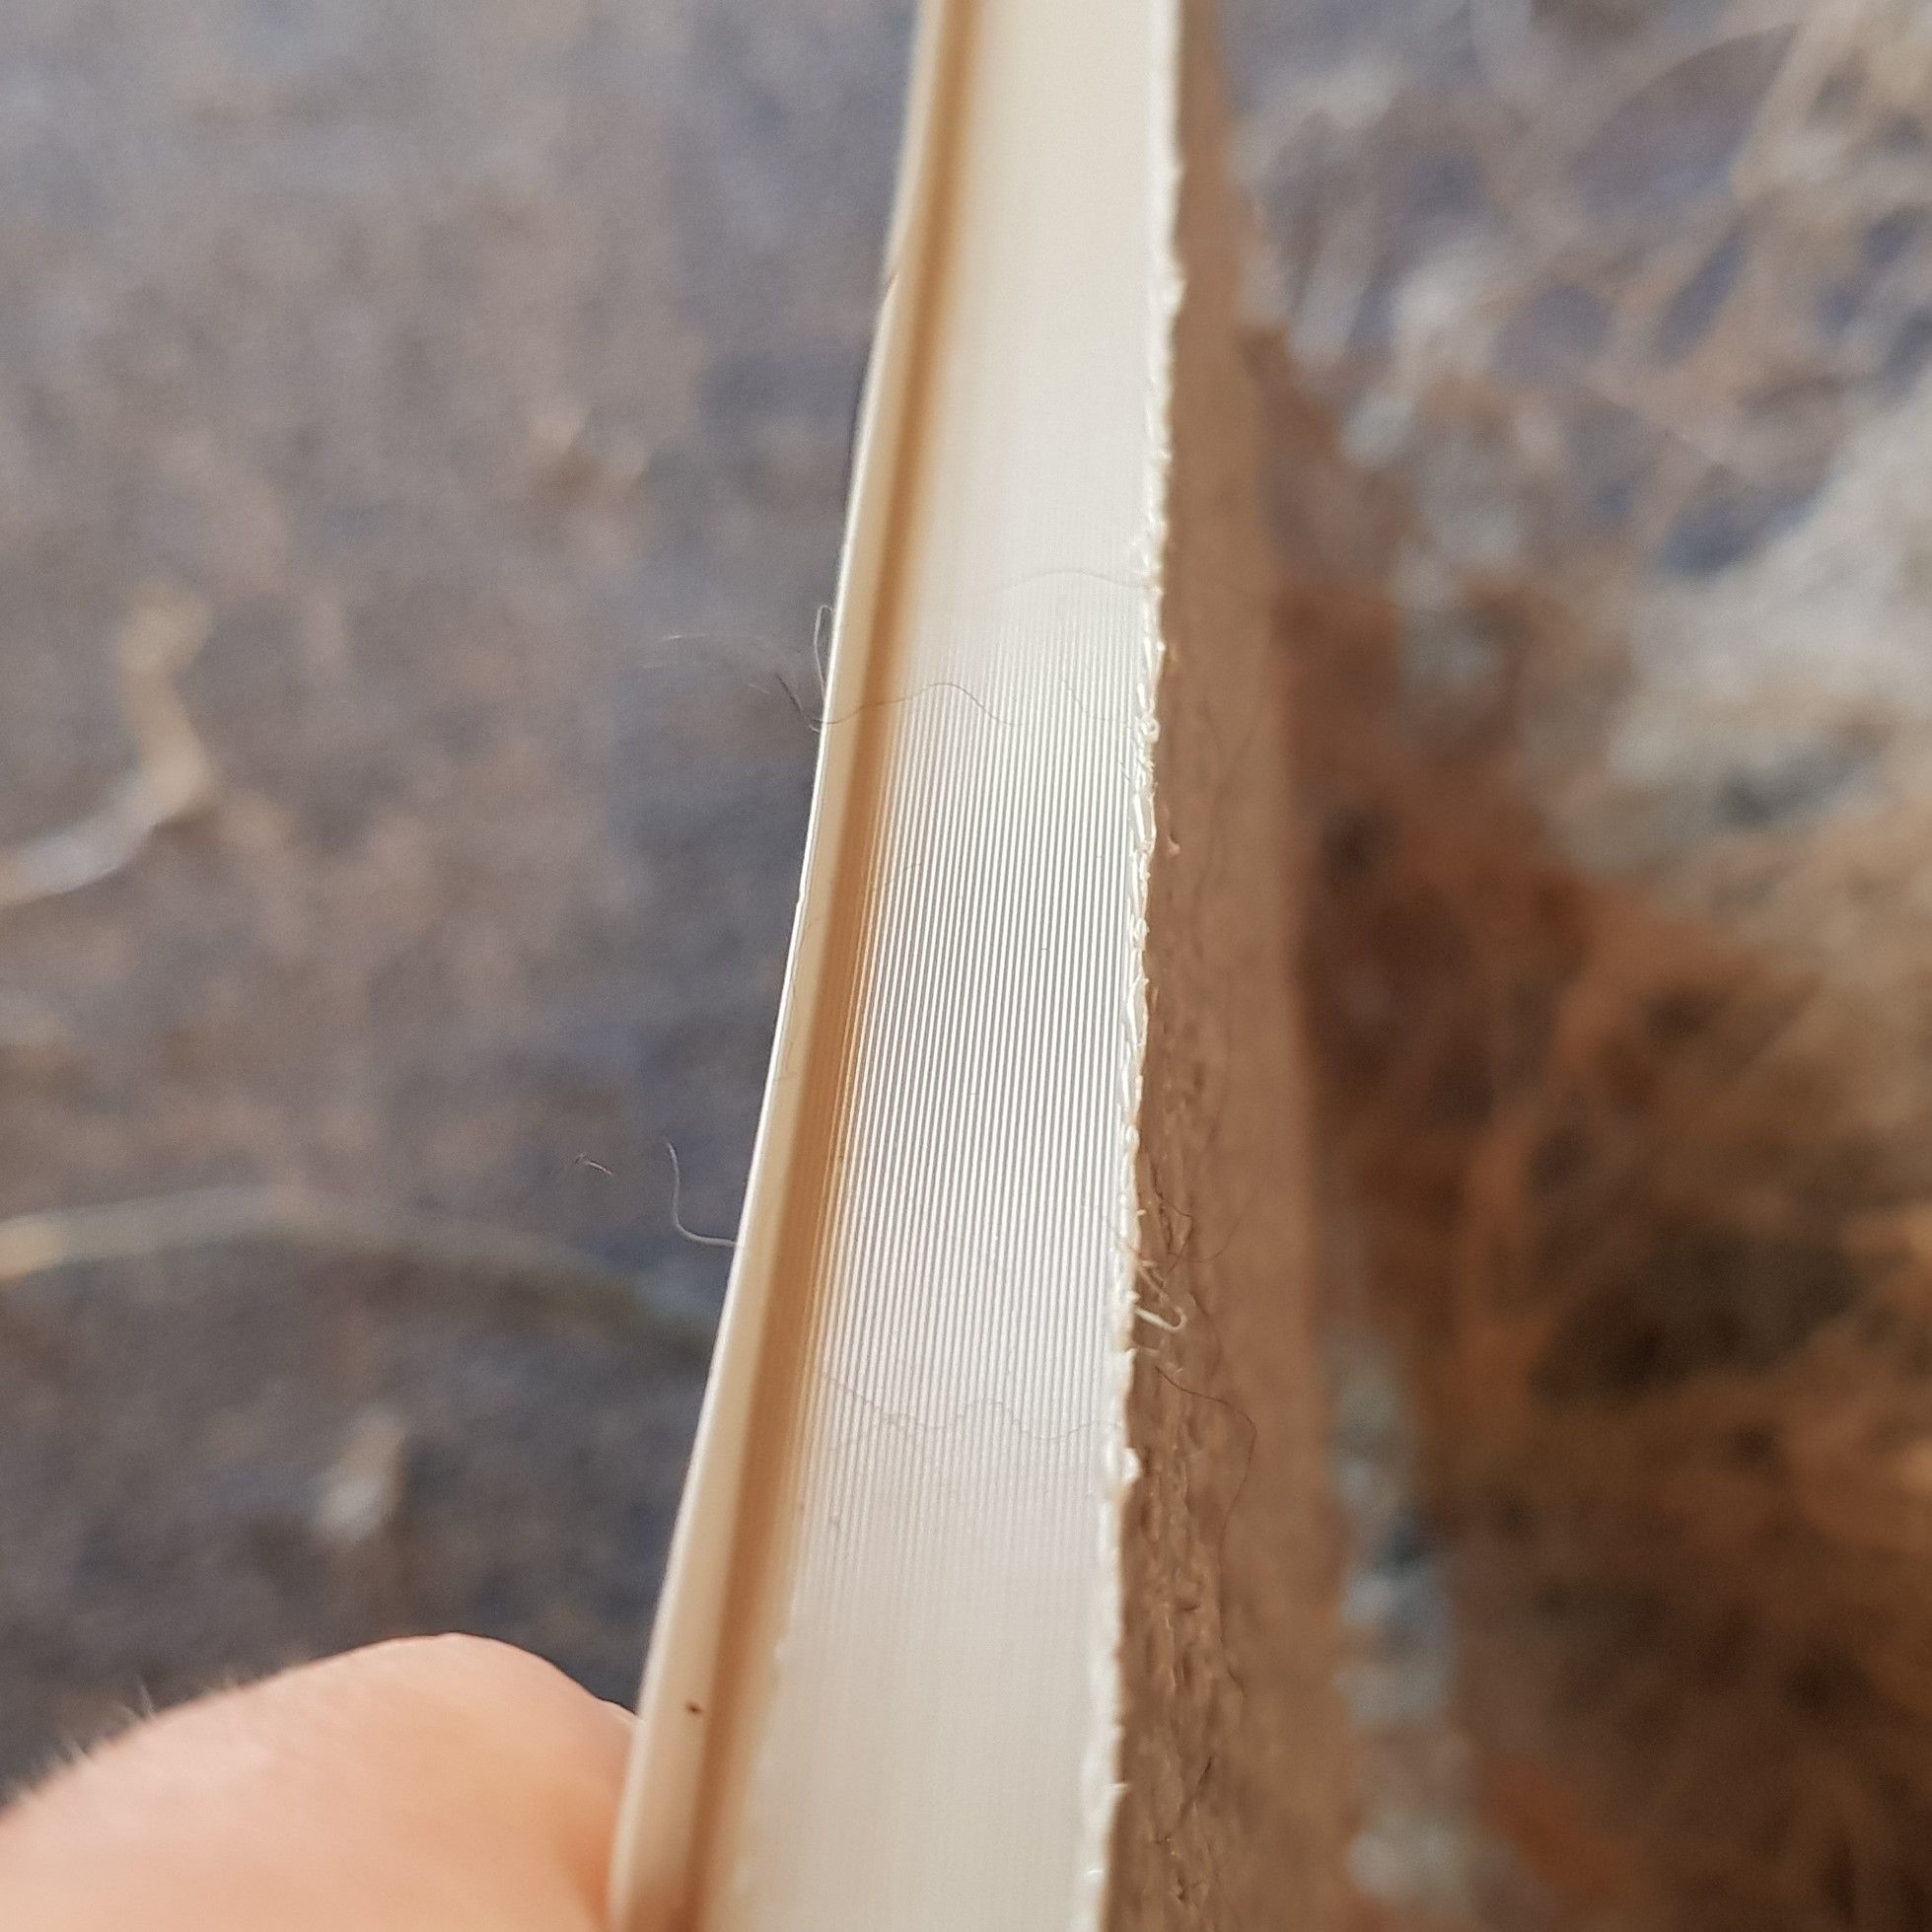
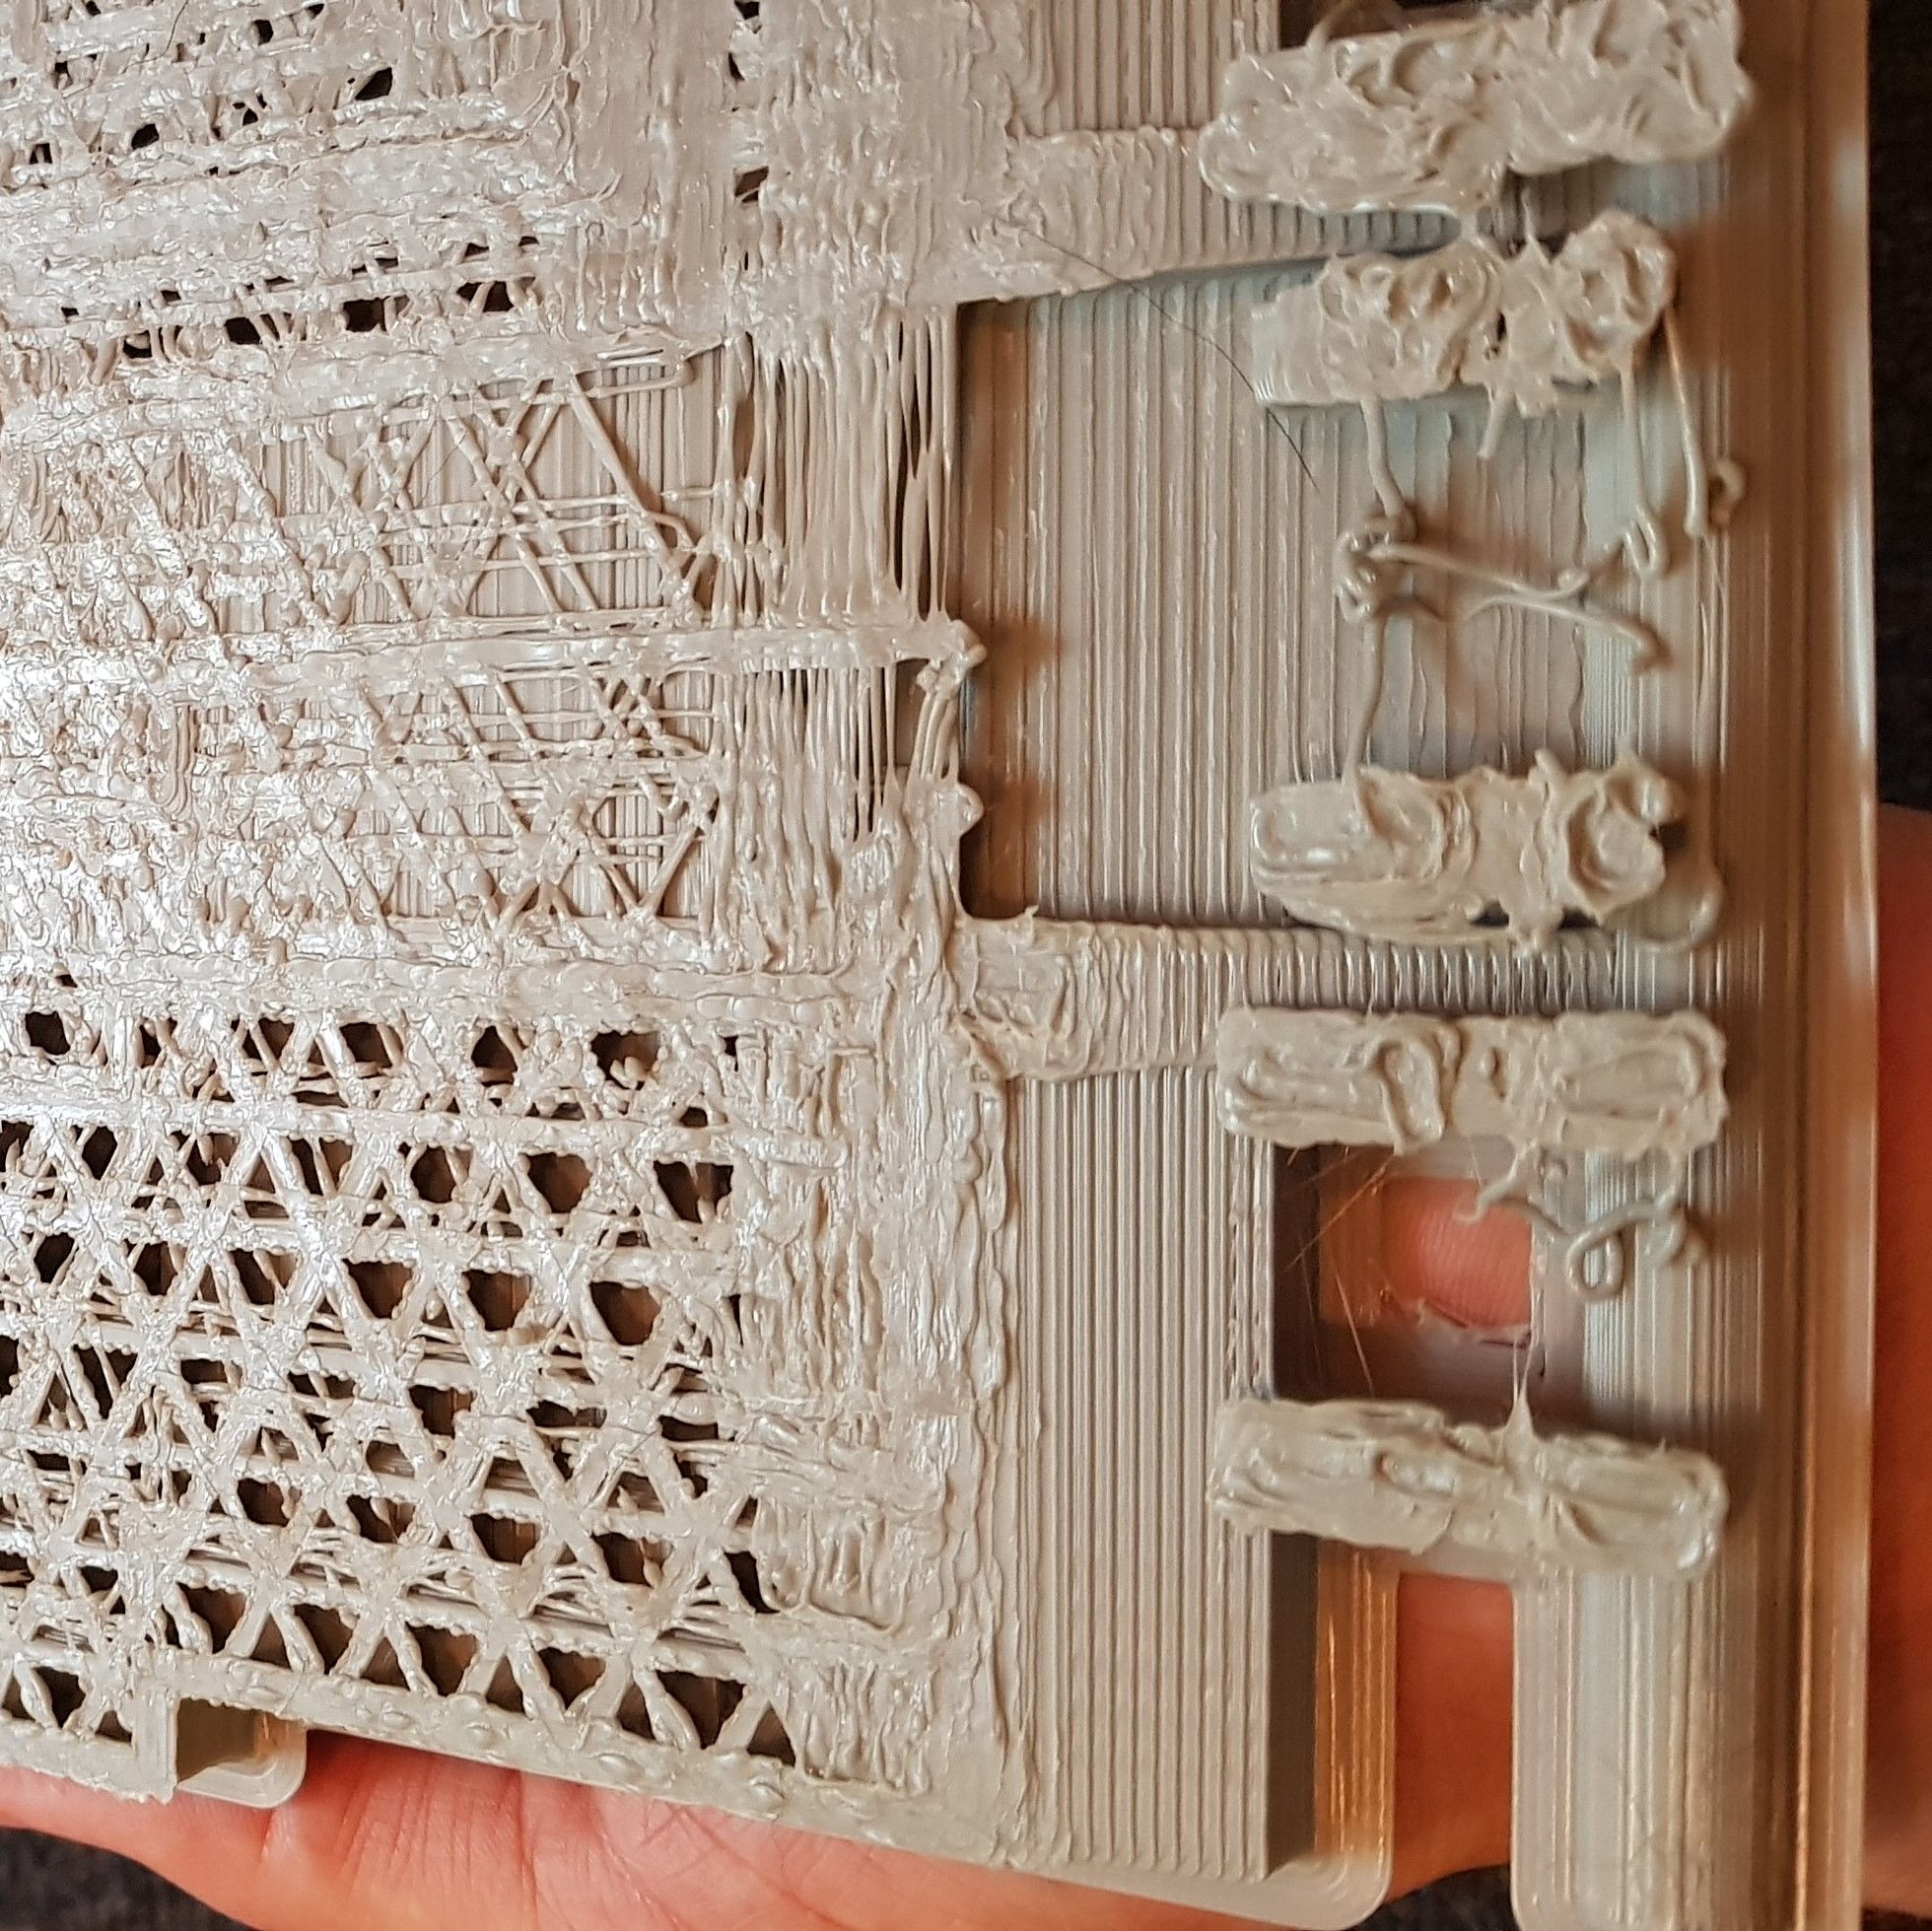
I noticed looking closely at the failed print that it seems to have stalled in the Z direction (probably due to the over temp shutdown), but continued to print in the X and Y.
If you look closely at the images below you'll see that the last 2 layers are messy, and in place before the layers start shifting.
I assume the order of events is something like this:
- Z axis drivers start to over temp shut down (one at a time or simultaneously I don't know).
- X and Y continue until print becomes too obstructed, then;
- X and/or Y fail due to stalling.


Now that stall detection is configured, I would expect that it would just get stuck in a stall/rehome/retry loop because there is a permanent obstruction.
SO......
Is there a way to take some action when an over temp shut down occurs? Can I pause the job or wait to cool down etc?
Config.g below
; Configuration file for Duet WiFi (firmware version 2.03)
; executed by the firmware on start-up
;
; generated by RepRapFirmware Configuration Tool v2.1.8 on Mon Mar 30 2020 11:14:18 GMT+1000 (Australian Eastern Standard Time); General preferences
G90 ; send absolute coordinates...
M83 ; ...but relative extruder moves
M550 P"Point Zero CoreXY" ; set printer nameM667 S1 ; select CoreXY mode
; Network
M552 S1 ; enable network
M586 P0 S1 ; enable HTTP
M586 P1 S0 ; disable FTP
M586 P2 S0 ; disable Telnet; Drives
M569 P0 S1 ; physical drive 0 goes backwards
M569 P1 S1 ; physical drive 1 goes forwards
M569 P5 S0 ; physical drive 5 goes backwards
M569 P6 S0
M569 P7 S0
M569 P8 S0
M569 P4 S0 ; physical drive 3 goes backwards
M584 X1 Y0 Z5:6:7:8 E4 ; set drive mapping
M671 X200,400,200,400 Y-60,-60,875,875 ; Set location of z leadscrews for independant bed levelling.
M350 X16 Y16 Z16 E16 I1 ; configure microstepping with interpolation
M92 X80.00 Y80.00 Z1600.00 E412.0 ; set steps per mm
M566 X600.00 Y600.00 Z20.00 E1200.00 ; set maximum instantaneous speed changes (mm/min) *** PREVIOUS VALUES X&Y:600 Z12 E900
M203 X8000.00 Y8000.00 Z400.00 E1500 ; set maximum speeds (mm/min)
M201 X800.00 Y800.00 Z100.00 E600.00 ; set accelerations (mm/s^2) *** PREVIOUS VALUES X400 Y400.00 Z10.00 E150.00
M204 P1200 T4000 ; print and travel acceleration
M906 X1600 Y1600 Z600 E1200 I30 ; set motor currents (mA) and motor idle factor in per cent
M84 S30 ; Set idle timeout
M593 F80 ; Set Dynamic Acceleration Adjustment
M572 D0 S0.05 ; Set extruder pressure advance
M915 P0:1 S5 F1 H200 R1 ; Set up stall detection; Axis Limits
M208 X0 Y0 Z0 S1 ; set axis minima
M208 X860 Y800 Z750 S0 ; set axis maxima; Endstops
M574 X1 Y1 S1
M574 Z0 S0 ; set active high endstops
M591 D0 P5 C3 R5:120 E20.0 S1 ; Configure Laser filament sensor for extruder drive 0.; Z-Probe
M307 H3 A-1 C-1 D-1 ; disable heater on PWM channel for BLTouch
M558 P9 H5 F120 T6000 ; set Z probe type to bltouch and the dive height + speeds
G31 P500 X-21.6 Y9.4 Z3.2 ; set Z probe trigger value, offset and trigger height - **PREVIOUS Z VALUE = Z1.35
M557 X40:800 Y40:760 S78 ; define mesh grid - AS DESIGNED
;M557 X270:530 Y270:530 S52 ; define mesh grid - FOR TESTING ONLY
M376 H5 ; Set bed compensation taper (layers to fade out bed compensation)
G29 S1; Heaters
M307 H0 B0 S1.00 ; disable bang-bang mode for the bed heater and set PWM limit
M305 P0 T100000 B4138 R4700 ; set thermistor + ADC parameters for heater 0
M143 H0 S120 ; set temperature limit for heater 0 to 120C
M305 P1 T100000 B4138 R4700 ; set thermistor + ADC parameters for heater 1
M143 H1 S280 ; set temperature limit for heater 1 to 280C
M305 P2 T100000 B4138 R4700 ; set thermistor + ADC parameters for heater 1
M143 H2 S280 ; set temperature limit for heater 1 to 280CM305 P101 S"Duet 2" T100000 B4725 R4700 ; Duet 2 Drivers Over Temp Warning
M305 P102 S"Duex 5" T100000 B4725 R4700 ; Duex 5 Drivers Over Temp Warning; Fans
M106 P0 S0 I0 F25000 H1 T45 ; set fan 0 value, PWM signal inversion and frequency. Thermostatic control is turned on
M106 P1 S1 I0 F500 H-1 ; set fan 1 value, PWM signal inversion and frequency. Thermostatic control is turned off; Tools
M563 P0 D0 H1 F0 ; define tool 0
G10 P0 X0 Y0 Z0 ; set tool 0 axis offsets
M563 P1 D0 H2 F0 ; define tool 1
G10 P1 X0 Y20 Z0 ; set tool 1 axis offsets
G10 P1 R0 S0
G10 P0 R0 S0 ; set initial tool 0 active and standby temperatures to 0C; Custom settings are not defined
-
this to me suggest that you need to cool the stepper drivers regardless.
a fan should blow across the underside of the duet board where the steppers are. -
@Veti perhaps... but is there nothing that I can do to pause the job should an overheat even occur?
Also - should I have installed the heat sinks on the underside instead of the top side????
-
@Gerrard said in Pause print on driver overheat?:
Also - should I have installed the heat sinks on the underside instead of the top side????
do you by chance have a cloned board? they cheap out on the copper in the pcb which means the heatsink design does not work as intended.
-
@Veti I do...
I'm assuming there's nothing I can do about pausing...
-
you could potentially write a macro and execute that on layer change, but that is more of a bandaid.
you need to address the real problem and cool the board.
using an case like this for example
https://www.thingiverse.com/thing:3721923 -
@Veti So the board is setup on a bench, with heat sinks and a fan blowing across - it's not ducted, but there's plenty of air flow.
What would this macro look like?
-
M906 X1600 Y1600 Z600 E1200 I30 ; set motor currents (mA) and motor idle factor in per cent
Your motor current on Z is set to 600ma but your link for the motors indicate they are rated at 2100ma. So your Z motors are very likely stalling, hence the warnings.
Target ~80% of rated, so 1600ma
Those errors may have been from after the reboot due to the hard power off during a stall. Before worrying about how to pause during an overheat situation try giving the motors the right current and see if they still stall. It's likely a non-issue.
Cooling is good idea either way, but I don't think it's actually an overheating issue in normal operation here.
By the way in your other thread about stall detection I did ask
"Motor currents should be around 80% off rated max. Did you change the config for the new motors?"
-
@Phaedrux Sorry for the confusion... those 2100mA motors were for the X and Y.
These are the motors for the Z axis.
I take your point on motor current for these too - I've now set that to 1200mA (80% of 1500mA).
Still doesn't give me a lot of confidence - if the Z motors fail again (and they could), then I have a guaranteed crash. But if there's nothing I can do about it, then so be it.
-
@Gerrard said in Pause print on driver overheat?:
if the Z motors fail again (and they could),
Well running them at half the ideal current is likely the biggest issue. Once given enough current they should be more reliable. However if the bed is large and heavy those motors may be a bit anemic.
Before trying a long test print again I would suggest running a dry print with no filament loaded. (turn off the heaters and enable cold extrusion (M302 P1) to prevent it from halting on error).
-
@Gerrard said in Pause print on driver overheat?:
But if there's nothing I can do about it, then so be it.
Well the thing to do about it is try to make it reliable in the first place. As I said, I don't think the errors you saw were indicative of what was actually happening during the print.
Give the motors the current they need, cool the board, and there should be no more stalls to detect or pauses on overheat needed. Besides, if there were an actual overheat or driver error I am pretty sure the print would halt anyway.
It's actually really hard to trigger overheat warnings on the drivers. We're talking over 100c.
-
I'm referring to an insurance policy, but i've made the suggested changes, so we'll see how it goes.
-
@dc42 what exactly happens if a driver overheat happens during a print? Or short to ground for that matter?
-
Reports of all 5 drivers on the DueX being over temperature suggest either that the drivers are actually cool and it is the SPI communication or power feed to the DueX5 that has broken down, or the drivers really are hot because a transient has killed all the drivers.
-
@Phaedrux said in Pause print on driver overheat?:
@dc42 what exactly happens if a driver overheat happens during a print? Or short to ground for that matter?
An overheat warning just produces a message. An overheat error or short to ground shuts down the driver until VIN power is removed.
-
@Gerrard
post a picture of your wiring -
@Gerrard I think its already been answered by dc42, but I quite often get those over temp and short to ground errors on my Duet WiFi when I hit the Estop. I have a separate 5v power to the Duet so the processor and web control stay on and I can see them. In my case there definitely isn't a short to ground and the temperatures are all low/stable.
The Duet is designed so that the driver chips conduct heat to the back surface of board (hence you cool the board) not the drivers directly. See https://duet3d.dozuki.com/Wiki/Mounting_and_cooling_the_board#Section_Mounting_1
One other benefit of this is you can get a reasonable idea of how hot things get over time (transients less so) by looking at the CPU temperature. If doing this though, I would recommend calibrating the CPU temp (follow this guide https://duet3d.dozuki.com/Wiki/Calibrating_the_CPU_temperature)Side note on the cloned boards. The blue heatsinks they ship with probably make the cooling situation worse. Most people stick them on top of the drivers (plastic surface so doesn't conduct heat very well) and they tend to block any good cooling airflow over the board.
Also, I recommend double checking all the soldering joints on the bottom of the board. I have a clone board and found it had a couple of bad/dry joints on the heater pins