What would you build if you were starting again now?
-
@dc42
I know that's comparing apples and pears. But the form factor is cool and like pixelpiper said reduce functions. -
@opentoideas said in What would you build if you were starting again now?:
While it always feels slow what are realistic speeds for a reasonable finish with a well designed modern printer? I am guessing there isnt a huge improvement to be gained possibly double?
I haven't attempted to break any speed records.
My default speed is 60 or 90 mm/s depending on what I am printing. I can do 120 but print quality suffers a bit and I'm kind of OC when it comes to print quality.
I've read the factors such as path length coupled with acceleration can get in the way of truly consistent high speeds like the 400mm/s reports you hear from time to time.
When I have configured my printer these higher speeds it begins to make noises I don't like.
Frederick
-
@fcwilt quality is so subjective as everybody has different aspects of quality and what is acceptable.
For the type of things I tend to print dimensional accuracy is probably most important as parts are often interlocking the current ones having a sliding friction fit rail assembly so it either works or not.
While it is printing at 85mm/s I am less concerned over surface defects as long as the parts fit but surface defects at the points of contact are a problem. Part strength and layer adhesion are more important.
Sounds like my old bed slinger isnt doing too bad though
-
@alankilian said in What would you build if you were starting again now?:
Speaking of deltas, (I have a SeeMeCNC Rostock Max V3.2 which uses a Duet2/Ethernet)
SeeMeCNC build a 300mm Delta for US$1,500 and a 500mm !!! Delta for US$4,500. Both use Duet.
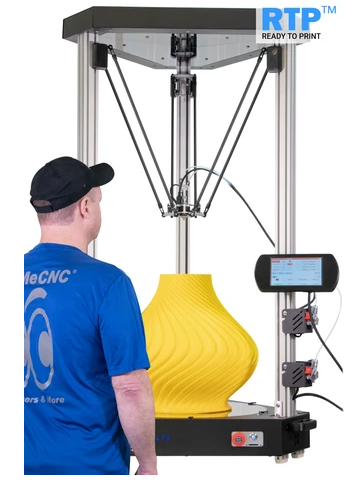
You can see the warping even in the demonstration picture...

-
@dc42 I am aware that it is already tight, but it is totally acceptable to reduce some functionality. An other option would be to have a stack of PCBs, combining a “digital” one with uC, driver, and CAN transceiver with a power board containing the regulators as well as the MOSFETs for fans and heater.
-
@pixelpieper said in What would you build if you were starting again now?:
@dc42 I am aware that it is already tight, but it is totally acceptable to reduce some functionality. An other option would be to have a stack of PCBs, combining a “digital” one with uC, driver, and CAN transceiver with a power board containing the regulators as well as the MOSFETs for fans and heater.
A stack wouldn't work on a E3D tool changer because there isn't room.
Basically, it's impossible to make a single board that meets all needs including CE certification and a desire for smaller size. As it stands, on a Voron the Duet 3 Tool Board provides everything needed, including support for the Z probe and an accelerometer, and provides options for a second temperature sensor for a Pinda-type probe and for fans with tachos.
-
@opentoideas said in What would you build if you were starting again now?:
@fcwilt quality is so subjective as everybody has different aspects of quality and what is acceptable.
For the type of things I tend to print dimensional accuracy is probably most important as parts are often interlocking the current ones having a sliding friction fit rail assembly so it either works or not.
With the rare exception of printing something in the "fun" category for family/friends everything I print are functional parts of one sort or another. So my requirements are likely quite similar to yours.
Frederick
-
@ajdtreyd My rostock max v2 is laying on the floor with 60% of parts removed (also me an user from 2014). For the last month my Voron 2.4 have printed 8 hour a day and it's working great. I would never come back to a wooden delta anymore and i'm printing faster and with more acceleration now with a direct drive extruder than with the bowden one in the rostock. Things are going only to improve with the upcoming 3.4.
I'd like to build another delta but they need to have a really rigid frame to print reliably and also dimensional accuracy is not always so good, usually near the towers. -
Hehehe, yeah. My v2 sat unused in the corner for almost 2 years. In its stock form I don't think that printer found too many owners able to make it live up to the marketing claims. Like the 280mm (11 inches) diameter build area when the arms are only 270mm long. Their forums were full of complaints about print quality for anything more than 100mm from center. I guess my point is, don't judge all deltas by a really old model with poorly designed geometry and a pressboard (MDF) frame.
After a couple years of upgrading my knowledge and my delta, I'm printing dimensionally accurate parts with no trouble. Here's a test print I did after my latest upgrade (replacing the too flexible molded cheapskates with carriages I designed and printed).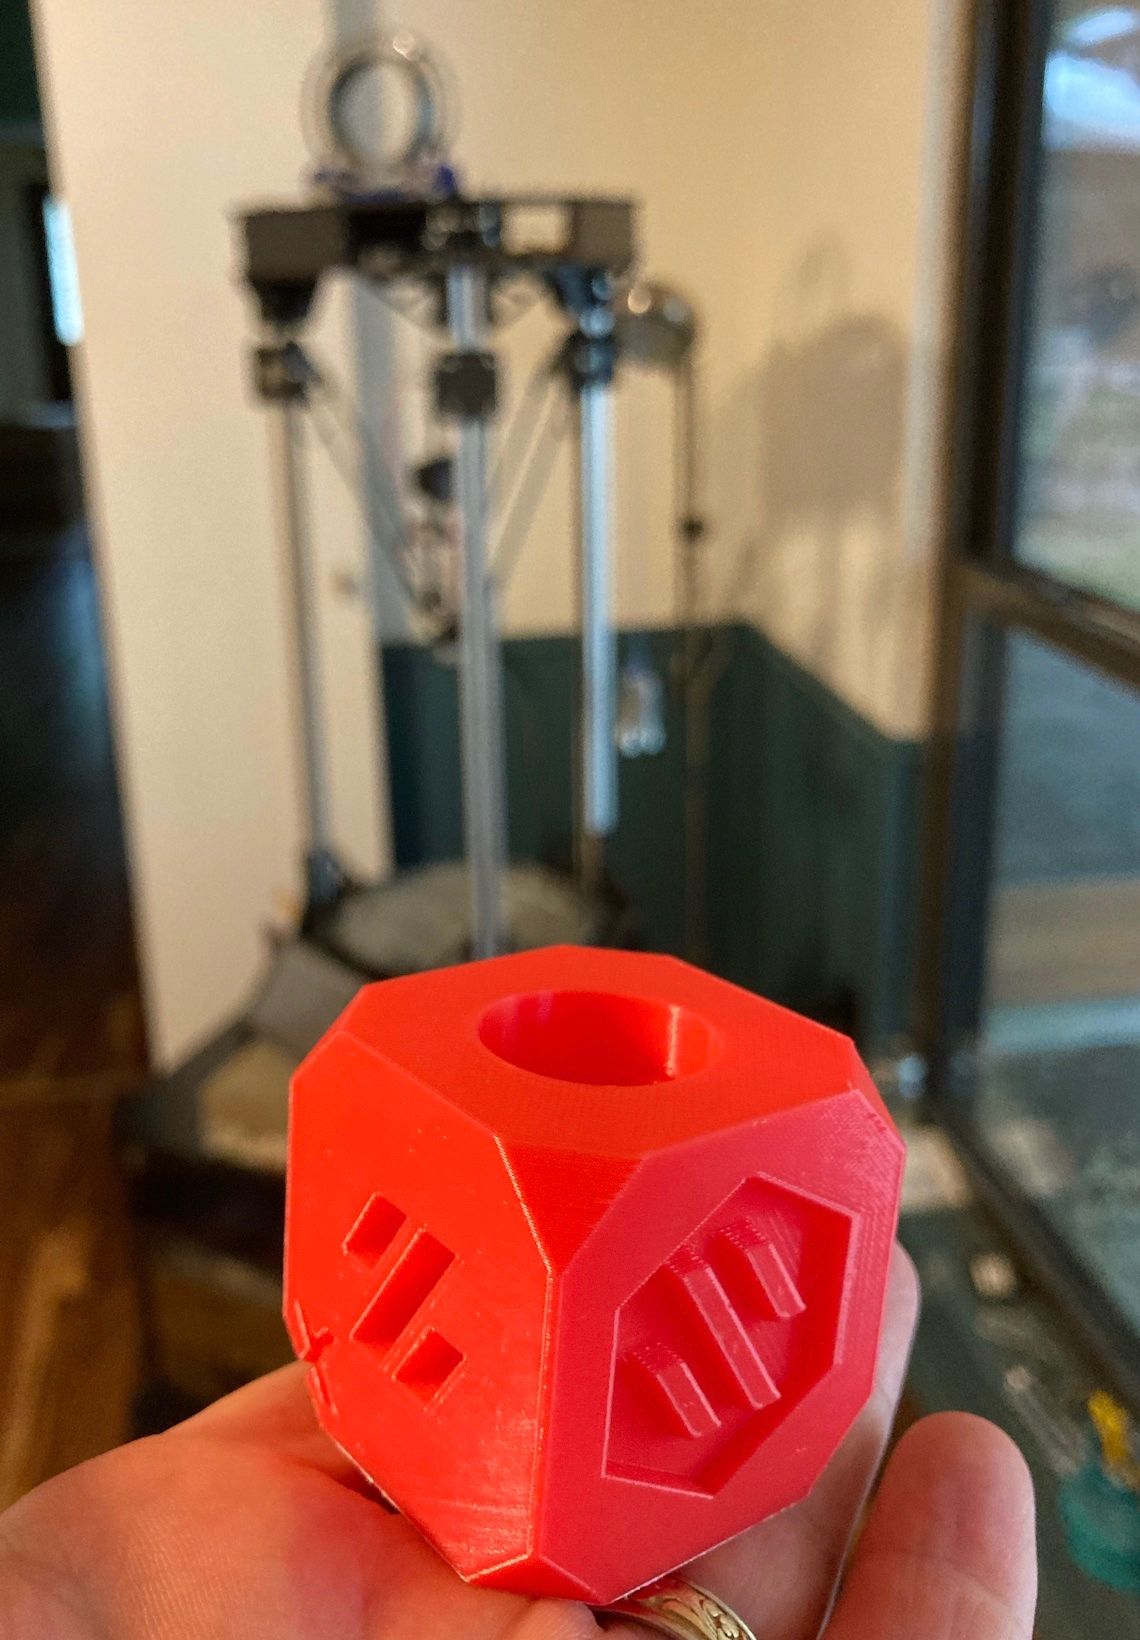
I still needed to tune PA, used no input shaping and I used some old, loose PLA for the test print so its not as good as the printer can do. I had just watched Nero3DP's video "toasty is melting" during which he was asked what his typical print speeds and accels are. He displayed the speed/acceleration page from his SuperSlicer profile and so I used those settings to print the voron cube.
All this said, I would recommend to anyone who has a stock v2 or v3 (or even v4 ??) not bother upgrading unless they are into it for the learning. Contrary to my belief when I started the upgrade process, it's cheaper, easier and faster to just build a new printer. You can sell the old one to someone with an unusual appreciation of nostalgia!
- Trey
-
@dc42 said in What would you build if you were starting again now?:
Basically, it's impossible to make a single board that meets all needs including CE certification and a desire for smaller size.
Have you considered populating components on both sides, consolidating connectors, etc, to minimize size?
A small footprint can be a strong selling point because it will simplify retrofitting existing tool head designs.
-
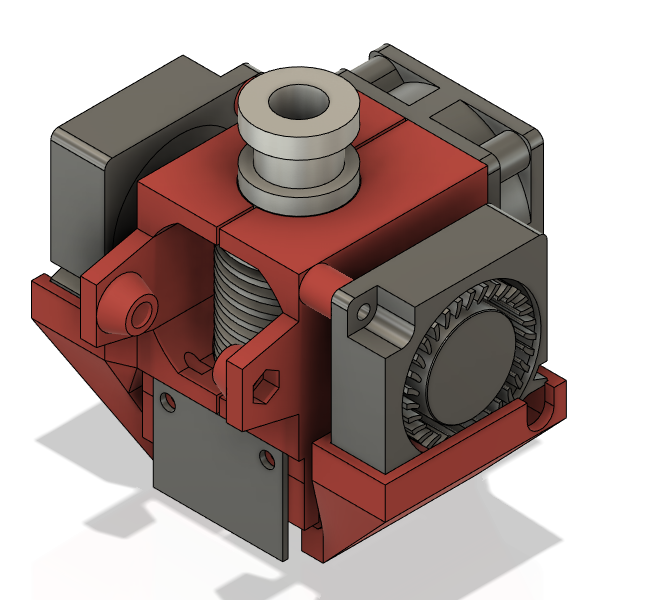
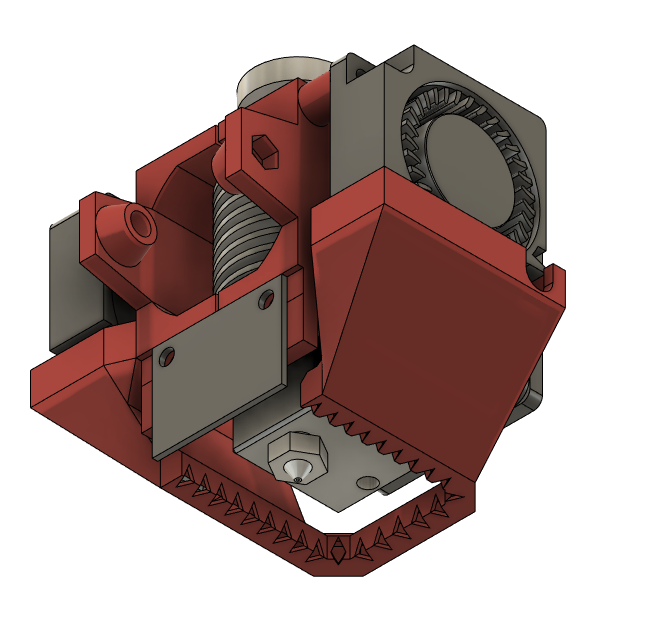
@ajdtreyd i could write a thesis with all the edits i made to the V2. Starting from new cf arms with ball joints made by myself because at the time no one was selling it. Another cool part i made was the mount for E3d V6 (started with V5
 ). It was really cool to design and it has a lot better cooling and support for mini ir probe.
-
Nice graphic.
How do you change the nozzle? The graphic doesn't show all views of the design.
Frederick
-
@fcwilt not perfectu but used this to assemble
I always used the .4 nozzle with that delta. I have a nozzle fun pack, but only used with the Voron for testing them.
You can look it there: https://a360.co/2USEGD9an these are the real parts printed with the V2 (consider all belts and carriage are 6 years old and should be replaced probably)

-
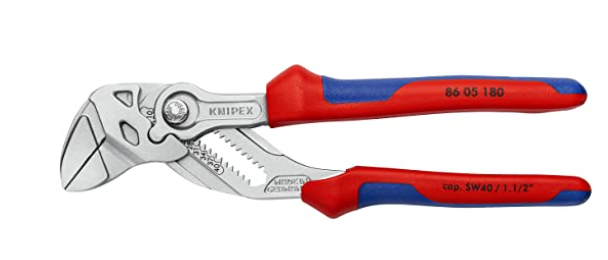
I found this Knipex to work very will with my nozzle exchanges. The jaws are smooth and parallel and it has leverage that allow to easily apply sufficient force.
-
@zapta now i have a dragon hotend so no more problem with spinning heater block! E3D served me well in the years, but it's time for them to update their design.
-
@mikes I gave up on the V6 a few years ago after the heat break kept loosening in the heatsink during prints. I've been using a cheapo Chinese hot-end for a few years that cost $15 when I bought it, plus replacing the supplied crappy fan with a Sunon mag-lev type for another $7. It has set screws to hold the heatbreak in the heatsink, and a metal bracket that is screwed to the heatsink to hold the fan. No more rotating heater blocks or melting, rotating fan mounts. It came with a 50W heater and cartridge type thermistor.
-
@mikes said in What would you build if you were starting again now?:
@zapta now i have a dragon hotend so no more problem with spinning heater block!
I also have a dragon but with a E3D round grove interface.

Once I will have my voron up and running will see how I can convert it to the two-screws type mounting.
-
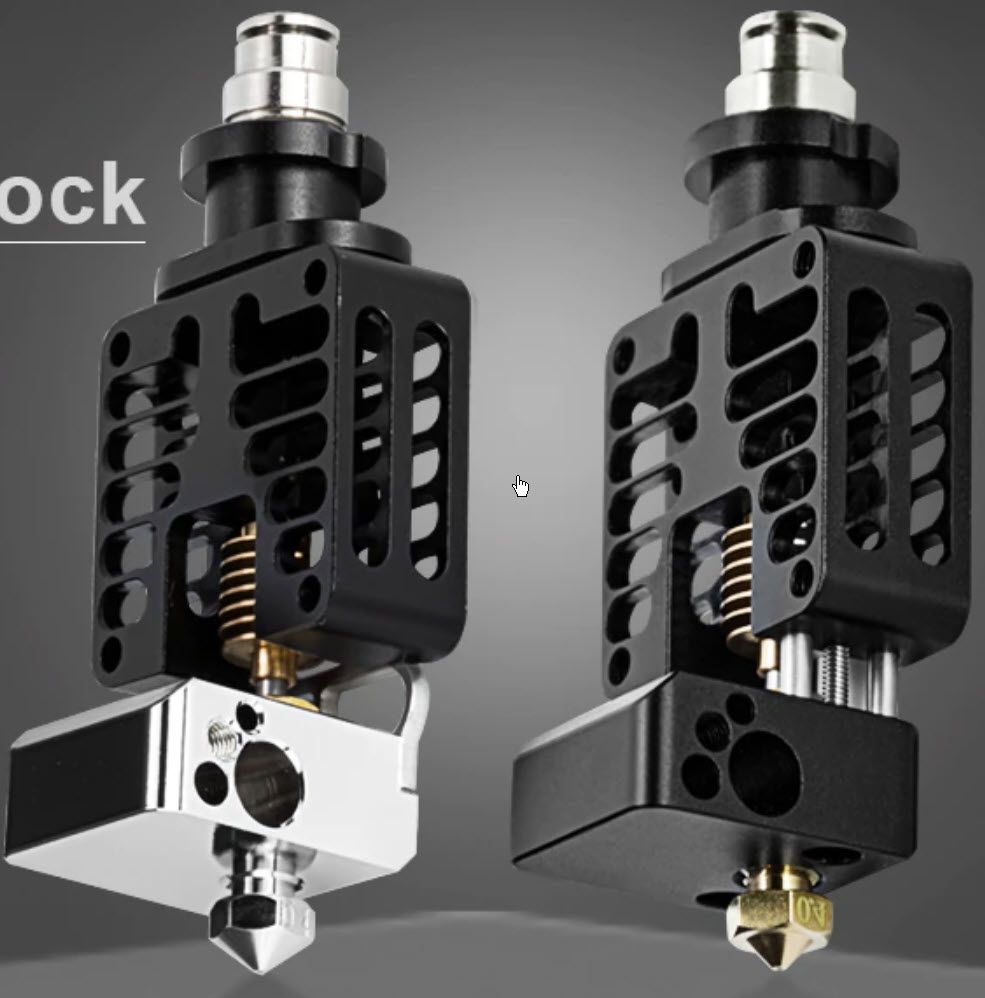
I've got a couple of "no name" units something like these.
The design is like the right image but with the plated copper block of the left image.
The fan mounts to the heat sink via the four threaded through holes - for those that like push/pull fans.
It doesn't use grub screws to hold the heater/thermistor cartridges which is too bad.
The V6 mount removes leaving two threaded holes.
I bought two of them to see if I liked them (I do) but now I cannot find them again. The inventory of vendors on AE seem to change with the winds.
Frederick
-
@mikes, after reading your post I looked again at my grove mounted Dragon and realized that if I remove the groove adapter, it has 4 screw holes that I can use with the Voron Dragon variant. Thanks for your post I will have a proper Dragon with a single hand nozzle replacement

(The documentation of the Voron leaves so many details out to a point that many steps require extensive research in the Fusion 360 model, youtube, and discord).
-
@zapta that's exactly how i mounted it. However you should always use 2 hands for nozzle swapping... twisting force on the x carriage will be a lot less and prevents damage