Building a printer questions and help please
-
So I decided to build for my self a new printer , cube style and I am getting stuck at some choice's so hope someone can help me.
First problem is how to connect the threaded rod to v-slot for bed mounting.
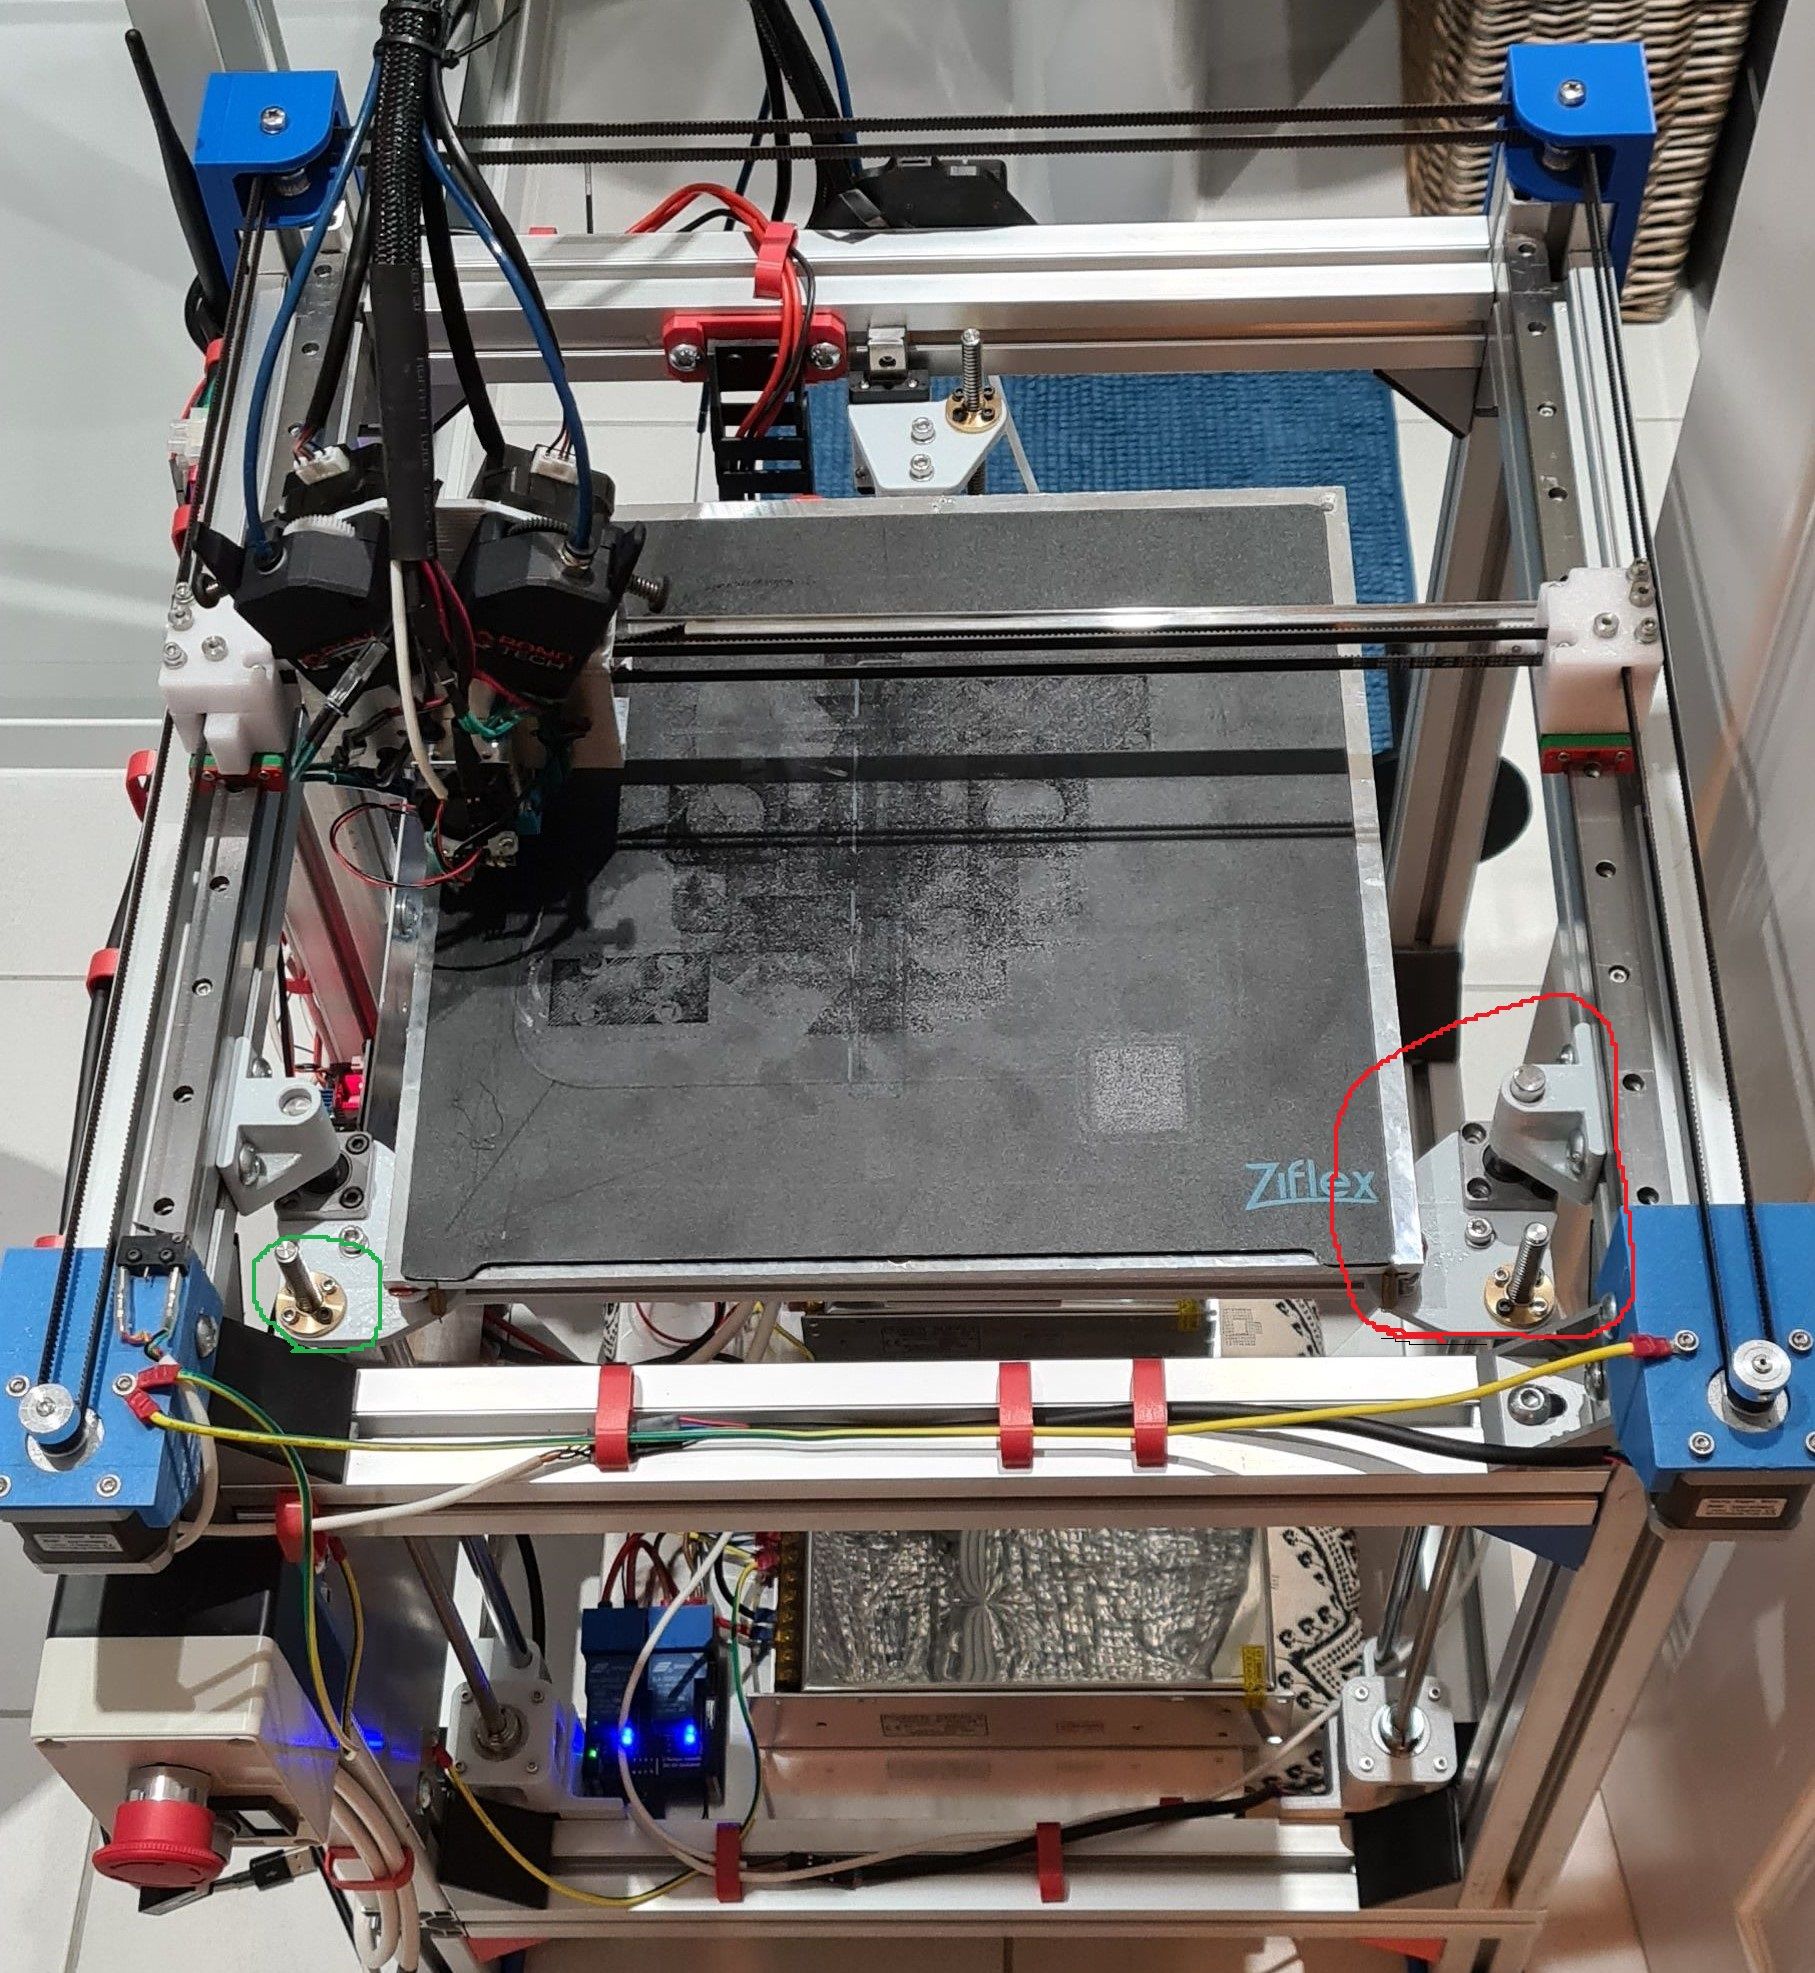
Can I find anywhere something similar with the red circled plate or how do I connect the green circled system to 2020 v-slot ?

Picture "stolen" from another member because I may miss the exact name for thisI prefer something metallic because this build will be inside an enclosure and mainly print ABS and other high temp materials.
-
there is the blv metal kit
-
If you can use an exact copy of what is pictured see about getting the .stl from the owner (or model it yourself) and have a printing service make it in a material that will tolerate temps you think it will see or use the tools you have to fabricate something from metal. If you have a printer already that can get up to 280-290'ish you can cough up $150 and buy some HTN with lots of CF https://cdn.shopify.com/s/files/1/2327/6017/files/TDS-Essentium-HTN-CF25_v1.0-Minus-3D.pdf?v=1609355683
This stuff is supposed to be stupid stiff and should live happily in a 90+ c chamber. There are cheaper HTN's. -
@razrudy Glad to see my beast gaining some fame

I designed most of that printer myself in Fusion 360 so can send you any of the design files if you'd like.
The main frame is made out of 4040 extrusion, but the bed is supported on a pair of 2020 extrusions shaped like a T. The front lef/right pieces you've highlighted on there are 3d printed, but they are just flat plates with holes, so no reason you couldn't do something similar yourself with a bit of aluminim plate, a drill and a saw. They bolt to the 2020 extrusion with M5 T-nuts.
The front corners of the bed are guided by 10mm dia rods and linear bearings. You can buy metal mounts for them that will clamp them to a 2020 frame (e.g. these for an 8mm rod).
For the lead screw nuts, you can even buy nylon nuts that will bolt directly to 2020 extrusions (e.g. https://makers-hut.com/product/openbuilds-nut-block-for-8mm-metric-acme-lead-screw-cnc/). I bet if you search, you'll find plenty of similar items online
Here's some more pictures of my bed if you want to take a closer look. I won't claim it is a perfect design, but I'm pretty happy with the results it produces. Any questions, just ask


-
I don't quite understand what you're asking for with regard to mounting the lead screws. Are you referring to the means to connect the bed plate to the screws, or the screws to the frame?
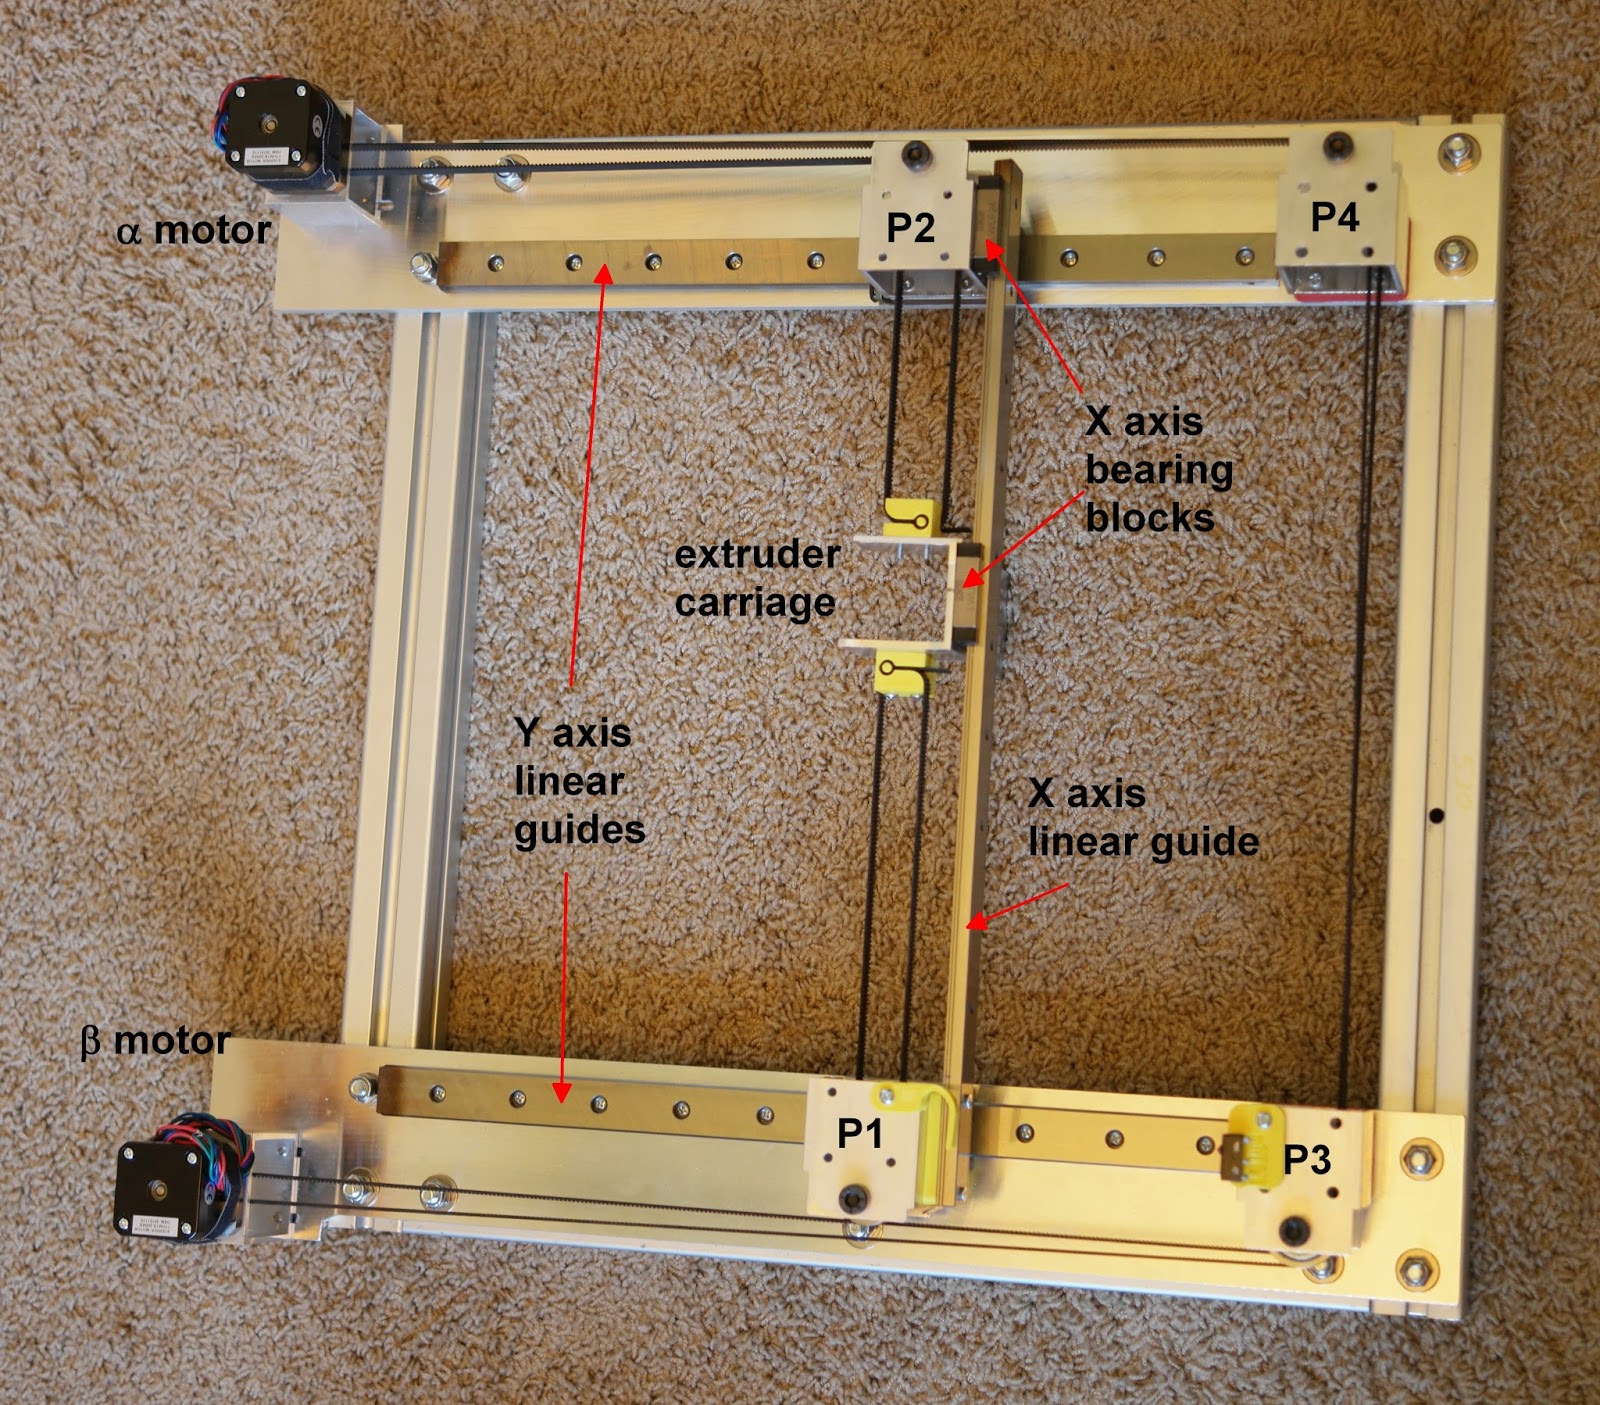
If you have a hack saw and a drill press you can make this almost all-metal XY stage from aluminum tubing, tooling plate, and t-slot:

The only plastic parts are a couple spacers that can easily be replaced with metal and the belt clamps (yellow).
Note- when you heat the XY mechanism the aluminum will expand. That will move the Y axis guide rails apart and will lead to binding unless you do something to mitigate it. I used a second X axis bearing block to allow one of the Y axis bearing blocks to move laterally without binding. The X axis guide rail just slides a little in the second bearing block. It never binds.
More:
https://drmrehorst.blogspot.com/2017/07/ummd-corexy-mechanism.html
https://drmrehorst.blogspot.com/2020/01/ummd-x-and-y-axis-modifications.html -
@engikeneer what's the thickness of the printed plate ( not sure if this is the proper term for that part) please?
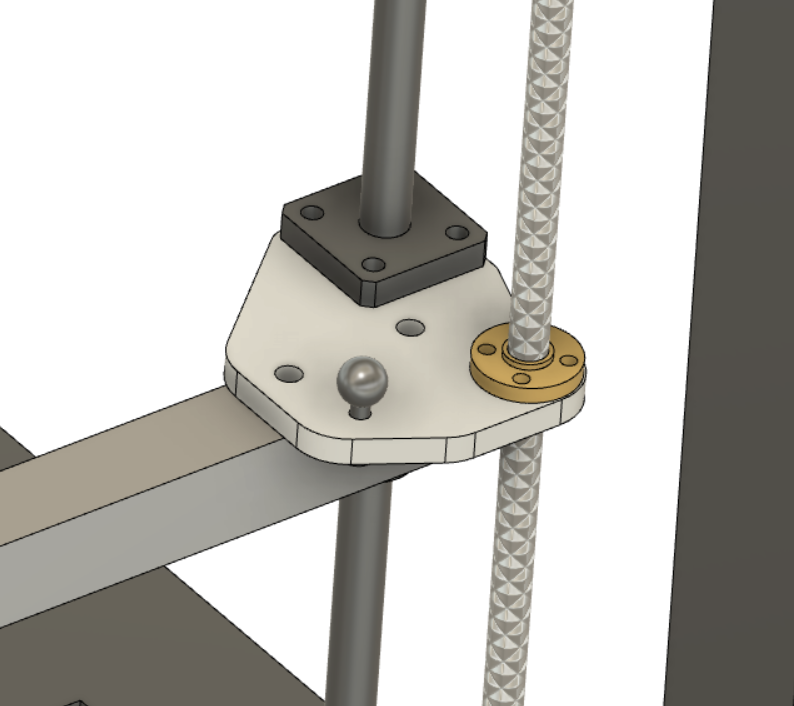
Thanks for the extra picture they will really help me.@mrehorstdmd this plate is what I am looking to find or something similar.
There is almost nothing to fix the 2020 ( or2040) to the yellow part on the lead screw , except this Nut block
I can move the smooth roads and the ball for bed plate to other location , but couldn't find any option to fix the extrusion to the lead screw.
-
@razrudy In mine, it's 6mm thick, printed in PETG with a high infil density. Here's a .stp & .stl file for that piece if you're interested.
RH Bed Corner v1.step
RH Bed Corner v1.stlIf you want to buy something for mounting the lead screw nut to your bed, there are some standard blocks out there (e.g. this ). I've not seen any that bolt directly to a 2020 extrusion, but you could definitely drill a pair of 5mm holes in one of them so you could.
One thing to bear in mind with this is alignment of the leadscrews and linear rail/rod. If the lead screw nut and linear bearing mount on different things, then you will need to make sure they are positioned correctly relative to each other (so they don't try and bend/strain each other). Equally, if they are on one piece like mine, you have no option for adjustment at the bed, so if they're out of tolerance (like mine were when I first printed them on my old prusa clone), you get the same issue...
-
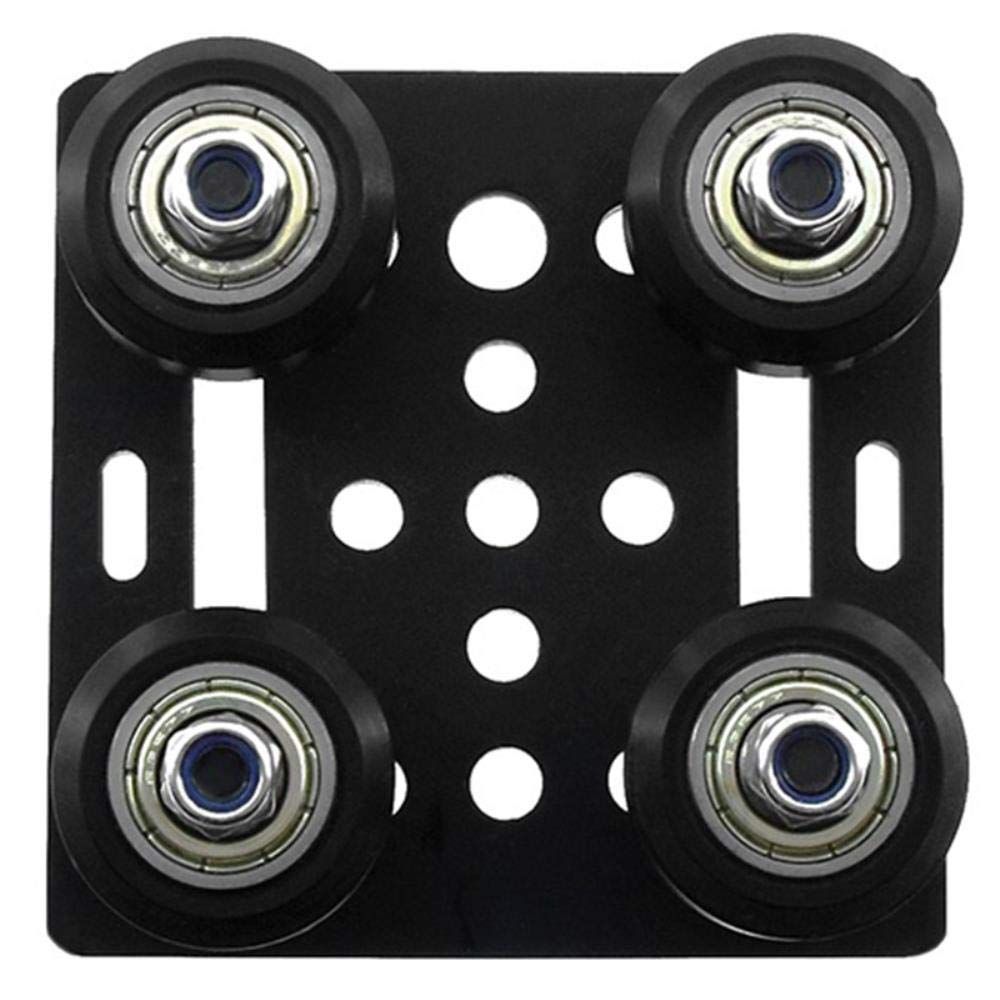
New question. I am planning to use the Pulley V-Slot Build Gantry Plate from the picture but with 3 wheels only. The question is should I use 2 adjustable wheels and 1 fix or 2 fix and 1 adjustable?

I am using them on a " @Phaedrux D-Bot build style " with some minor differences.
Also the PETG printed parts will be ok at temp of up to 60C for motion system ( the same part's like on D-bot build ) At least until I will get all the metal parts made.
-
@razrudy said in Building a printer questions and help please:
The question is should I use 2 adjustable wheels and 1 fix or 2 fix and 1 adjustable?
Fix 2 and make 1 adjustable. The 2 fixed on one side together will even out to form a straight line. The adjustable one opposite side will tighten it up.