Why is my bed temp fluctuating around 10c without heat on?
-
I thought of that but I also connected another thermistor on it's own plug and left it laying on the workbench and it did the same thing???
-
@wkellyo said in Why is my bed temp fluctuating around 10c without heat on?:
I thought of that but I also connected another thermistor on it's own plug and left it laying on the workbench and it did the same thing???
Yes, that's odd. Might there be some moisture or other contamination on the Duet, in the vicinity of the thermistor connector or the microcontroller?
Another possibility is that the 3.3V voltage rail isn't stable, because it is used as the ADC voltage reference. Is the 3.3V regulator chip (or anything else) getting hot?
-
I'll check the voltage and the chip and report back.
-
I checked the chips, nothing getting hot and the voltage of the 3.3volt rail was 3.279 volts and very stable. Today I took the board back off and using a microscope, looked it over very close. I carefully using a X-Acto knife, went between each leg of the CPU making sure of no bridges. I did find a few tiny solder balls but none of them were shorted. Put the board back in and it does the same thing so I ordered another board from Filastruder as the board I have now is a clone that came with the BLV parts kit from Aliexpress. Unless you know of anything else to try I'll swap the board and hope for the best.
Kelly
-
Hi dc42, (Tevo Little Monster)
i have the same problem like wkellyo, bed temp fluctuating without heat on.
what i did until now.
-change the bed resistor from orginal TLM to (https://de.aliexpress.com/item/32819816264.html?spm=a2g0s.9042311.0.0.27424c4dE5rUIG)
but the same problem.
-then i ground the bed plate for a test, messure with multimeter the connection of the ground and all good, psu also have ground.
but the same problem-->bed temp fluctuating without heat on.
What i figure out, first layer temp constant 60 C°, then at second layer (and all other layers) heat is off, i see it on leds connected to my psu, but temp beginn zu rise to 65C° and more. then i canceld the print.
-next test i disconnect all coustom wire from led buck convertec,etc. but with smoothie, all was good.- looks like more a slicer Problem? Test it with PrusaSlicer 2.1.1+, Cura 4.4, Simplify3D but all the same problem
i'am at the end of my knowledge.
Please Help
i'am at the end of my knowledge.
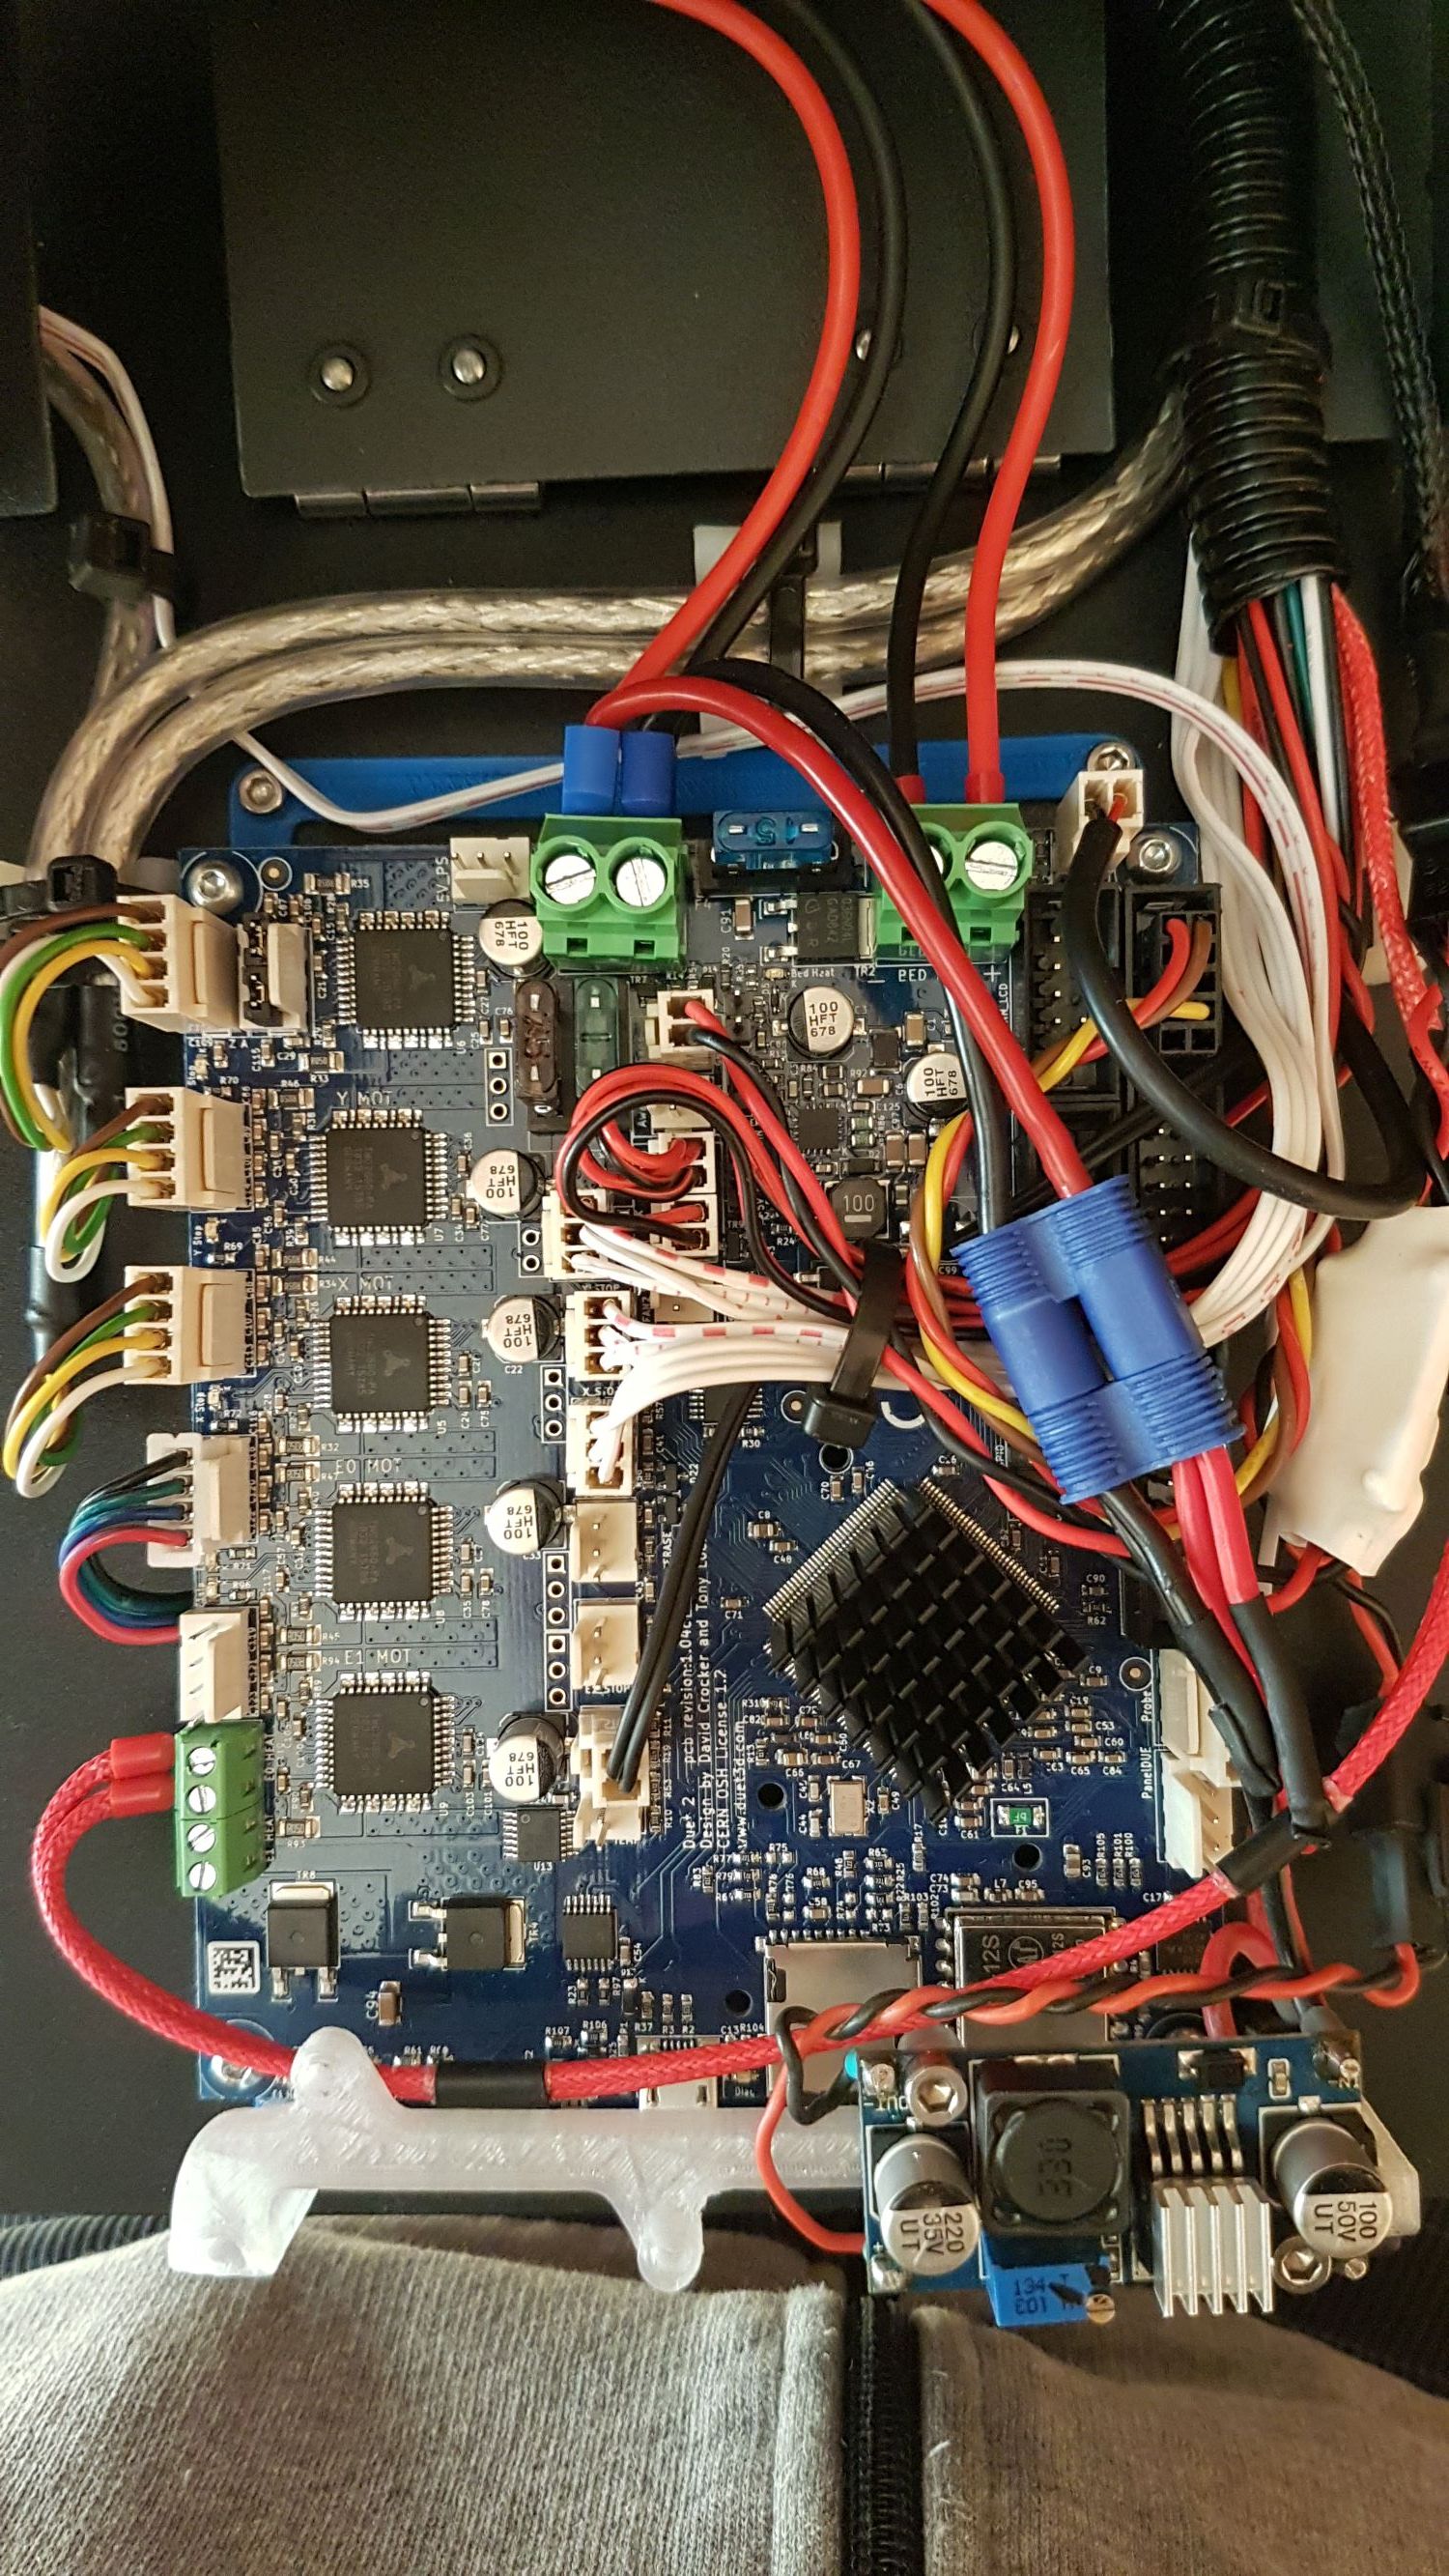
a picture of my wireing now:


-
@Rols what happens to thebed thermistor reading when you start to heat the bed?
-
My newly ordered filastruder Duet2 board came in yesterday and I decided to install it today. I just knew it was going to fix my issue. I installed the new firmware, Got it connected to WiFi and traded my SD card with the one that came, hooked it all up and flipped the switch and.... DARN!! Same thing - Bed Temp fluctuating all over the place (within about 10c) So, I deducted my clone duet board was fine. Bright side: I now have a matching OEM Duet and Duex! I defiantly decided I was going to unplug every plug on the board, one at a time until I found the issue! As a test which I did several days before and it didn't make a difference, I connected another thermistor and left it hanging to the floor. The temp was perfectly stable. So, I began stripping the wires from the bed out of the wiring ducts with the fluctuating thermistor connected back up. nothing seemed to change it. I might mention I'm using a 120v silicone bed heater. I checked the thermistor to the bed for any stray voltage and found about 0.126 vac on the thermistor so I figured maybe some some inductance was going on but could never find it even after disconnecting most of the 120v bed wiring, I never disconnected the neutral from the bed heater. I also found about 4-6 vac between the bed heater frame and the earth ground. The bed frame is mounted in a kinematic setup so it floats on three points which the three bed leveling steppers are driving. I broke out the meter and started testing stuff. The bed frame is isolated as the meter showed infinity ohms from the bed frame to ground so I'm not sure where the stray voltage was coming from. I decided to try grounding the bed heater frame to ground and the temp stabilized perfectly. After the test, I ran a permanent ground to the bed frame, put it all back together and that fixed my issue. I plan to run grounds from all seven steppers as well since they are all mounting in plastic and add a few more here and there for good measure.
Hope this helps someone else. -
@wkellyo Thanks for the object lesson on the importance of good grounding.
-
@T3P3Tony normal room temperature 22,6C°. Start normally at 60C° and for the first layer the temperature is constant 60C°. the controller shut down the impulse to the SSR and the SSR cuts the 220V for the Bed.
Next step. Shielded cable and new resistor in the bed. i think for me there is the problem.
I report back. -
What i've done until tody.
-The printer itselve is Grounded, Motors, Frame, Heatbed, etc.
- Grounded the Heatbed Plate once more with good grounding
-Heatbed is Powerd by 230v. 1 SSR Relay.
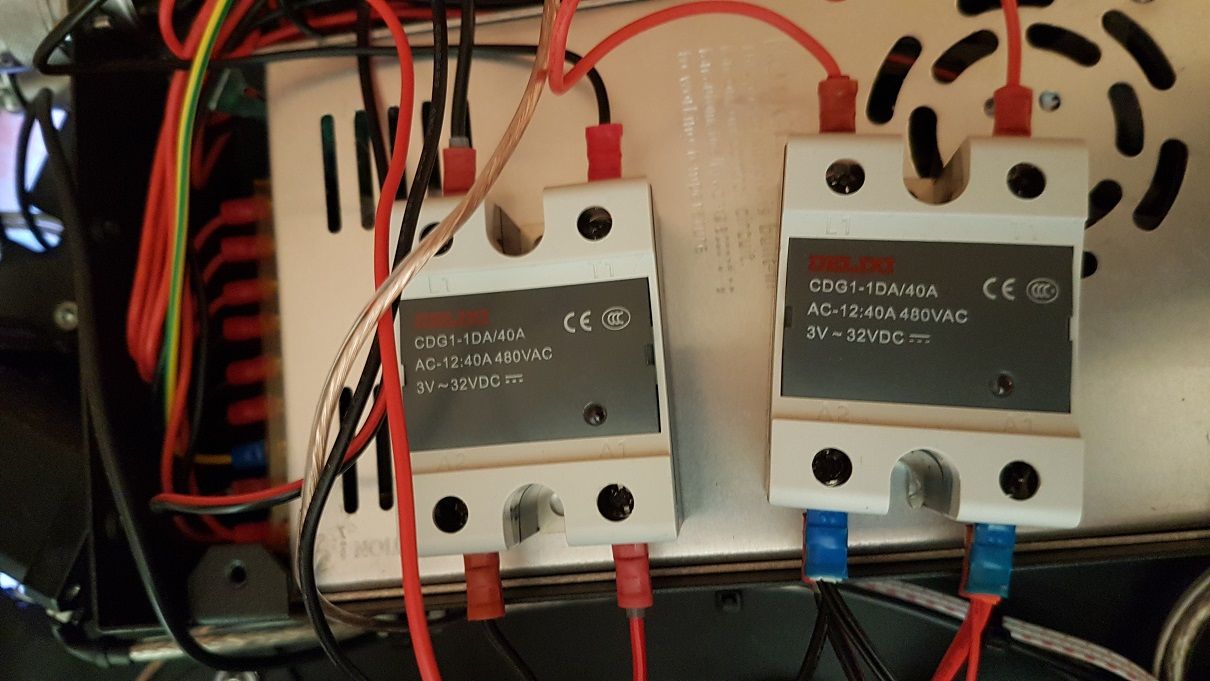
-Now i have 2 SSR for both Phases a complete cutoff - a new (https://de.aliexpress.com/item/32819816264.html?spm=a2g0s.9042311.0.0.27424c4dE5rUIG) Thermresistor
and at the end of the Heatbed a shielded cable to the Controller Duet2 Wifi - Make PID tuning of the Sensor at 90°C. Kalibrate it for my surface and its perfect.
hold his temp. at 60° manually.
What i figured out:
in a test print the Thermresistor is constant at 60°C at the first layer,
then the controller board stop the impulses to the ssr, what is right, because the thermresistor getting hotter,
but the bed get colder. in the speed the bed gets colder, the thermresistor rises up.
it looks like the Thermresistor gets a switch in measure direction at the end of layer one.
Please help, i am at the end of all.
It is a config Problem?
or a hardware problem of the duet?
all the same on Firmware 2.04, 2.05, 3.0 all the same on 3.0 i made a new config.my config of 2.04-2.05:
; Configuration file for Duet WiFi (firmware version 2.03)
; executed by the firmware on start-up
;
; generated by RepRapFirmware Configuration Tool v2.1.4 on Fri Dec 13 2019 17:23:05 GMT+0100 (Mitteleuropäische Normalzeit); General preferences
G90 ; send absolute coordinates...
M83 ; ...but relative extruder moves
M550 P"RLM" ; set printer name
M665 R157.0741 L397.19 B156 H523.32 ; Set delta radius, diagonal rod length, printable radius and homed height
M666 X0 Y0 Z0 ; put your endstop adjustments here, or let auto calibration find them; Network
M551 P"xxxxxx" ; set password
M552 S1 ; enable network
M586 P0 S1 ; enable HTTP
M586 P1 S1 ; enable FTP
M586 P2 S1 ; enable Telnet; Drives
M569 P0 S1 ; physical drive 0 goes forwards
M569 P1 S1 ; physical drive 1 goes forwards
M569 P2 S1 ; physical drive 2 goes forwards
M569 P3 S0 ; physical drive 3 goes forwards
M584 X0 Y1 Z2 E3 ; set drive mapping
M350 X16 Y16 Z16 E16 I1 ; configure microstepping with interpolation
M92 X80.00 Y80.00 Z80.00 E414.1165 ; set steps per mm
M566 X1200.00 Y1200.00 Z1200.00 E1200.00 ; set maximum instantaneous speed changes (mm/min)
M203 X18000.00 Y18000.00 Z18000.00 E1200.00 ; set maximum speeds (mm/min)
M201 X1000.00 Y1000.00 Z1000.00 E1000.00 ; set accelerations (mm/s^2)
M906 X1200 Y1200 Z1200 E630 I30 ; set motor currents (mA) and motor idle factor in per cent
M84 S9 ; Set idle timeout; Axis Limits
M208 Z0 S1 ; set minimum Z; Endstops
M574 X2 Y2 Z2 S1 ; set active high endstops; Z-Probe
M307 H3 A-1 C-1 D-1 ; disable heater on PWM channel for BLTouch
M558 P9 H5 F120 T6000 ; set Z probe type to bltouch and the dive height + speeds
G31 P500 X0 Y20 Z1.42 ; set Z probe trigger value, offset and trigger height
M557 R120 S30 ; define mesh grid; Heaters
M305 P0 T100000 B4170 R4700 ; set thermistor + ADC parameters for heater 0
M143 H0 S120 ; set temperature limit for heater 0 to 120C
M305 P1 T100000 B3950 R4700 ; set thermistor + ADC parameters for heater 1
M143 H1 S280 ; set temperature limit for heater 1 to 280C; Fans
M106 P0 S0 I0 F500 H-1 ; set fan 0 value, PWM signal inversion and frequency. Thermostatic control is turned off
M106 P1 S1 I0 F500 H1 T50 ; set fan 1 value, PWM signal inversion and frequency. Thermostatic control is turned on
M106 P2 S0 I0 F500 H-1 ; set fan 2 value, PWM signal inversion and frequency. Thermostatic control is turned off; Tools
M563 P0 D0 H1 F0 ; define tool 0
G10 P0 X0 Y0 Z0 ; set tool 0 axis offsets
G10 P0 R0 S0 ; set initial tool 0 active and standby temperatures to 0C; Custom settings are not defined
; Miscellaneous
M911 S10 R11 P"M913 X0 Y0 G91 M83 G1 Z3 E-5 F1000" ; set voltage thresholds and actions to run on power loss;M501: Read stored parameters
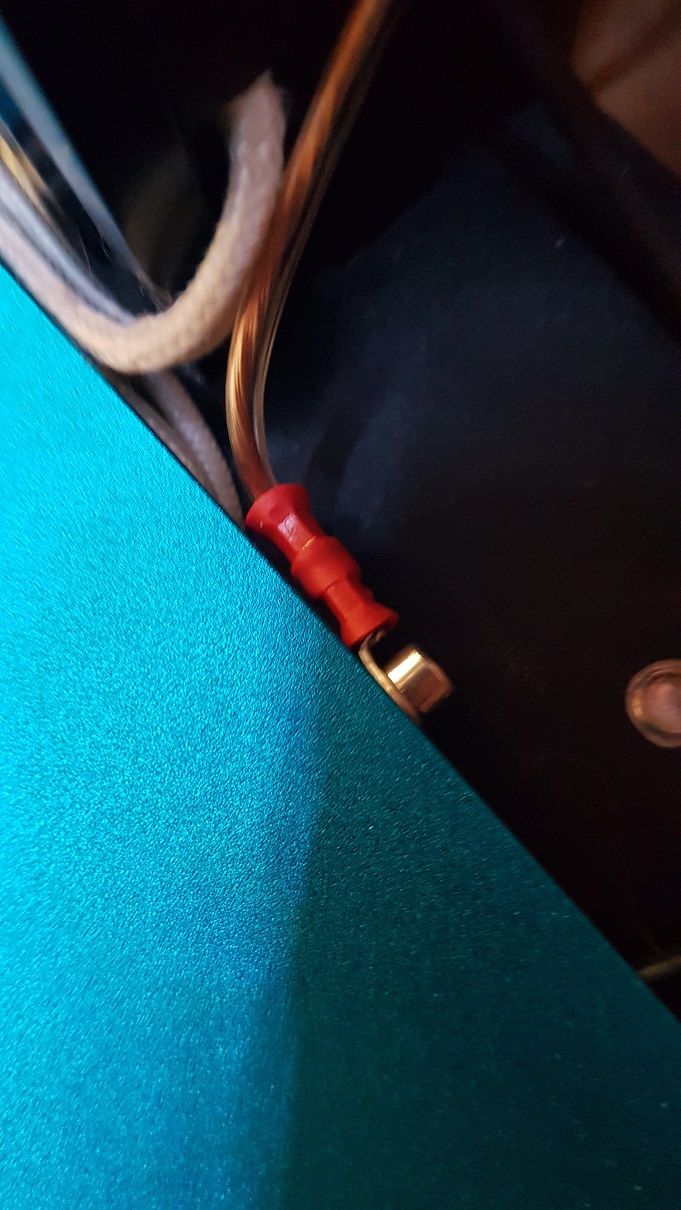
M501 ;M501: Read stored parametersPicture vom the ground and SSR


- Grounded the Heatbed Plate once more with good grounding