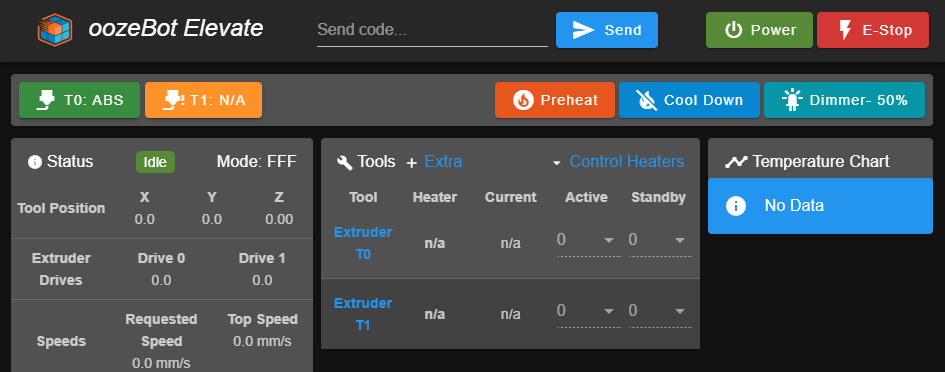
Our intent with DWC is to only enhance its functionality by adding in some unique functionality necessary for our printers. However, we weren't fully satisfied with filament handling, so we overhauled it. It isn't as clean underneath as it uses globals to handles the various states, but overall, it's working well. Feedback is welcome and the final code will be released on our github.
Best posts made by oozeBot
-
Preview of our updated DWC UI
-
You down with OPP? (oozeBot Post-Processor)
We thought we'd create a thread about the initial beta of our post-processor (PP) for Slic3r-based programs (PrusaSlicer, SuperSlicer, etc) - especially with the recent threads about only probing the needed area on the build plate as that is its primary goal. Also because there isn't much info out there on building PPs and this could be used as framework for other projects.
The project lives at: https://github.com/oozebot/OPP It is not yet documented, as I just posted it. I'll get to that soon, but will provide an overview here on how to utilize it.
The script is written in Python, so you will need to install the latest version on your machine. OPP.py needs to be downloaded to your local machine and then referenced in your slicer under Print Settings > Output options > Post-processing scripts as follows:
"C:\Path To Python\python.exe" "C:\Path To Script\OPP.py"
To keep it lightweight, it relies on two additional lines of code added to Printer Settings > Custom G-code > Start G-code:
;=== OPP HEADER === ;FirstLayerMinMax: X{first_layer_print_min[0]}:{first_layer_print_max[0]} Y{first_layer_print_min[1]}:{first_layer_print_max[1]}
There are several variables that are defaulted in the script that can either be altered within it for your setup or can be passed into the script on the Post-processing command line referenced above. These are documented within the script but here they are as written in the command line with a quick overview:
"C:\Path To Python\python.exe" "C:\Path To Script\OPP.py" mesh=2 points=5 spacing=18 start=M9000 xOffset=19 yOffset=19 minGrid=0 maxGrid=300
It really only makes sense to pass in mesh and either points or spacing. The rest can be quickly adjusted in the script for your printer.
There are 3 options for Mesh:
Mesh=0 disables the functionality
Mesh=1 creates a custom mesh grid utilizing points- example: An object where X=100 and Y=200 with 5 points will probe the X-axis every 20mm per row and probe the Y-axis every 40mm per column, generating a 25 point mesh grid
Mesh=2 creates a custom mesh grid utilizing spacing
- example: An object where X=100 and Y=200 with 20mm spacing will probe the X-axis 5 times per row and probe the Y-axis 10 times per column, generating a 50 point mesh grid
As explained above, Points are used with Mesh=1 and Spacing is used with Mesh=2.
Start is the filename or customer mCode for an equivalent of start.g (we use M9000 / M9000.g). A unique start file is needed as start.g is called prior to executing any gcode at the beginning of a job and the unique mesh grid will not be executed otherwise.
And if you aren't using an initialization script like start.g, you should really consider converting to one!
xOffset and yOffset are your probes offset. They are used to find the center of the custom mesh grid. This is useful to set your Z=0 in the center of the mesh instead of the center of the build plate.. because you really only care about the relative section of your build plate when using a custom mesh.
minGrid and maxGrid are the boundaries your probe is capable of reaching. It the algorithm creates a mesh outside these bounds, the script will alert the user and no mesh will be created.
The end result of the PP is the injection of the following code. Note the size of the mesh is different as Mesh=1 uses the exact size of the printable object(s) + 1mm where Mesh=2 creates a grid based on the spacing around the object.
Mesh=0
;== Modified by OPP: oozeBot Post Processor ;== Source: https://github.com/oozeBot/OPP ;== Initialization script M9000
Mesh=1
;== Modified by OPP: oozeBot Post Processor ;== Source: https://github.com/oozeBot/OPP ;== 25 point mesh grid M557 X73:146 Y42:137 P5 M9000 C"mesh" X90.5 Y70.5
Mesh=2
;== Modified by OPP: oozeBot Post Processor ;== Source: https://github.com/oozeBot/OPP ;== 30 point mesh grid M557 X72.0:162.0 Y36.0:144.0 S18.0 M9000 C"mesh" X98.0 Y71.0
Note the parameters being passed into the custom start code (M9000). They can be handled like this within M9000.g (or whatever you use).
G28 ; Home all axes if exists(param.C) if {param.C} = "mesh" ; Generate custom mesh grid if exists(param.X) & exists(param.Y) G1 Z5 X{param.X} Y{param.Y} F9000 ; Move to center of object to set Z=0 else G1 Z5 X136 Y136 F9000 ; Move to center of build plate to set Z=0 M558 F200 H2.0 A20 S0.02 ; Configure z-probe M561 ; Clear bed transformations G30 Z-500 ; Probe build plate M208 X-10 Y-10 S1 ; Allow negative travel for X & Y M290 R0 S0 ; cancel baby stepping G29 S2 ; cancel mesh bed compensation M561 ; Clear bed transformations G29 S0 ; Perform mesh probing M208 X0 Y0 S1 ; Disallow negative travel for X & Y else G29 S2 ; cancel mesh bed compensation M561 ; Clear bed transformations G29 S1 P"heightmap-110c.csv" ; Load height map M376 H5 ; Set mesh taper
-
Duet 3 / Toolboard - significant issue when connection is lost
We recently had the power wire leading to the toolboard fray which resulted in it losing power. When this happened, the print continued, however the BLTouch's probe extended breaking it in half.
While this exposed our carriage needs better strain relief, we would like to request the firmware immediately pause the print if it loses it's connection to the toolboard.
Is this possible? Thanks
-
RE: oozeBot Elevate
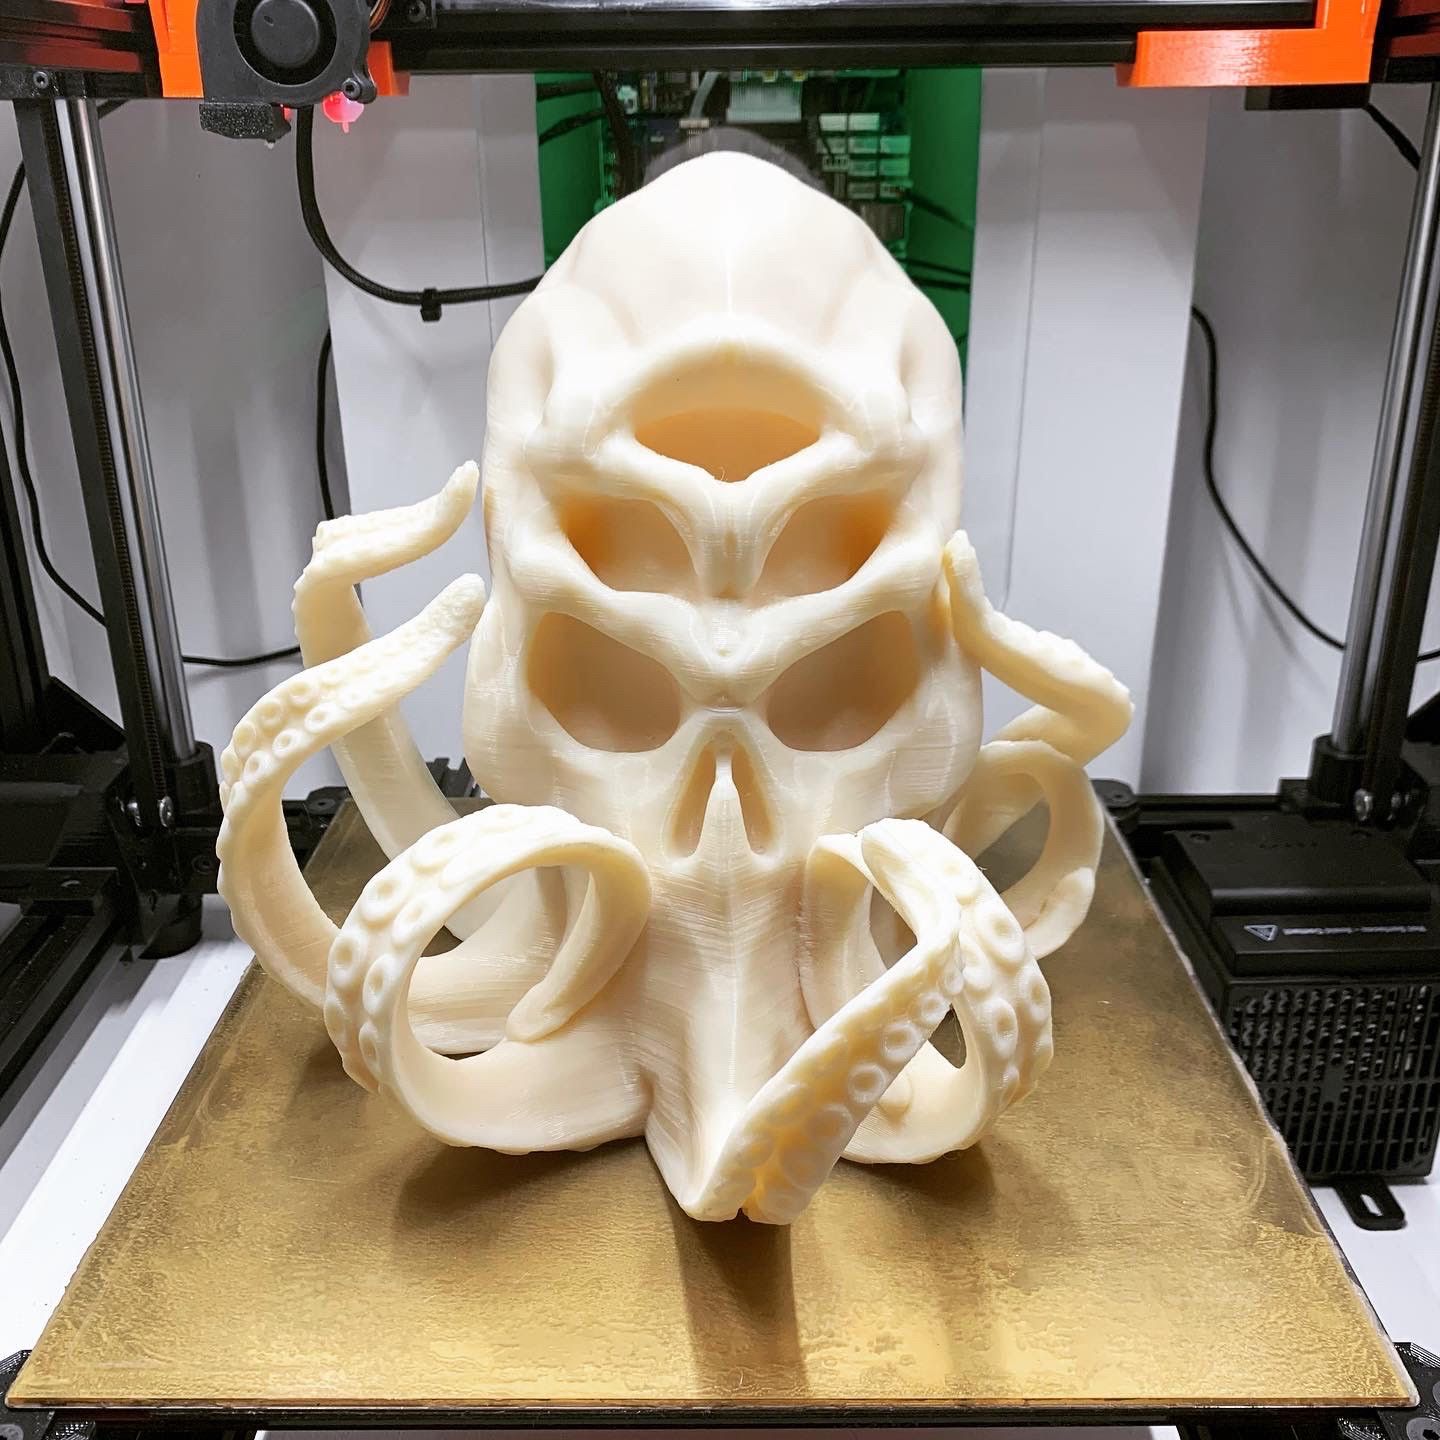
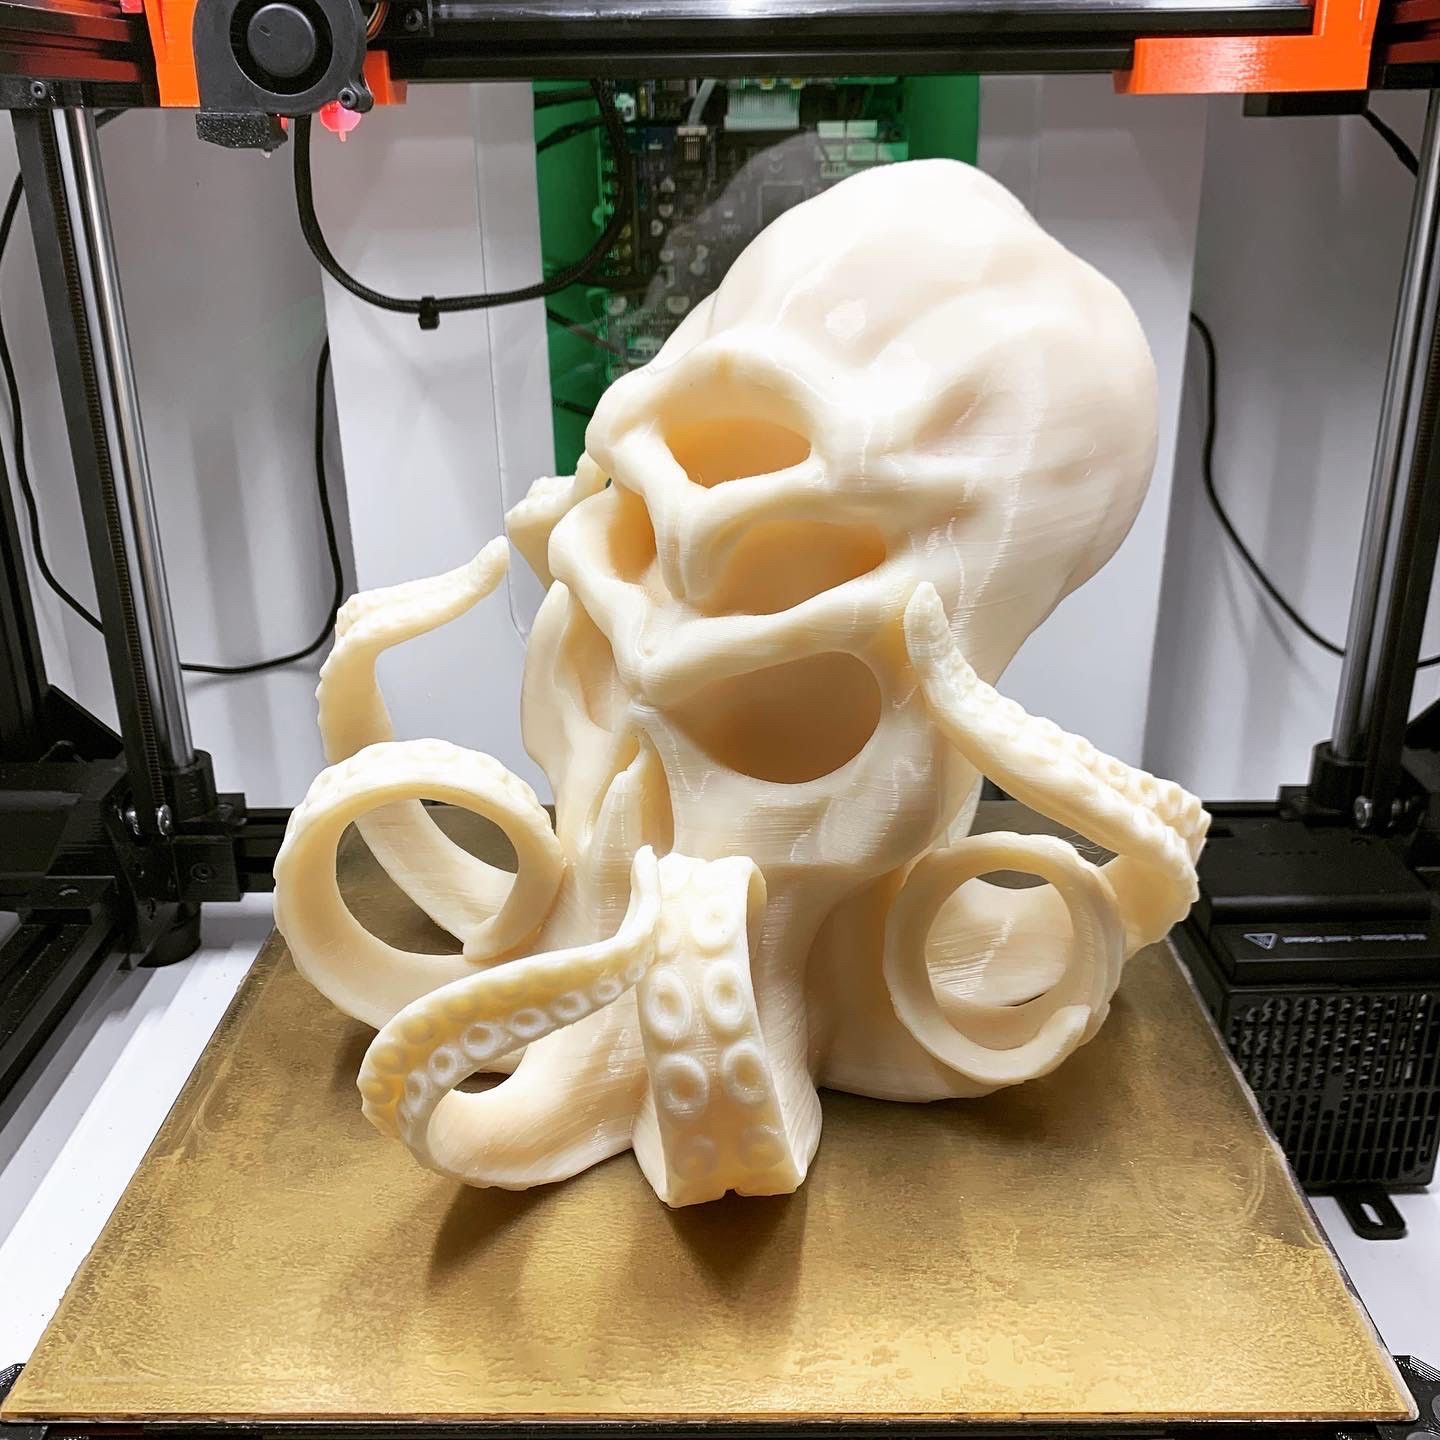
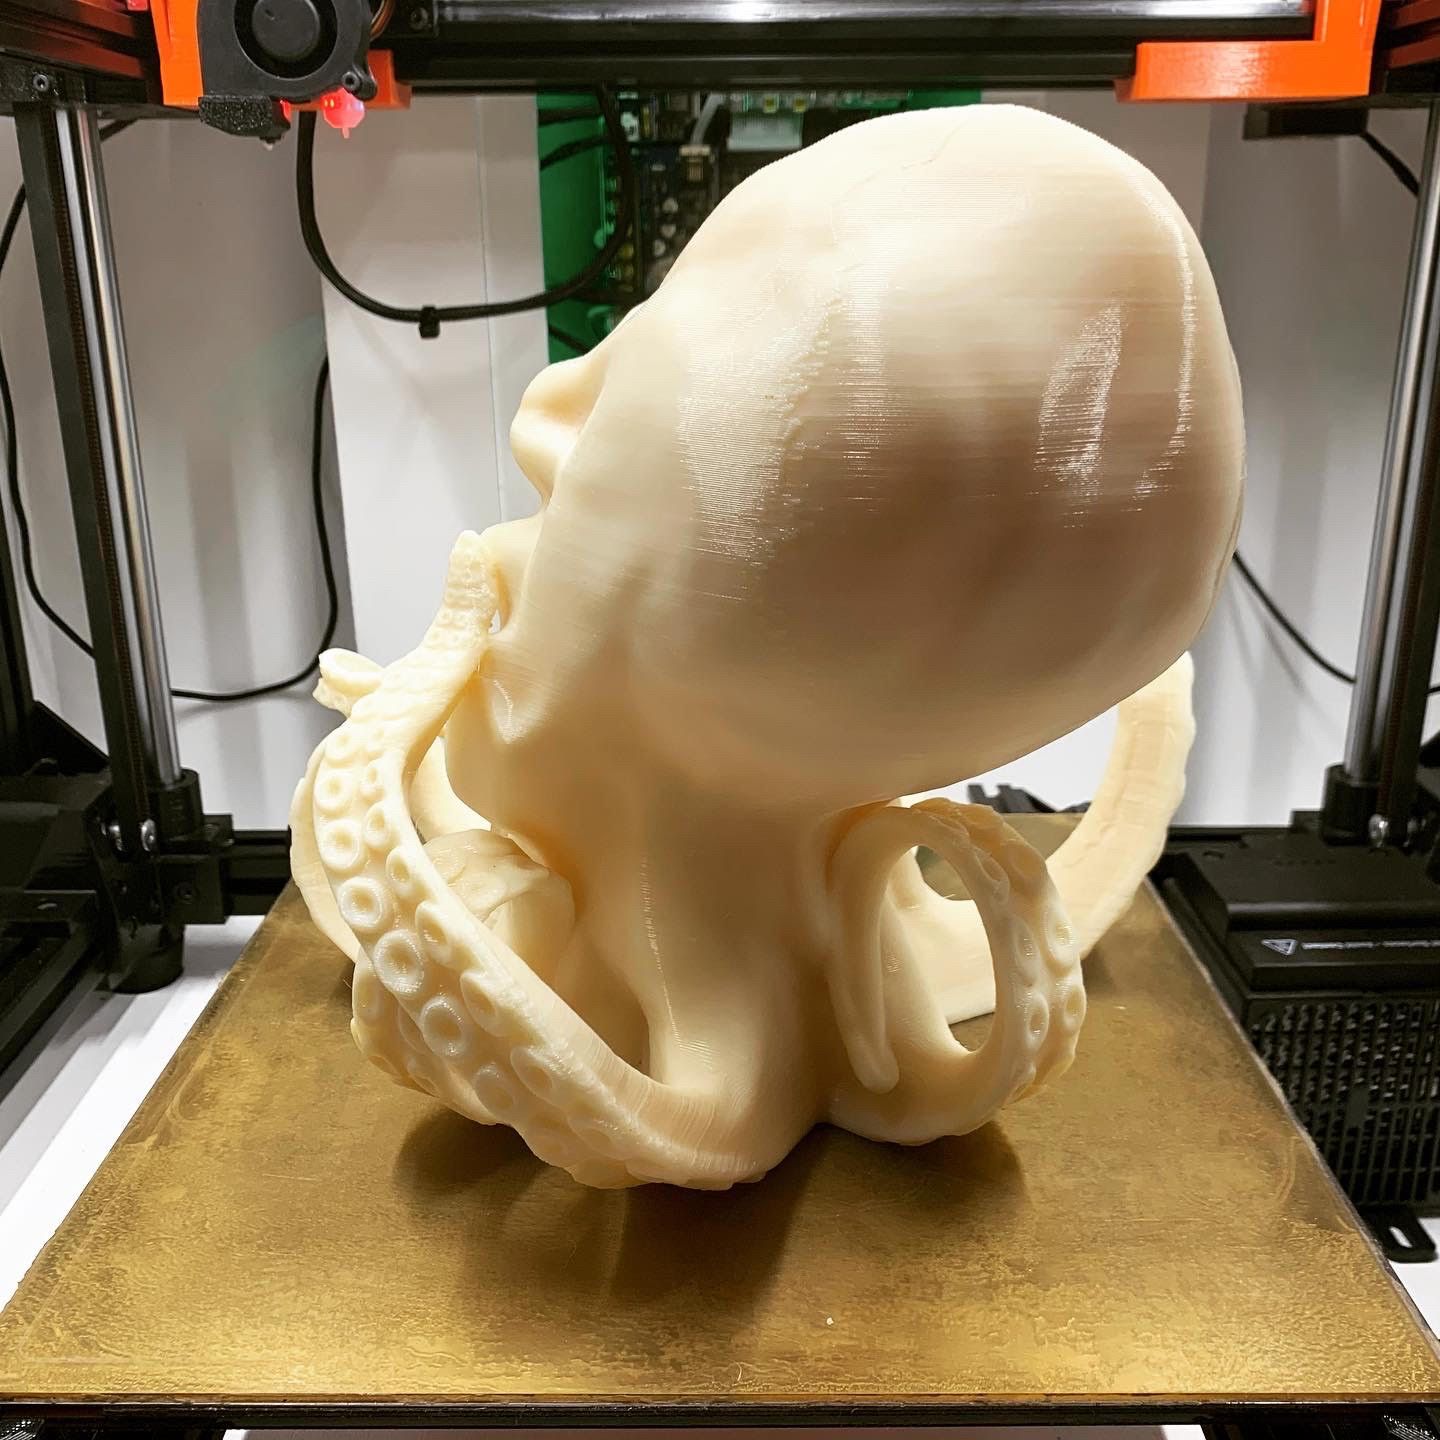
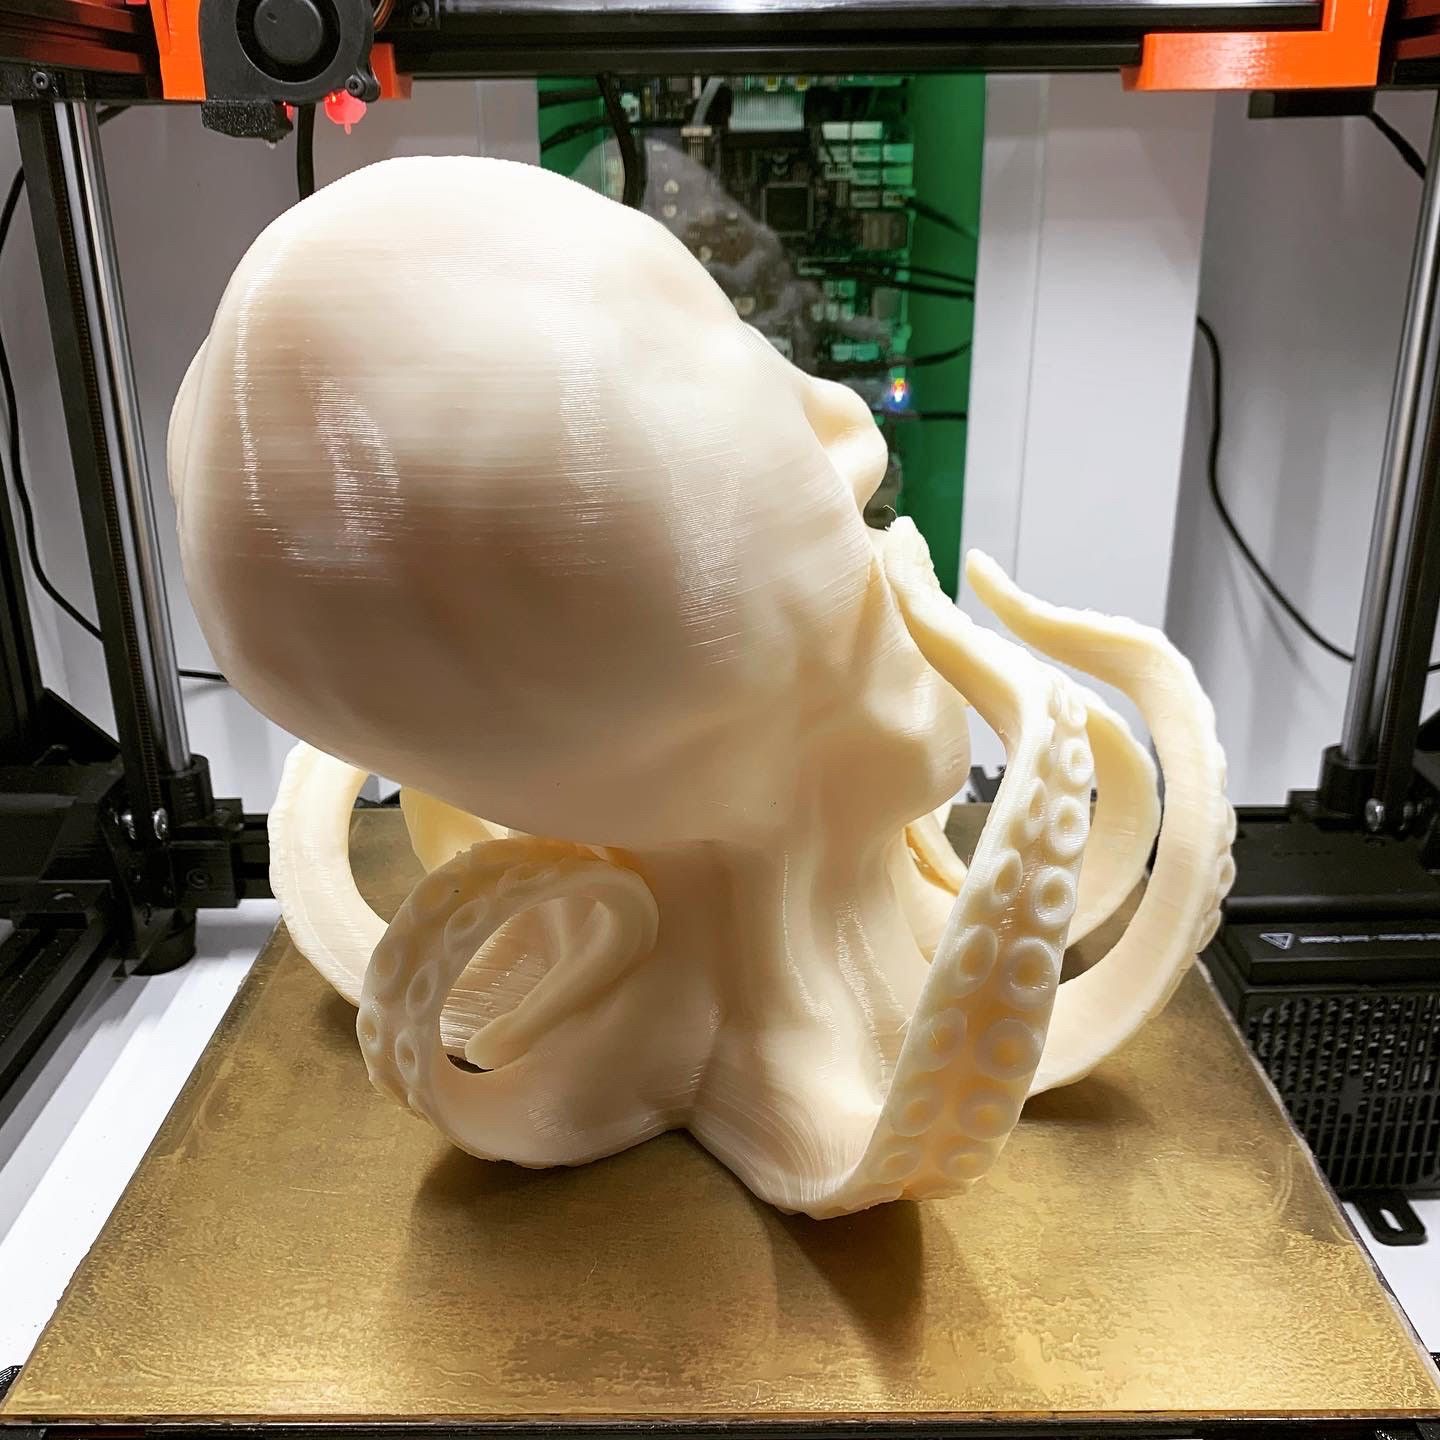
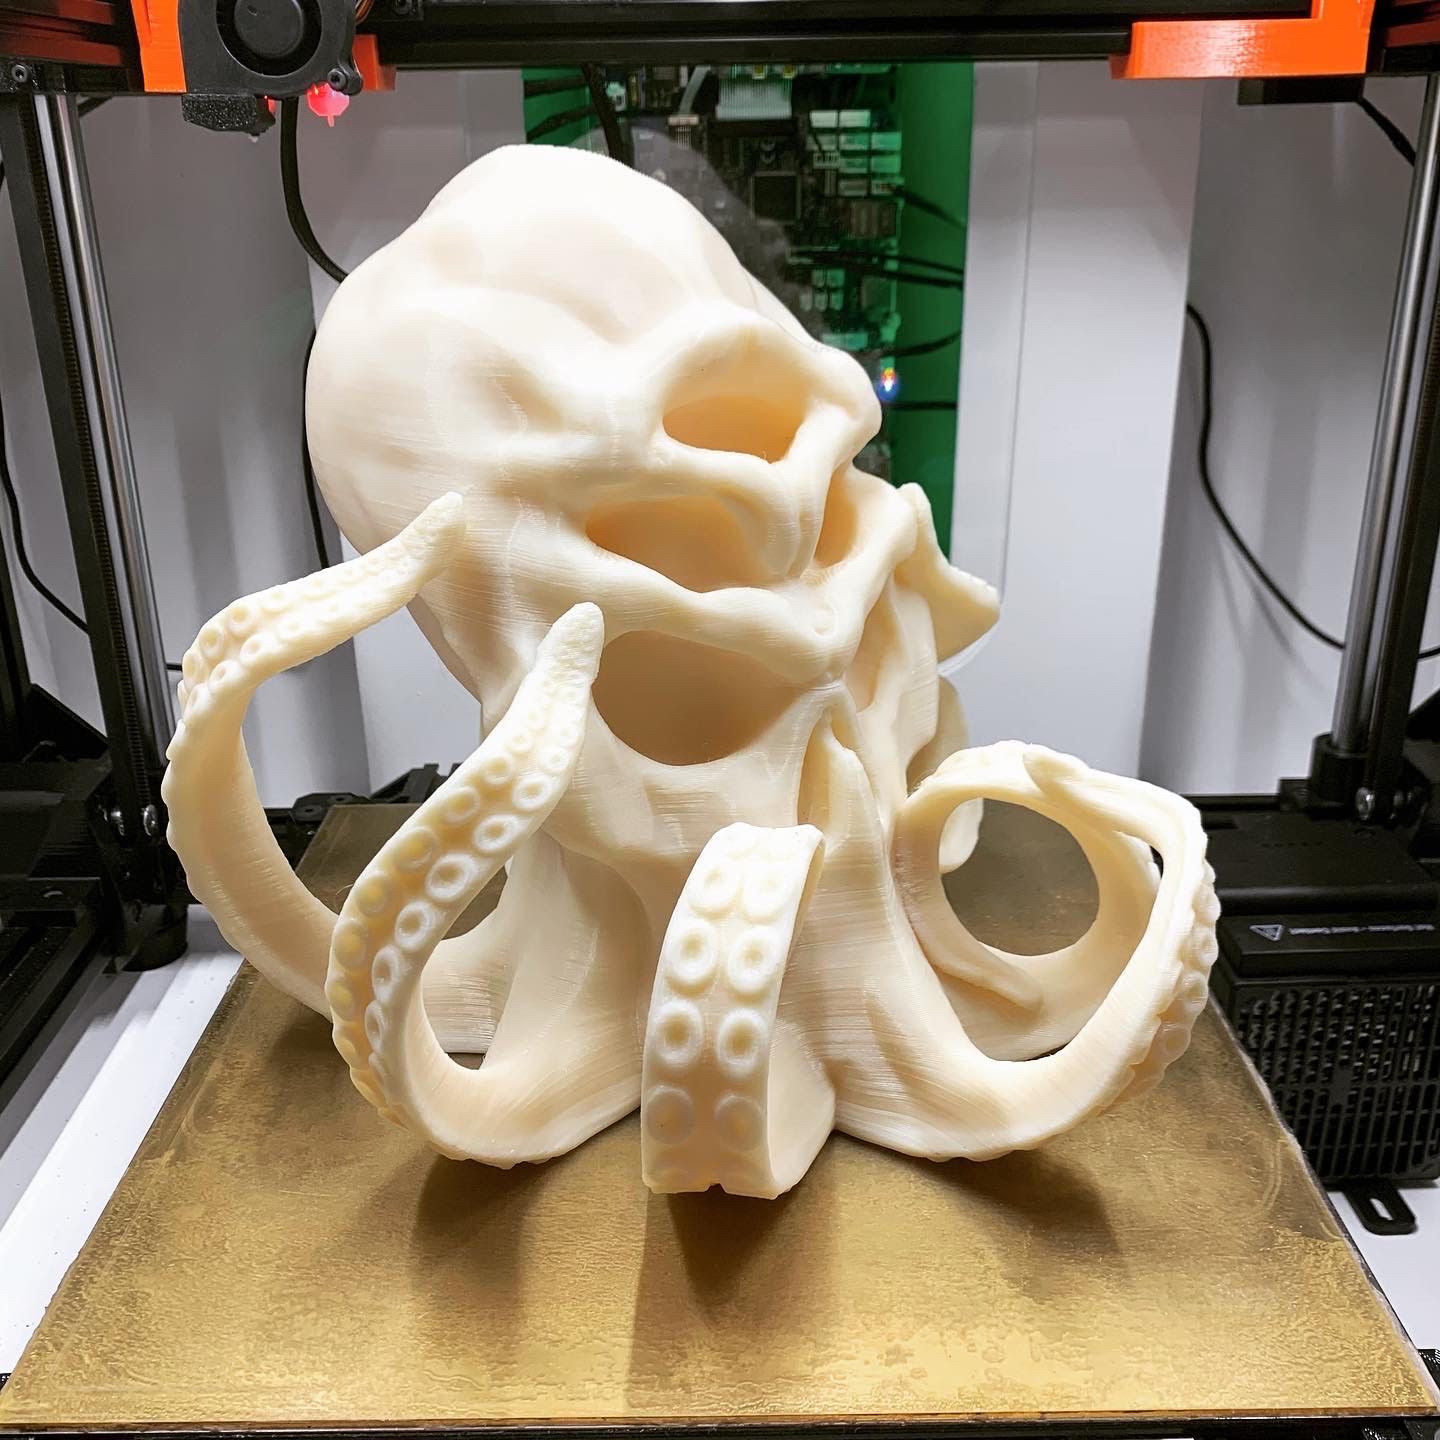
I wanted to post a few photos of a Halloween "torture test" we recently completed. This was printed in ABS, with no supports, using a 1.2mm nozzle. Extrusion width was 1.8mm and layer height was .4mm. It is 300mm deep x 264mm wide x 244mm high, was printed in ~17 hours, and weighs right at 3.5lbs.
This was our first time using a 1.2mm nozzle and getting the retraction settings right to (mostly) control stringing was a challenge, but firmware retraction made the changes easy! There was some mid-air printing near the base, but that was in the design and it recovered beautifully..
-
RE: Duet 3 / Toolboard - significant issue when connection is lost
@dc42 / @T3P3Tony - We need to raise this issue again to see if anything could be done about it, potentially in 3.4 as it creates a significant risk.
What was just discovered is that if the toolboard isn't communicating with RRF, the following errors are reported but then the script continue. This is extremely hazardous for bed leveling as it continues with the homez.g script even though the toolboard/probe isn't responding.
3/5/2022, 12:54:39 PM Error: Failed to enable probe 3/5/2022, 12:54:39 PM Error: M280: Response timeout: CAN addr 20, req type 4012, RID=73 3/5/2022, 12:54:38 PM Error: Response timeout: CAN addr 20, req type 6037, RID=72 3/5/2022, 12:54:37 PM Error: M280: Response timeout: CAN addr 20, req type 4012, RID=71
To us, the condition of losing connection with the toolboard is significant enough that RRF should immediately halt.
-
RE: oozeBot Elevate
Check out this video Slice just posted of one of our machines in action! What they didn't mention is this 200mm tall Spider-man was printed in ABS at 100mm/s (50mm/s external perimeter) in ~8 hours!
-
RE: New Input Shaping plugin v3.4.1-b1
One thing I just realized is that the the moves are based on max speed set in M203 - which in our case is 400mm/s - way above normal printing speeds. It might be beneficial to allow setting the speed of the moves as a parameter as that definitely plays into the readings..
-
Pushing the bounds of DWC on a SBC
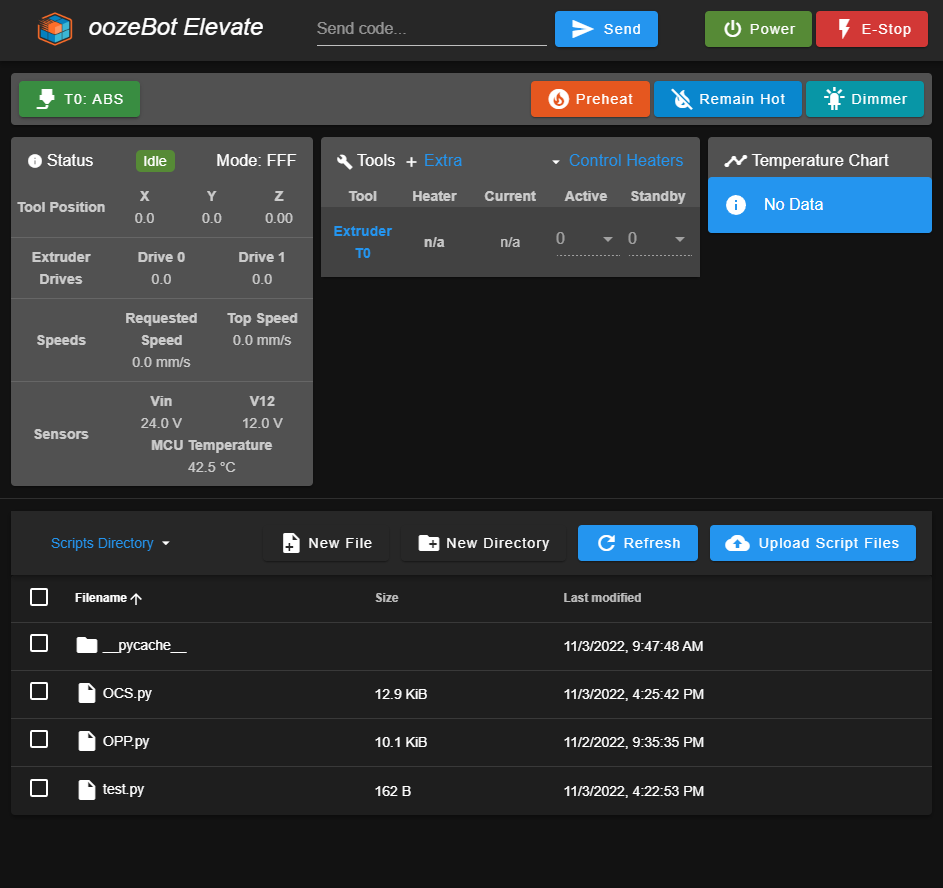
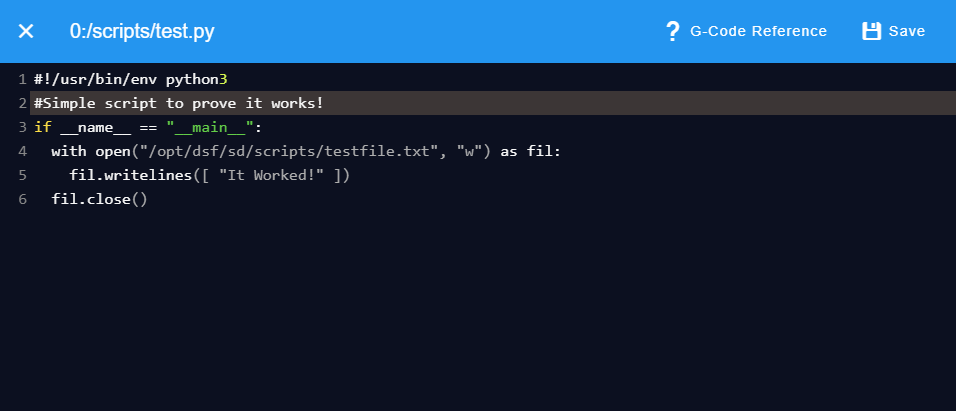
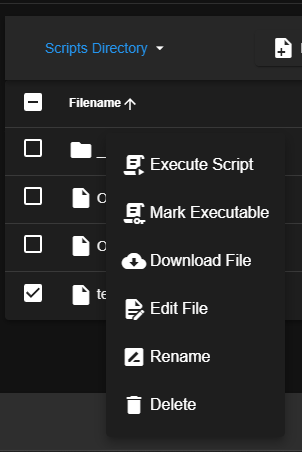
I had some time today to mess with DWC today and implemented a new list view for python / bash / other scripts under System. We needed a clean way to distribute scripting updates to not-so-savvy linux users. I'm pretty pleased with it so far and would love some feedback. This will be posted to our github just as soon as version 3.4.4 of OWC (oozeBot Web Control) is wrapped up.
New Script List
File Editor
New Menu Items:
results of executing the script:
-
PSA - Disable RPi WiFi Power Save
A few months ago, our machines began experiencing random failures where the SBC (we use the Raspberry Pi 4b) would become unresponsive. It was worrisome, to say the least, as it began randomly happening to all our printers. After considerable effort in diagnosing the issue, we believe the issue to be WiFi Power Save mode. After disabling, we have not experienced any further failures for several weeks.
If/when the WiFi module 'hiccups' due to Power Save being enabled (and it's enabled by default) the SD Card will timeout as it shares the same interface as WiFi and the RPi becomes unresponsive.
If anyone reading this disagrees, or has better insight, please feel free to correct us.
There are several ways to disable WiFi power save mode. We chose to create a service to handle it based on information found here: https://raspberrypi.stackexchange.com/questions/96606/make-iw-wlan0-set-power-save-off-permanent
Create a new service file:
sudo systemctl --full --force edit wifi_powersave@.service
Insert the following code and save:
[Unit] Description=Set WiFi power save %i After=sys-subsystem-net-devices-wlan0.device [Service] Type=oneshot RemainAfterExit=yes ExecStart=/sbin/iw dev wlan0 set power_save %i [Install] WantedBy=sys-subsystem-net-devices-wlan0.device
Run the following two commands and then reboot:
sudo systemctl disable wifi_powersave@on.service sudo systemctl enable wifi_powersave@off.service
After reboot, you can verify it is now disabled by running the following:
iwconfig | grep "Power Management"
The output should now include something like the following:
lo no wireless extensions. eth0 no wireless extensions. Power Management:off
-
RE: oozeBot Elevate
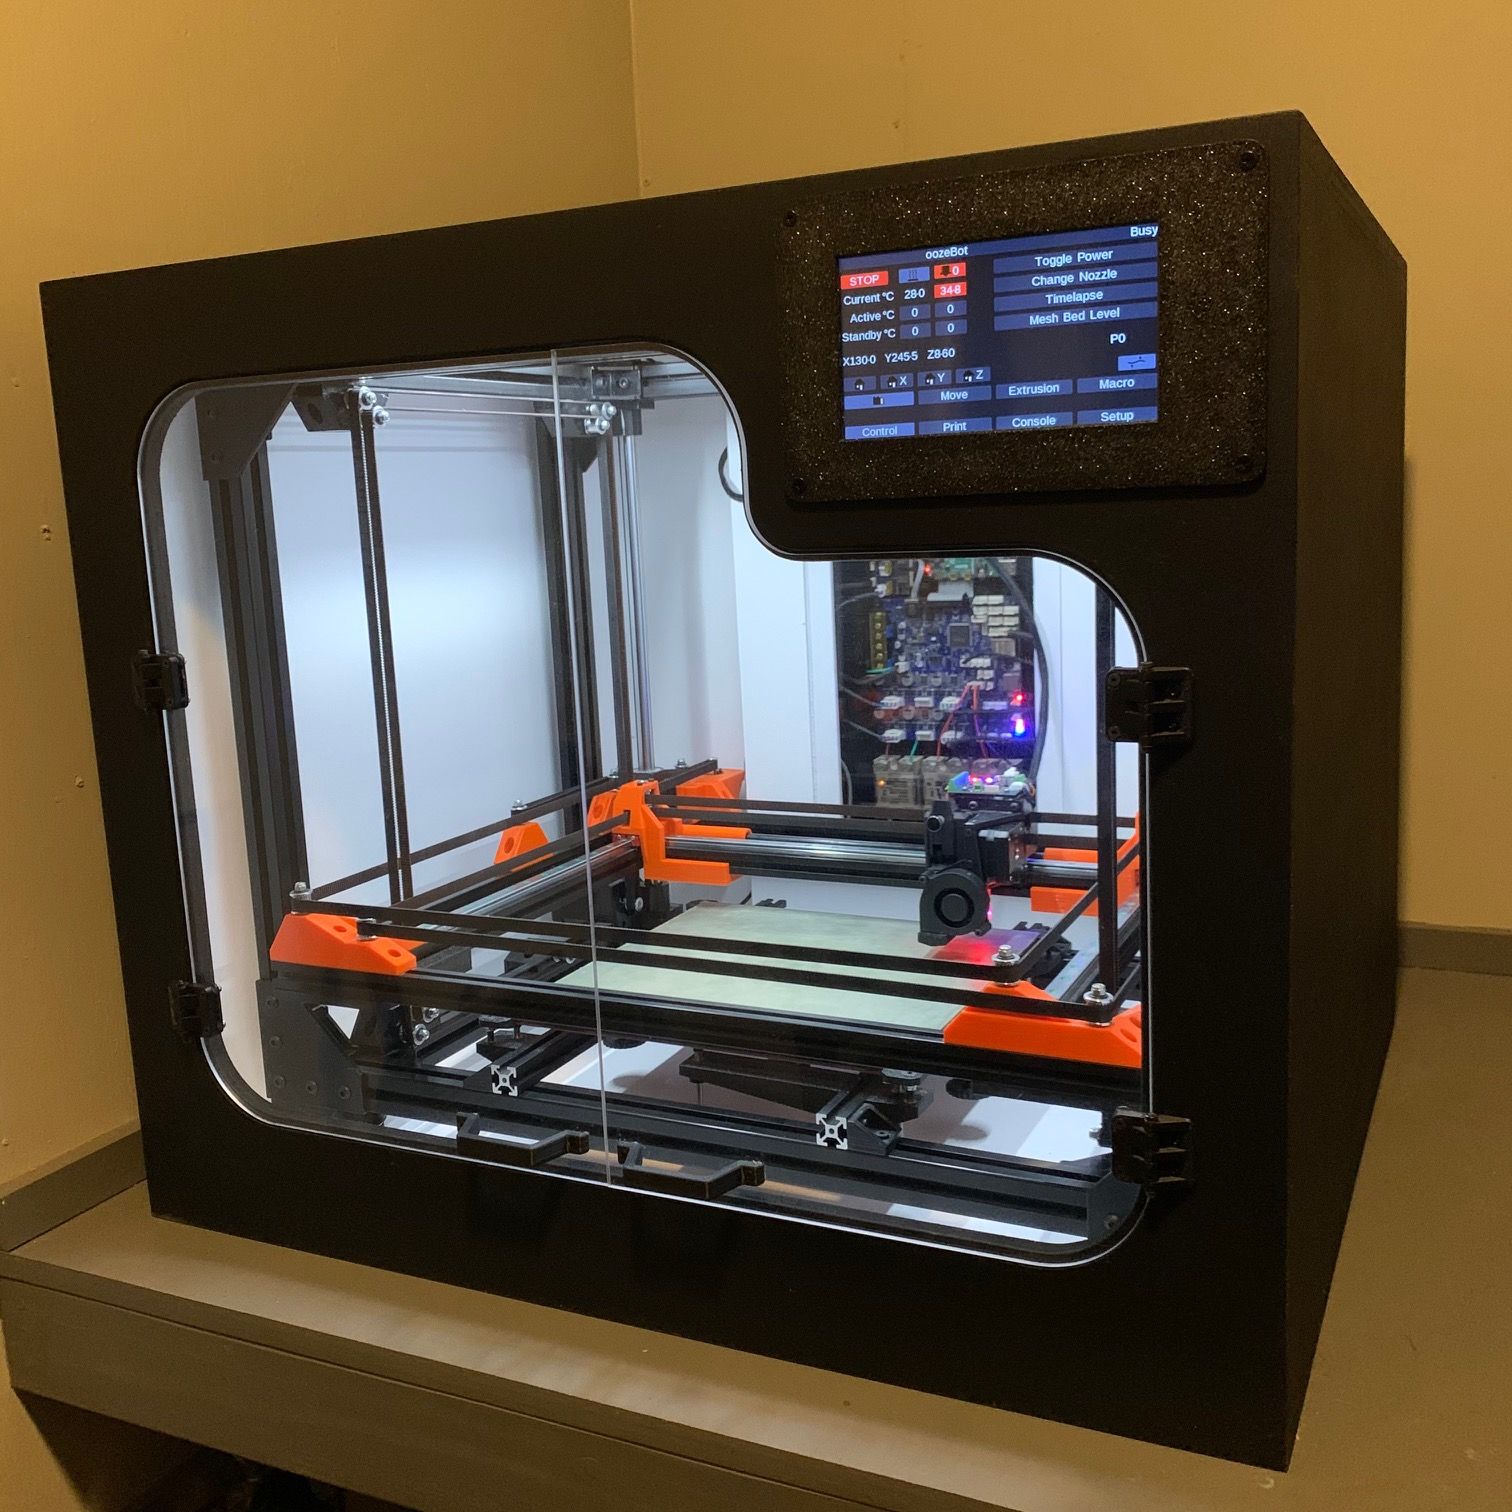
Here's a quick pic of our latest prototype in the enclosure I just finished..
Latest posts made by oozeBot
-
RE: New experimental DuetPi Bookworm builds available
@chrishamm said in New experimental DuetPi Bookworm builds available:
@oozeBot Right, the Bookworm build uses a startup script to determine if it's running on a Pi 5. If it is, it makes those adjustments automatically. I'll update the documentation.
Thanks. I just added something similar within duetcontrolserver's postinst script to do the same.
-
RE: New experimental DuetPi Bookworm builds available
@chrishamm - I was able to get past my issue. The documentation ( https://docs.duet3d.com/User_manual/Machine_configuration/DSF_Other#gpio-transfer-ready-pin ) states The following steps can be skipped if a Raspberry Pi is used. That does not appear to be valid for the Raspberry Pi 5 as I had to switch to gpiochip4 instead of the default gpiochip0. Thanks
-
RE: New experimental DuetPi Bookworm builds available
@chrishamm will you be releasing instructions on how to "roll your own" copy of DuetPi for bookworm? We have a custom version but I've not been able to get it to connect with the old instruction set as I'm receiving:
Setting up reprapfirmware (3.4.6-3) ... [fatal] Could not connect to Duet: Timeout while waiting for transfer ready pin
In the meantime, I'm flashing one of your builds onto an SD for testing now.
Thanks!
-
RE: Tool board 1.2a crimp question
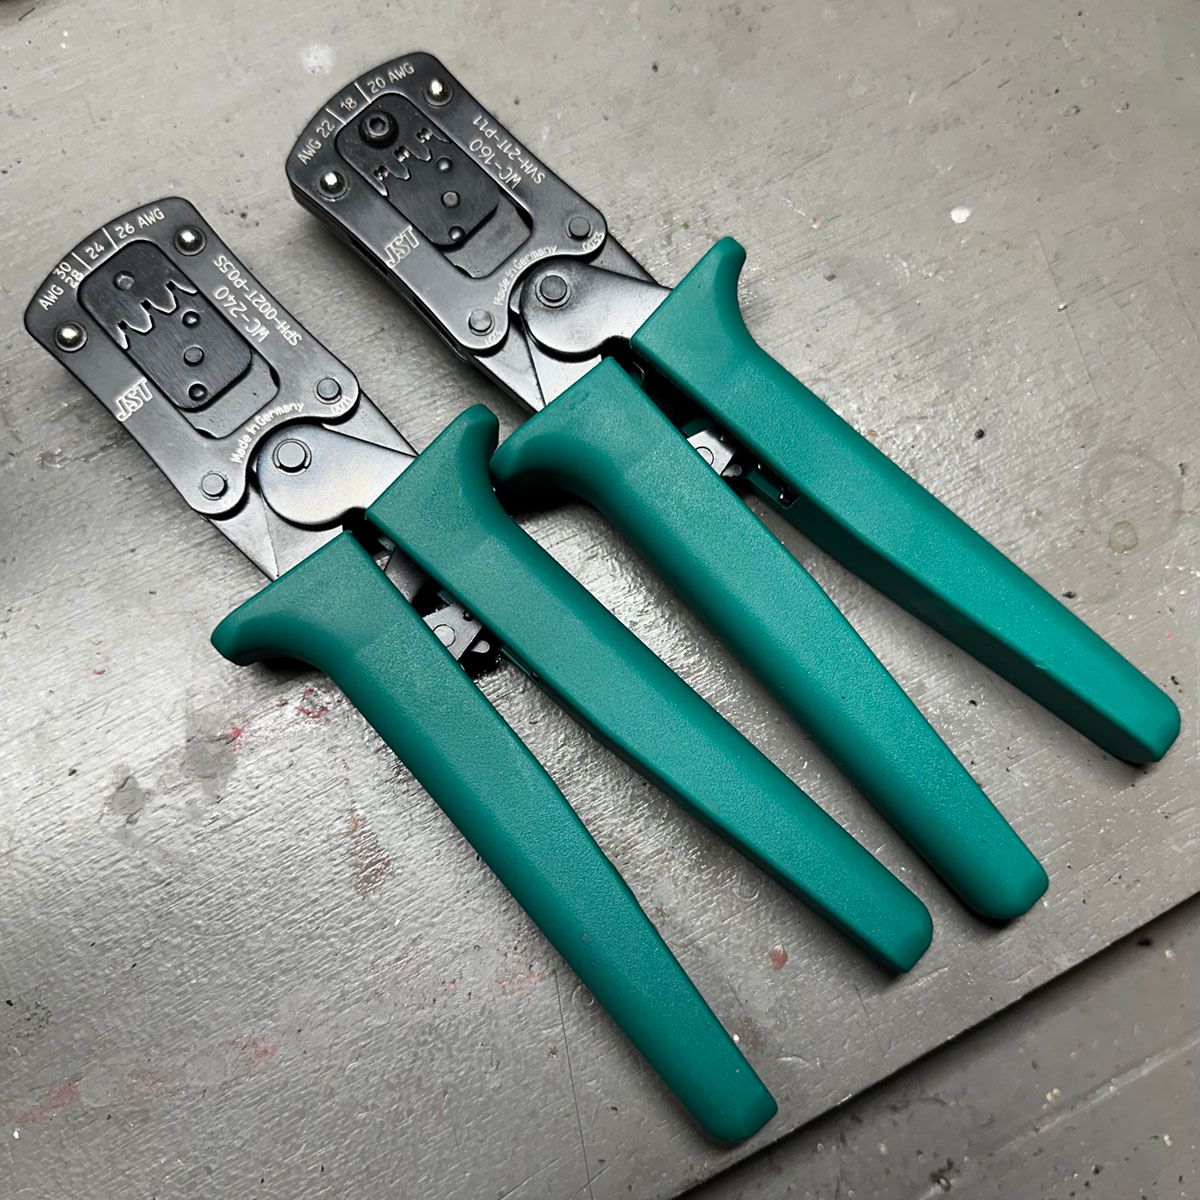
While I feel certain almost no one else on the forum can (or should try to) justify such costly terminal crimpers, I'll throw out there that these official JST crimpers are the absolute shiznit. We have both the PH and VH models. Now if only Molex had something as high quality for the KK terminals.
-
RE: custom_http_endpoint.py example - http error 500?
@chrishamm Thanks! That’s the nudge we needed- It’s definitely a permission issue. We’ll get it sorted.
-
RE: custom_http_endpoint.py example - http error 500?
Bump.. So far I have not been able to find any logging or details on why it is returning a 500 error. Note that any invalid URL returns 404, so DSF is picking up that it's been registered.
Maybe the example is from a previous version of dsf-python and needs updating? Please advise as we do have a use for this and are quite motivated to put it into practice. Thanks
-
custom_http_endpoint.py example - http error 500?
We are evaluating the custom_http_endpoint.py example located at
https://github.com/Duet3D/dsf-python/blob/main/examples/custom_http_endpoint.py. We are running dsf-python-3.4.6.post4. The example is returning a 500 error and we are unsure how to debug it to move past it. Here is the output from the console while running:send: {"mode":"Command","version":12} recv: {"success":true} send: {"command":"AddHttpEndpoint","EndpointType":"GET","Namespace":"custom","Path":"getIt","IsUploadRequest":false} recv: {"result":"/run/dsf/custom/getIt-GET.sock","success":true} Try accessing http://duet3.local/machine/custom/getIt in your browser...
Any thoughts on what might be wrong? Thanks in advance.
-
RE: Building DWC along with DSF
@chrishamm That all makes sense. I like being able to build it all together as DWC builds pretty quickly on our build server but yeah, bypassing DWC if it hasn't changed is a good idea. I just wanted to make certain I wasn't overlooking a flag or something but didn't know how I could be after reviewing the code. Thanks
-
RE: Toolboard HAT
@infiniteloop we’ll discuss- not against it at all but would want to spend a bit more time on the design and then have a few made for verification before posting based on the initial batch we received. We have a lot going on at the moment but will revisit soon!
-
RE: Toolboard HAT
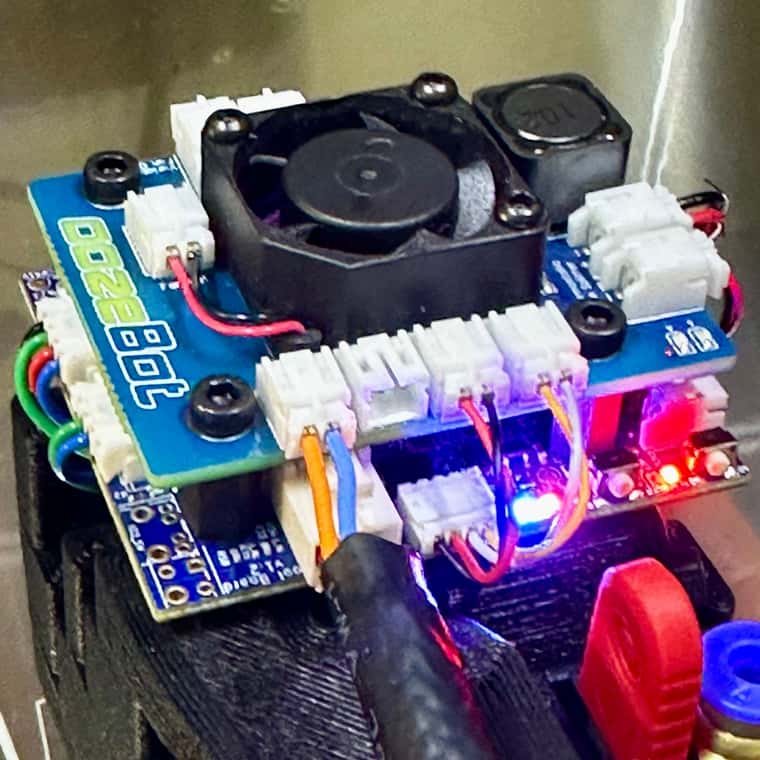
Here is one more photo showing the canbus wiring. We are really liking this method over soldering the pigtails.