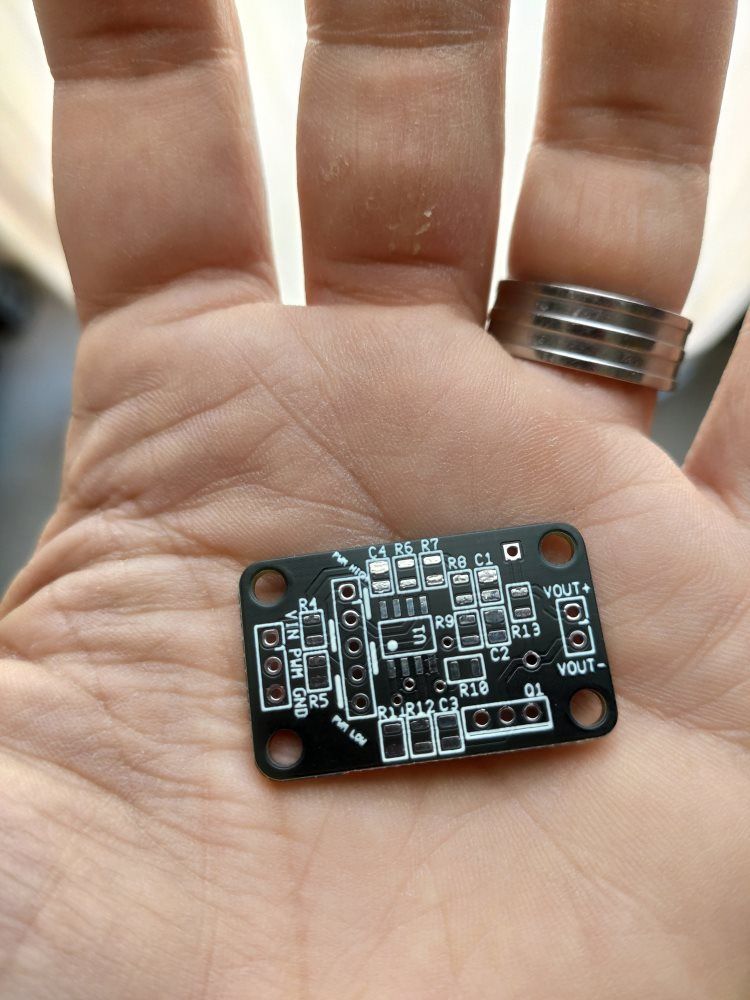
Boards arrived!

They are VERY small and very cute 
As soon as I get some spare time I will assemble the first one and perform some testing. If it all works ok, then I will move it to the betatesters phase 
Boards arrived!

They are VERY small and very cute 
As soon as I get some spare time I will assemble the first one and perform some testing. If it all works ok, then I will move it to the betatesters phase 
First batch ordered!
15 PCB are on its way 
If there is no problem with the design, I'll order about 50 more, wich would be enough for all the boards everyone asked for.
Anyone wants to betatest a board from this first batch once arrives?
@egon-net said in Designing a PWM to Analog mini board for fans:
25 board batch on its way!
- Parts ordered to Mouser
- Boards ordered to JLCPCB


Waiting...
@egon-net said in Designing a PWM to Analog mini board for fans:
@egon-net said in Designing a PWM to Analog mini board for fans:
25 board batch on its way!
- Parts ordered to Mouser
- Boards ordered to JLCPCB
- Parts arrived from Mouser
- Boards in their way from JLCPCB
Waiting...

It all seems ok, so I will build the boards and send them as soon as posible 
First board assembled and tested!

You can see the new integrated electrolytic capacitor, smd diode and led. I'll try to assemble/pack all boards this weekend, and send them early next week.
All the boards have been sent!
Please message me with an email so I can send the board documentation to everyone.
I have the very same problem! And I also have a toolchanger just like you, custom CoreXY motion system with e3d toolchanger hardware. The thing is my bed is almost flat and it doesn't make my prints fail, but I no longer have the perfect first layers I used to have since I went toolchanging. I even thought that the extra weight of the tool was making my X gantry sag, but the expected sagging doesn't quite match the effect I see when printing.
@bananapuppy said in PWM to constant DC voltage for fan control:
SA105E104MARTB AVX
Ceramic is ok, but I'd try to get one with X5R or X7R dielectric. The one you picked has Z5U dielectric which is not that good.
Europe -> Spain -> Valencia
I am in the very same situation. Same kind of machine, but just one Z motor moving two ballscrews.
@droftarts My bad, It was beta2+4... I remember reading a post that suggests using version 3.5.1 with the 3.6 betas... I'm right now in 3.5.0, and I'm experiencing issues (all temperatures are .0 and refreshes work only every other time)
I have just updated RRF to 3.6.0 beta4, which is supposed to go with PanelDue FW 3.5.1, but I can only find 3.5.0 version, is it a beta version hosted anywhere?
Thanks!
https://www.reddit.com/r/prusa3d/comments/1b2577t/comment/ksj8ff7/?share_id=CR6_0Y-1uBdp7iVZoW9DP
It would do a enormous difference for my setup...
I don't have any more boards, but you can go with S1lencer ones 
I used mouser, and I have just checked and they have them in stock...
Here it is:
https://github.com/EgonVLC/PWM2Analog
Multisim/Ultiboard files, GERBERS, schematic and build instructions.
I will add further info when possible.
Hi all, I'm sorry I have been quite busy for personal reasons. I will try to post all the resources in github and share the link today.
Best regards.
@danielkrah I already use a PEI sheet, but there's no adherence at all. I end up with the adhesive tape, and it kinda works.
Any news about this issue?