Flying extruder with 4th axis
-
Hi there!
Thanks for the quick response, can you tell me where exactly and how should i put the endstop info?
i´m using E1 endstop conector for the effector switch and E0 conector for the 4th axis´s endstop -
@ander said in Flying extruder with 4th axis:
Thanks for the quick response, can you tell me where exactly and how should i put the endstop info?
If you are running RepRapFirmware 2, and in your M584 command you have created a U axis for the 4th tower, then you need:
M574 U2 S1
The S1 parameter assumes the endstop is a normally-closed switch. Use S0 if it is normally-open.
Edit: from your config.g file and your earlier post, I see that you are using RepRapFirmware 3. You currently have this line in config.g:
M574 U2 S1
Change it to:
M574 U2 S1 P"e0stop"
-
Hi there,
i made the change you sugested and now the 4th axis moves well when homing, but doesn´t compensate when i move manually to the left or right and if i go down on z the 4th axis doesnt move either. another thing to point out is that the web interface is recognizing 5 endstops(0,1,2,3 and 4) i guess the number 4 is the efectors endstop but manually triggerring doesn´t change at all. -
By the way, i realized that suddenly another file was created with a name of config.g.bak, should i delete it or just leave?
-
@ander said in Flying extruder with 4th axis:
Hi there,
i made the change you sugested and now the 4th axis moves well when homing, but doesn´t compensate when i move manually to the left or right and if i go down on z the 4th axis doesnt move either. another thing to point out is that the web interface is recognizing 5 endstops(0,1,2,3 and 4) i guess the number 4 is the efectors endstop but manually triggerring doesn´t change at all.Please post your current config.g file. A photo of your printer showing where the 4th tower is in relation to the others would also help.
-
Hi
the setting is this one:
https://www.youtube.com/watch?v=ToBLN7YHWt4
this is when used to work fine
this is the config file:
config(1).gconfig.g.bak can´t be posted here
Thanks -
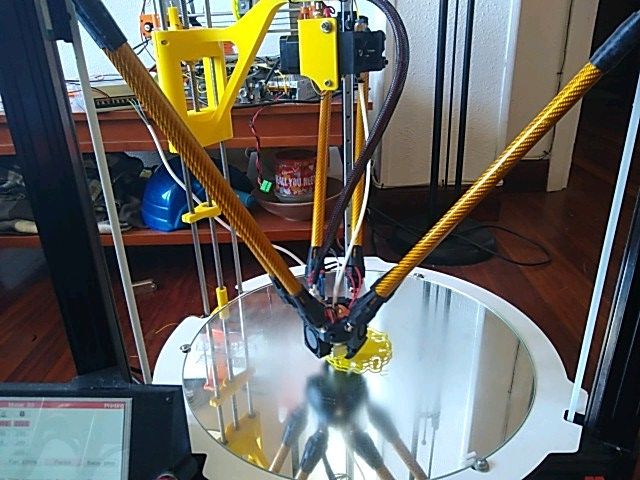
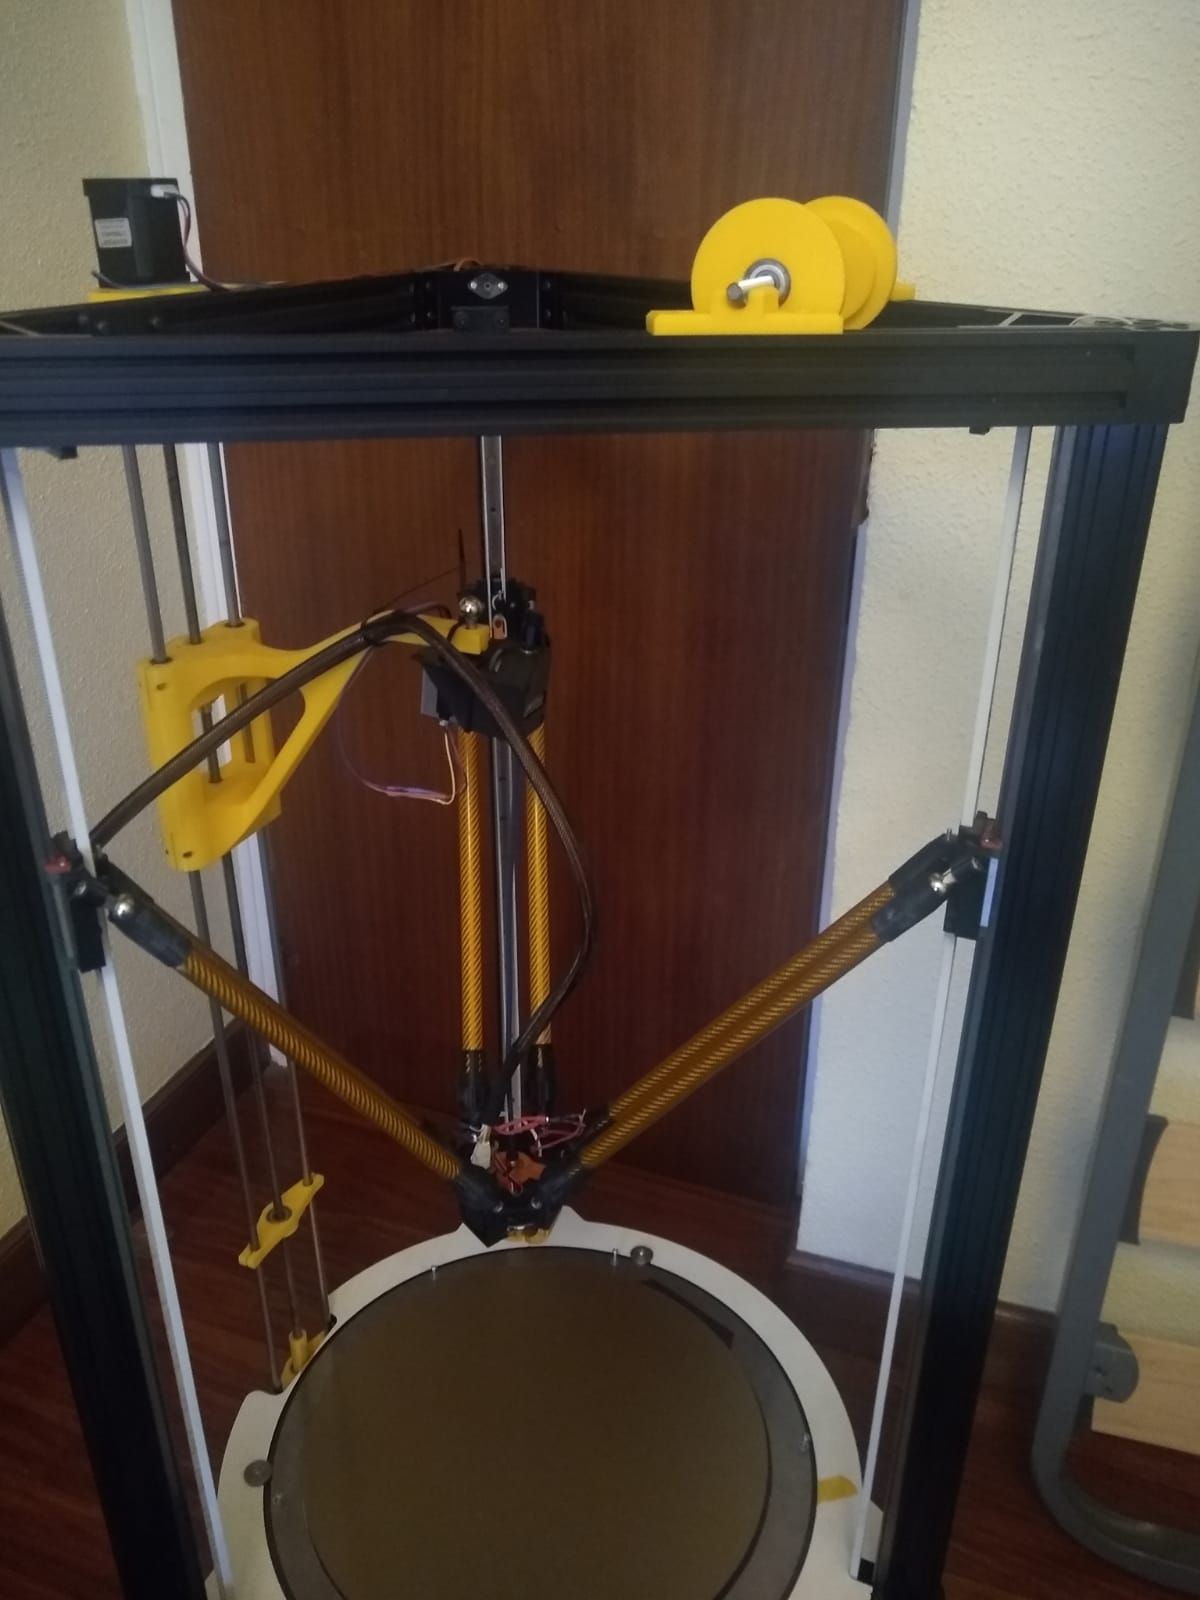
here i have a picture of the setup

-
Can anyone help me out?
My printer is still with the same problem, i´m going to sumarize a bit:
I have a delta running on a duet wifi and i installed a 4th axis to my delta printer for the tipical hanging extruder motor sistem (shown in the picture), it was running fine until i tried to update to firmware 3.0 (it was running in a previous version). i tried to apply all the changes made to the old firmware version to make the 4th axis run ( U axis) but it didn´t work very well.
Now the 4th axis moves well when homing but if i move down manually, the axis X Y and Z move well but not the U axis. Also, by moving manually to the left or right the U axis should compensate automaticaly the hight and it doesn´t.
The effector has a switch on it for autolevel pourposes, i think it is not well defined because i see no changes in the web interface by clicking manually , and the other axis do, including the U axis.
I leave my last config file here so you can have a look and if someone can see an error can give me a hand.
thanks in advance. 1582918282938-config-1(1).g
 -
See https://duet3d.dozuki.com/Wiki/ConfiguringRepRapFirmwareDeltaPrinter#Section_Adding_additional_towers_to_carry_flying_extruders. Your config.g command doesn't have the M669 command.
-
Hi there
Thanks for the help, i saw i had some errors so i changed them and the new axis seems to work fine even with lateral compensations, But i still have to fix one last thing so the printer can start printing, and this is the Z probe situation. I feel a bit confused with this thing in the firmware 3.0.
Being a delta printer has 3 axis ( X,Y,Z) and then it has an effector with a mecanical switch on it similar to the atom delta 3d printer.
The new axis(U) endstop is conected to E0 endstop pin, and the effector´s Z probe is conected to E1 endstop pin.
Here i put my config file and bed file.config(2).g bed.gAfter finishing the entire configuration i will post the finished config file so others can use it
thanks -
As you are running RRF3 I suggest you change your M558 command to this:
M558 P5 C"e1stop" H5 F1200 T6000 ; set Z probe type to effector and the dive height + speeds
Use either P5 (filtered) or P8 (unfiltered). The command as shown is for a normally-close switch. If your switch is normally open (not recommended) then use C"!e1stop" instead.
-
Hi there
thanks for all the help, the printer looks that works fine, now time to create some macro´s etc.
For those who want to replicate this setup i will leave here my config file so you can copy.
It is currently running on a duet wifi and firmware 3.0
config (2).g -
Hello everyone
The 4th axis delta is running but i noticed an issue and i don´t know how to solve it.
To put everyone in context, we are running a delta printer on a duet wifi using firmware 3.0. the printer has an aditional axis for the flying extruder (see picture).
The issue is that the non printing moving speed is very low, i can increase the speed in simplify 3d up to 400mm/s (currently set at 200mm/s), and you notice no difference.
Even homing speed is very slow, and i noticed that if i push the endstop of the aditional tower by hand when homing, the rest of the motors speed up inmediately, so i looks like it is related to the aditional axis.
i will put the config file and homing file so you can please give me a hand.
Thanks config (3).ghomedelta.g
 -
I don't see your config.g file.
I suggest you change your homedelta.g file as follows:
; homedelta.g
; called to home all towers on a delta printer
;
; generated by RepRapFirmware Configuration Tool v2.1.8 on Thu Feb 27 2020 08:16:33 GMT+0100 (hora estándar de Europa central)
G91   ; relative positioning
M584 P4
G1 H1 X833 Y833 Z833 U833 F5000 ; move all towers to the high end stopping at the endstops (first pass)
G1 H2 X-5 Y-5 Z-5 U-5 F4800    ; go down a few mm
G1 H1 X10 Y10 Z10 U10 F360     ; move all towers up once more (second pass)
M584 P3
G1 Z-5 F600               ; move down a few mm so that the nozzle can be centred
G90                        ; absolute positioning
G1 X0 Y0 F6000             ; move X+Y to the centre
Added M584 P3 line, and removed the U parameter from the following G1 command.
-
I don´t know why but the config file was on the right of the picture i sent.
i just removed the U parameters in the home section, and the u axis doesn´t go back home anymore
config (3).g -
@ander said in Flying extruder with 4th axis:
i just removed the U parameters in the home section, and the u axis doesn´t go back home anymore
That isn't what I suggested. Read my reply again.
-
Sorry i missunderstood. i made the change you suggested and still makes non printing moves very slow
-
We do not advise running at x256 microstepping. Change to x16 with interpolation, adjust the M92 steps/mm accordingly, and try again.
-
It worked very well!
Thanks for the excelent service!!