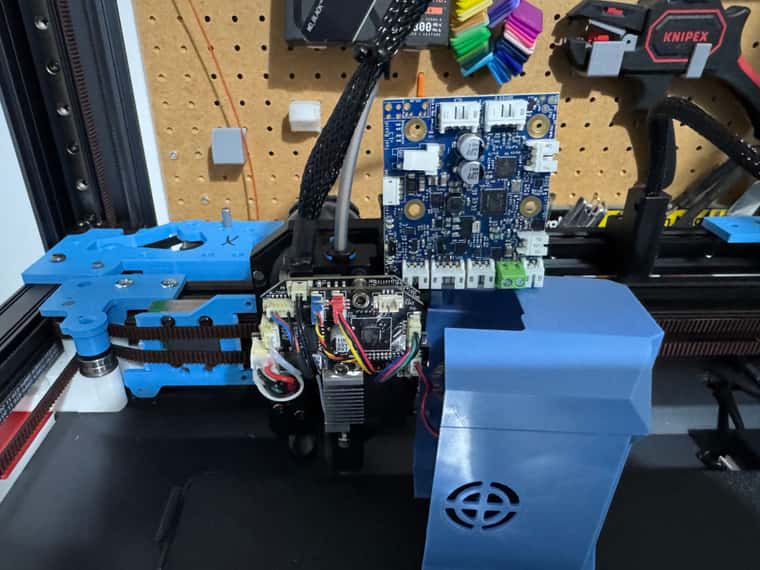
Sovol SV08 Multiple Motion System Upgrade.
-
@dwuk really enjoying following along with this build. Good to see the multiple motions systems code getting a chance to be used on a two head toolchanger!
-
First test of the mechanics - to make sure I haven't messed up Gantry1.
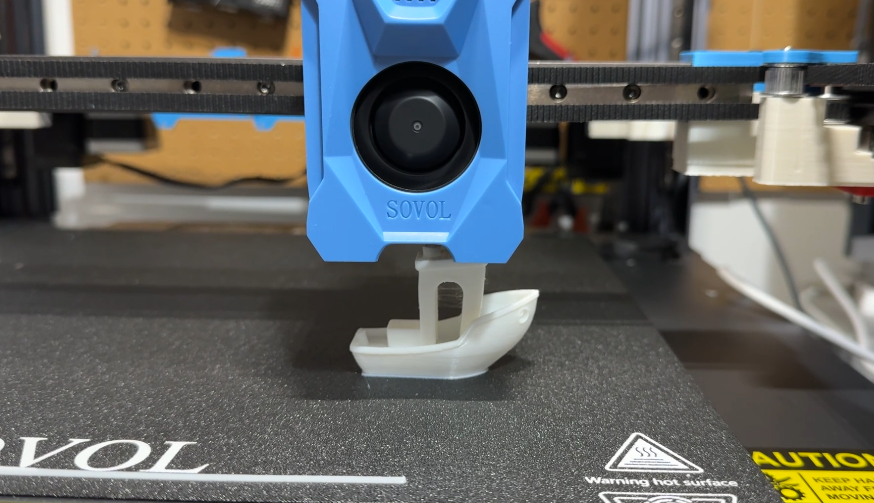
Worked surprisingly well on existing Klipper board - see short video demo.
https://youtu.be/3d6z5srohSQ
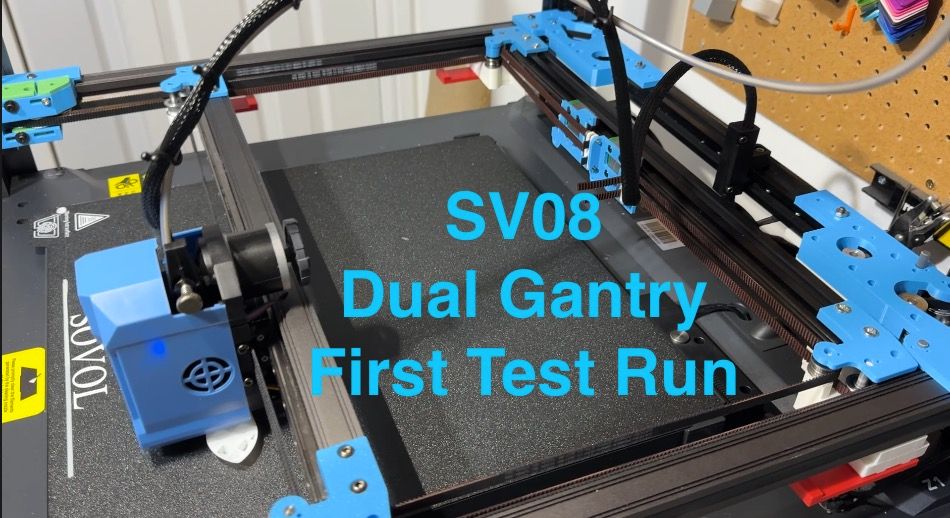
Can't yet get gantry 2 to work - due to lack of linear rail carriages, plus motors are probably not powerful enough - as for first try they didn't move.
Will try Swapping the motors around before upgrading.
Set smaller motors at 0.85a (the rating printed on them) - which didn't work.
Update - rear gantry moves ok with original sovol motors at both 0.85a and 1.5a (even with 3d printed carriages).
-
Managed to get 2nd gantry working.
Had a lot of trouble with Motors - the ones I saved from a WeedoX40 wouldn't work.
Eventually I discovered that they have different pin connections to Sovol motors - with have the coils connected on pins 1+4 and 3+6. My motors were 1+3 and 4+6.
So found some other motors - from my MPCNC - which are more powerful - 1.7a - and they eventually worked.
Then had a lot of trouble withy homing and setting values for TMC drivers - will probably switch to end stops for the final build - but eventually got it working.
Then next problem was prints keep losing position - eventually worked it out that I was moving too fast for the MPCNC motors - F36000 was too fast for them - so slowed down to 18000 (300mm/s). And that sorted out the problem.
Decided to try a print - despite plastic bearing posts, and plastic linear rail carriages - ran the print at half speed - but it worked.
Did an initial print on the from gantry - then swapped over the extruder and stepper connections - and reconfigured Klipper for the different motors.
Demo of print on 2nd gantry here
https://youtu.be/7ar74Ne5ryI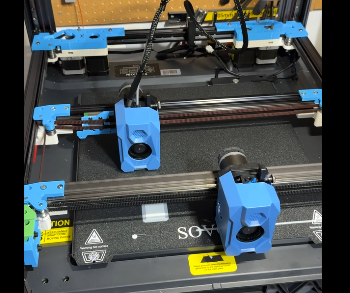
Have learn't quite a lot about configuring steppers which will come in useful once I try the Duet migration - which is probably now the next step.
-
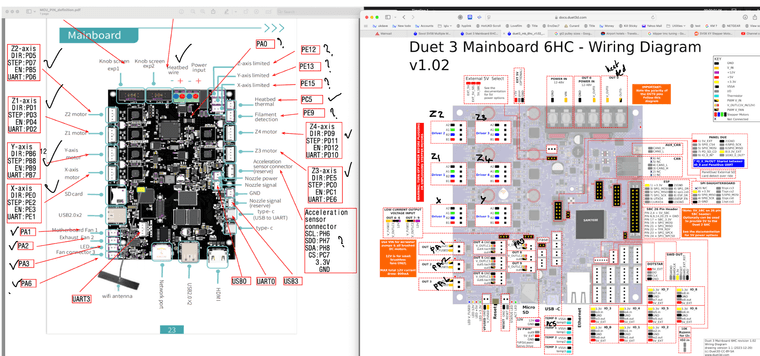
Starting to plan Duet Conversion - initially with just one Gantry and the 6LC and a single 1LC board
-
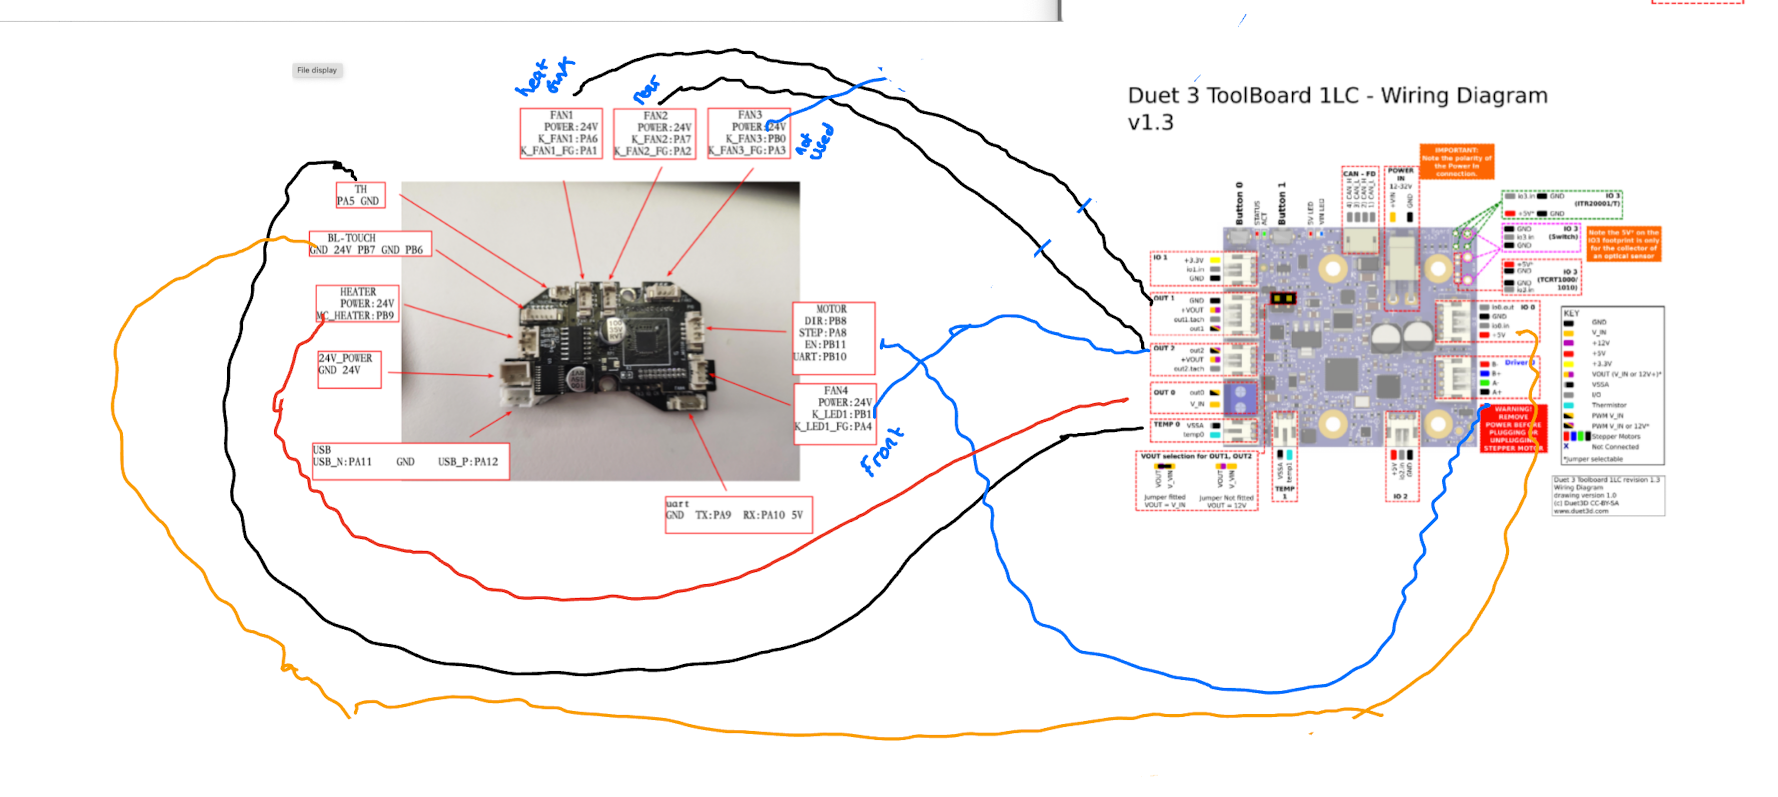
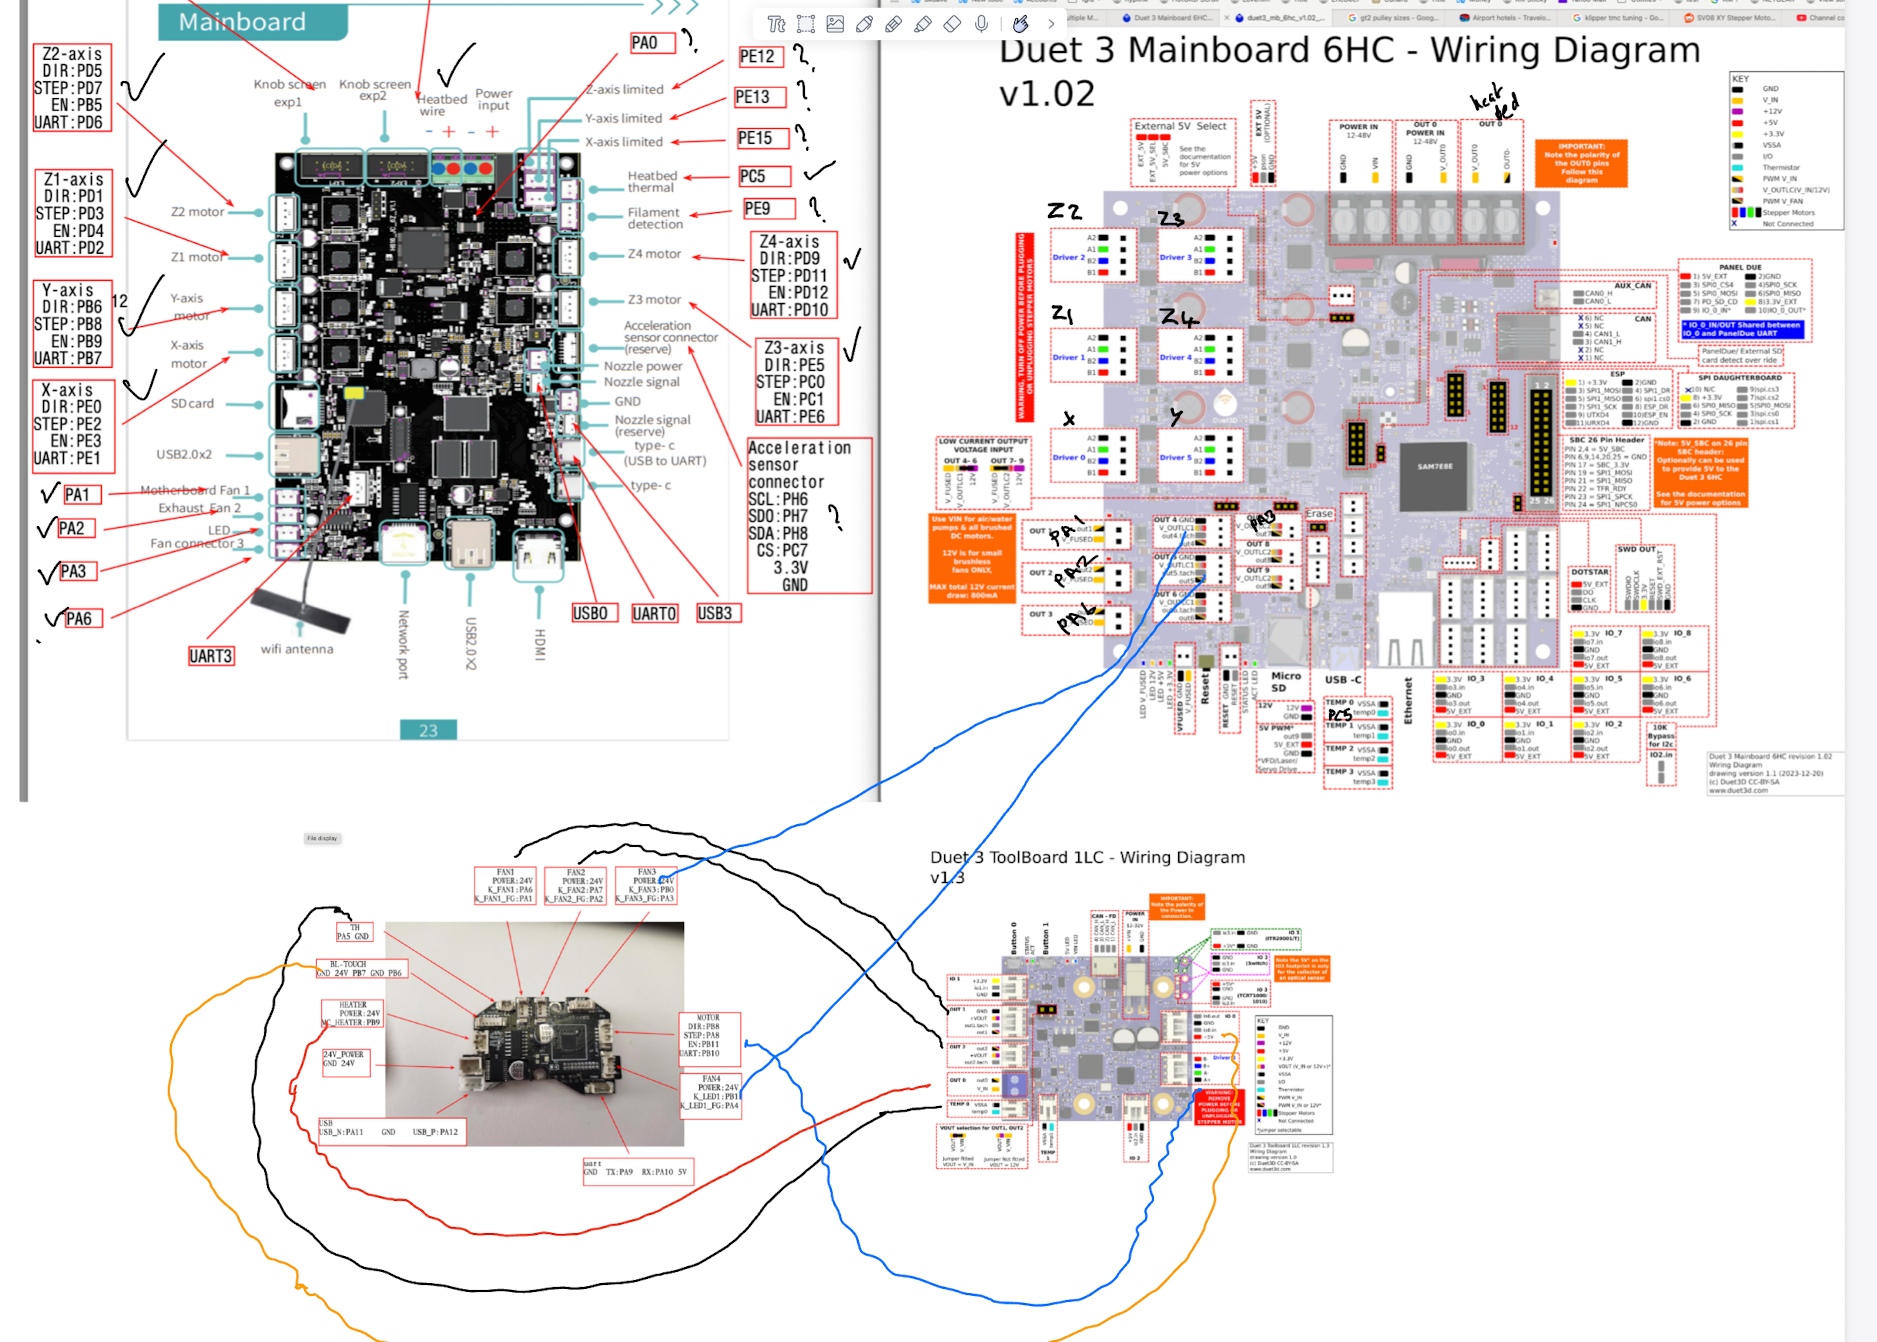
Added tool board wiring - looks like there are not enough connections for the 3 fans - so might have to run some extra cables from the main board. I have shown wiring for 4 fans - but I think only 3 are used.
-
-
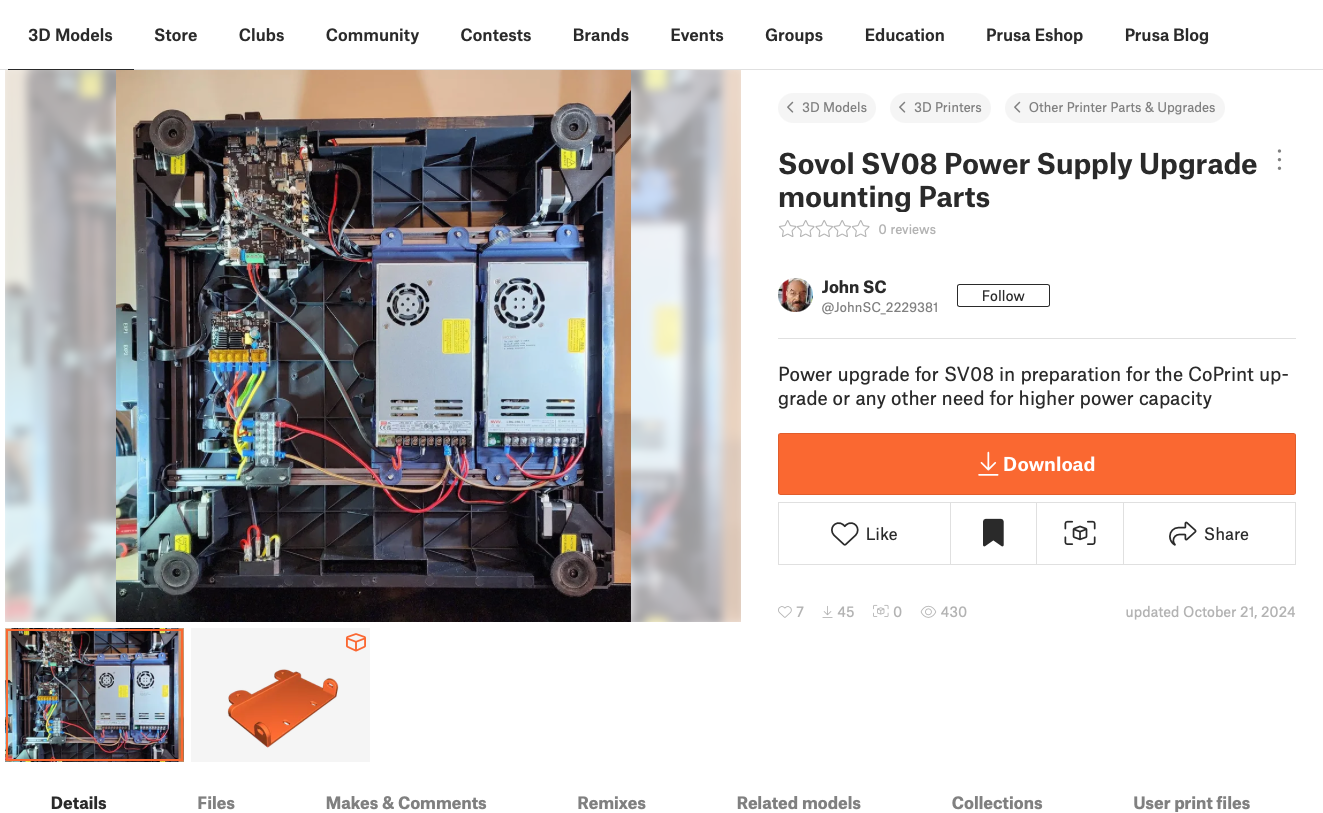
Next job is the power supply upgrade. The stock PSU is tiny - only 6.5a. I've got a 20A PSU from my WeedoX40 - so will put that in there instead. Need to decide whether to take the @TeachingTech approach- and put it in the same place as the existing PSU - which involves cutting some posts off.
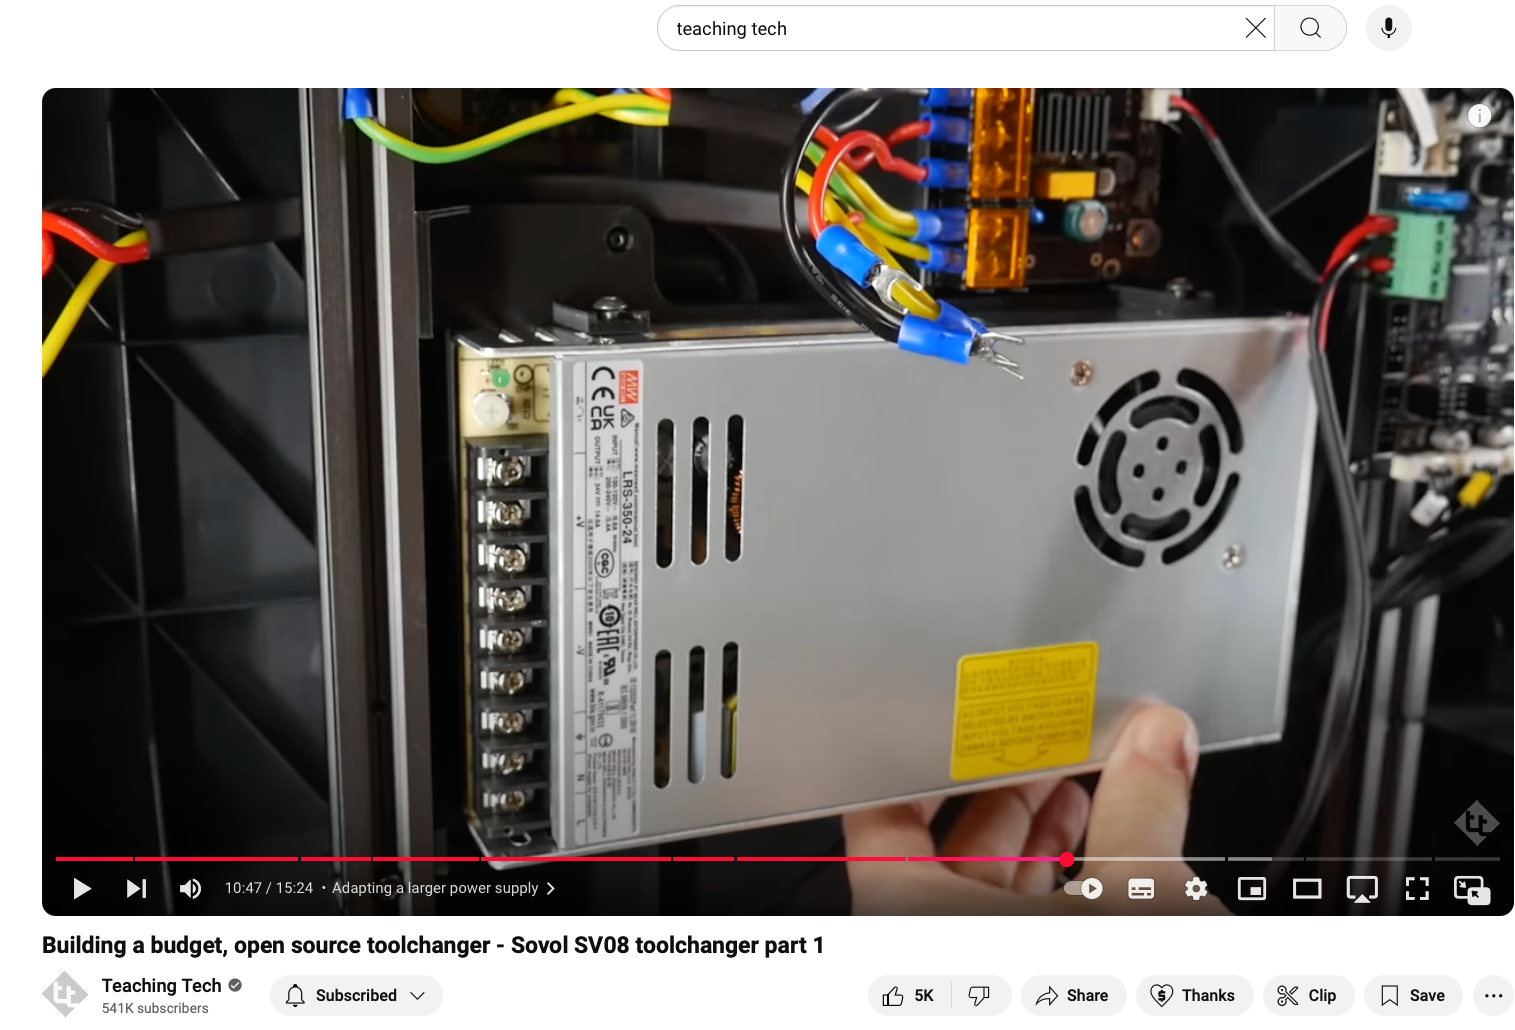
Or go with @JohnSC's approach and mount the new PSU at the bottom -
Then for placement of Duet Boards. The Mini5+ board hasn't arrived yet - but it can be inside somewhere. I'm thinking of putting the Duet 6HC below the existing board - here maybe
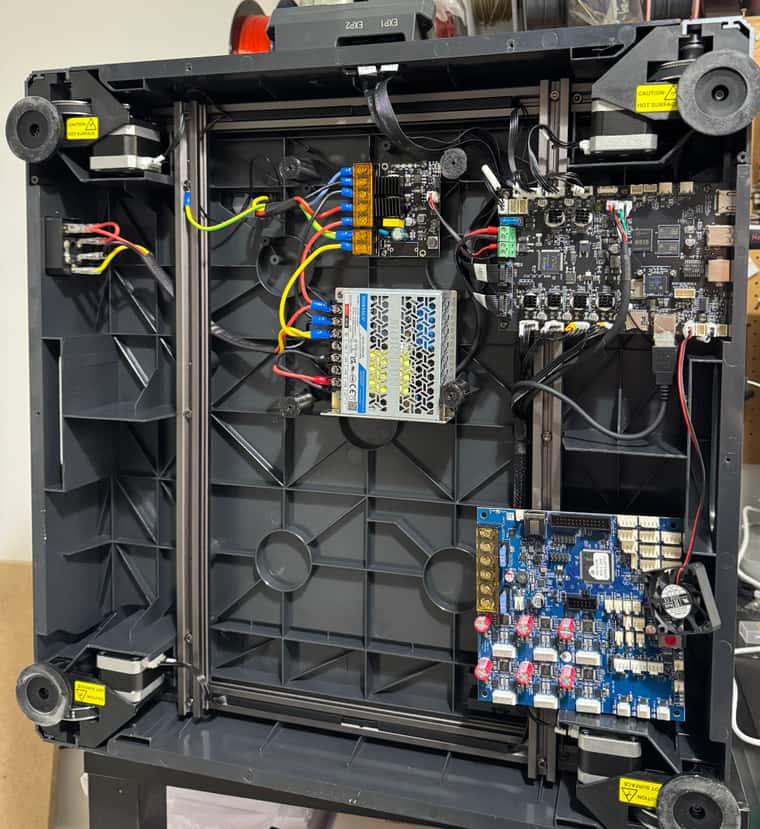
Will involve cutting out some new holes to give access to the sd card, usb-c and ethernet. This pushes me towards the teachingTech approach to PSU placement.
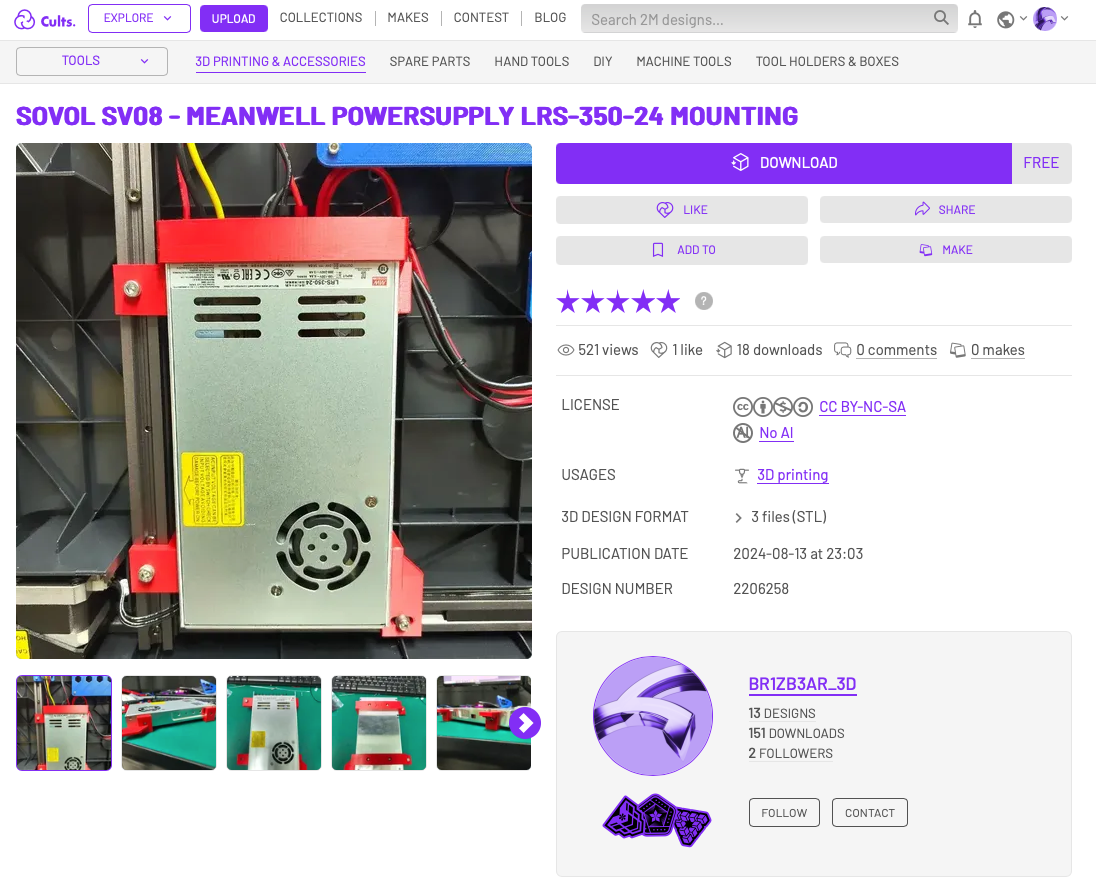
In the end decided to go for this model as first attempt at PSU mounting
-
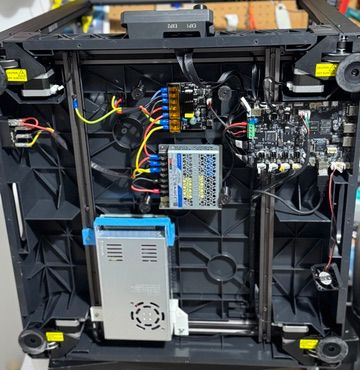
PSU Installed and design for Duet Holder done.
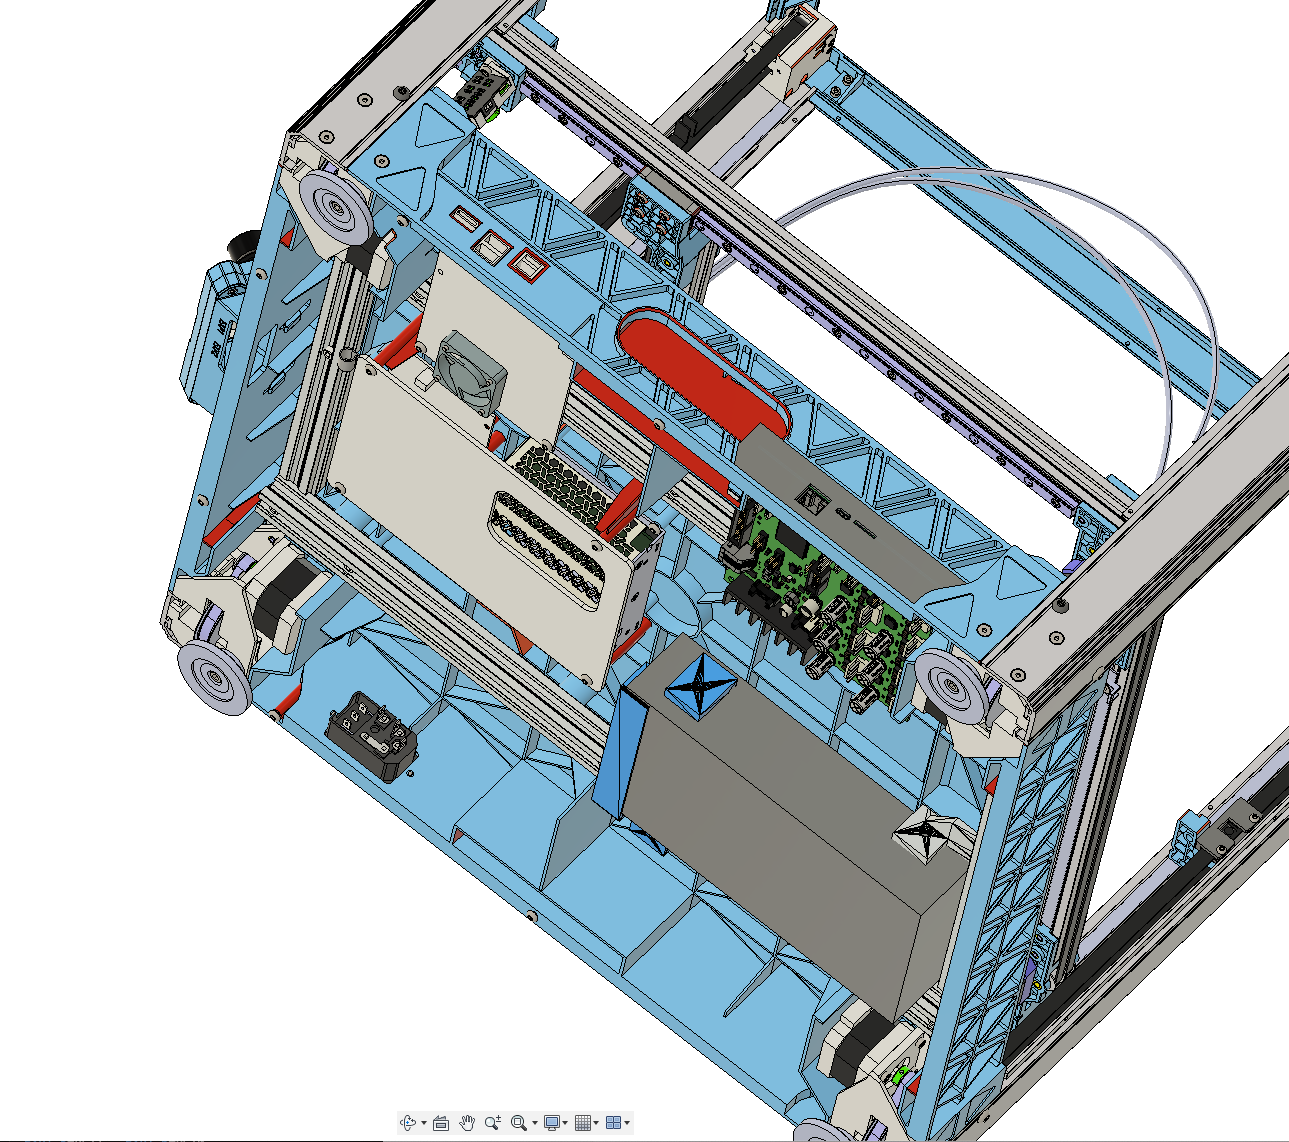
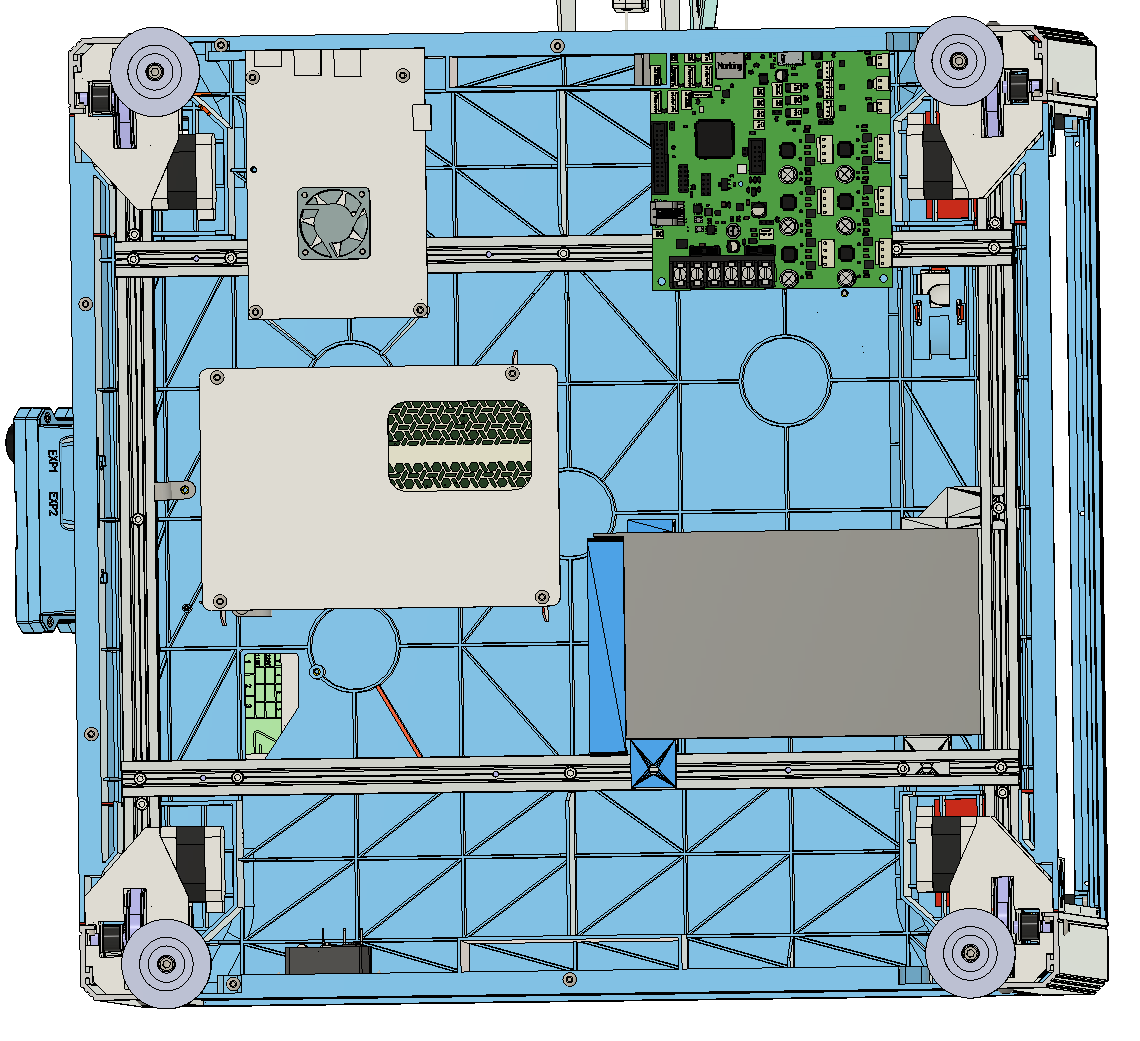
-
@dwuk Duet3 6HC board now installed - now for lots of wiring up.
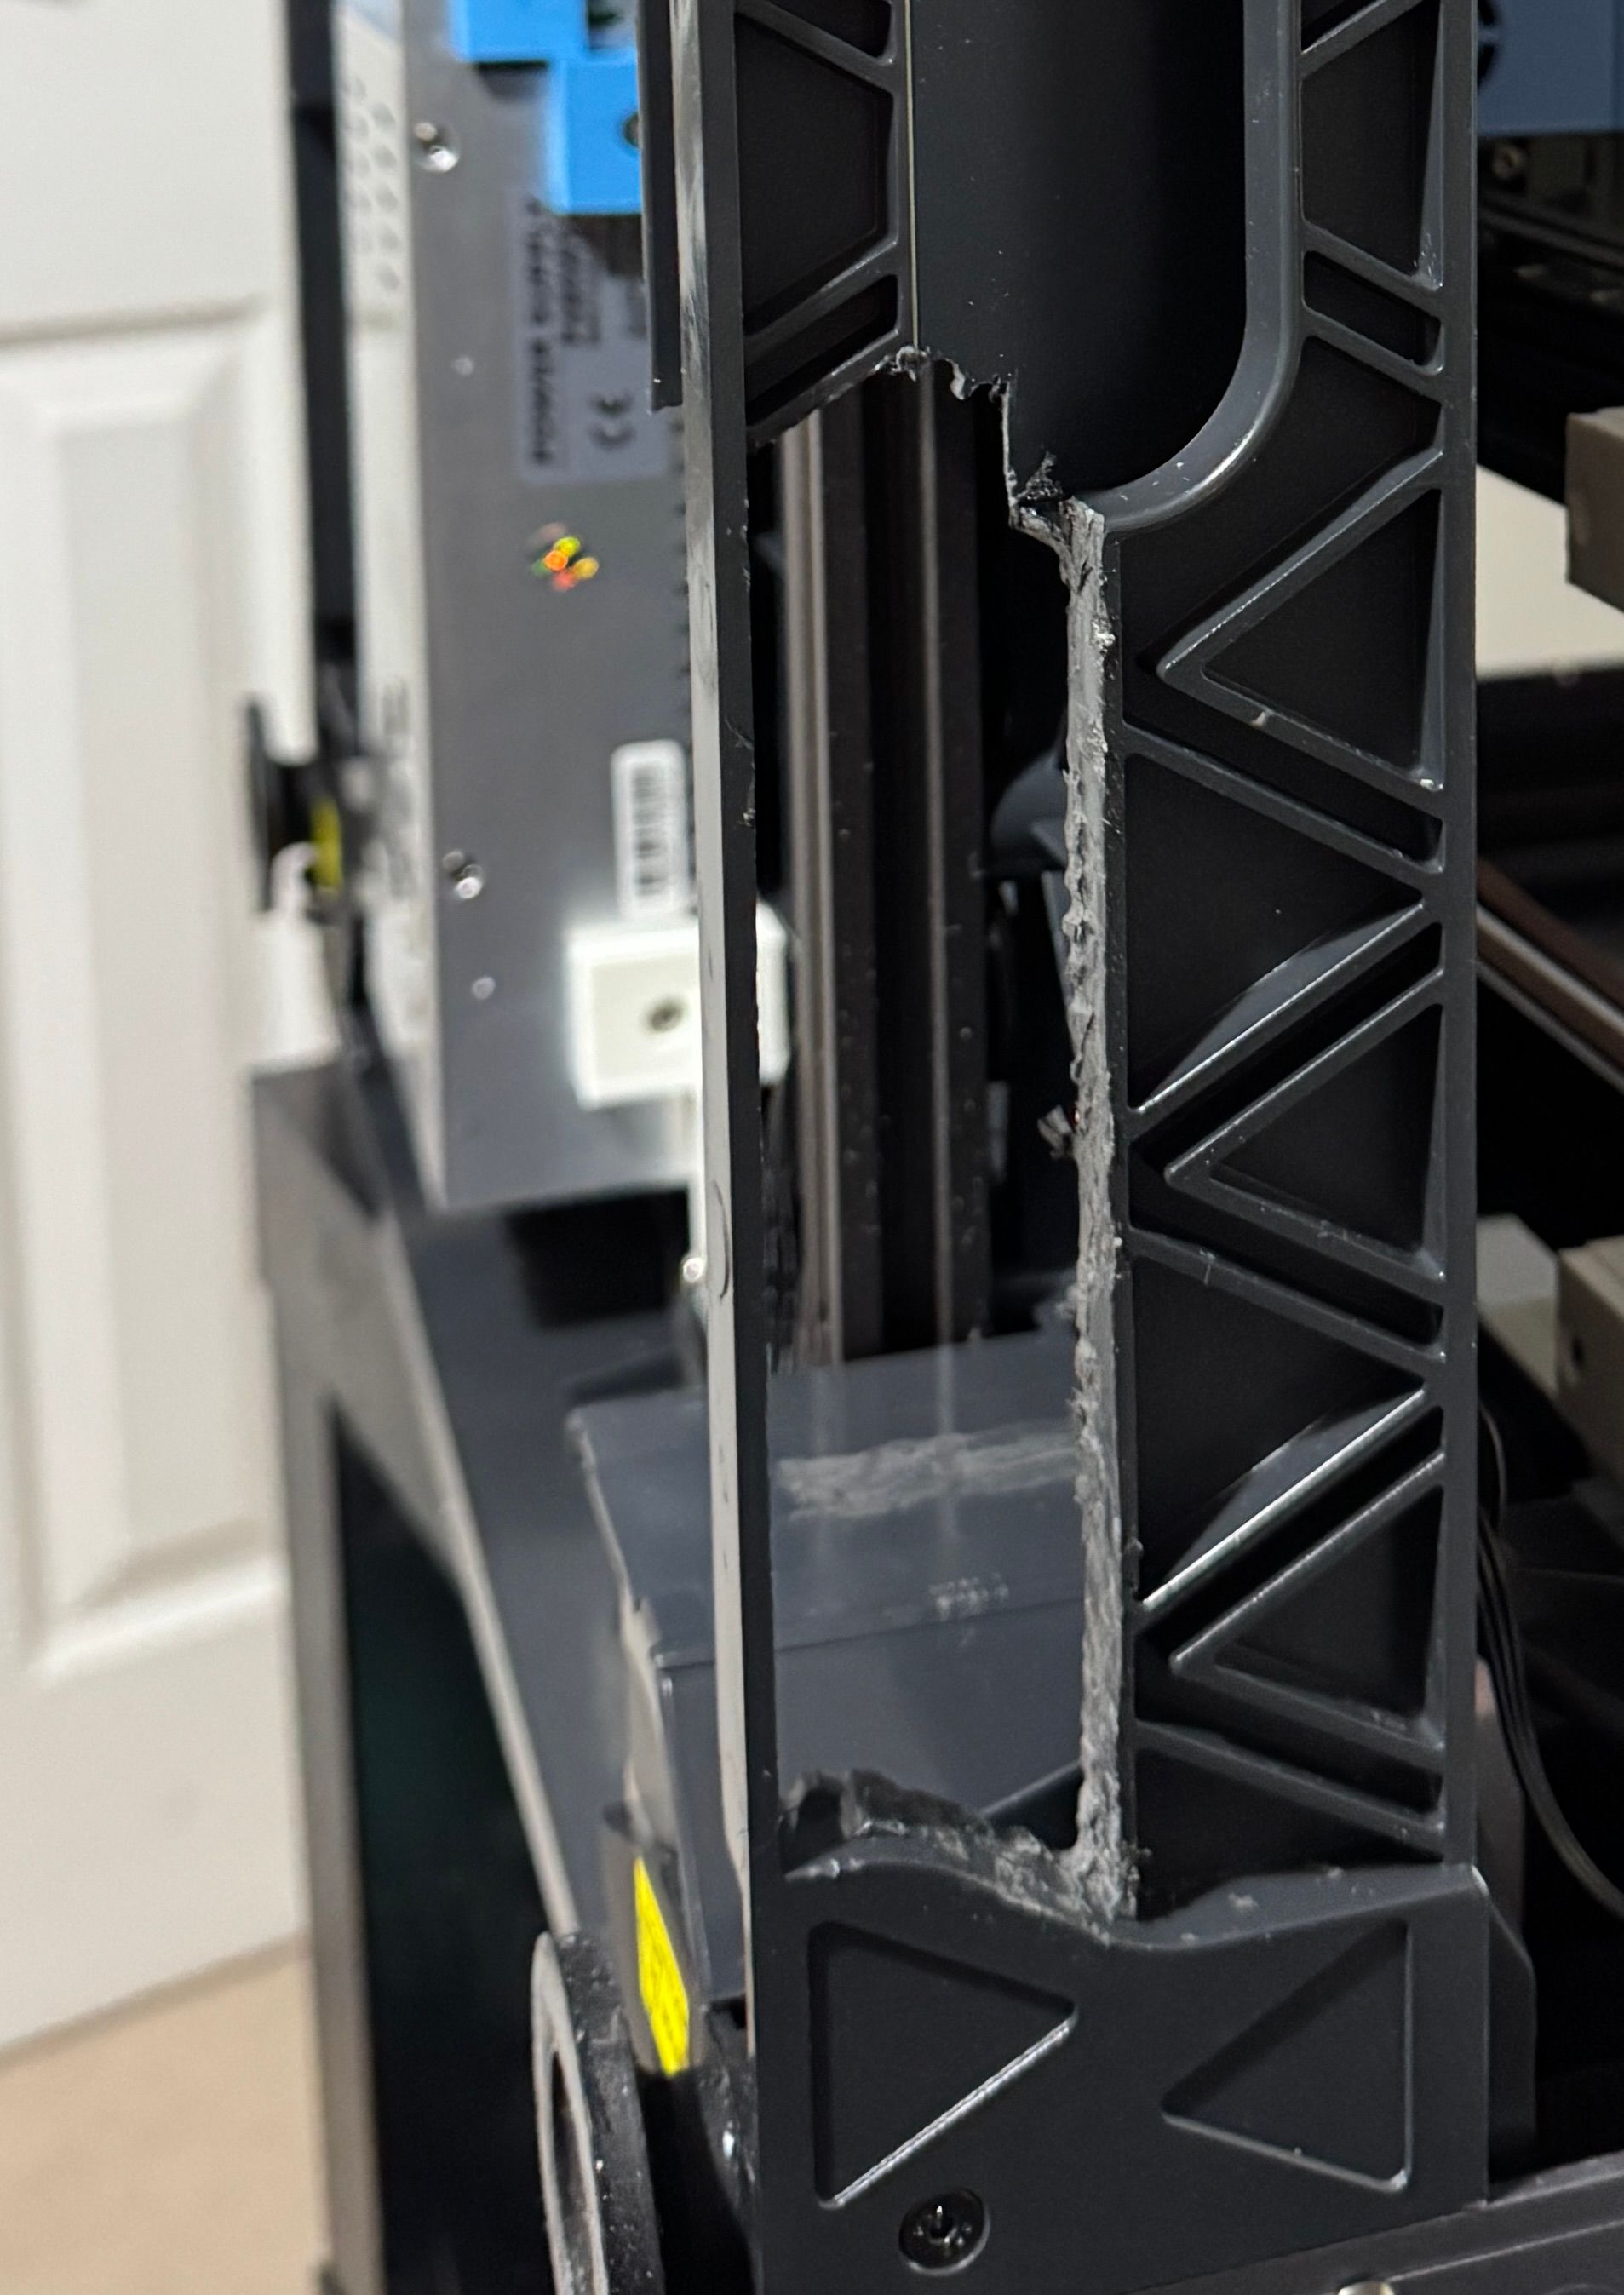
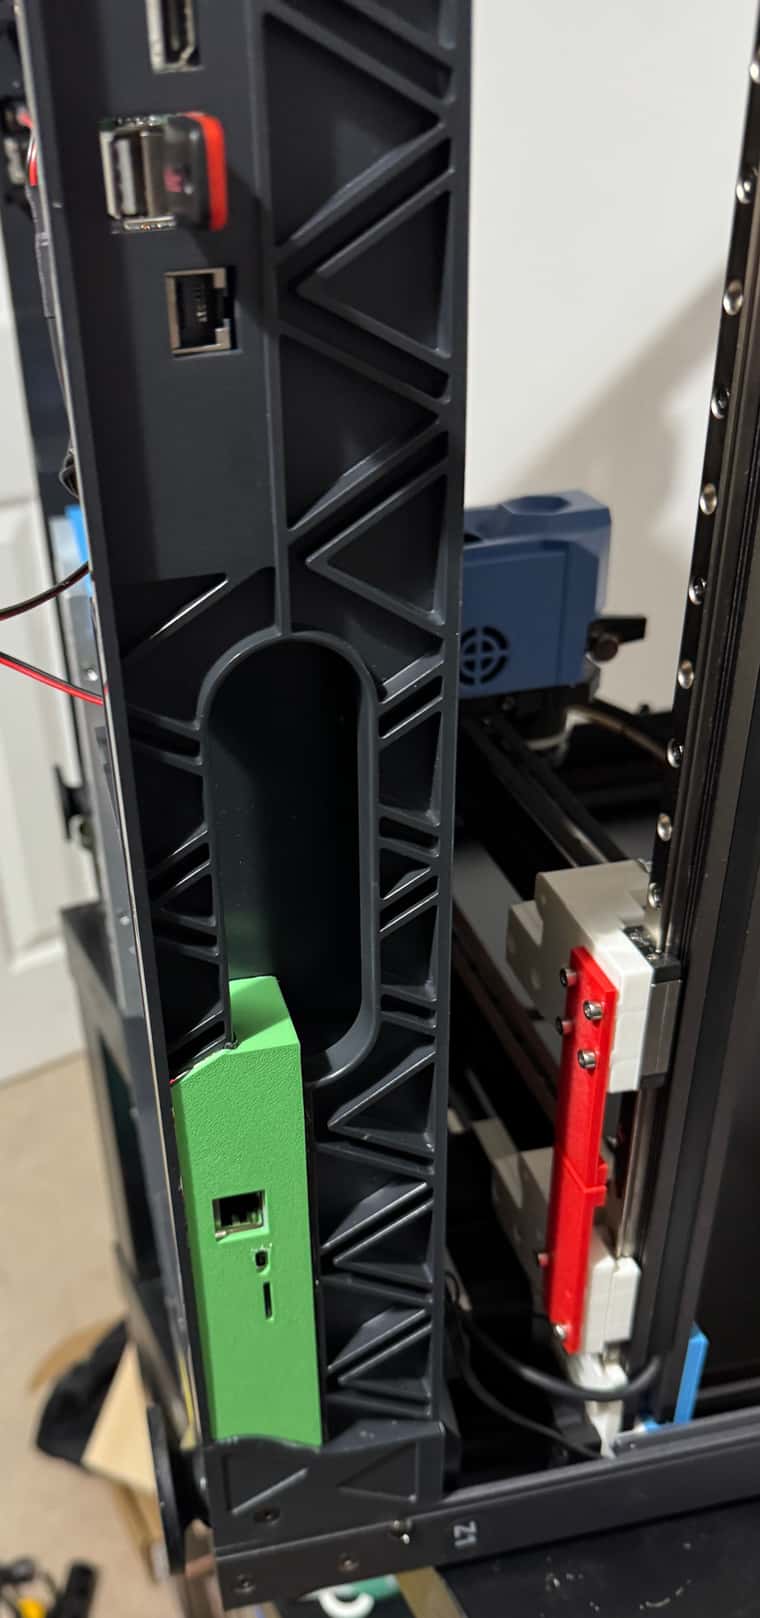
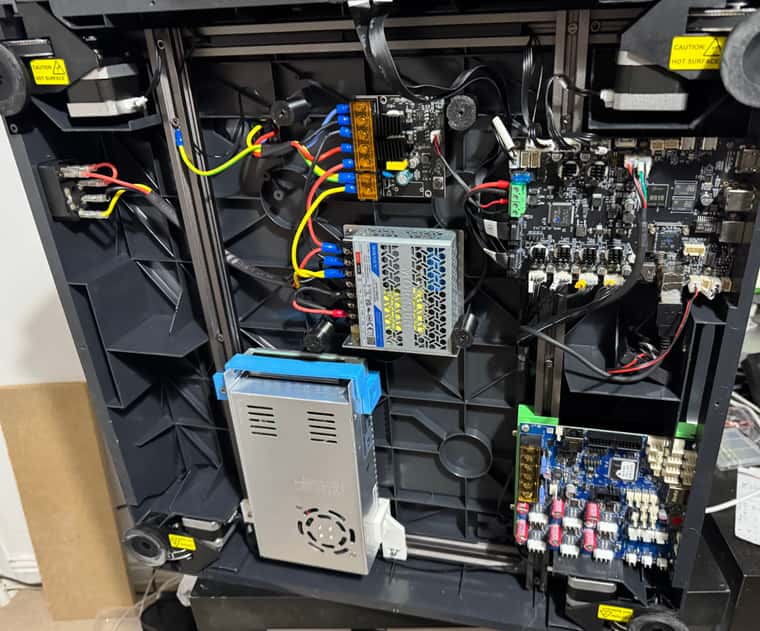
-
Starting to plan for expansion boards - looks like there is room,
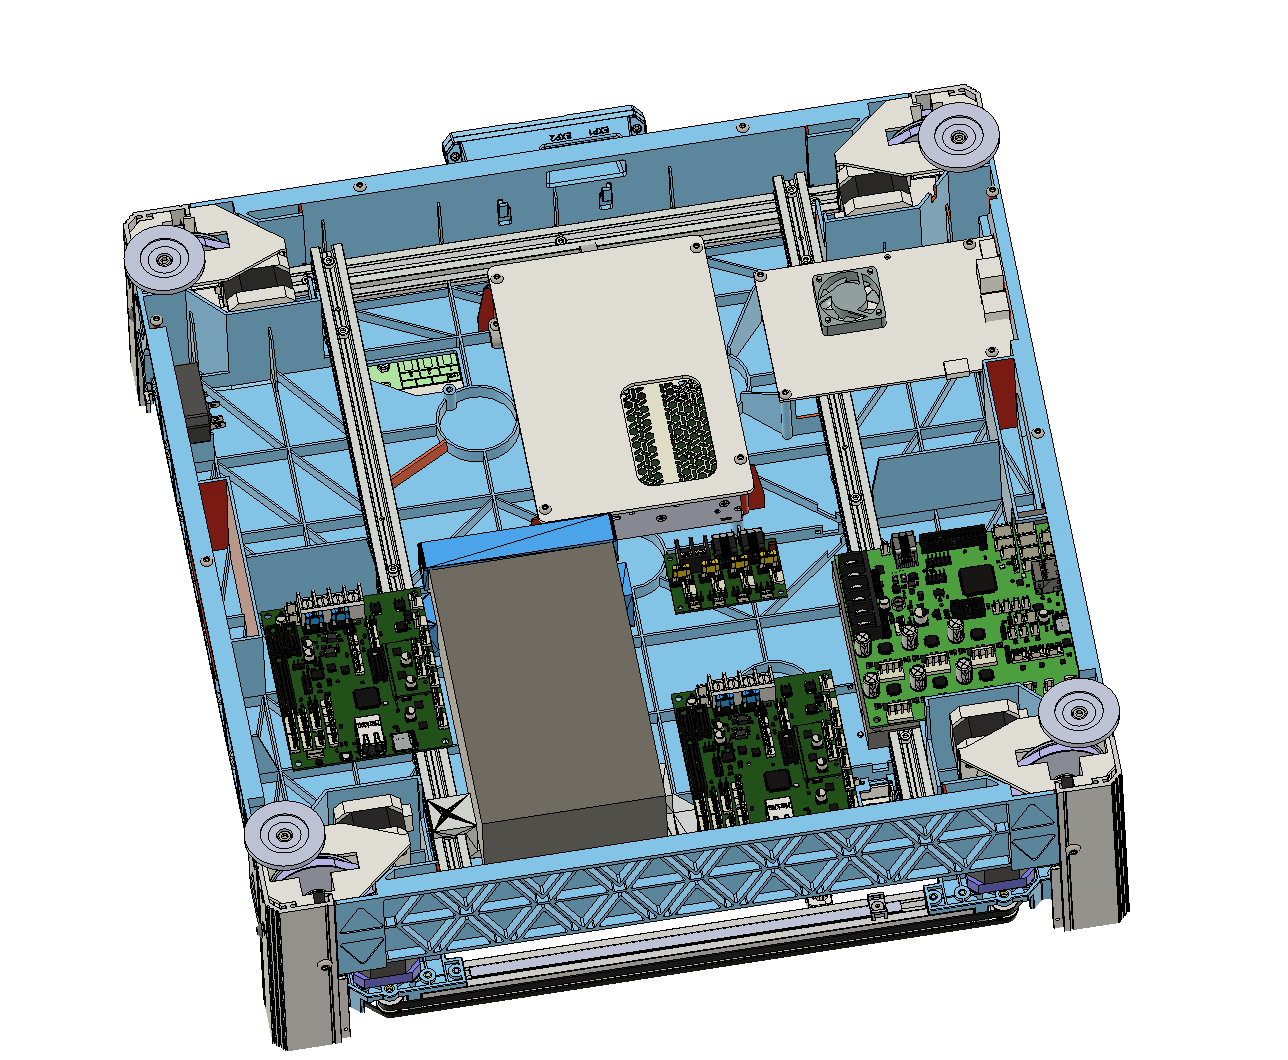
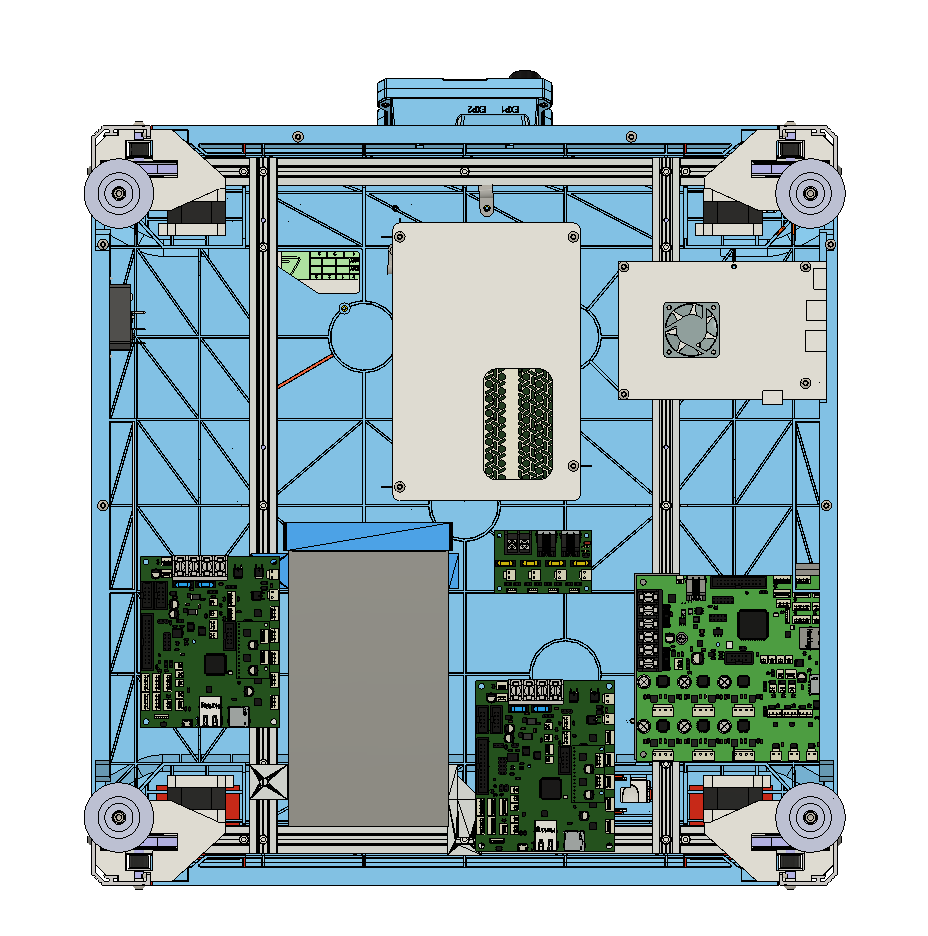
Tool Distribution board and first Mini5+ needed for Dual Gantry, with further Mini 5 probably needed for IDEX - unless I can reduce the stepper requirement - by using less for IDEX and Servo's for Z Hoppers.
-
@dwuk This is all such an amazing project, along with your work on splitting the slicer output for two tools to print at the same time. Keep up the good work, and thanks for documenting it so well!
Ian
-
Good progress made on Duet6hc commissioning. Power and first 6 steppers wired up, and firmware upgraded.
Think I will try and see if I can get some movement tomorrow - before tackling the harder problem of the 1LC wiring.
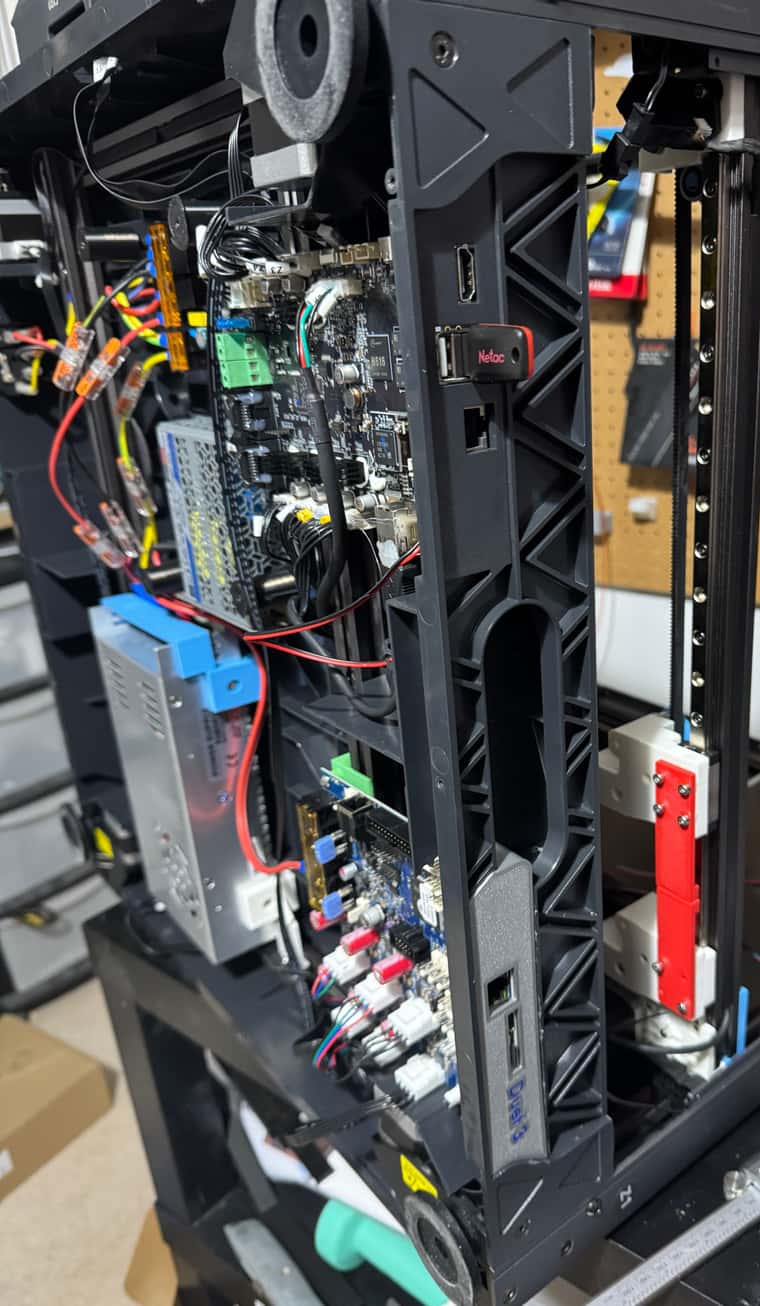
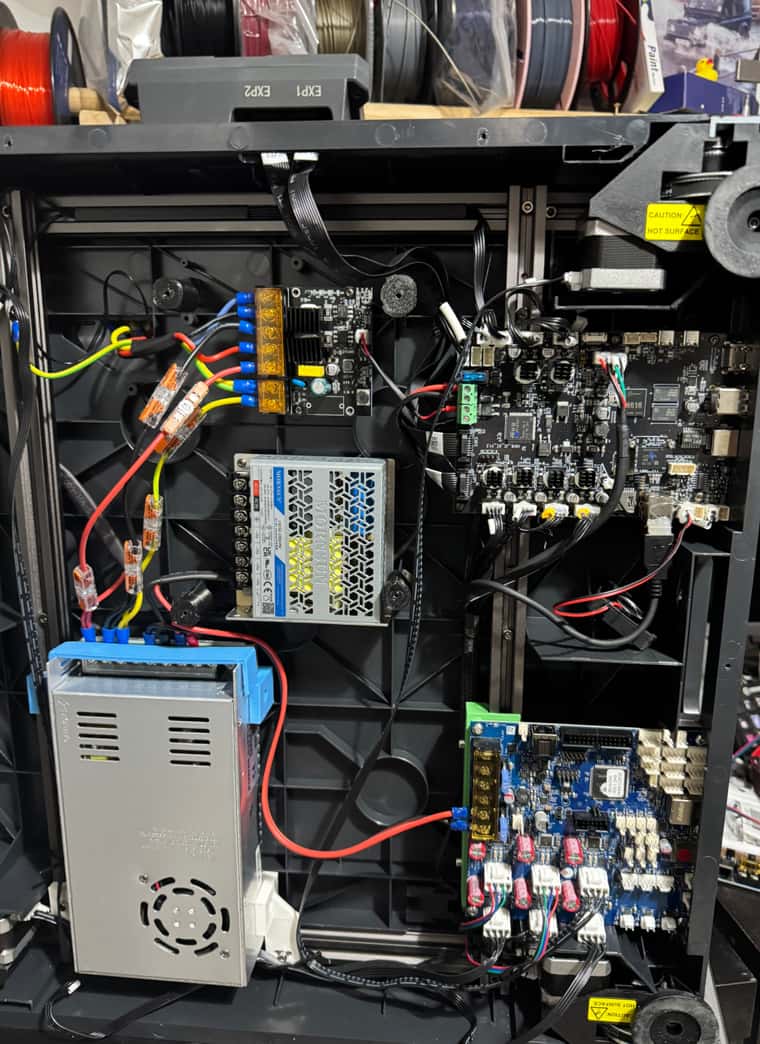
Old board and wiring left in place for now - if nothing else it will be useful for it to provide the camera feed.
-
@droftarts. Thanks - really enjoying the project so far - I can see why people spend so much effort on printer upgrades and self builds. Will be really interesting to see whether parallel printing is practical.
-
@dwuk said in Sovol SV08 Multiple Motion System Upgrade.:
interesting to see whether parallel printing is practical.
I'm sure there is a niche for it, same as for tool changers or MMU-printers. Each system has some drawbacks, here:
Building/commissioning/homing and maintaining perfect z-height will be a nightmare. -
@o_lampe Agreed Automated alignment, homing, maintaining perfect z-height are all essential, plus also speed, reliability, filament colour/material management & slicing.
In terms of niche MMU - I use the AMS on my BL printers 99% of the time - always for filament selection for single colour prints - but also pretty often for 4-11 colour prints -
I wasn't sure how much use I would get out of a 2nd identical multi colour printer (which I bought to double my printing speed) -
In my usage scenarios when I am using one of the printers I find I end up using the second one too for at least half of the time. It's usually only filament management that stops me from using the 2nd one even more often. i.e. Not having two sets of every filament needed. I've got a few ideas on how to solve this problem too - with some sort of automatic on demand filament roll splitter.
Tool changers I agree are more niche - probably due to the expense of having so much print head hardware sitting around unused for 99% of the time, plus also being limited on the number of colours supported. I think MMU/AMS type multiplexers are more practical for prints with many colours in them - but 2 to 4 extra 'tool changer' print heads I think could help speed up print times and reduce waste quite a bit without adding massively to the cost. A solution that only changes the nozzle and hot end would be even more useful too.
Building and Commissioning I would see as a separate problem - which would ideally be solved by a manufacturer taking up the idea.
-
Other boards now installed.
Biggest issue was finding Duet3_CANiap32_Mini5plus.bin - it isn't in the current release - and GitHub search didn't find it. Eventually found it in previous release.Just about every cable from the printer is a different size to the Duet boards.
Hardest ones are the tiny extruder connections. I've ordered some male versions of the existing connections which are 1.25mm - so I can make up adaptors. For the bed thermistor I decided to leave both connectors attached.
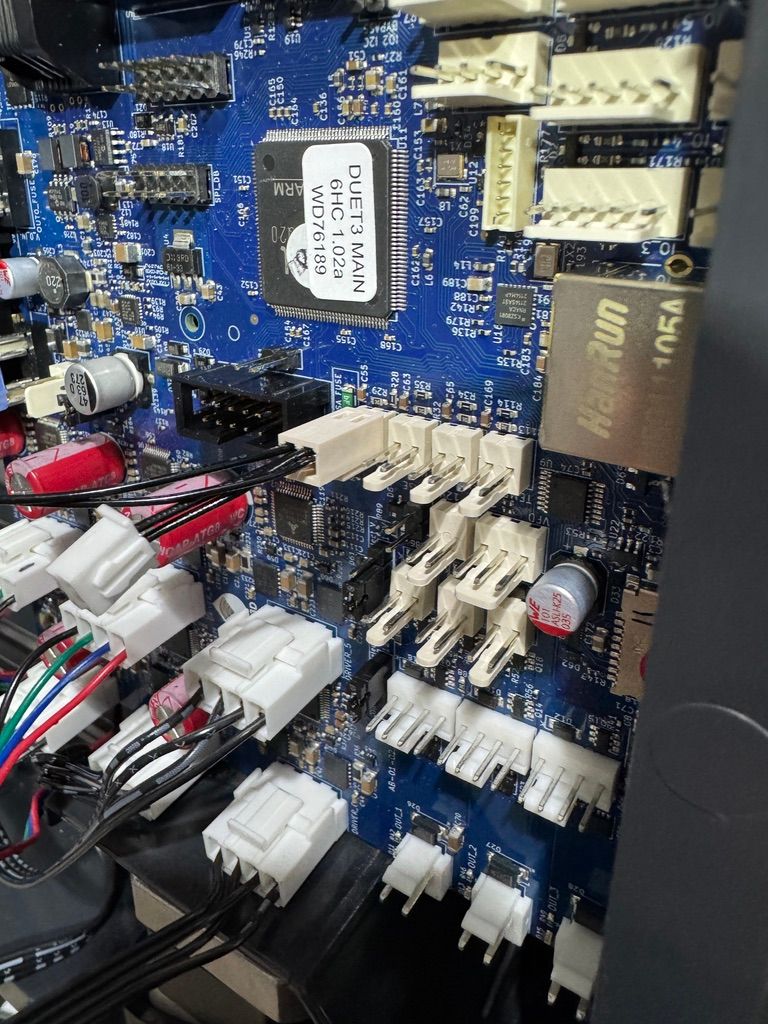
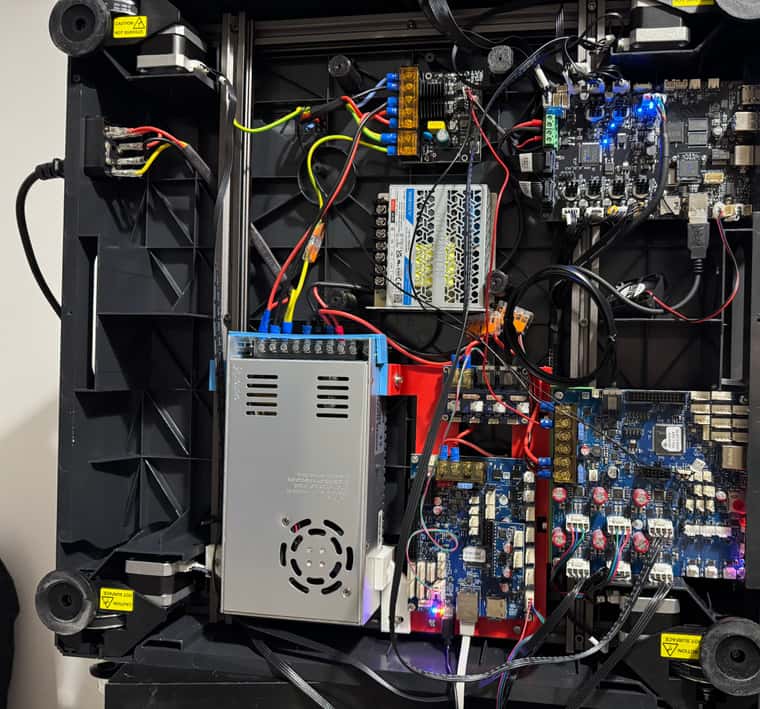
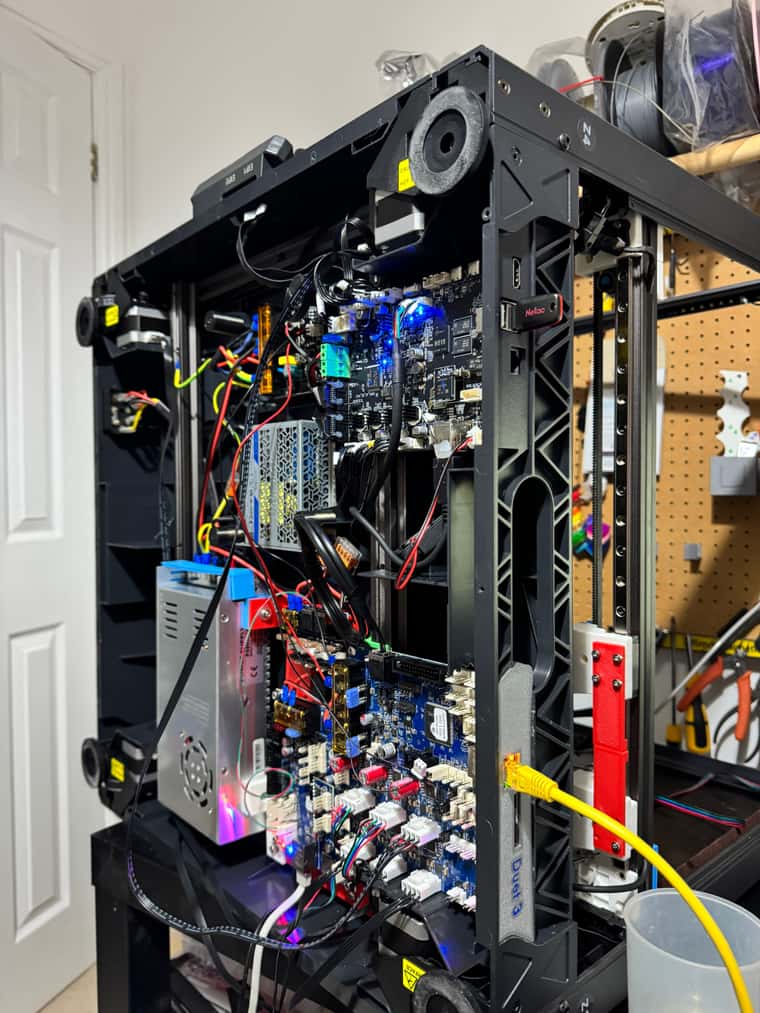
-
@dwuk said in Sovol SV08 Multiple Motion System Upgrade.:
- it isn't in the current release - and GitHub search didn't find it. Eventually found it in previous release
thanks. I have added them to the 3.5.4 release.
-
Thanks.
Update from today - is that I thought I have updated the firmware on the Mini5+ board yesterday - but actually there was a timeout and it didn't update.
I could check the firmware etc. and run other commands - but firmware updates wouldn't work
The main 6HC board was on 3.5.4 and the Mini5+ on 3.4.0.
I spent most of the morning checking cables and making up two more cables - which I tried running from the tool expansion board but still got the same error.
Eventually though I figured out the problem - which was related to 3.4.0 not seeming to like being updated via CAN-FD
So I manually upgraded the Mini5+ board via SD card and usb terminal to 3.5.1 - and downgraded the main system - and all was then ok.
I then upgraded them both to 3.5.4 and they worked ok.
Motors for first gantry now all connected up - and X,Y & Z movement now working.
Mains Heatbed basic function also working. I had forgotten to install the in power initially - but figured it out after a while. Will have to do PID tuning at some point.
I was going to configure sensorless homing next - but based on the Duet documentation mentioning how inaccurate that method is I think I will add some limit switches and use them instead for the homing.
-
@dwuk sensorless homing isn't as good as homing with a limit switch, but it's OK if you don't need the facility to resume a print that has been interrupted due to power failure. I still use sensorless homing for the X and Y axes of my tool changer.
-
@dc42 Thanks - Will get the printer working on Sensorless first as you suggest and leave looking into limit switches until a bit later.
Update: Got X and Y Sensorless homing working in about 10 mins - its much easier to do than it was on Klipper.
