DuetWifi Beta board testing feedback - July 2016
-
Hi Everyone,
This is a quick summary of initial setup, wiring, calibration and test of the 'new' (at time of writing) DuetWifi board. (7-7-2016)
Short version - I'm impressed and It's all going great!
As delivered, I was slightly concerned about a lack of Ethernet and also wondered about range and coverage with the Wifi, as it turned out the Wifi is actually very convenient, fast and quick to setup. - I'm now sold on it, but would still quite like a wired IP connection…
You do need USB drivers if they have not already been installed, the files are here - https://github.com/dc42/RepRapFirmware/tree/dev/Driver - and could have been added to the supplied microSD card - most people could read them from the card and install drivers etc.
I was originally going to install it into a Delta printer, but after some further thought I decided to fit it into a BigBox Printer. Having fitted 400step motors everywhere it seemed like a good idea to try out the new drives and also see if it can further improve the BigBox capability.
I'm running most of the motor's at around 850mA - the motor's are happy and not hot, and the TMC2660 driver are cool with no extra heat-sinking.
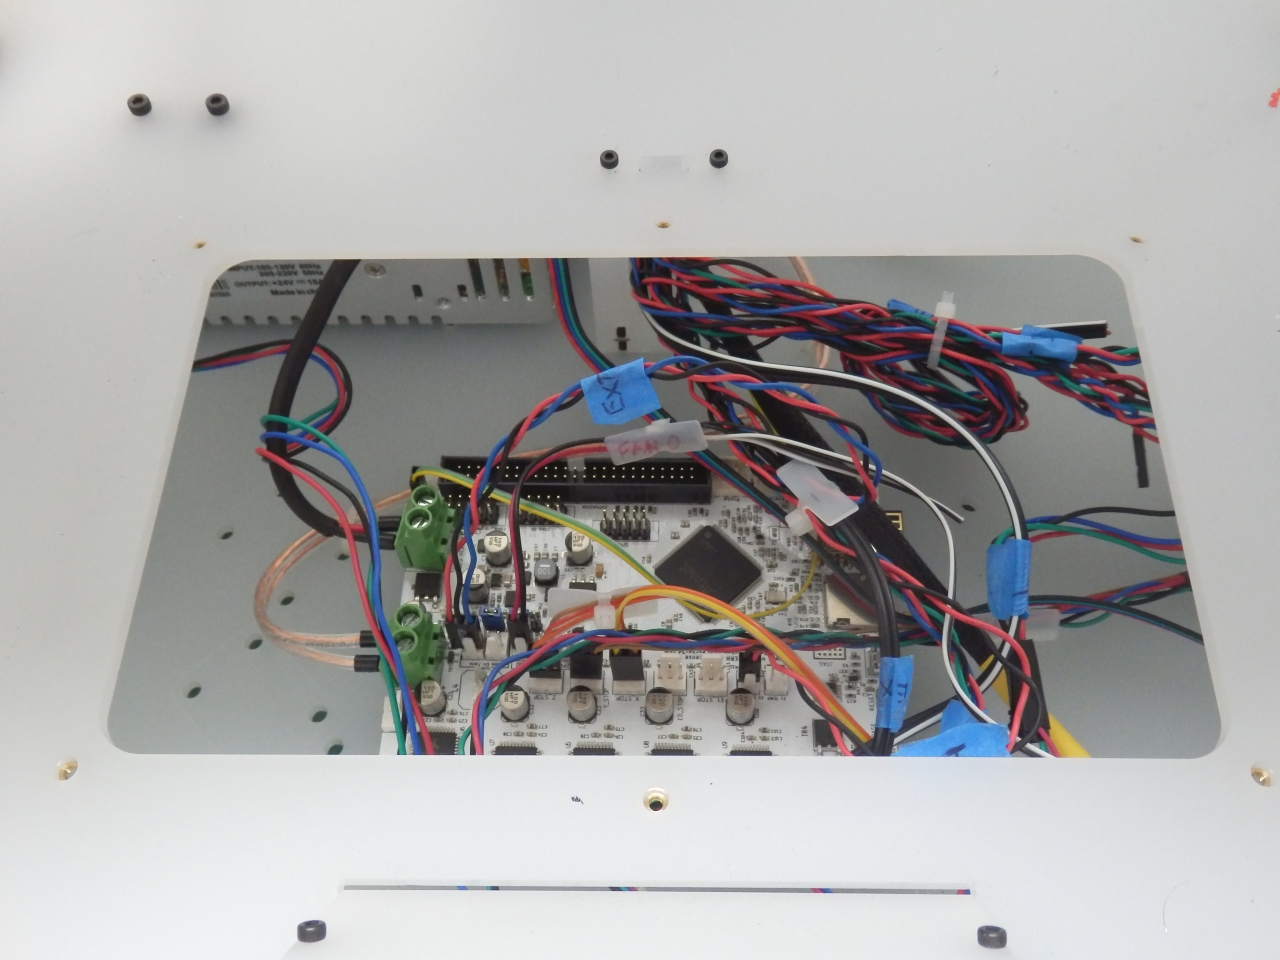
Wiring was not a problem, but I did obviously need to change some of the connector's and sensor pinouts etc.
Main changes here were for the probe sensor - now using a 4 pin connector rather then the standard 3 pin.
Motor wiring is slightly different on a Rumba for some (maybe historic?) reason - so one coil was swapped. Not really an issue - could have just reversed in firmware, but I wanted to follow the Duet pinout for now.
Fans and whatever else are running at the main input voltage, so make sure if you are over +12V that your fans are also rated the same.
Hot-end and heated bed are also at main power input as normal. The BigBox is already designed for 24v operation and that's about the limit of the new DuetWifi board, so it's a good match.
For info it's running at 24v with an E3D Volcano Hot-end at the moment, but the plan is to get many more extruders running with the DuetWifi as soon as possible.
I'm using a thermistor rather than a PT100 at the moment, but I expect to try out different temperature options soon.
Doing the thermistor setup in the configurator was not ideal - beta values rather than a table, but it does give an accurate reading - I'm just not sure everyone will understand what to do to get their correct thermistor sensor reading accurately.I had a few minor configuration setup issues, originally I edited an existing config file, then after a little experimentation and some confusion over the Z end stop (I'm using David's IR sensor for Z) I used the really nice and easy online configurator - https://configurator.reprapfirmware.org/# . After completion, that seemed to spit out a file that did not correctly configure the microstepping rates (still not totally sure why), so after some further experimentation and a few more edits I then had a fully configured BigBox printer with Duet Wifi electronics.
I originally had the IR sensor connected to the Z end-stop, but quickly worked out that it was actually best used on the Probe input. That could do with a brief note or some simple wiring and setup details as I imagine more people will want to go with this configuration. The IR probe really does work very well as a no-contact Z sensor.
Some fumbling was because I'm not completely familiar with the Duet and RepRap firmware, I have only used it in RepRapPro machines to-date, I'm really getting into it now. It should be used much more widely in existing and new machine designs in my opinion. It's a total joy to have such control over the machine configuration without the need to re-compile or modify the core firmware.
I'm also getting used to using it in Wireless mode. It's a bit of a pain when you are just doing the basic but time-consuming configuration of a new machine, but many people may just be selecting an existing config, so will have less reason to keep on resetting / restarting or modifying the config data etc.
Quick point - When resetting the board via the web interface you often see the axis move and make some odd noises - that could do with being more gracefully disabled as it's a little disconcerting when motor's drive and grind into endstops etc. even if it is for only a second.
Now it's all setup, I really like how well the Wifi works although because it needs to connect to your router, coverage can be an issue. I would have liked an Ethernet option, but it's not a big issue. Maybe if the Wifi module was on pin-headers then an Ethernet module could have simply swapped out, so people can choose one or the other rather than only have Wifi on the new board.
When using the web-interface it feels like you have total control (It really is fantastic). Without it, I'm really missing an LCD panel and control knob. I will be looking at adding one ASAP.
I was also slightly concerned about the location of the 'erase' button, it's close to the reset, which I used quite a few times to stop the machine when the axis was going in the wrong direction before correct configuration etc. In more of a panic I could have easily pressed the erase instead. Not a big issue, but I would have used an option jumper for the firmware erase/recover feature as it's not often you should need to do that.
I'm running a combination of x32 and x64 microsteps, that's actually quite a lot of steps per/mm because of the motor's being 400 step and the extruder also being a geared drive system.
Overall the first power-up was quiet and the motion both looks and sounds smooth. Almost no driver noise or 'funky music' from the motor's being driven.
Fan noise is now my focus - but that's not the electronic's fault - that's just noisy fans.
First print was almost spot-on for calibration, just a few minor tweaks to the config for acceleration, speed/direction change and maximum speeds (I'm going around 20% faster with most things than before) - not found the upper limits yet.
I will add some pictures and further progress.
But if anyone has any questions or would like any further info on any aspect, just let me know.
Cheers,
Richard
@RichRap3D
Blog - www.richrap.blogspot.com -
Rich, thanks so much for your detailed feedback, l am glad you like the board and the web interface.
We had not announced the web based configuration tool yet so it has not been extensively tested. It will be really helpful if you can send through your bigbox config files and we will ask ChristianH to add them as a template, at the same time we can see why what it spat out was not quite right for the BigBox. By the time the preorder boards are shipped it should be the standard way for new users to setup Duets.
The motor movements you noticed on startup have been fixed by David in the latest firmware release: https://www.duet3d.com/forum/thread.php?id=42
As far as this is concerned:
Maybe if the Wifi module was on pin-headers then an Ethernet module could have simply swapped out, so people can choose one or the other rather than only have Wifi on the new board.
All I can say right now is look out for future announcements on this front.
Looking forward to pictures!
-
Hi Tony,
I will send over the original Config tool output (I made a copy before editing), and also what I changed to get it all working.
And when I have everything tuned within an inch of it's life, maybe other BigBox Users may find it useful for an upgrade.
The main problem was with the step rates - the Config tool produced -
M350 X32 X32 X32 X32 I0 ; Configure microstepping without interpolation
M350 X32 X32 X32 X32 I1 ; Configure microstepping with interpolationThat's just X repeated for all axis locations by the looks of it, so I changed it to be -
M350 X64 Y64 Z32 E32 I0 ; Configure microstepping without interpolation
M350 X64 Y64 Z32 E32 I1 ; Configure microstepping with interpolationI'll update the firmware now - thanks for the link.
Pictures soon, I'm having too much fun experimenting with it at the moment

Cheers,
Rich.
-
Some images of my BigBox DuetWiFi (and now also PanelDue) Setup -
Wiring into the BigBox -

Hot-end setup and first test-prints for calibration -

Vase testprint -

Functional parts -

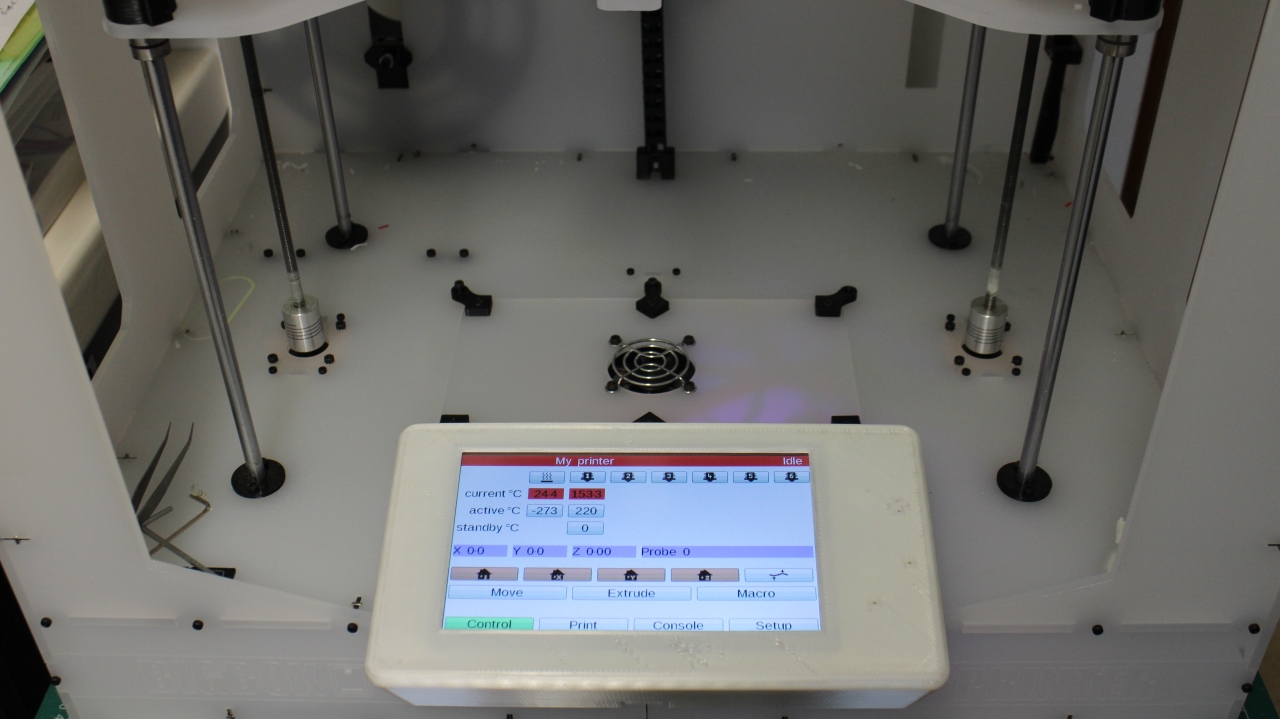
Custom case for the 7" Paneldue - Based on David's OpenSCAD enclosure designs -

Electronics fitted -

Simple serial connection from DuetWifi to PanelDue and replaces the original BigBox graphic LCD placement -

Awesome! -

I'm still tweaking the config file, but will make it available with plenty of comments in it - it may be useful to anyone else thinking of upgrading their electronics to the DuetWiFi
Cheers,
Rich.
-
prints look fab! That paneldue case looks like some "comercial plastic" (exept that it would proably be hard to get out of a mould, from the looks of it). But what happend to the front? Bubbly / ripped kapton?
-
Rich, great work thanks!
-
prints look fab! That paneldue case looks like some "comercial plastic" (exept that it would proably be hard to get out of a mould, from the looks of it). But what happend to the front? Bubbly / ripped kapton?
Thanks. The first layer has a few problems at the back because it was set too low and the nozzle ripped up a few of the first layer traces. It was my error in not setting the first layer height calibration. Fixed now.
This print was also at slightly too high acceleration rates, causing some issues that have also now been resolved.
The LCD enclosure clips onto the front, but can also easily be taken off, and used as a tethered control unit if you need.
-
@RichRap3D, could we get the stl file for the LCD enclosure ?
-
I think it's this one from David http://www.thingiverse.com/thing:656884
-
There's one with the firmware on github.
-
I am sorry, I meant the one with the clip which can be attached to the BigBox Printer.
-
please can you explain about https://configurator.reprapfirmware.org/# I try to many way but did not so me to finish configuration