Just getting started with input shaping
-
Hi,
As part of my ongoing upgrades to what started life as a small, inexpensive Chinese CoreXY printer, I have added a tool board.
It worked fine so I began to check out input shaping.
I had no issues recording different profiles but am at a loss how to move forward.
Consider the example graph from the Duet documentation:
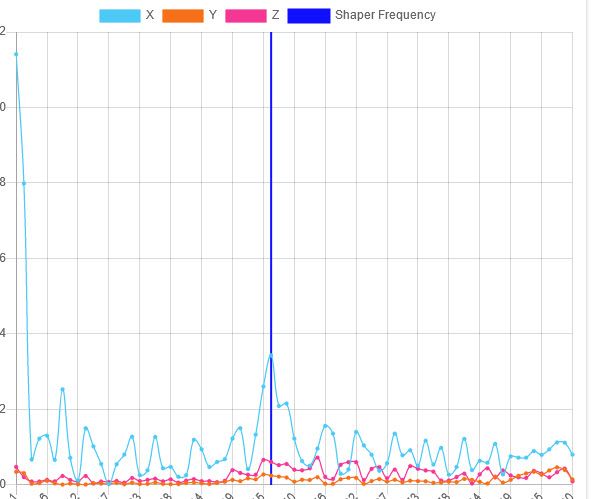
Just one big peak easy to focus on.
Now here is my recording with no shaping applied:
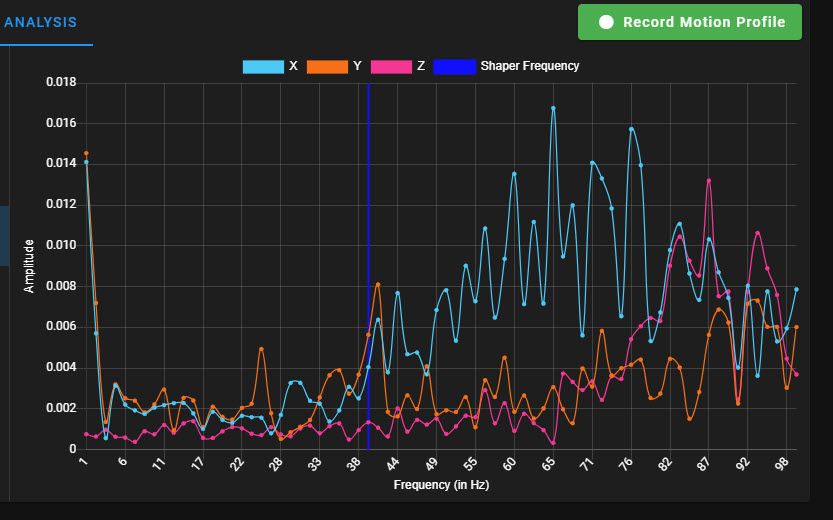
Big peaks in many locations.
So what is my next step, other than tossing the printer into the nearest dumpster?
Thanks much.
Frederick
-
@fcwilt first, I'd take a couple of measurements and make sure they are consistent. Be cautious over the scale of the graph - it autoscales so one taller peak will make everything else look smaller!
Next, play with the different shapers in the tool. Some cover much wider frequency ranges than others you you can hit several peaks in one. Only trouble with wider coverage is it filters out more of the acceleration, so it will be a little slower printing. I use one of the wider ones with no issues mind!
Work out a few plausible ones, apply them and record a new measurement for each. Compare them and see which ones work best.
Finally, test prints. There's a few input shaping test prints around. You can vary the shaper or frequency applied every 10mm or so and use it for your final selection.
Bare in mind, input shaping is a useful tool for combating printer resonances and ringing, but it is not a magic sauce that fixes everything! -