Smart Effector issue
-
Can somebody show me how mesh.g is written? To be run with G29
-
@tecno This is what I use.
; mesh.g
; called to load/make heightmap.csv
M98 P"/macros/ResetBabystepping"
M561       ; clear any bed transform
while iterations < #move.axes & move.axes[iterations].visible
  if !move.axes[iterations].homed
     G28
     break
G29 S1        ; load heightmap.csv
if result > 1 ; make if it doesn't exist
	G29 S0
That {1} isn't in it.
-
@stephen6309 said in Smart Effector issue:
@tecno This is what I use.
; mesh.g
; called to load/make heightmap.csv
M98 P"/macros/ResetBabystepping"
M561       ; clear any bed transform
while iterations < #move.axes & move.axes[iterations].visible
  if !move.axes[iterations].homed
     G28
     break
G29 S1        ; load heightmap.csv
if result > 1 ; make if it doesn't exist
	G29 S0
That {1} isn't in it.
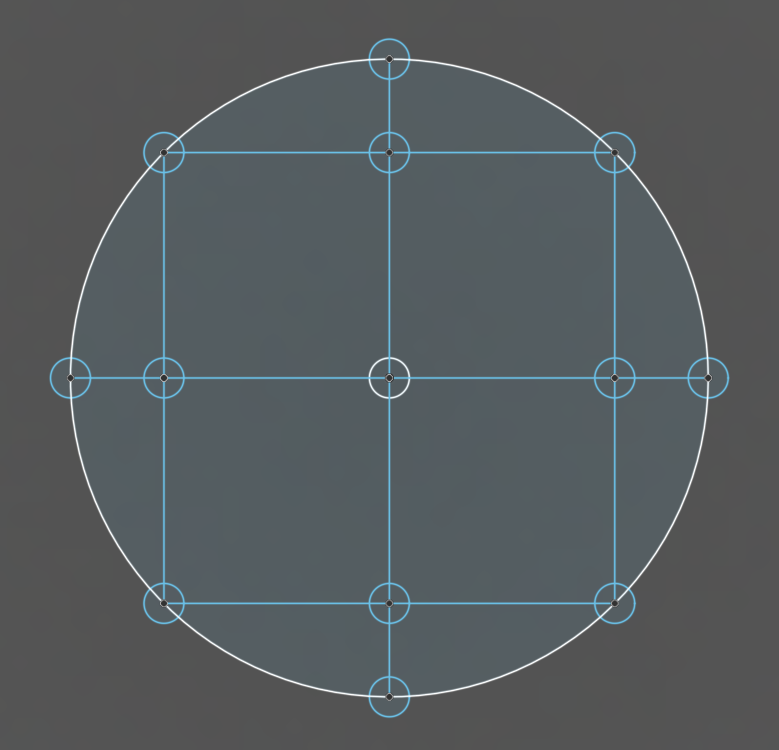
Not what I was looking for, below a mesh of small circles I want to probe But do not how to write that mesh.g file.

-
@tecno take a look at https://reprap.org/wiki/Delta_geometry and theres a minimum angle of the arms..and in your vid the angles looks smaller if you probe the outermost ppoints...and then you loose all the stability..for m it looks if the arms are too short or the build diameter is too big. make a small test and just probe with a smaller build plate diameter. Use http://www.escher3d.com/pages/wizards/wizardbed.php to get a bed.g and do the probing again...and look how stable the effector might be without probing in the air
-
@barracuda72 said in Smart Effector issue:
@tecno take a look at https://reprap.org/wiki/Delta_geometry and theres a minimum angle of the arms..and in your vid the angles looks smaller if you probe the outermost ppoints...and then you loose all the stability..for m it looks if the arms are too short or the build diameter is too big. make a small test and just probe with a smaller build plate diameter. Use http://www.escher3d.com/pages/wizards/wizardbed.php to get a bed.g and do the probing again...and look how stable the effector might be without probing in the air
With 80mm probe radius I have just under 30° angle on rods. So the angle is well over recommended 20° minimum.
-
@tecno in the vid..when you probe the oauter points the whol effector tilts..and dont trigger...i had the same...2 towers forces the effector on the buildplate and the 3rd tower cant stabilize it...mybe its a prob because we only have mag arms...im sure you need more than 20° if you use mag arms..
its easy to try a smaller bed diameter in the bed.g and make a test...
Its just the same probe that i had on my 300mm Delta -
@barracuda72 said in Smart Effector issue:
oauter points the whol effector tilts..and dont trigger
Medicine is M558 P8 R0.45 C"probe+servo0" H5 F3500 T2500
-
@tecno said in Smart Effector issue:
@stephen6309 said in Smart Effector issue:
@tecno This is what I use.
; mesh.g
; called to load/make heightmap.csv
M98 P"/macros/ResetBabystepping"
M561       ; clear any bed transform
while iterations < #move.axes & move.axes[iterations].visible
  if !move.axes[iterations].homed
     G28
     break
G29 S1        ; load heightmap.csv
if result > 1 ; make if it doesn't exist
	G29 S0
That {1} isn't in it.
Not what I was looking for, below a mesh of small circles I want to probe But do not how to write that mesh.g file.

G29 Run file sys/mesh.g, or if that file isn't found then do G29 S0
How is that file written? -
I don't think it works like that.
For mesh bed compensation you can't probe at arbitrary positions, you probe on the regular grid defined in M557.
Mesh.g is not for defining the probe points. As I understand it, it's for use if you have a sequence of commands you need to run to do bed probing (e.g. activate or pick up a probe).
I think you may be conflating or confusing mesh bed compensation with delta automatic calibration which uses a bed.g that does contain points to probe. Which is it that you are attempting?
-
@achrn said in Smart Effector issue:
I don't think it works like that.
For mesh bed compensation you can't probe at arbitrary positions, you probe on the regular grid defined in M557.
Mesh.g is not for defining the probe points. As I understand it, it's for use if you have a sequence of commands you need to run to do bed probing (e.g. activate or pick up a probe).
I think you may be conflating or confusing mesh bed compensation with delta automatic calibration which uses a bed.g that does contain points to probe. Which is it that you are attempting?
G32 is no problems (bed.g)
G29 can not reach all points -
-
This post is deleted! -
@tecno "can not reach all the points" seems to be a different complaint from probe sensitivity. Is that now the problem you are now trying to resolve? If it is the location of the points, what matters is your M557 - what M557 command do you have?
-
@arnold_r_clark said in Smart Effector issue:
@tecno said in Smart Effector issue:
Not one word what can be in that file to be found!
Im afraid that is not true.
There 100% IS an example of what can be in a mesh.g file, it is shown in the docs which can be found HERE
If you scroll down to the G29 command it lists what each "switch" for the command does and it also shows an example of what said mesh.g file can contain.
OK
Then I have to excuse me not understanding English that well.
Anywho my problem still exist with can not reach
-
@achrn said in Smart Effector issue:
@tecno "can not reach all the points" seems to be a different complaint from probe sensitivity. Is that now the problem you are now trying to resolve? If it is the location of the points, what matters is your M557 - what M557 command do you have?
M665 R95 L206 B80 H262
M557 R80 S15 -
This post is deleted! -
@arnold_r_clark said in Smart Effector issue:
@tecno said in Smart Effector issue:
@achrn said in Smart Effector issue:
@tecno "can not reach all the points" seems to be a different complaint from probe sensitivity. Is that now the problem you are now trying to resolve? If it is the location of the points, what matters is your M557 - what M557 command do you have?
M665 R95 L206 B80 H262
M557 R80 S15Have you carried out a step by set system setup and auto calibration ? it seems like your M665 command is missing switches. The M665 command in My delta looks like this :
M665 R181.428 L490 B135 H300.182 X0.093 Y0.252 Z.000I have a smart effector too. i might be wrong as its been a while since i set mine up but I think what i did was reduced the radius and spacing in the M557 command until it actually worked and I then incrementally went upwards until it failed
M665 L206.000:206.000:206.000 R97.665 H257.594 B70.0 X-3.669 Y-2.101 Z0.000 OVERRIDE
-
Your mesh grid is right to the limits of the bed. I'd try M557 set inwards slightly - say
M557 R75 S15.If that doesn't work, how does it fail to reach a point? What fails? Does it not move far enough? Does it generate an error? Does it generate horrible grinding noises and a smell of burning? What actually happens when it cannot reach?
Also, can it reach teh point it seems to be failing if you just put those coordinates in a
G1? -
@tecno said in Smart Effector issue:
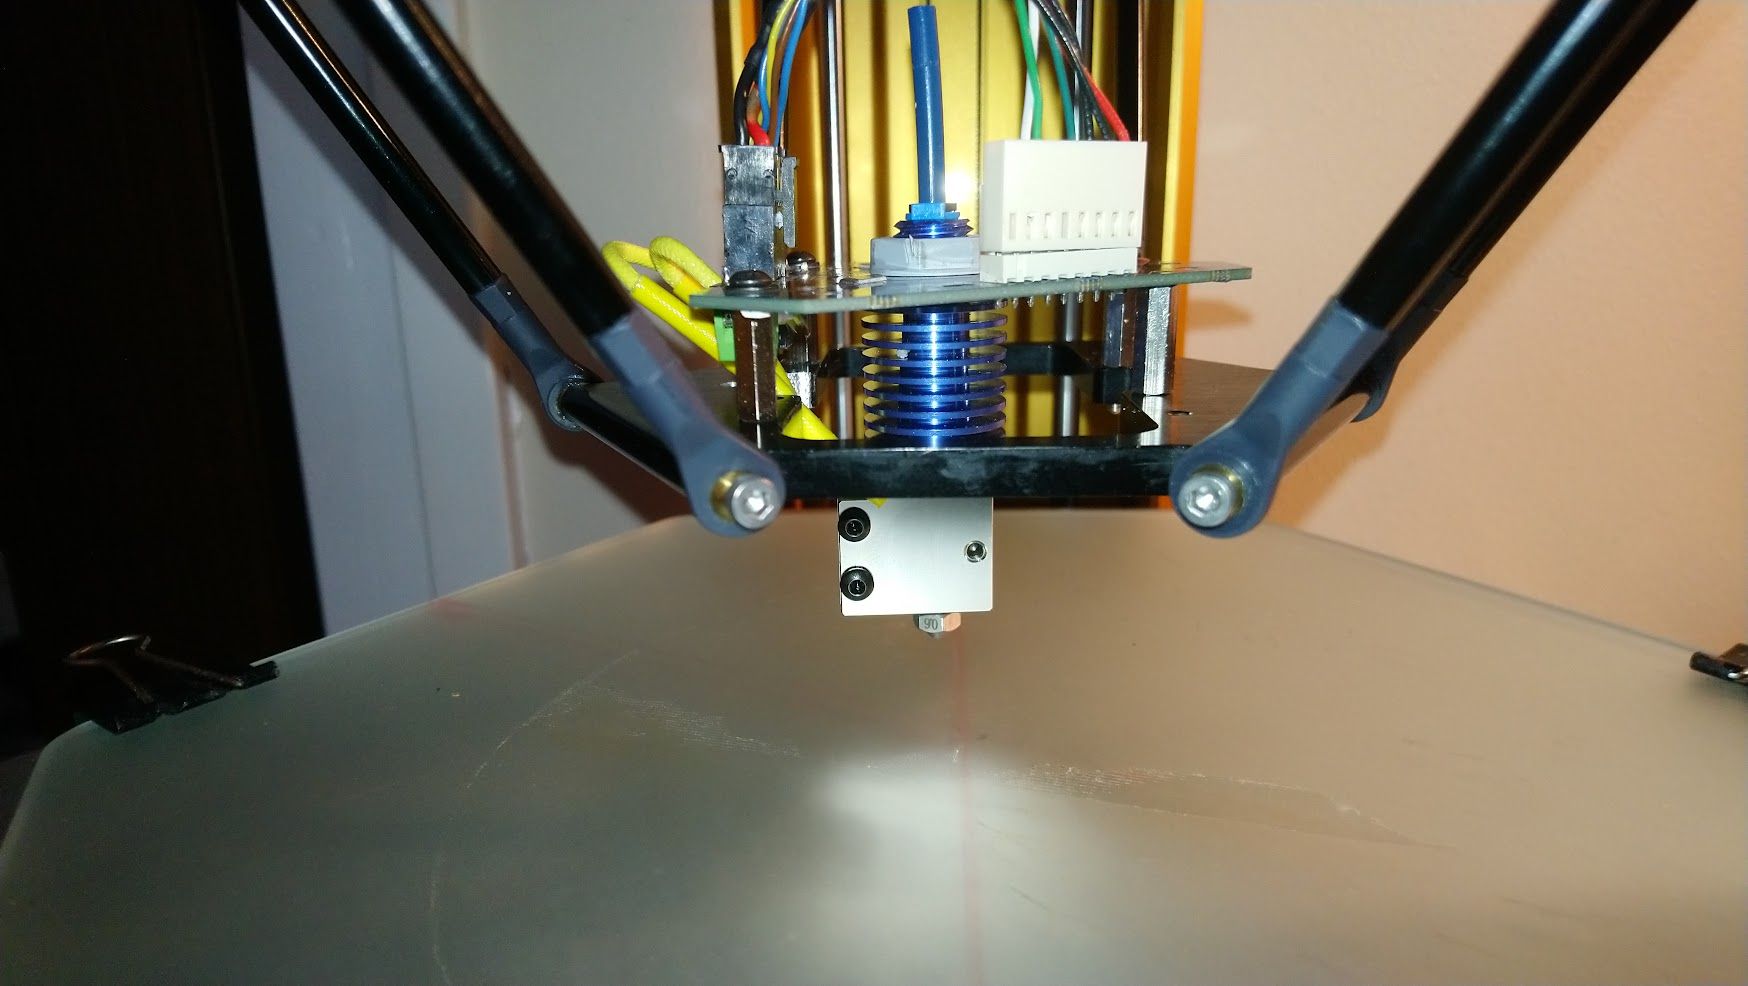
The rods and the adapter are original Dreammaker OverLord PRO, going back to a larger/wider effector (original adapter) made the situation better. Only trying to get this old Delta printer functional with a bit more modern parts.
I am in a process of building a large Delta of 1.4m height and ~550mm print diameter, Rods 610mm long directly to Smart Effector via magnets.This is extremely interesting as I'm still using my Overlord Pro, with the Dream maker hot end upgrade (V6 style) from some years ago.
The arm joints are getting tired and I have been considering fitting a spare Smart effector - but I'm still looking for appropriate arms etc., as the old ball joints are wear-prone and it seems daft to use new high accuracy parts with those.My larger machine has a smart effector on mag arms, which works superbly, the trigger distance near enough zero and amazing repeatability!
Back on topic:
If you want to retain the Overlord rods, I'd suggest using the Overlord effector plate and opening out the centre if required, so the Smart Effector fits through and is only attached at its original magball mounting holes.But, rather than screwing the two directly together, use long screws or threaded rod and commercial heavy wall tubular spacers or very precise printed blocks (for accuracy and rigidity) to offset the smart effector PCB upwards, so the nozzle offset below the plate is similar to the original overlord hot end.
It looks like spacers around 28 - 30mm long would be appropriate.
That will massively reduce the nozzle to effector leverage and tilt forces and increase accuracy, compared to having the entire hot end below the Overlord effector plate, with the rather flimsy arm joints.
(To reduce rod joint backlash on mine, I have a fairly strong rubber band around the centre of each pair of arms).
-
@rjenkinsgb
Hi Robert,
This is my temporary setup with the original effector plate.
My studs are 15mm and I have been thinking about adding 15mm to mimic original head setup.
So I will do this now and see what it gives.
