Trying to remove blobs, what order to change things
-
Hi Everyone,
For the longest time my prints have blobs at the end of a move. So, I get a ridge in the print where the seam is placed. I am once again trying to print the sword model and the new accuracy test from maker’s muse. It is the blobs that ruin the print and I really want to get this solved. I feel I am missing something fundamental in my understanding
My printer is a Kossel mini, duet 2, titan extruder with about 30cm Bowden connected to an all metal E3D V6. 12v
I have been reading all I can find on how to tune my extruder and was getting some small improvements changing the jerk and acceleration on the extruder but I still get blobs.
The best change I made is to update the slicer to do a random seam but that isn’t the fix I am looking for.My main question is what order should I change settings in and should I be trying different accelerations and jerk settings on the XYZ moves as well or is it just about the extruder. I have only been changing extruder settings but seem to have hit a ceiling.
My approach has been to up the acceleration, then play with jerk and then run the Pressure advance test and pick the best result.
I was finding almost no difference when running a stringing test between 2.5 and 4mm retraction.
Extrusion multiplier is good and extrusion width is accurate.I am using firmware retraction and pressure advance but feel I might be better using slicer retract so that I can use the wipe feature. This feels like the wrong answer
Current settings are
M566 X900 Y900 Z900 E2000
M203 X18000 Y18000 Z18000 E3600
M201 X1500 Y1500 Z1500 E3600

M572 D0 S0.5
M207 S3 F3600 Z0
Again, my main question is what order to I change things and what is a good print to use when changing on the fly so I can see results as they happen.
Thanks
-
Do you have the slicer you are using set for firmware retraction? The M207 line will not do anything without the slicer issuing the correct commands.
And, try tuning the S value in the M572 line; eg. increase or decrease it by 0.1; if it improves, try another step the same direction, otherwise try a step the opposite way etc.
-
@rjenkinsgb Slicer (prusa) is using firmware retract. Confirmed by checking for G10 and G11 in the output. I've tried playing with the pressure advance value from 0.1 to 1. I can find a setting where it is less terrible but not anything that gets me the results I can see others getting. That why i think it has to be some other sort of speed setting that is messing me up.
-
Can you please post some photos showing the blobs?
-
@buzzby I don't know the full answer to your question, but here's a few things I have learnt from trying to tune my machines
- xyz speed, jerk and accel all play a role as they determine how quickly the nozzle will move away at the end of a print move, and arrive at the start of a print move
- try changing the jerk policy. I think the default doesn't apply it to non-print moves, so I found better with results setting it to 1, so that jerk is applied to all moves so the head moves away faster on the travel move after a perimeter
- xyz and e speed, jerk and accel can all equally limit motion. E.g, if the extruder accel or jerk is too low, it won't be able to keep up with the pressure advance, so the xy motion with be slowed down to respect the E limits. Generally, I'd set the E limits as high as you can so that they don't interfere, especially during tuning. This becomes more of an issue with high pressure advance. On my old bowden setup (core xy with a much longer bowden than yours!) I found my limiting factor became the extruder, and I could actually print faster with a heavy direct drive than the lighter bowden
- the amount of pressure advance is proportional to the extruder acceleration, which in turn is linked to xy acceleration. Therefore when playing with your xy acceleration limits, you are also adjusting the effective pressure advance. You might find it worthwhile seeing how your pressure advance tuning varies with xy acceleration.
- there is also some tradeoff with jerk for corners and line start locations. When going round a corner with high jerk, the xy speed barely changes, so the extruder speed barely changes and the applied pressure advance is small (and all vice versa). Conversely when starting a perimeter line, a high jerk means the extrusion starts faster, so more pressure advance (I think).
- z speeds etc are only really important if the external perimeter involves a layer change (e.g. a single walled print), which isn't very typical
- slicers can control speed and acceleration per feature type - don't forget to turn it off for tuning prints!

- when picking a tuning print, it is important to capture the basic features from a real print. I'd typically do a 40-50mm cube, with at least two walls and some infill - doesn't need to be much, but some to mean the line start/end travel moves are more realistic. Might not apply to the normal pressure advance tuning, but does for seam tuning. Cylinders are also good for seams as there is nowhere to hide!
-
@engikeneer
I will try out the jerk policy to see what difference that might make. I have doubled my XYZ accel and no obvious difference. My machine is a delta, just incase that helps or hinders.I wonder if my extruder accel just needs to be much higher than the max speed.
I am running the K factor test for marlin Here, modified to work for duet but to see how my PA changes. It seems to float around 0.5 to 0.7 which little difference between if any value between these 2 numbers is used.
When you talk about Slicer speed do you mean the different speed settings for different features? Are you suggesting making them all the same for testing?
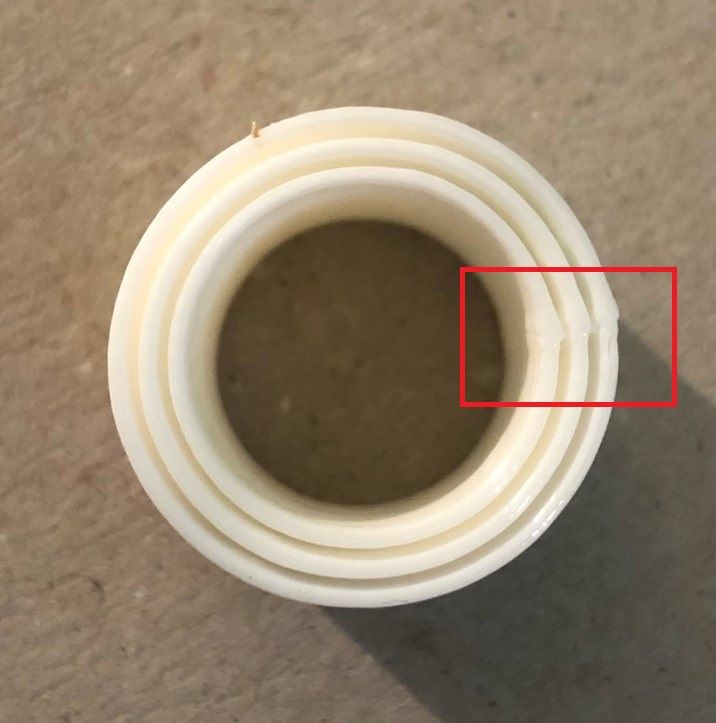
The above shows my problem. At the start / end of a move I get extra filament. It means that these 3 tube pieces get fused together.The only way i have found any sucess so far is to use slicer retraction so that I can use wipe AND I set the seam to be random so that 2 walls don't stop and start at the same point. This bodge doesn't even work that well. I'd like the slicer to keep the seam in the same place for a better finish
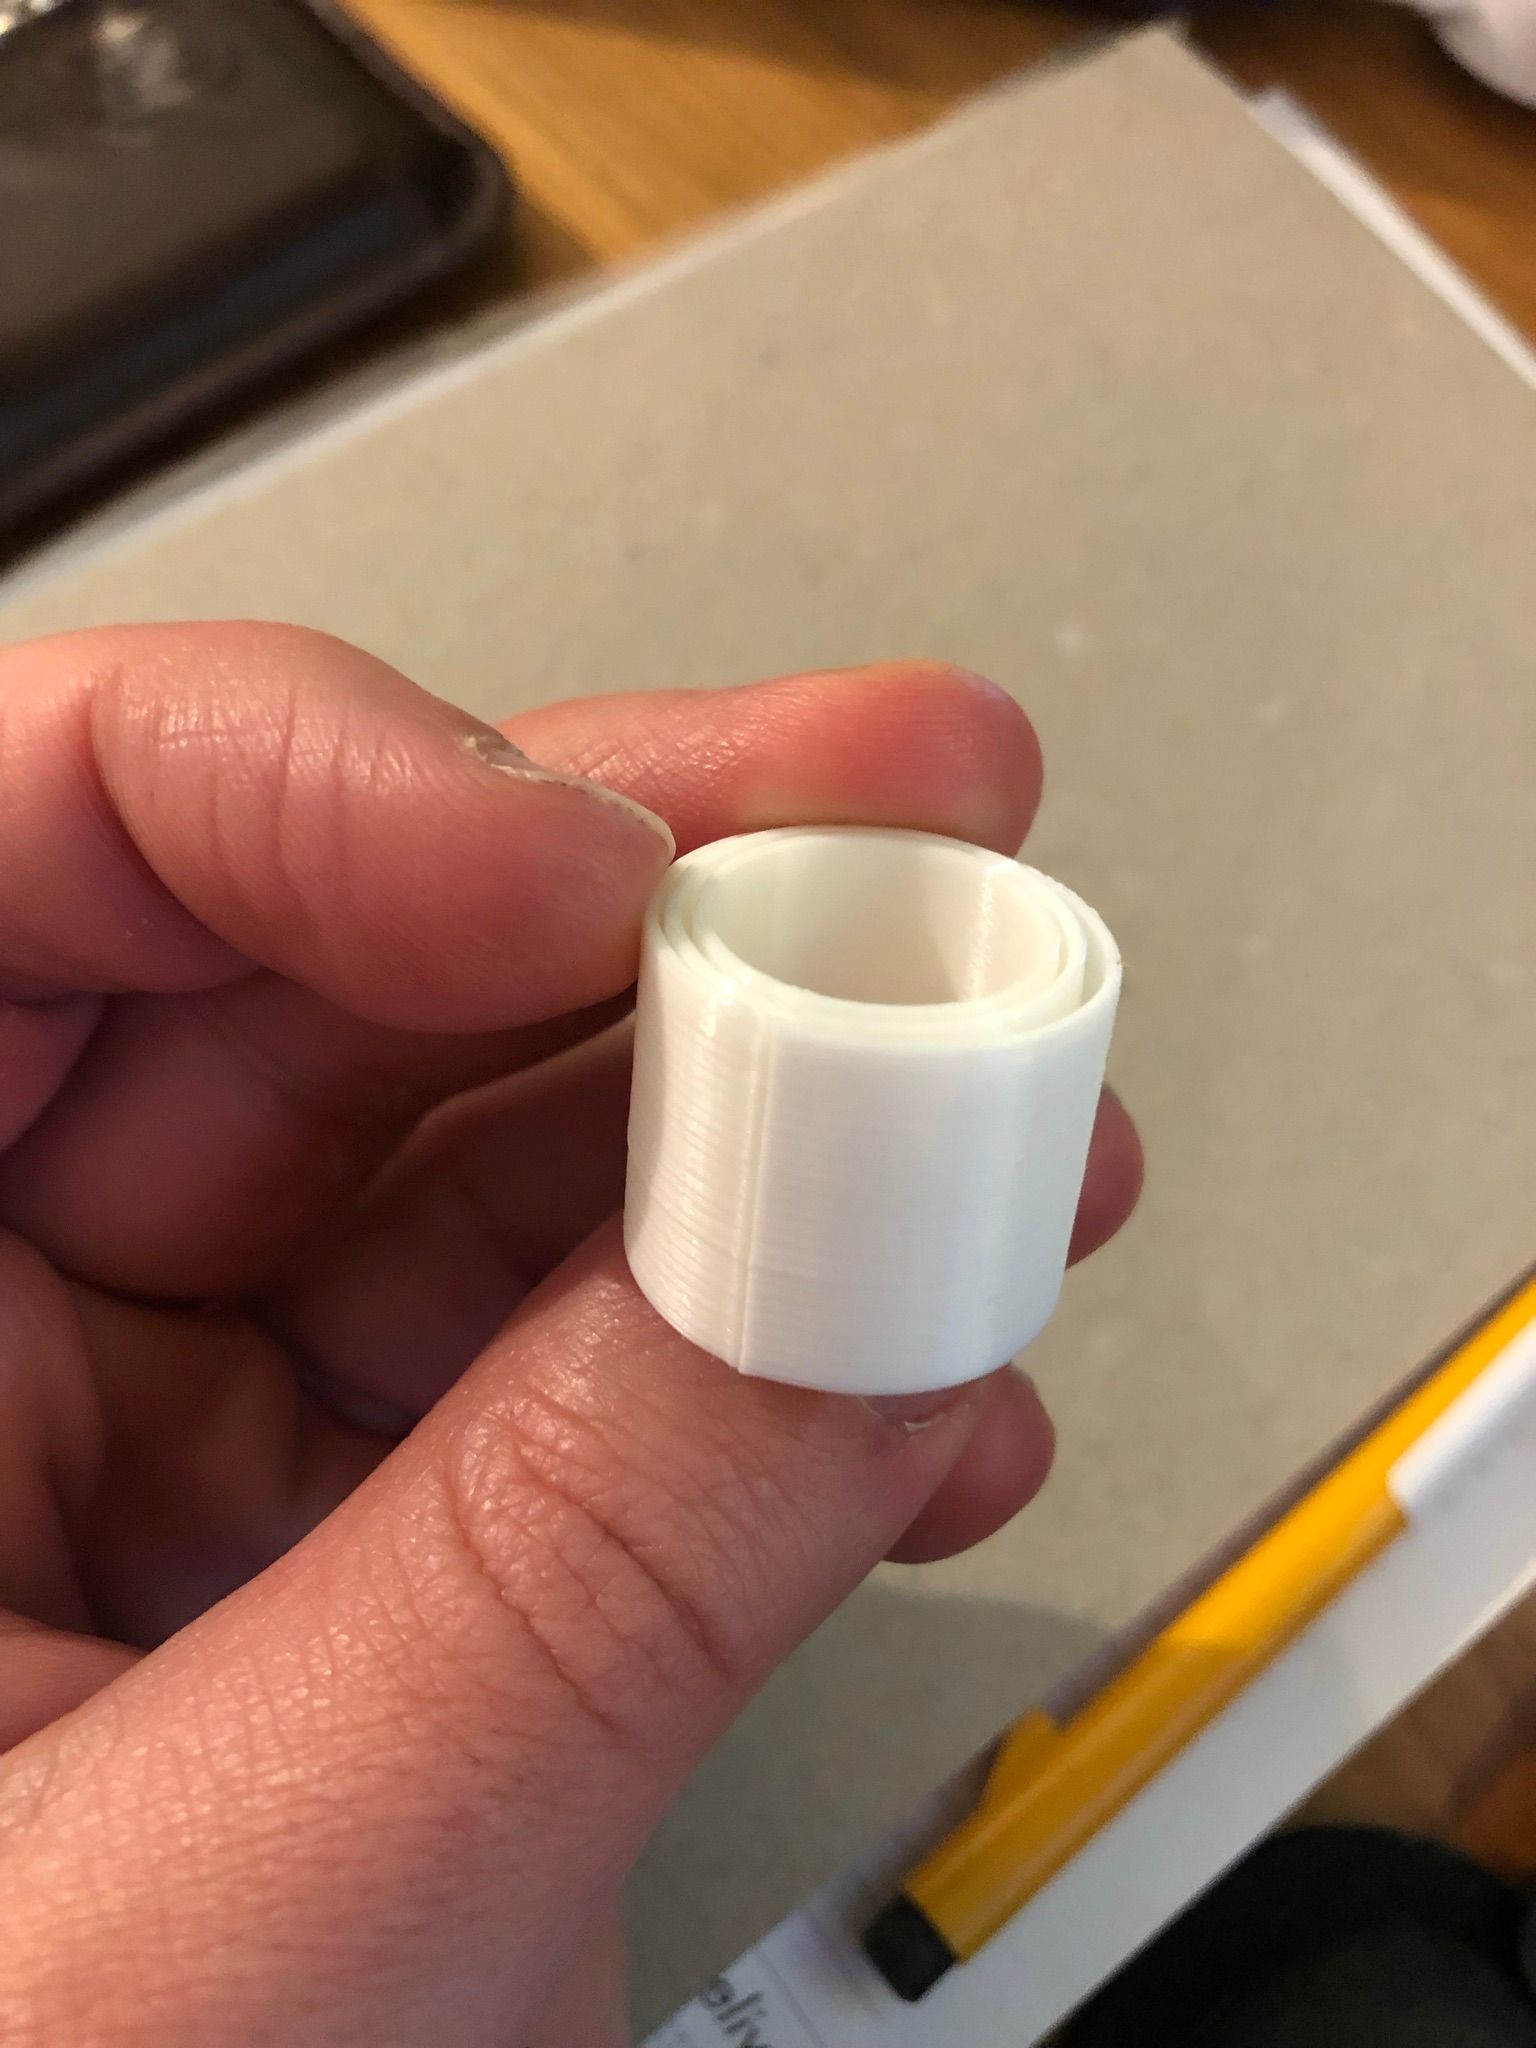
Hopefully this highlights how the seam ends up.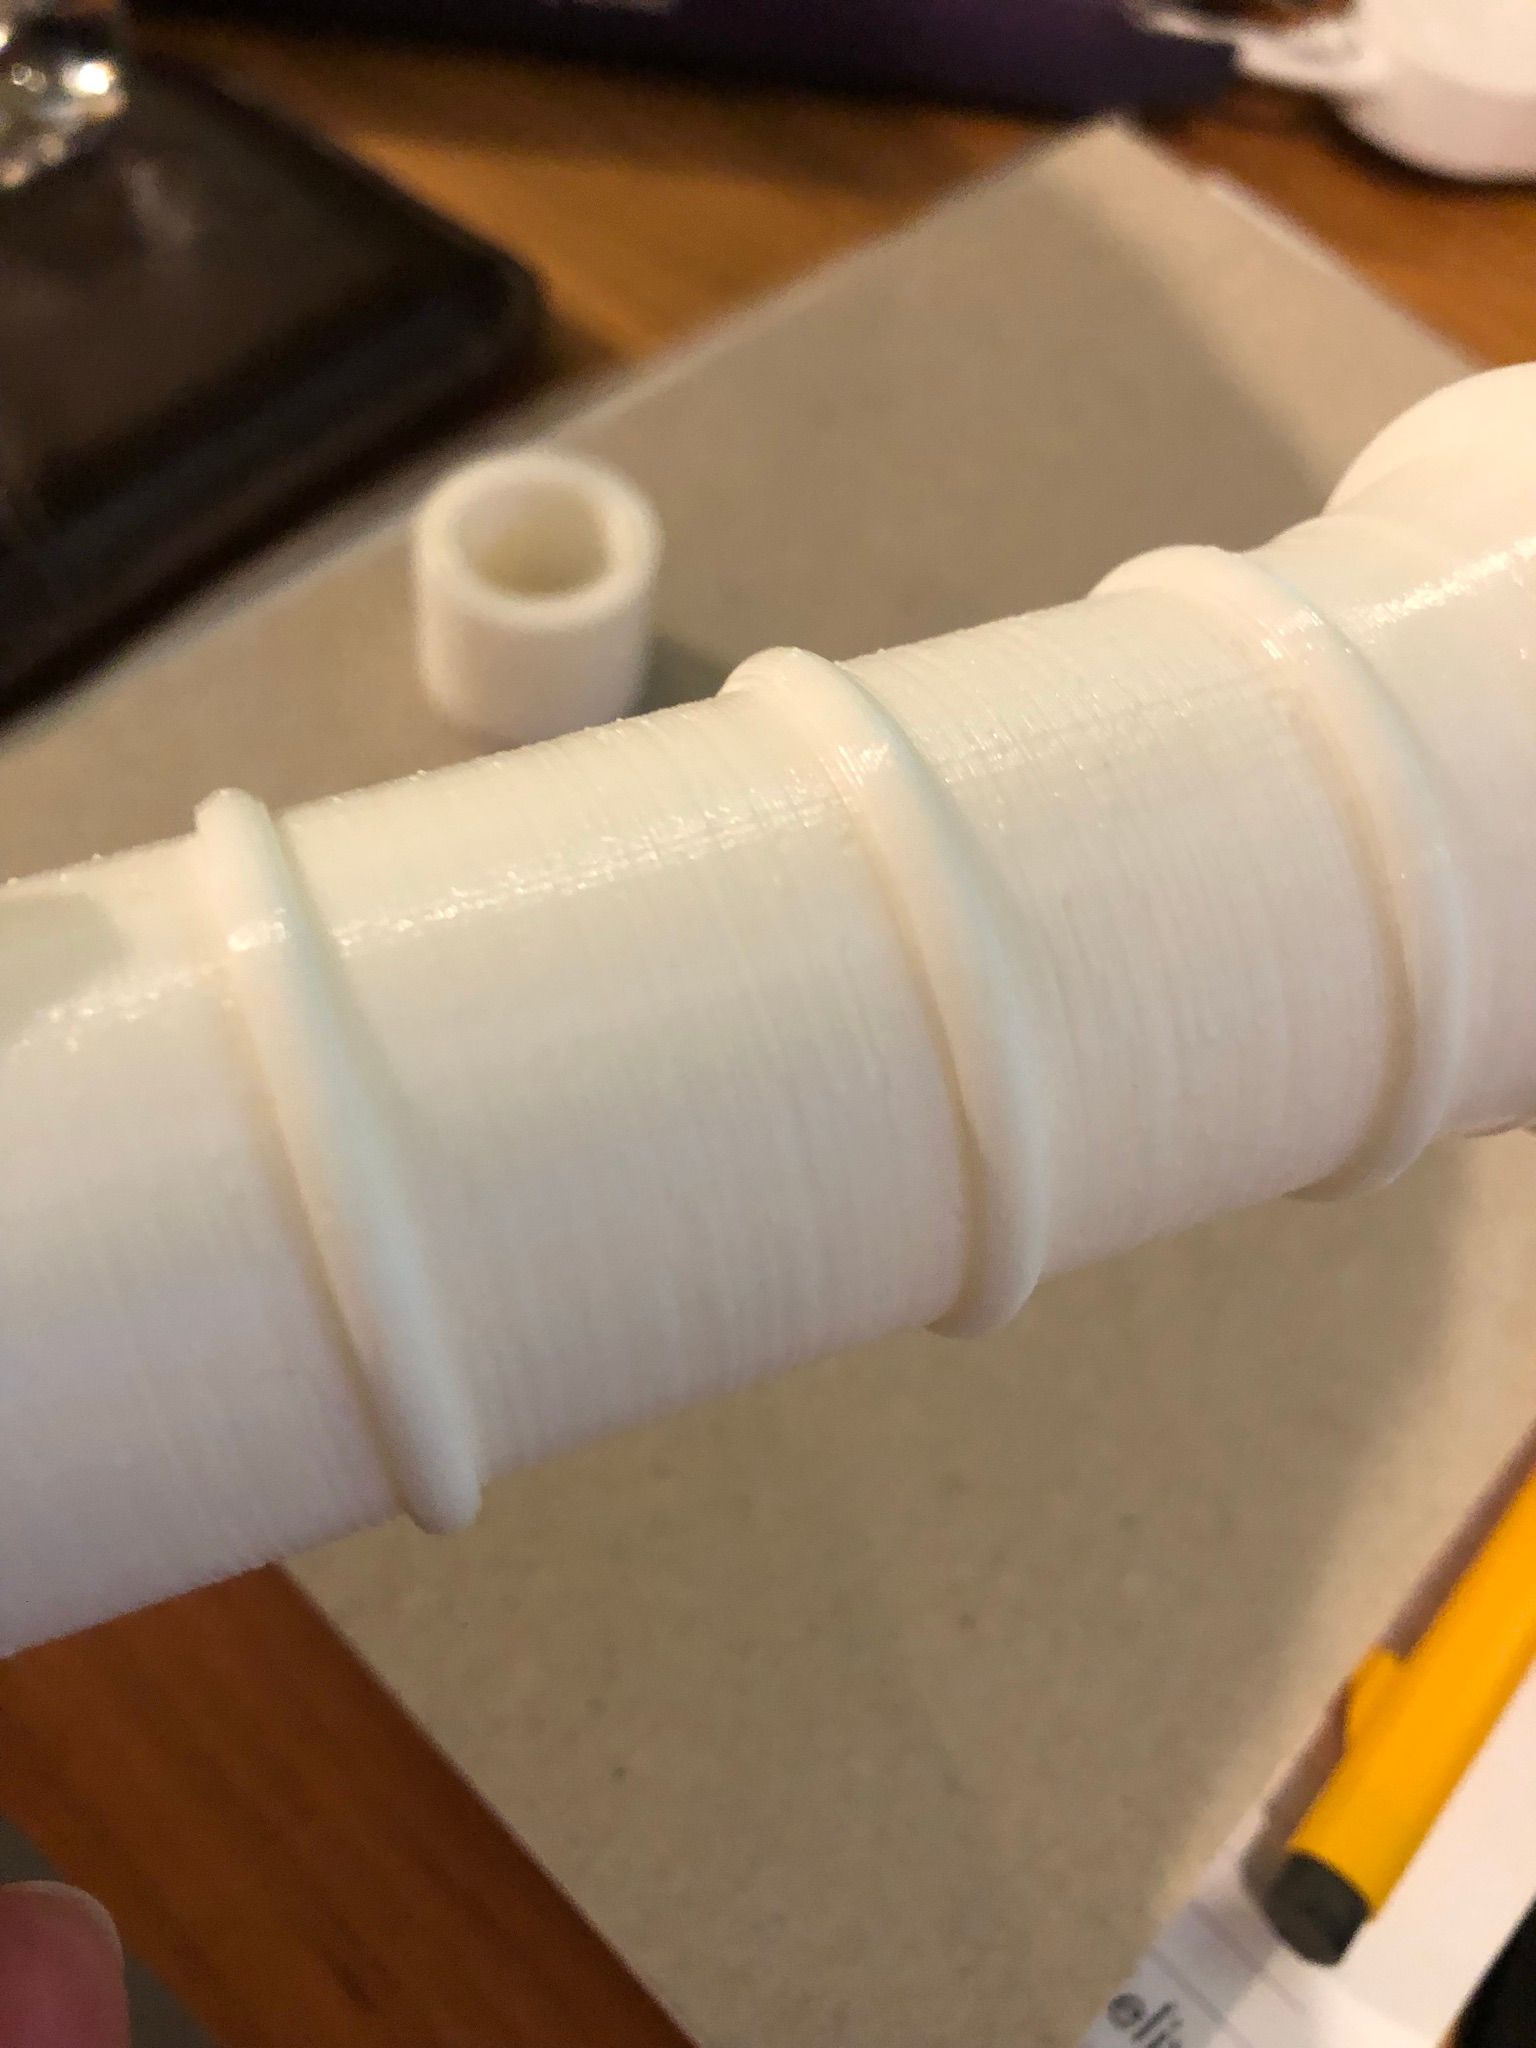
Shows how the "blobs" end up on the outside of a print. This is with the seam set to randomAny additional thoughts would be very welcome.
-
@buzzby sorry it's been a few days...
It can't help to try upping the extruder accel (if it can keep up), so I'd start with that. For ref, on my corexy with a heavy direct drive and pancake steppers, these are my settings (note I have a dual extruder so a lot of mass moving round!):
M566 X400.00 Y400.00 Z100.00 E800 P1
M203 X15000 Y15000 Z300.00 E10000:10000
M201 X3600.00 Y3600.00 Z200.00 E1600
M572 D0 S0.18
M207 S1.0 R0 F7000 T4000 Z0
One thing I have done is set a different retract/unretract speed. I think I read somewhere that a slower unretract may be better as you get less of a pressure spike in the nozzle as a new extrude move starts, but I never really experimanted enough to know if that's bull s**t or not... May also not be relevant in your case if the seams don't have retract/unretract moves
Re pressure advance tuning, there are several methods that are reasonably valid. My preferred is the single (or double) walled box method mentioned here:
https://duet3d.dozuki.com/Wiki/Pressure_advance#Section_Simplest_Method_Possible
If you're tuning pressure advance to improve seams, then personally I'd do a tuning method that looks at the seam. Molten plastic is hidiously non-linear so though the different PA tuning methods may all be valid 'in general', I've tyically found that what is perfect via one method (e.g. accelerating in a straight line ike the marlin K-factor) is slightly different to another (like the box method).RE slicer speed, I was more refering to acceleration control. If you have acceleration commands in your print file, you can't make changes on-the-fly (well you can, but they'll get overwritten very quickly!). Speed is one to bear in mind, but you can always just dial the speed factor up or down in DWC to play with that.
Looking at your 3-ring print, I would suggest that your PA is a little high (assuming anticlockwise motion in the top view). You can see a blob at the start of the move and underextrusion near the end. Obviosuly if it prints the other way round to that, you'll need more PA. If there are retractions between each of the cylinders, then that might also come in to play, and tuning retration distance, speed, and unretract speed may help.
-
@engikeneer
Thanks for your time and suggestions. I've been experimenting with increasing the extruder acceleration and it certainly hasn't hurt. The extruder is a little bit louder but no skipping. I haven't been seeing much of a difference in how the seam is done.Thank you for the link. I hadn't seen the box method before. I tried it out and what is odd is that I really don't see too much difference at all. The picture is from 0.4 to 0.7 in 0.05 increments every 5mm. Maybe 0.6 is around the best but the seam and corners are pretty much the same.
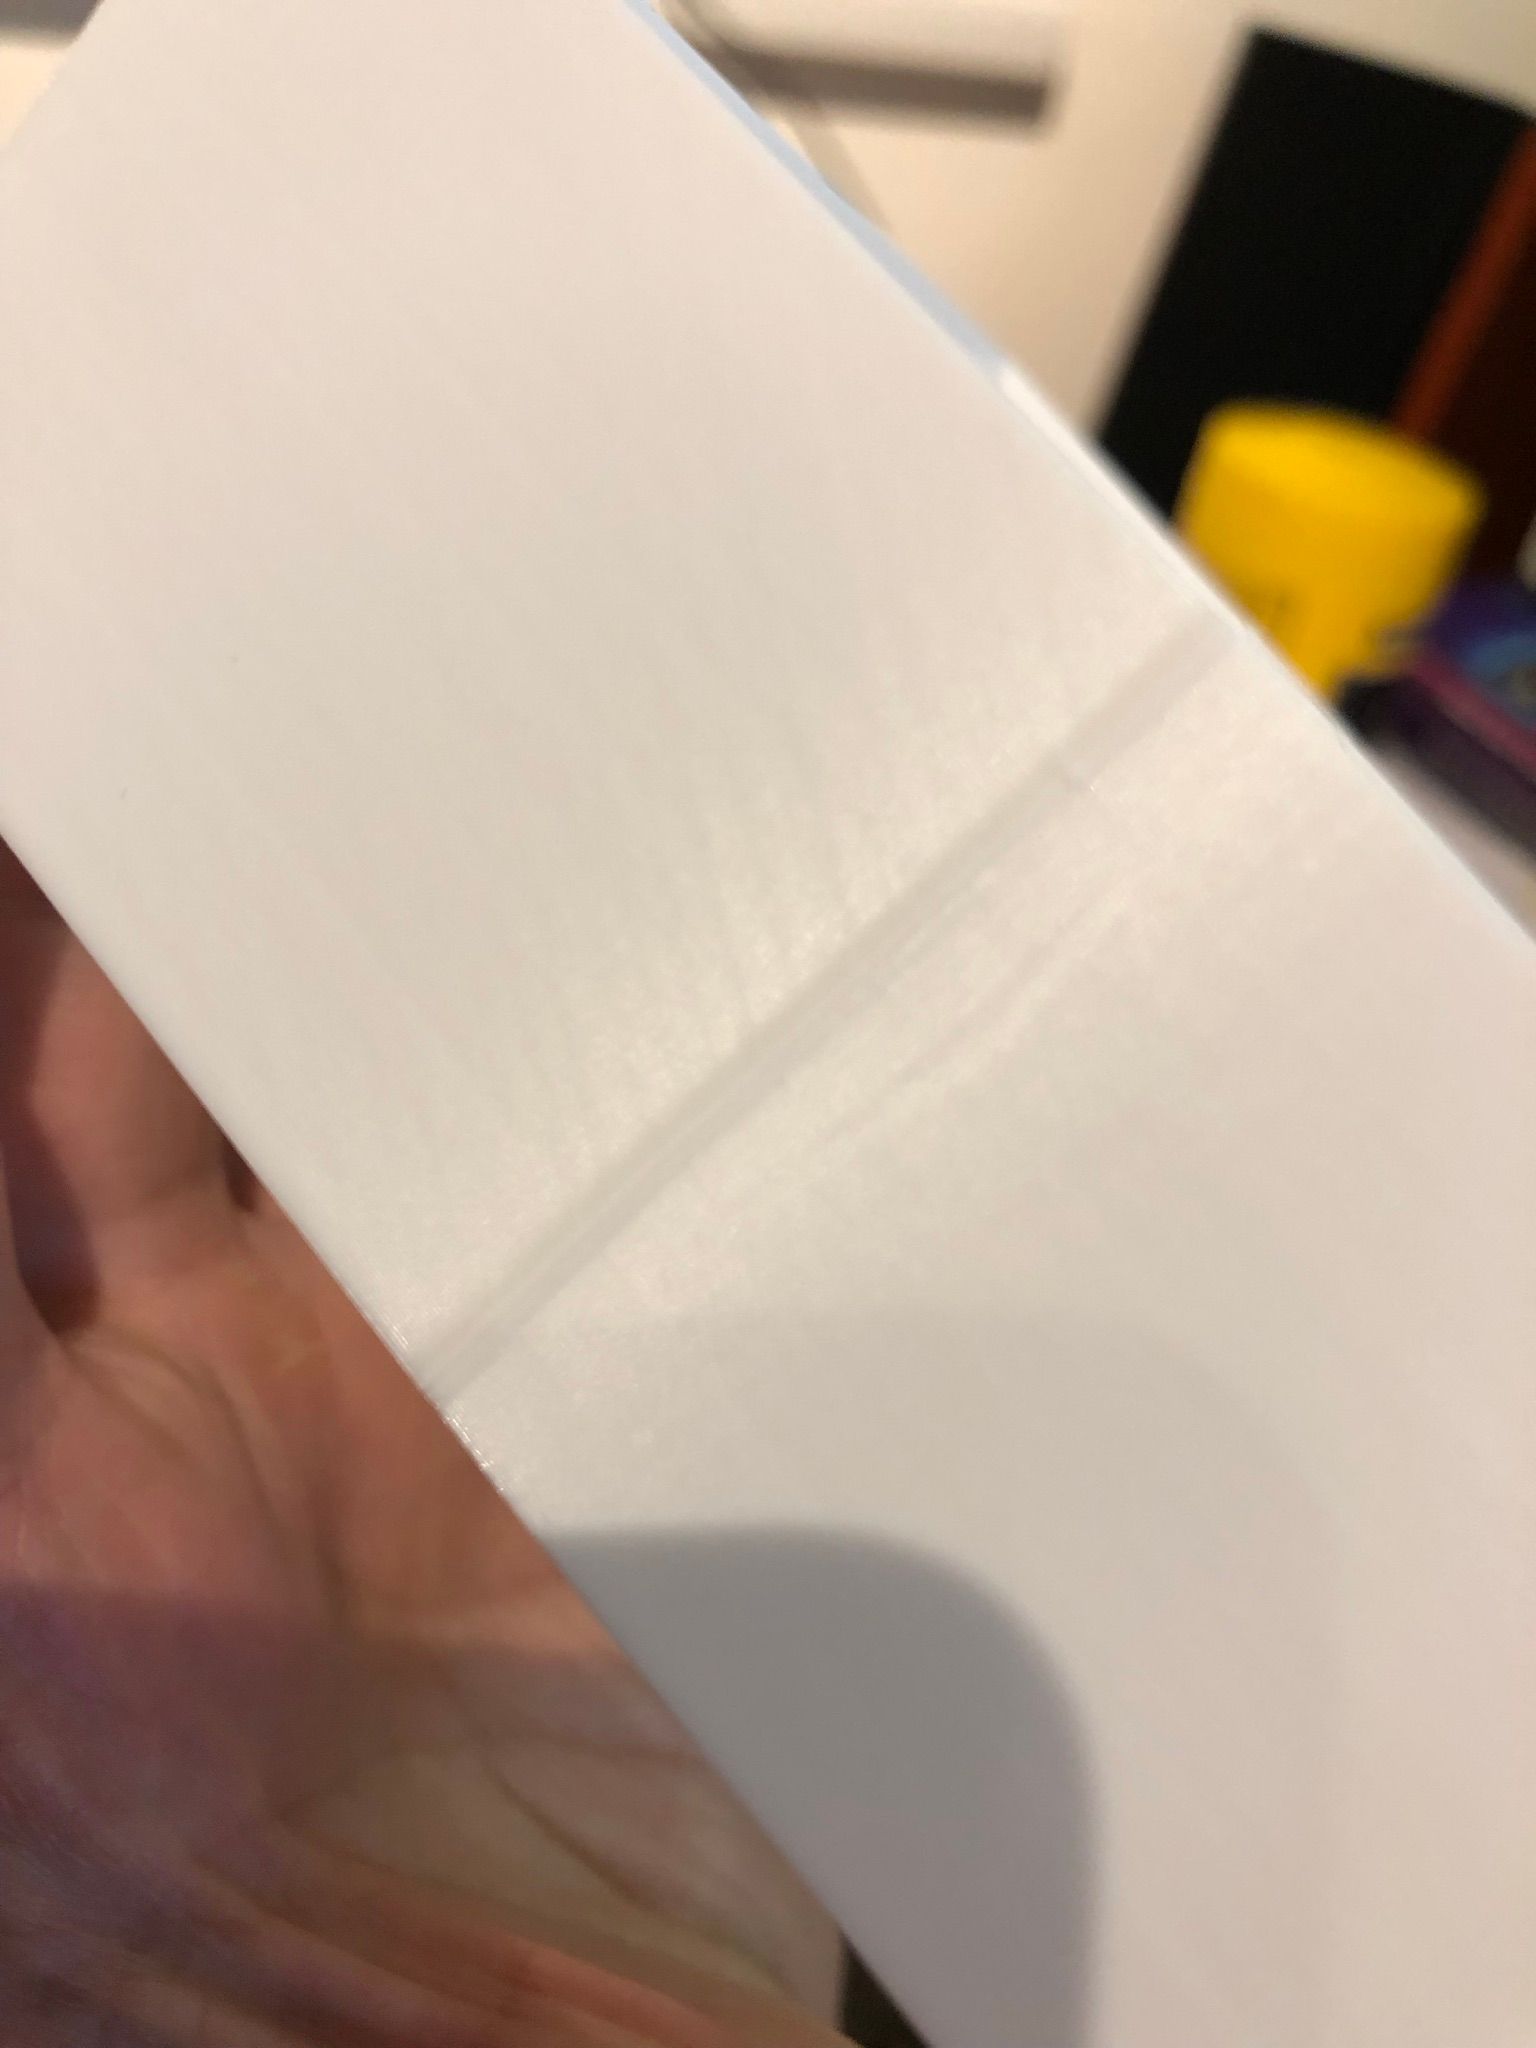
Made me think that my other accelerations were maybe a bit slow so I have upped them from 1500 to 5000. Maybe a very small difference in quality in a positive way but nothing amazing.
My thinking now is that the retraction speed must be the majority of what is causing the problem. Need to try some more experiments with that but still feels like i am missing something else.
Need to do the box test again with all my new settings.
For reference here are my new settings
M201 X5000 Y5000 Z5000 E10000 ; Set accelerations (mm/s^2) Used to be 1500 M203 X18000 Y18000 Z18000 E20000 ; Set maximum speeds (mm/min) M566 X900 Y900 Z900 E1000 P1 ; Set maximum instantaneous speed changes (mm/min) M572 D0 S0.64 M207 S3.0 F5000 T3600 Z0 -
@buzzby If it helps, on my old bowden corexy, and on my current (/work-in-progress) bowden delta, I have ended up with pressure advance & extruder settings that make it quite noisy at times. The corexy in particular sounded like a machine gun on fast short infils - was a bit disconcerting but gave decent enough results.
It's hard to tell from a picture, but it looks like your PA box test never really found either a 'way too much' or a 'way too little' value? If you haven't already, you might find it worthwhile doing a much broarder run (like 0.0 to 2.0) to see what the limits actually are. I found I got a few 'false positives' where slight printing variations made some parts look a little better than they were. I usually end up doing 4 or 5 boxes to get some confidence in the result I'm looking at.
A couple of other thoughts I had:
- Have you tried playing with the nozzle temp at all? It's maybe a bit more detailed tuning, but too low a temp can require more pressure in the extruder and impact the start/end of moves as the pressure builds/dies. Equally, too high a temp might cause stringing which will mean you want more retraction etc. I know its another interlinked parameter to vary, but might also be an easy one to try on-the fly or in a repeat PA test.
- Have you set the tension/backlash on the titan gears? I think you're meant to loosen the screws then push the stepper into mesh to remove the backlash before tightening it all up? I've only ever use a very cheap & terrible cloned titan where this was a big problem, and it went in the bin soon after...
- Might also be worth double-checking the bowden tube clips are fully tight at both ends and the tube is sat all the way in to the hotend and extruder.
Apolgies if you've already covered these - I'm just spouting all the random thoughts that come into my head
 Good luck and keep us posted!
 -
@engikeneer
The testing continues. Thank you again for your suggestions.
I did a test to see if temps made any difference. Printed a cylinder and went from 200c to 220 in 5c increments every 10mm. Zero no difference in how the seam was printed. Bit surprises it made no difference but a worthwhile test.I have continued with some box tests. I thought I was making progress but still cannot find a PA setting to get the sword test print I have to not weld itself together and I really don't want to have to use the slicer wipe function as that only works on a retraction. Anyway here are some pics of the box tests
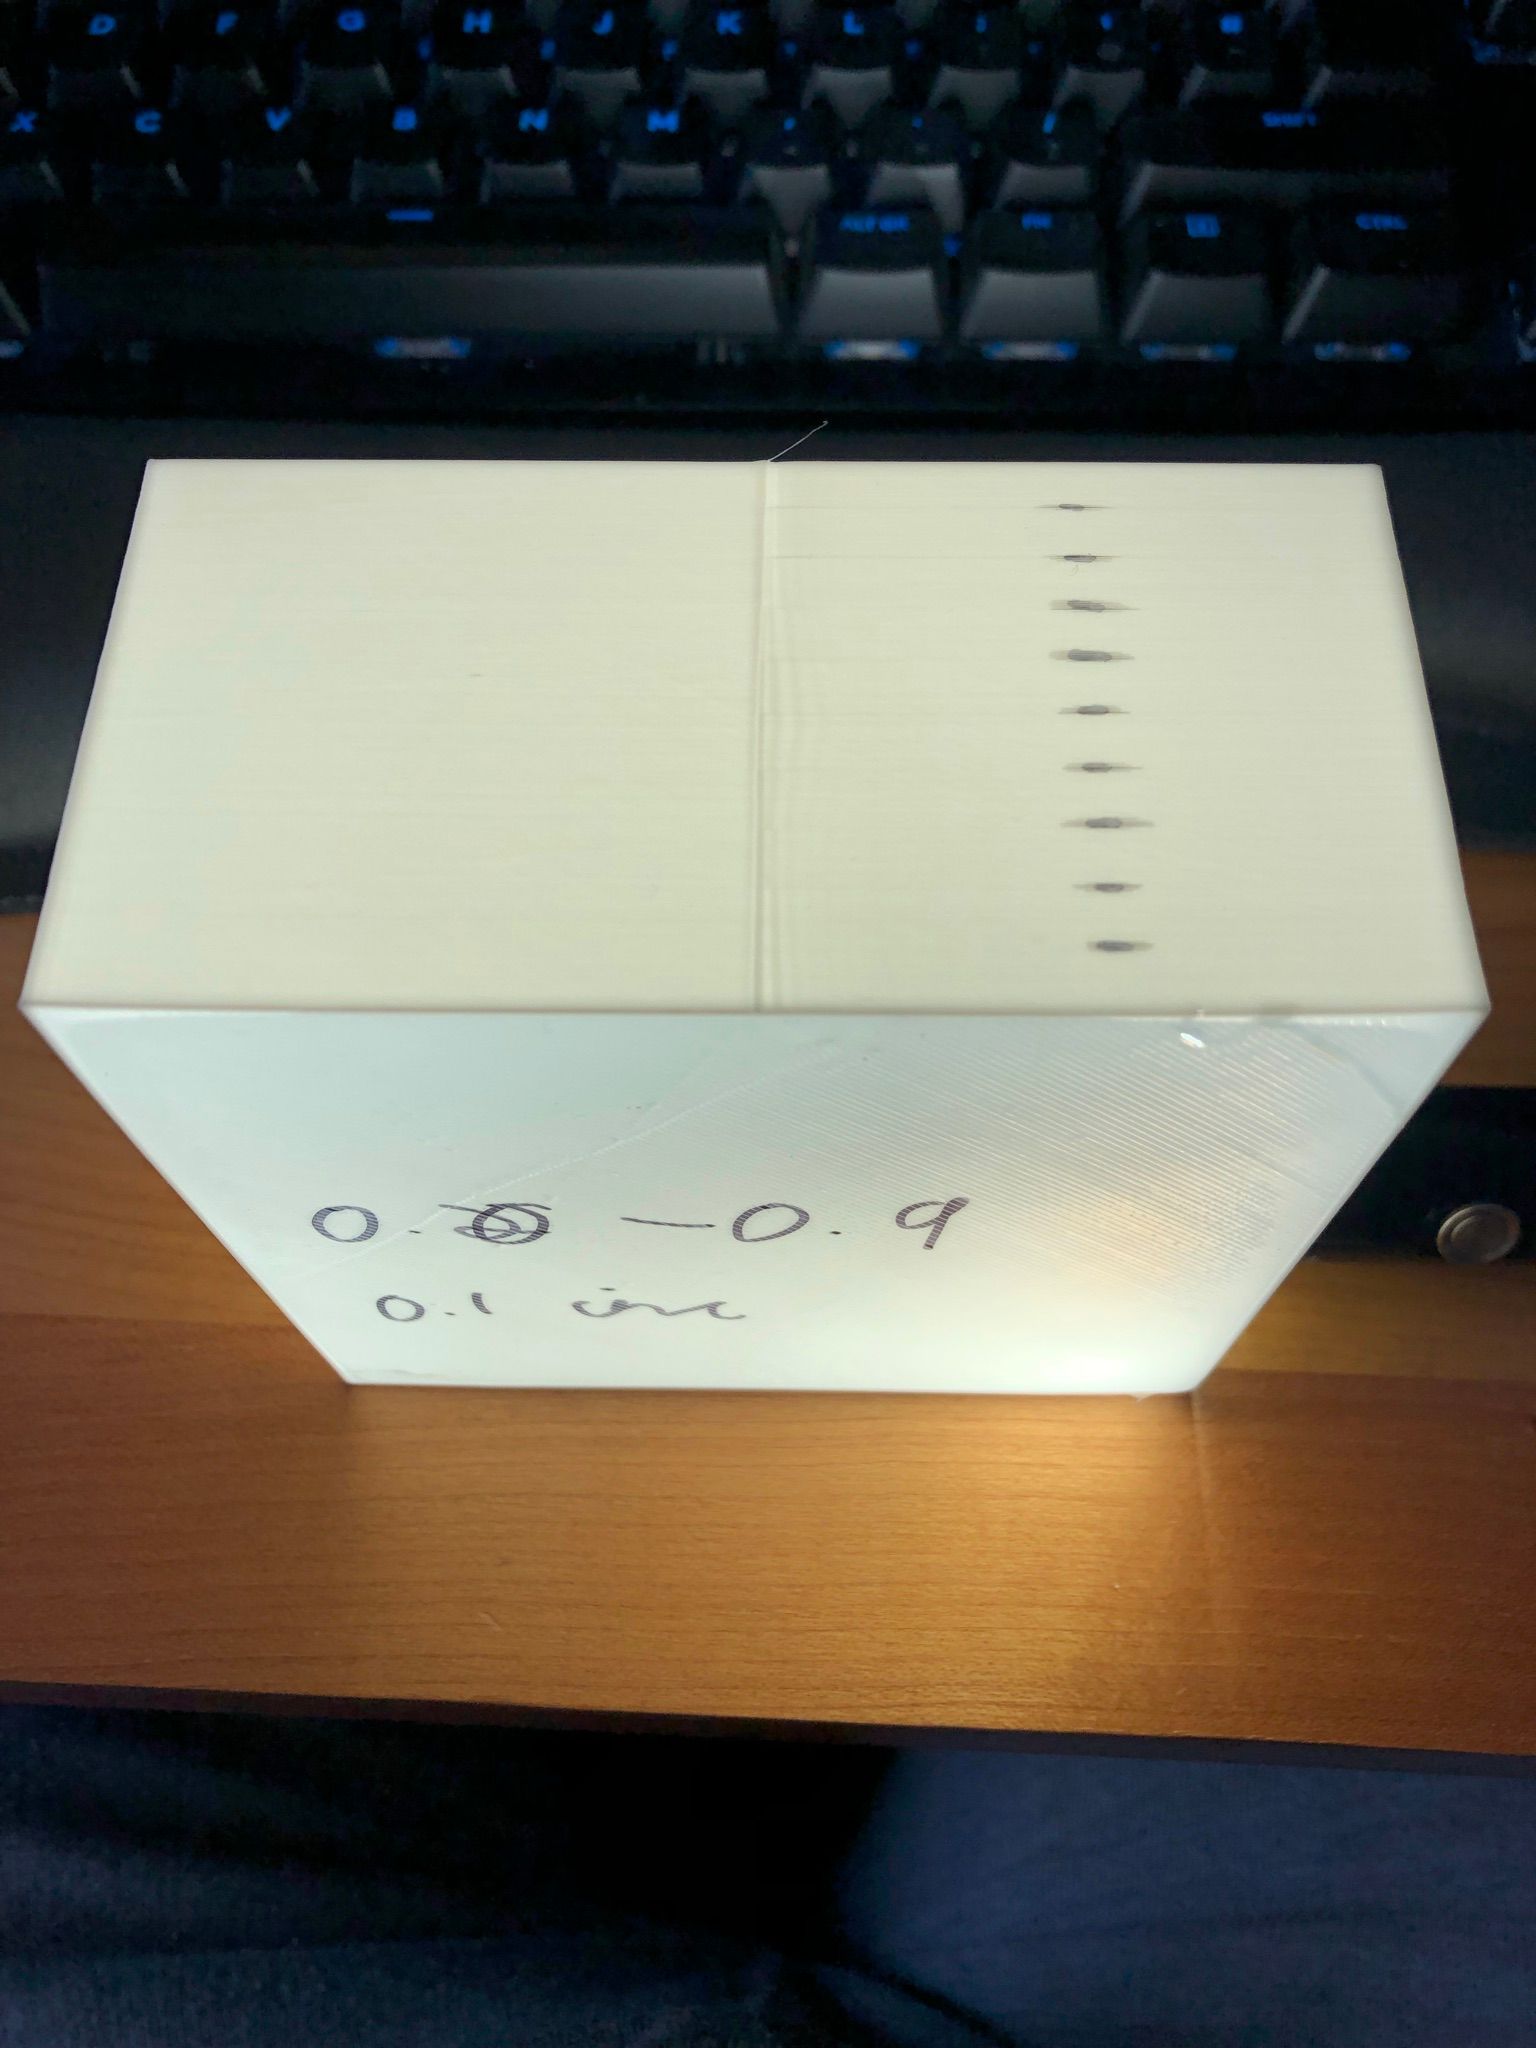
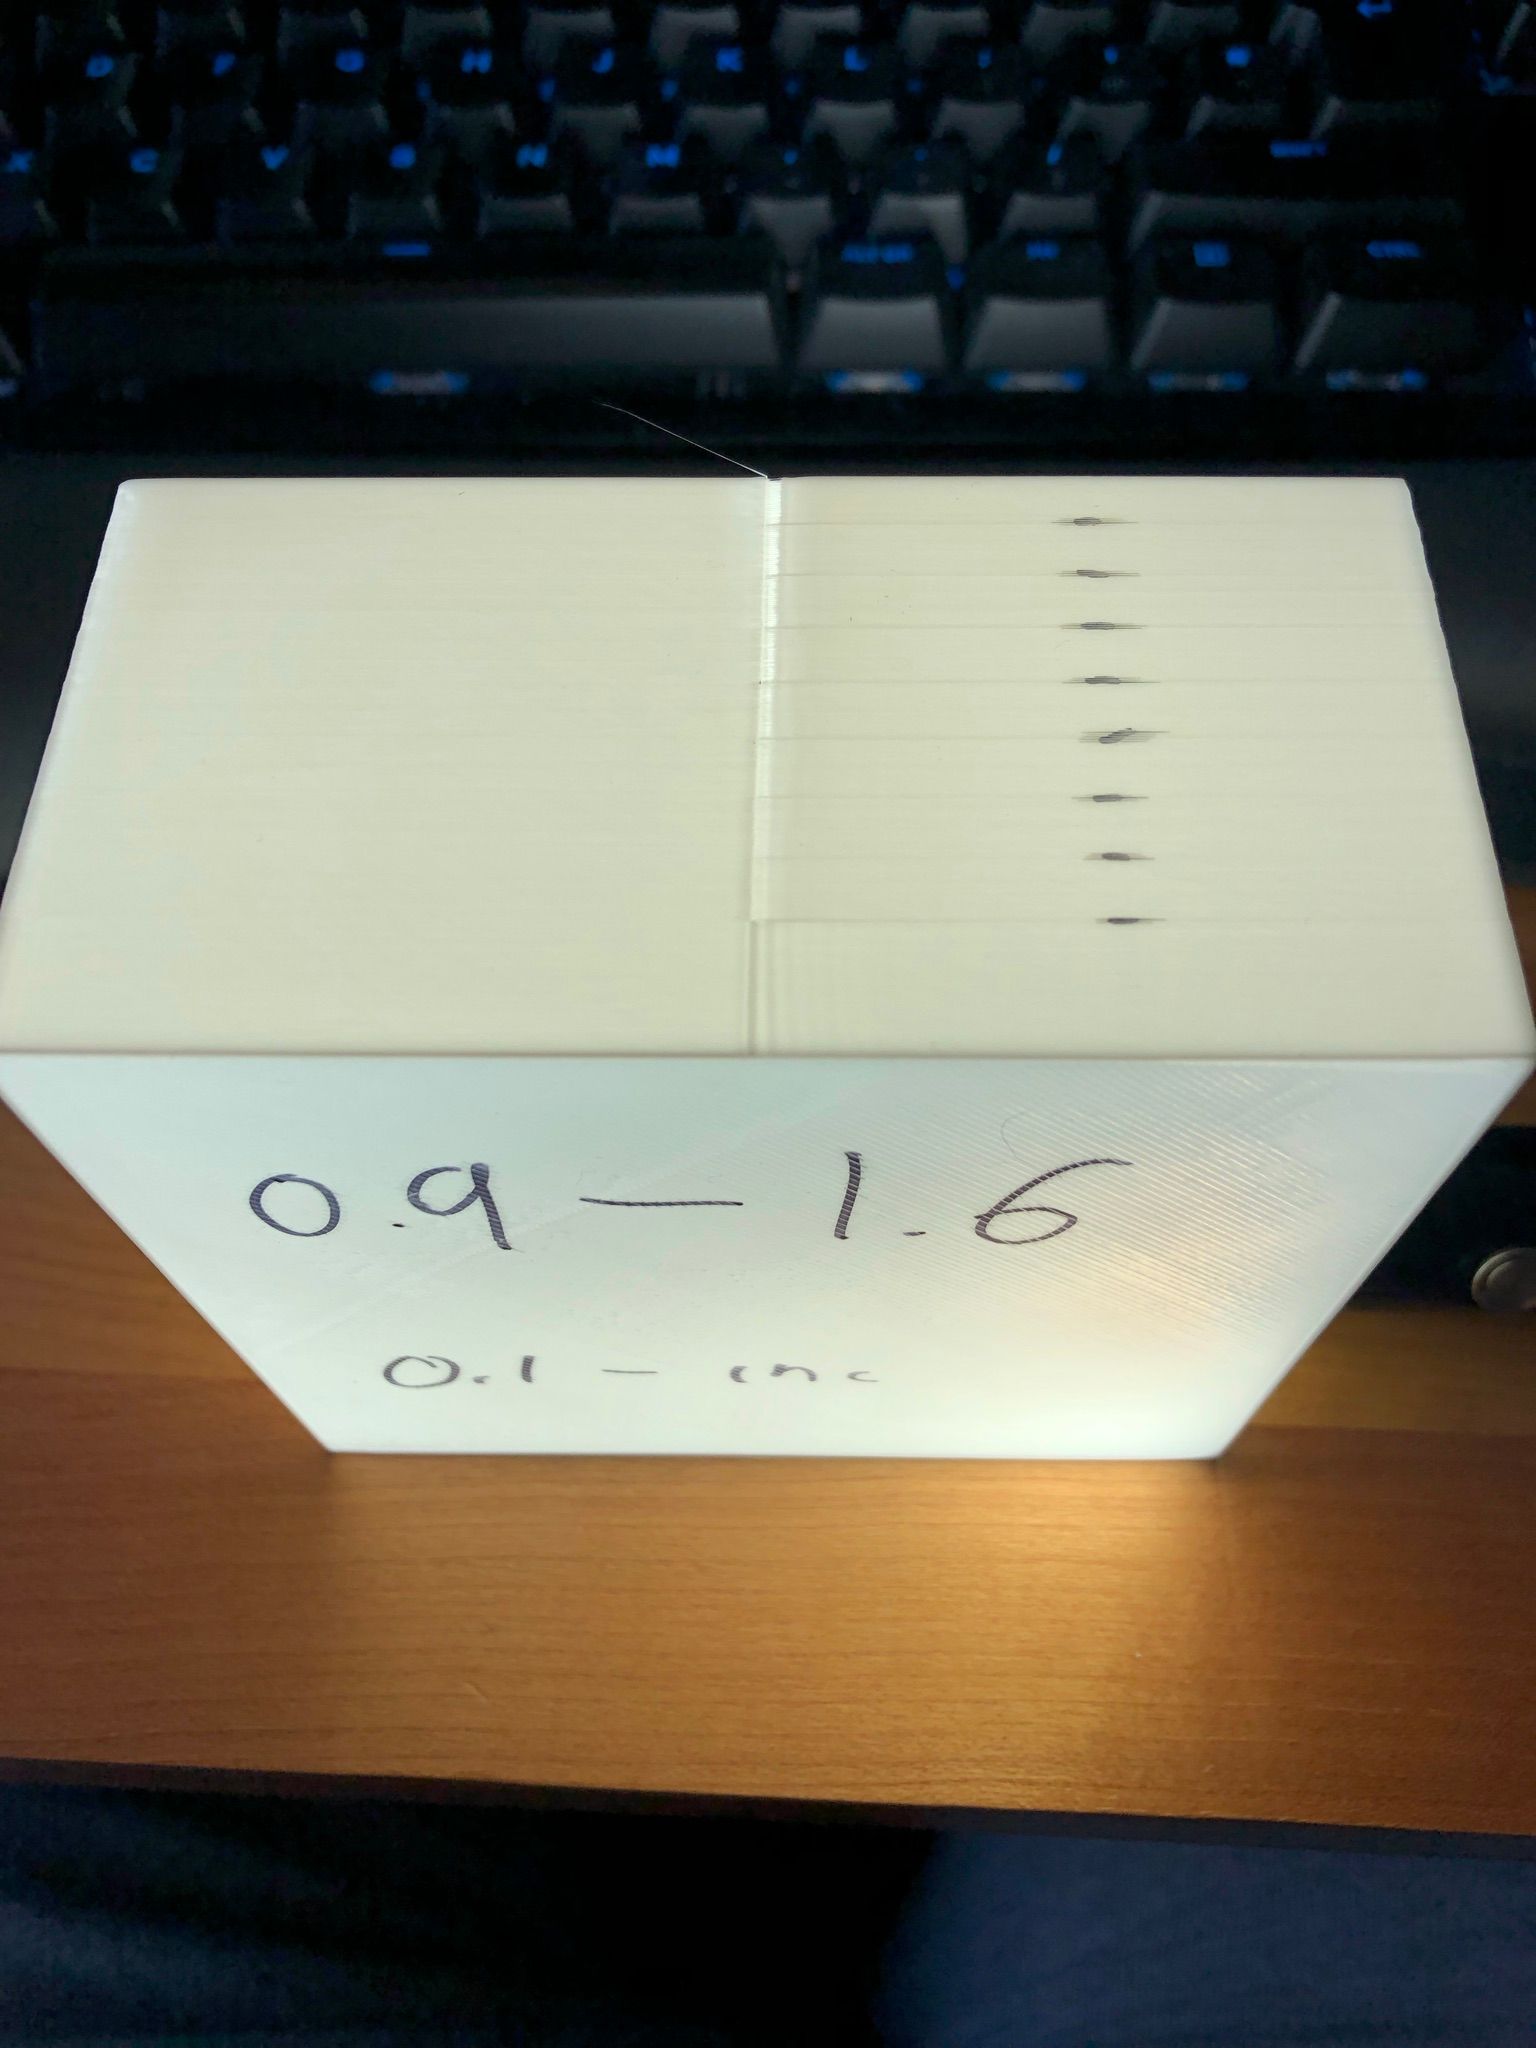
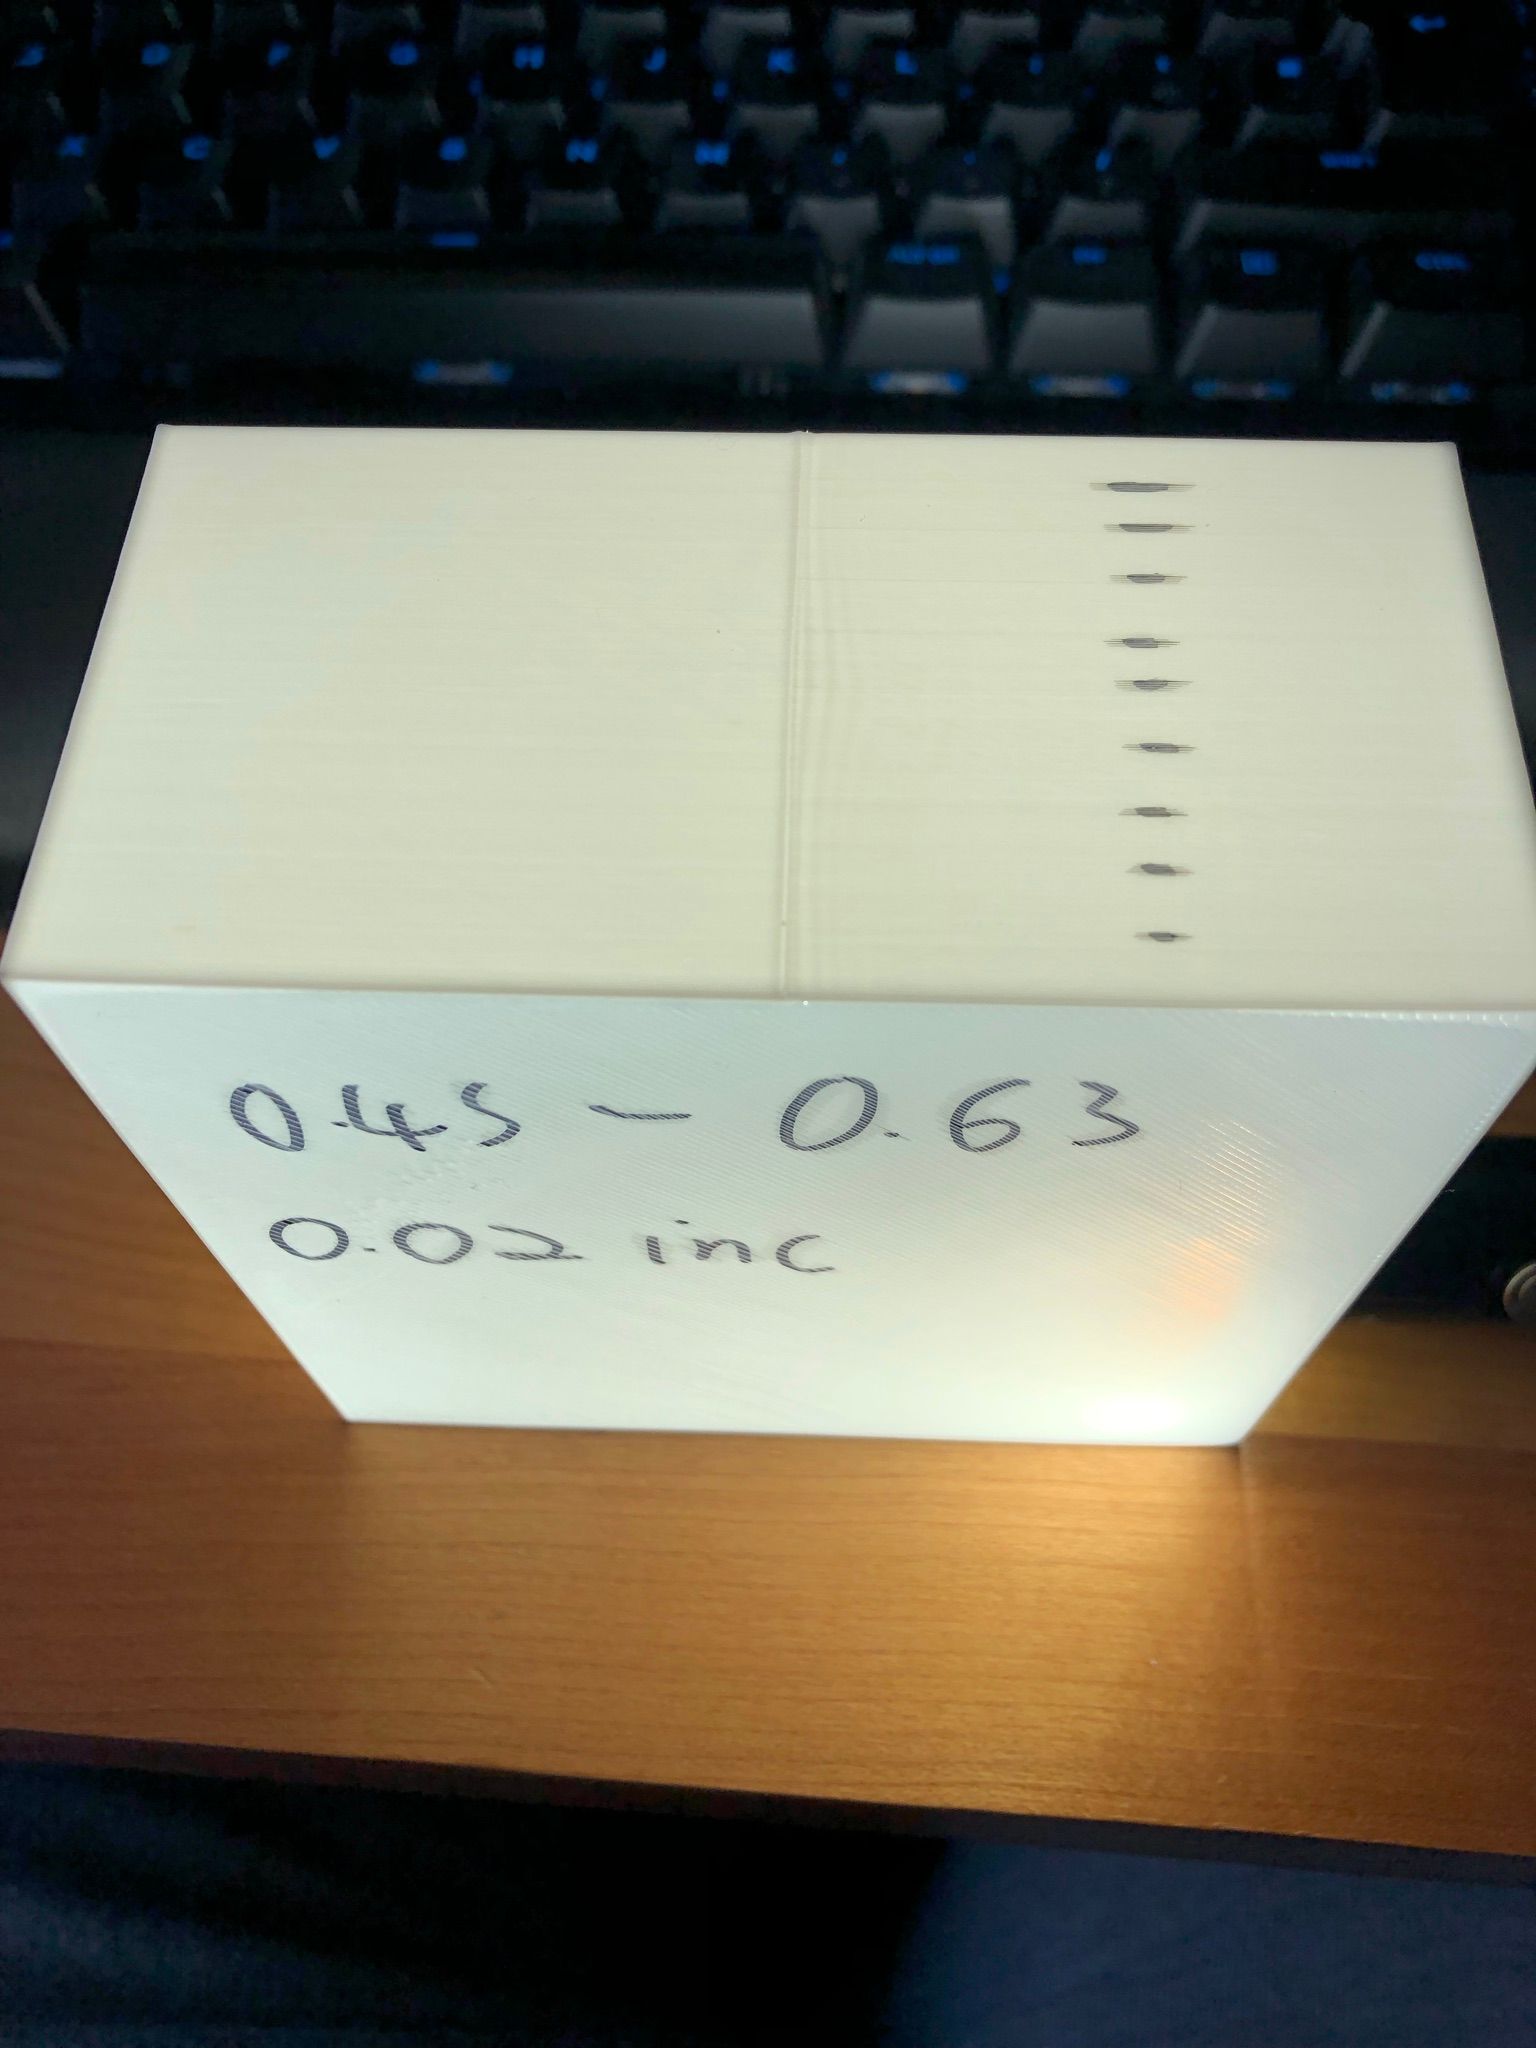
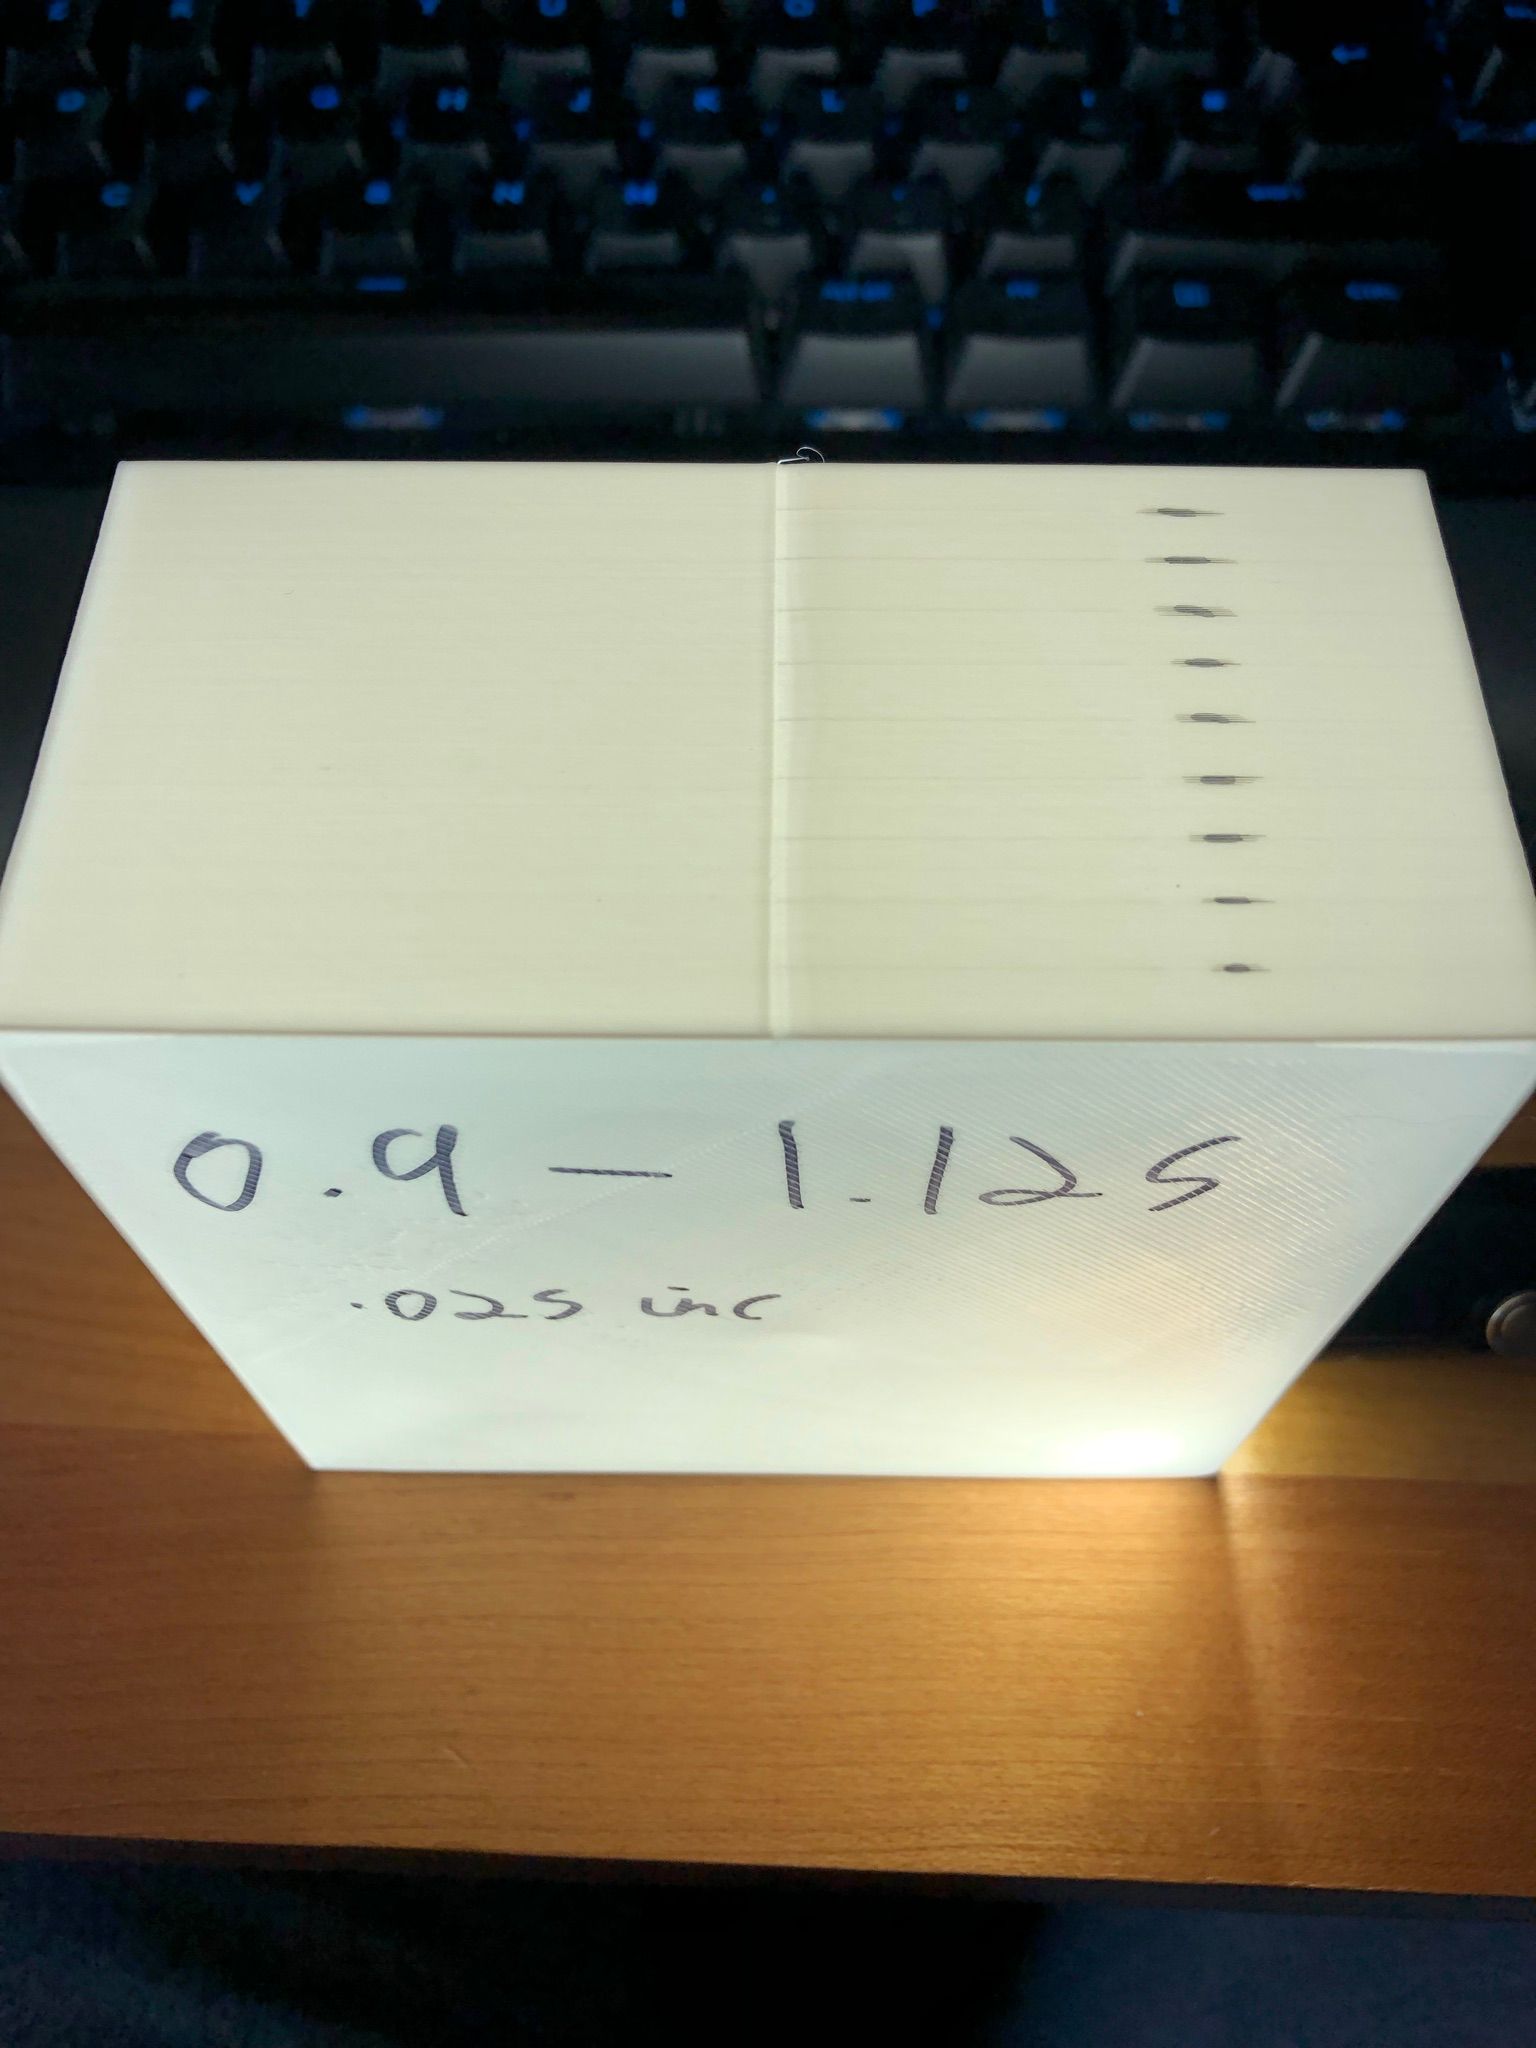
Looked like there was a sweet spot between 0.9 and 1.1 but my print to try and find it didn't really have a huge range of differences.
I found a forum thread here that talks about LOWERING the jerk on the travel axis.
Worth a shot, so i have halved my XYZ (delta) jerk speed from 900 to 450 and did another box test
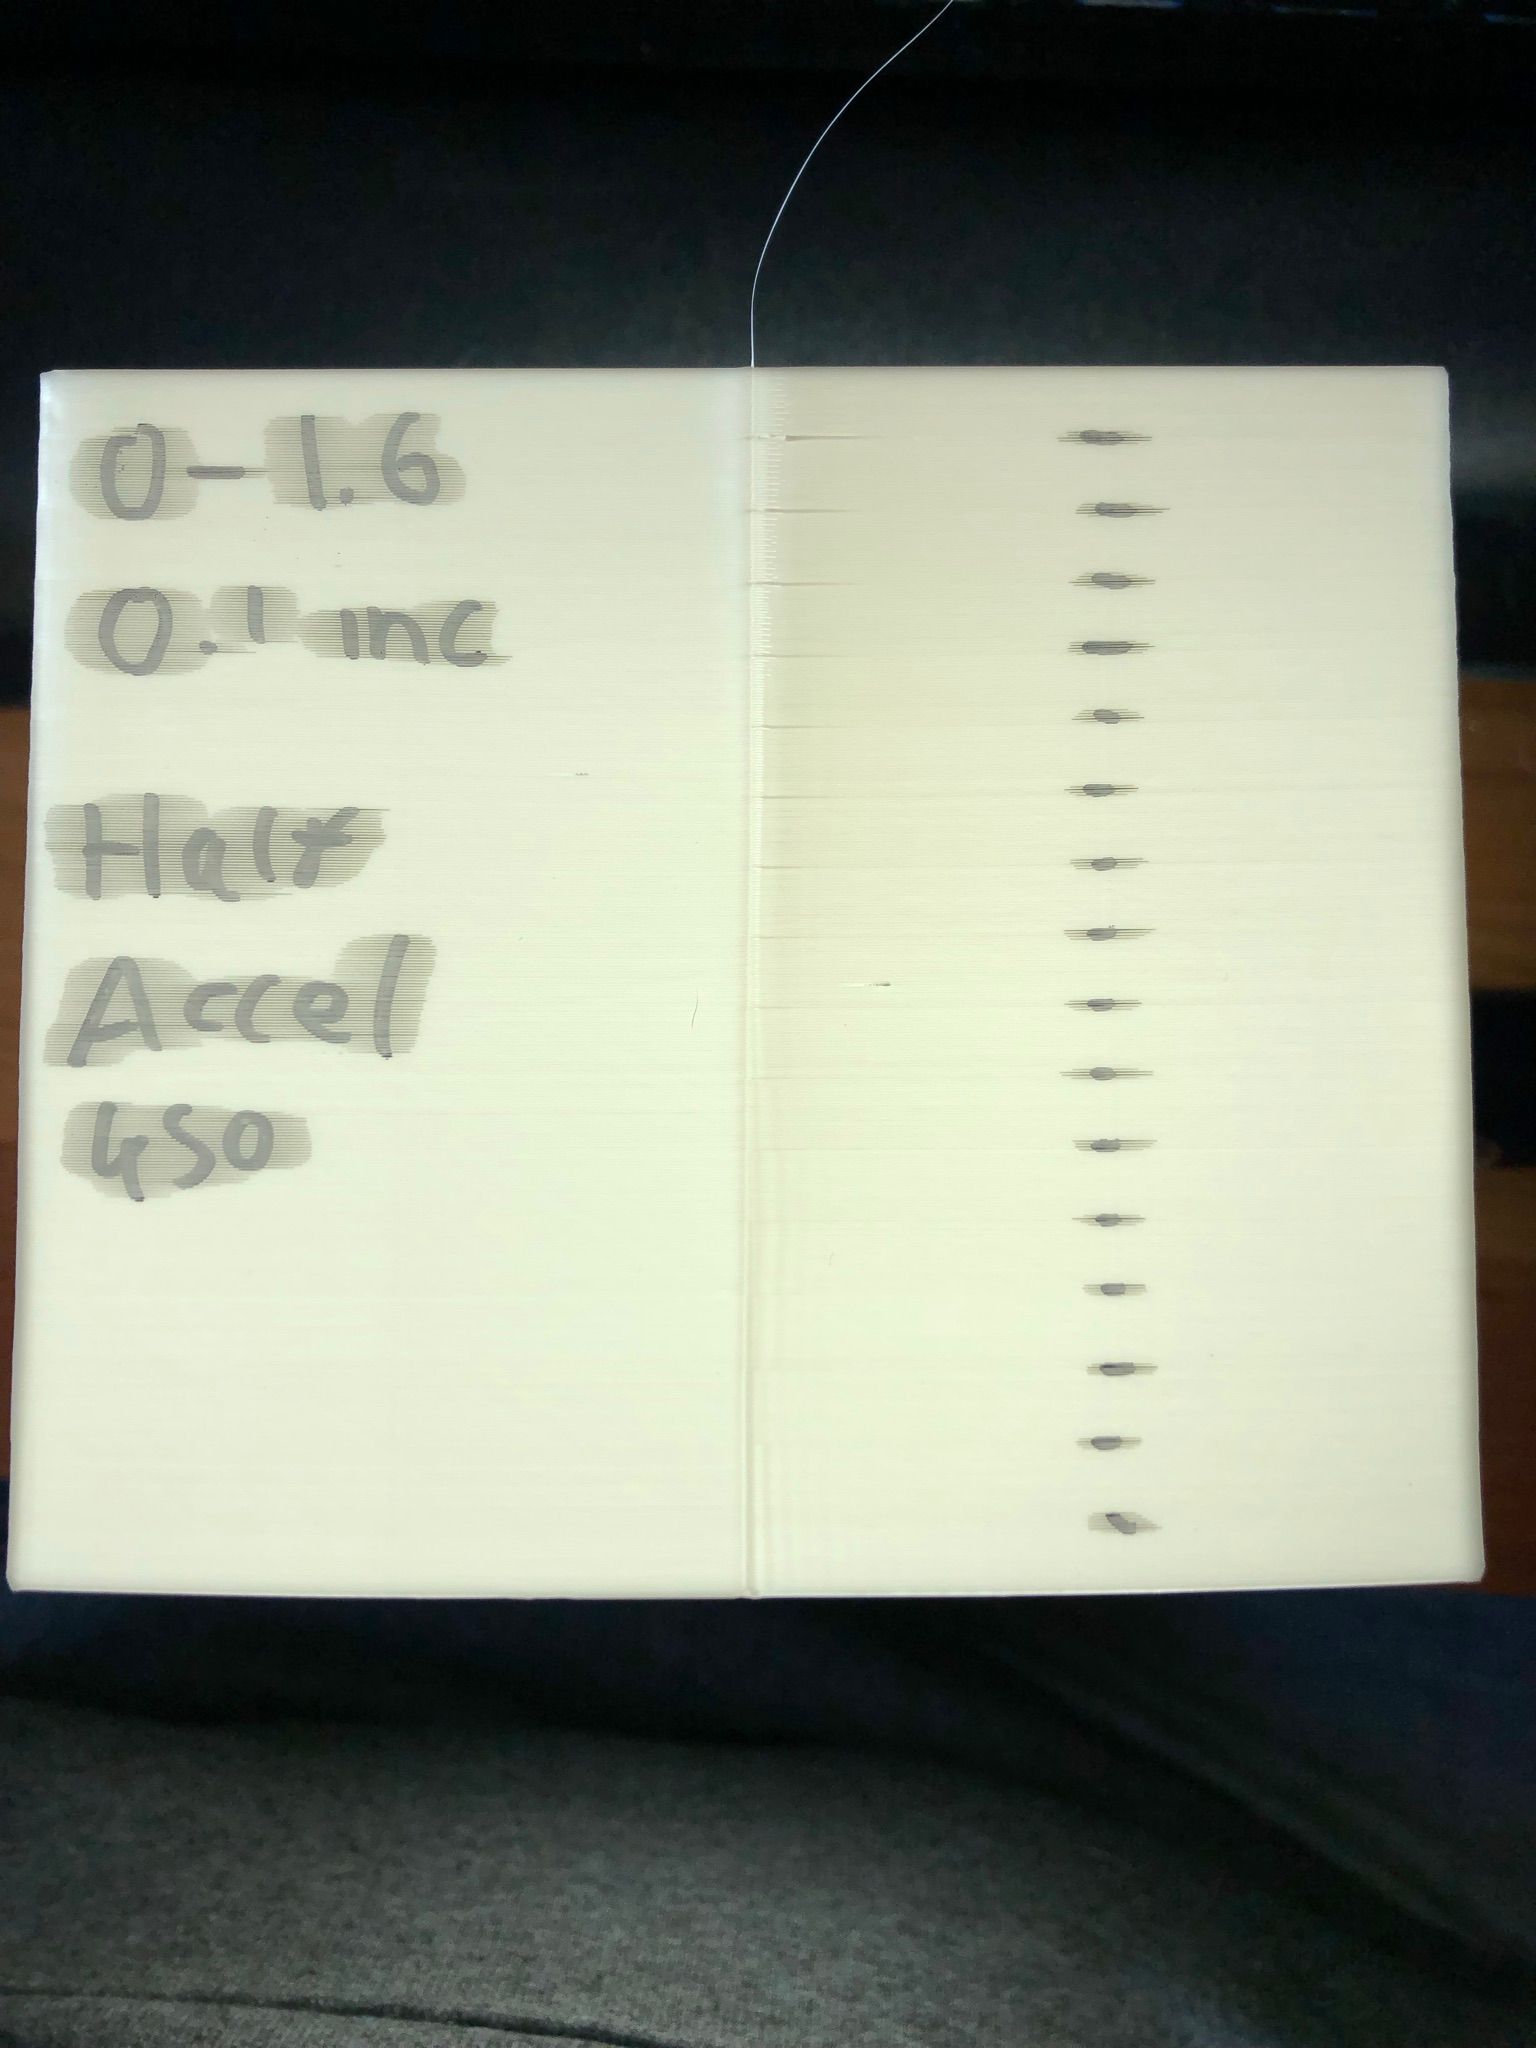
This looks quite encouraging somewhere between 0.3 - 0.6
On all of the pictures, the black mark shows when the PA value was changed.
I am currently running the same test but with a 30mm cylinder to see if they compare to how the box prints or if it is different.
My bowden tubes are tight in the clips. I haven't yet checked about the backlash but I think in the tests I have done that could have been canceled out. Will check anyway once i stop the next print.
M201 X5000 Y5000 Z5000 E10000		; Set accelerations (mm/s^2) Used to be 1500
M203 X18000 Y18000 Z18000 E20000	; Set maximum speeds (mm/min)
M566 X900 Y900 Z900 E1000 P1		; Set maximum instantaneous speed changes (mm/min)

M207 S3.0 F5000 T3600 Z0
My current settings. The last picture is using 450 for XYZ jerk values.