New heated enclosure printer
-
I have all the hardware and mechanicals here and am starting the teardown of the temp chamber. The heater/fans were a cool design with a motor using an extended shaft to pass though the insulated wall. there was a small fan on the motor side to cool it and on the hot side there were two heater elements at the intake of the squirrel cage rotor. It is a pretty clean design and could be easily DIY duplicated with a simple motor shaft and a couple of elements from a heat gun.

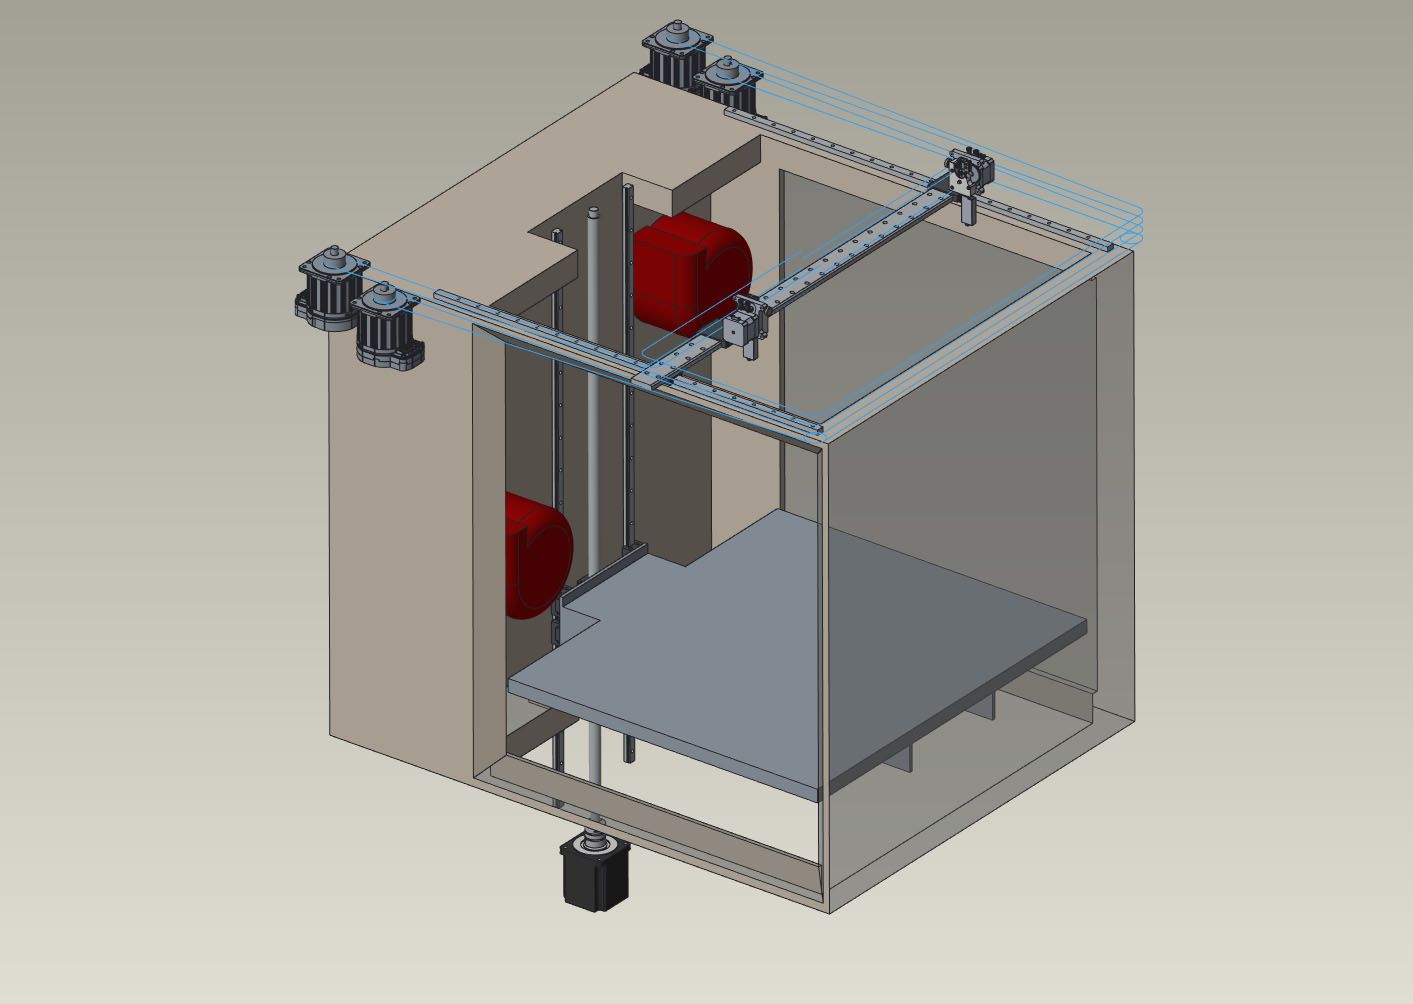
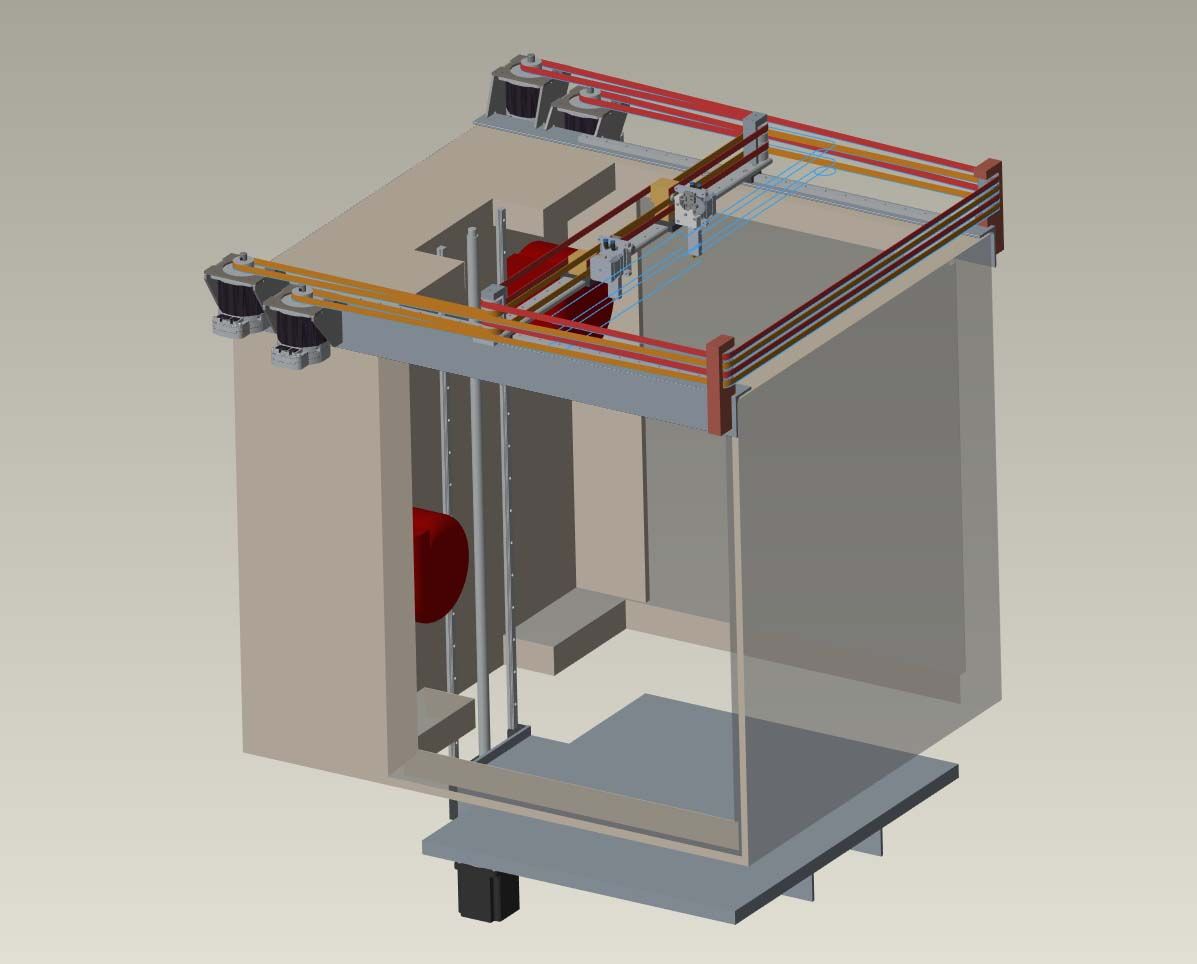
Starting on the mechanical details next. Did a bunch of internet browsing so not to reinvent the wheel and ended up with something similar to the a stacked version of the Digital Dentist's recommendations, which are pretty damn good.

The overall rail and carriage layout is done, now to draw up a few brackets and mounting plates to ensure it is all easily align-able and rigid when tightened down. All of the mechanicals are outside of the heated chamber to keep their thermal expansion minimized. The carriage and table support inside the chamber will be made from high temp carbon fiber sheet to minimize thermal growth of the moving mechanism and the aluminum/Keenovo heated build plate assembly will float on a support system to allow it to freely expand without binding. CF has a low CTE and a really high modulus so the cantilever carriage should be plenty rigid and very stable.
-
@jens55 I run a custom built chilled liquid cooled core-xy machine in a heated chamber with a BL-touch in 100-150C all the time with no issues. I recently upgraded to a 6mm ceramic glass bed from borosilicate, and the ceramic glass has a near perfect uniformity I don’t bother with the mesh bed leveling anymore. I started using feeler gauges between the nozzle and glass on the 4 bed adjusters and it’s been incredibly consistent first layers/line widths. So depending on how you setup your machine it might now be worth the 40 dollars for a fancy end stop.
-
@jps0284 Sounds like an interesting machine. What material do you print with it? Since bed levelling and a BL are pretty simple and already part of the design it is not a hassle to include.
What exactly does a fancy end stop entail?
-
@coseng @coseng I mostly print Polycarbonate, CFPC, High temp CF nylon, CF PEI. Im constantly tweaking my machine and after I switched from dual z lead screws to 1204 ball screws with more ridged build plate and a ceramic glass bed, once I leveled it with the feeler gauges the bl touch really doesn't offer much other than act as a fancy end stop. It also seemed like there was some
Inconsistencies with the measurement read outs at times, when I relied on the accuracy of the bl touch is when I seemed to have more time diagnosing layer height issues than doing it manually. -
@jps0284 BL Touch do say that it is only good to around 65C, so I am not surprised you were having measurement inconsistency at higher temps.
-
@3dpmicro Thanks for the info, Centro was the low quote from a few places for the bellows and now is on order.
-
Making some progress with the build. It is all stripped down, the lower section is newly insulated, and the top section has the pass-through hole in the bottom cut. That hole makes it one big chamber for almost 1m of Z travel, 0.68m and 0.72m for XY.

We'll flip it and cut the same hole in the top which the motion subassembly will drop down into and be closed off with a y-axis bellows.

Each motor pair/y axis rail/belt pulley assembly base will be a rigid steel 2x3" angle that will be milled flat and mounted along the top of the housing. Each of these will be carefully aligned to keep everything parallel. The Z axis stage will be a separate assembly that bolts to the back wall of the chamber.
-
@coseng looking good. Not sure what chamber temp you're shooting for but consider mineral wool board if the fiberglass is insufficient. In my testing A 1" thick piece with foil backing reduced 210c on the foil side to 55c on the outside. Consider also that thermal expansion will have an effect on your motion system. May require realignment once it is up to temp.
Can you give us an idea on the cost of the bellows for the sizes you ordered? -
@3dpmicro This is for ABS so I am not expecting more than 100C chamber temp. The lower section insulation is 2" thick and should be fine. All the motion components are isolated from the chamber to minimize their growth but all alignment will be done at operating temp. The z carriage and bed support will be made from high temp CF sheet to minimize thermal growth/shifting.
2 pieces of a 29" wide x 29" stroke (1" compressed) bellows good to 100C was $300.
-
Nice. I'm using a Funmat HT right now at work that can go up to 90c chamber. ABS is sweet at 70c
-
@3dpmicro said in New heated enclosure printer:
ABS is sweet at 70c
Nice to hear. I've got a pretty decent sum in this so far and am really hoping it is not a time/money pit!
-
Still making progress, the heated chamber is cut, lined, and just about done.

The next step is laying out the electronics and wiring in the side area. Here are the main connections:
75VDC/1200W power supply for ClearPath XYUV servo power
24VDC/480W power supply for Duet 6HC powerDuet 6HC mainboard
-24VDC power in
-CAN to (2) 1LC toolboards
-OUT_1 to SSR for bed heater
-OUT_2 to SSR for chamber heater/fans
-OUT_3 to E3D water cooler 12V fan
-OUT_4 to E3D water cooler 12V pump
-OUT_5 to internal chamber recirculation 12V fan
-IO_01234 to XYUVZ endstops
-IO_5 to power 5V of EBOB for step/direction output
-TEMP_0 to PT1000 sensor for heated bed
-TEMP_1 to two PT1000 sensors in series for heated enclosure
-DIY soldered connections to EBOB for step/direction
-PanelDue 7i.1LC XY head
-CAN line
-24VDC power in
-filament stepper motor
-filament sensor
-PT1000 sensor
-80W 24VDC heater
-BLTouch1LC UV head
-CAN line
-24VDC power in
-filament stepper motor
-filament sensor
-PT1000 sensor
-80W 24VDC heaterI think that covers it all.
The servos and steppers are outside of the heated chamber so should not have overheating issues but if so, I can use the 1LC fan output for a filament stepper fan and the servos have fan mounts on the heatsink that can be driven from the power supply.
The 5/16" ground aluminum build plate and Keenovo 3000W 220VAC heater with silicone foam insulation arrived and will be put aside until the Z mechanism is ready next week.

Final build volume is 700x644x1020.
The next plans are to install the electronics, power supplies, etc. and initial wiring in the side compartment. Then bolt the Z axis in, connect it, and do a rough commission and alignment, then bolt the XYUV in and do the same. Then dig in for some extended tweaking sessions!
-
OK, one small revision. I just ordered a Duet Tool Distribution Board to handle connecting the 24VDC and CAN lines to the two 1LC boards on the printheads. That makes wiring a little cleaner and allows for some easy future expansion.
-
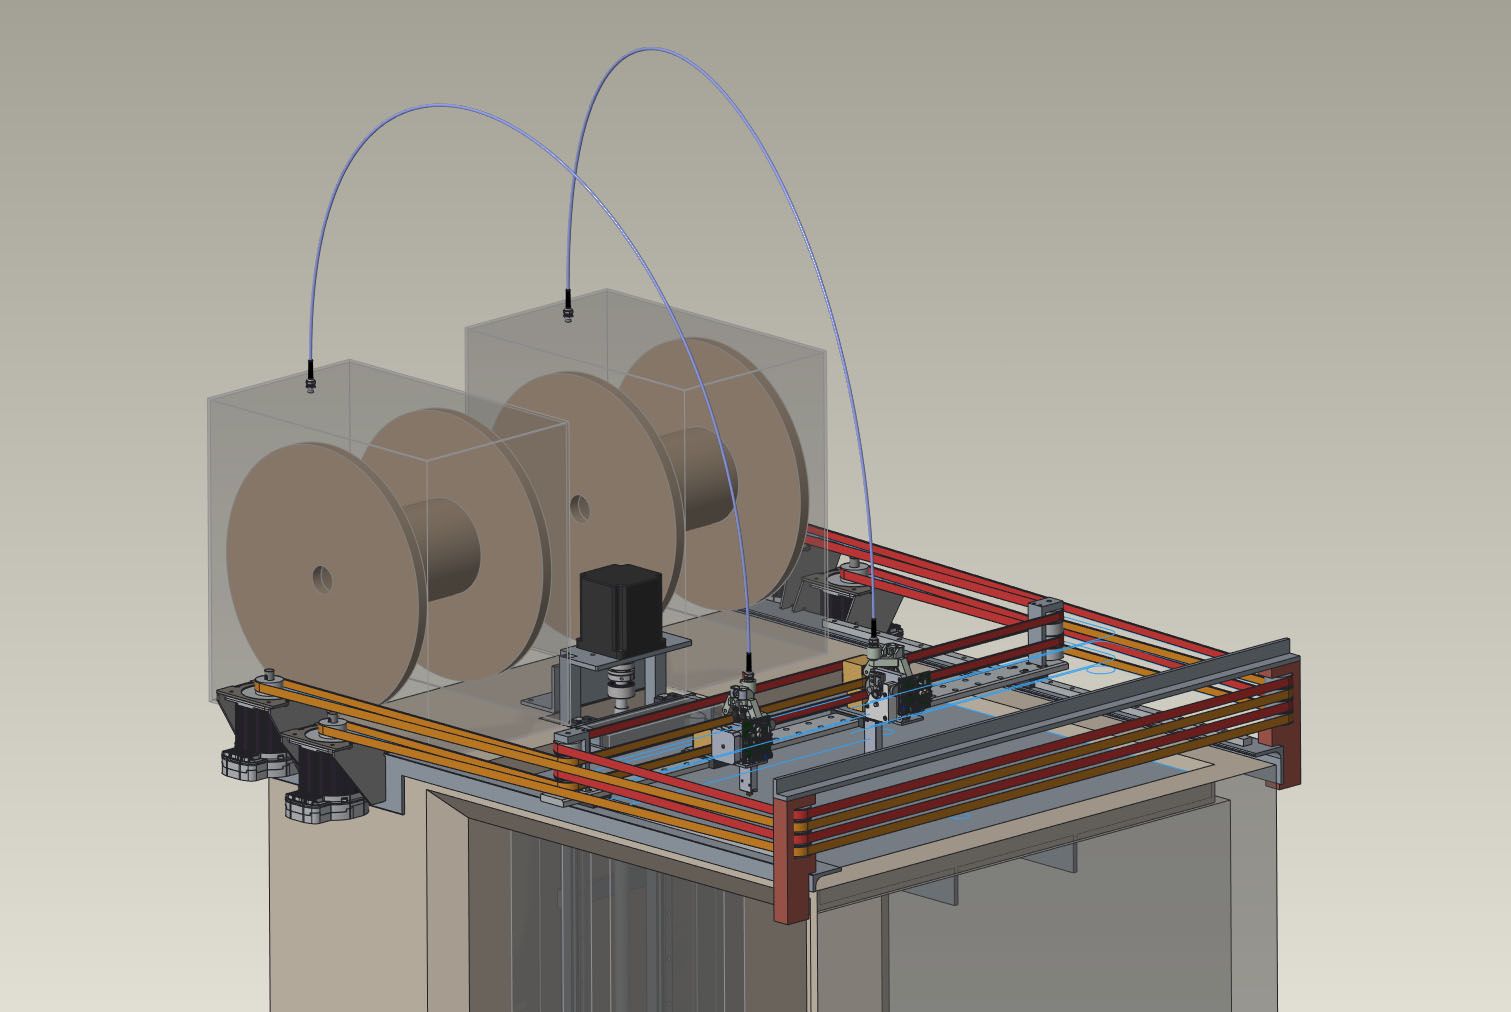
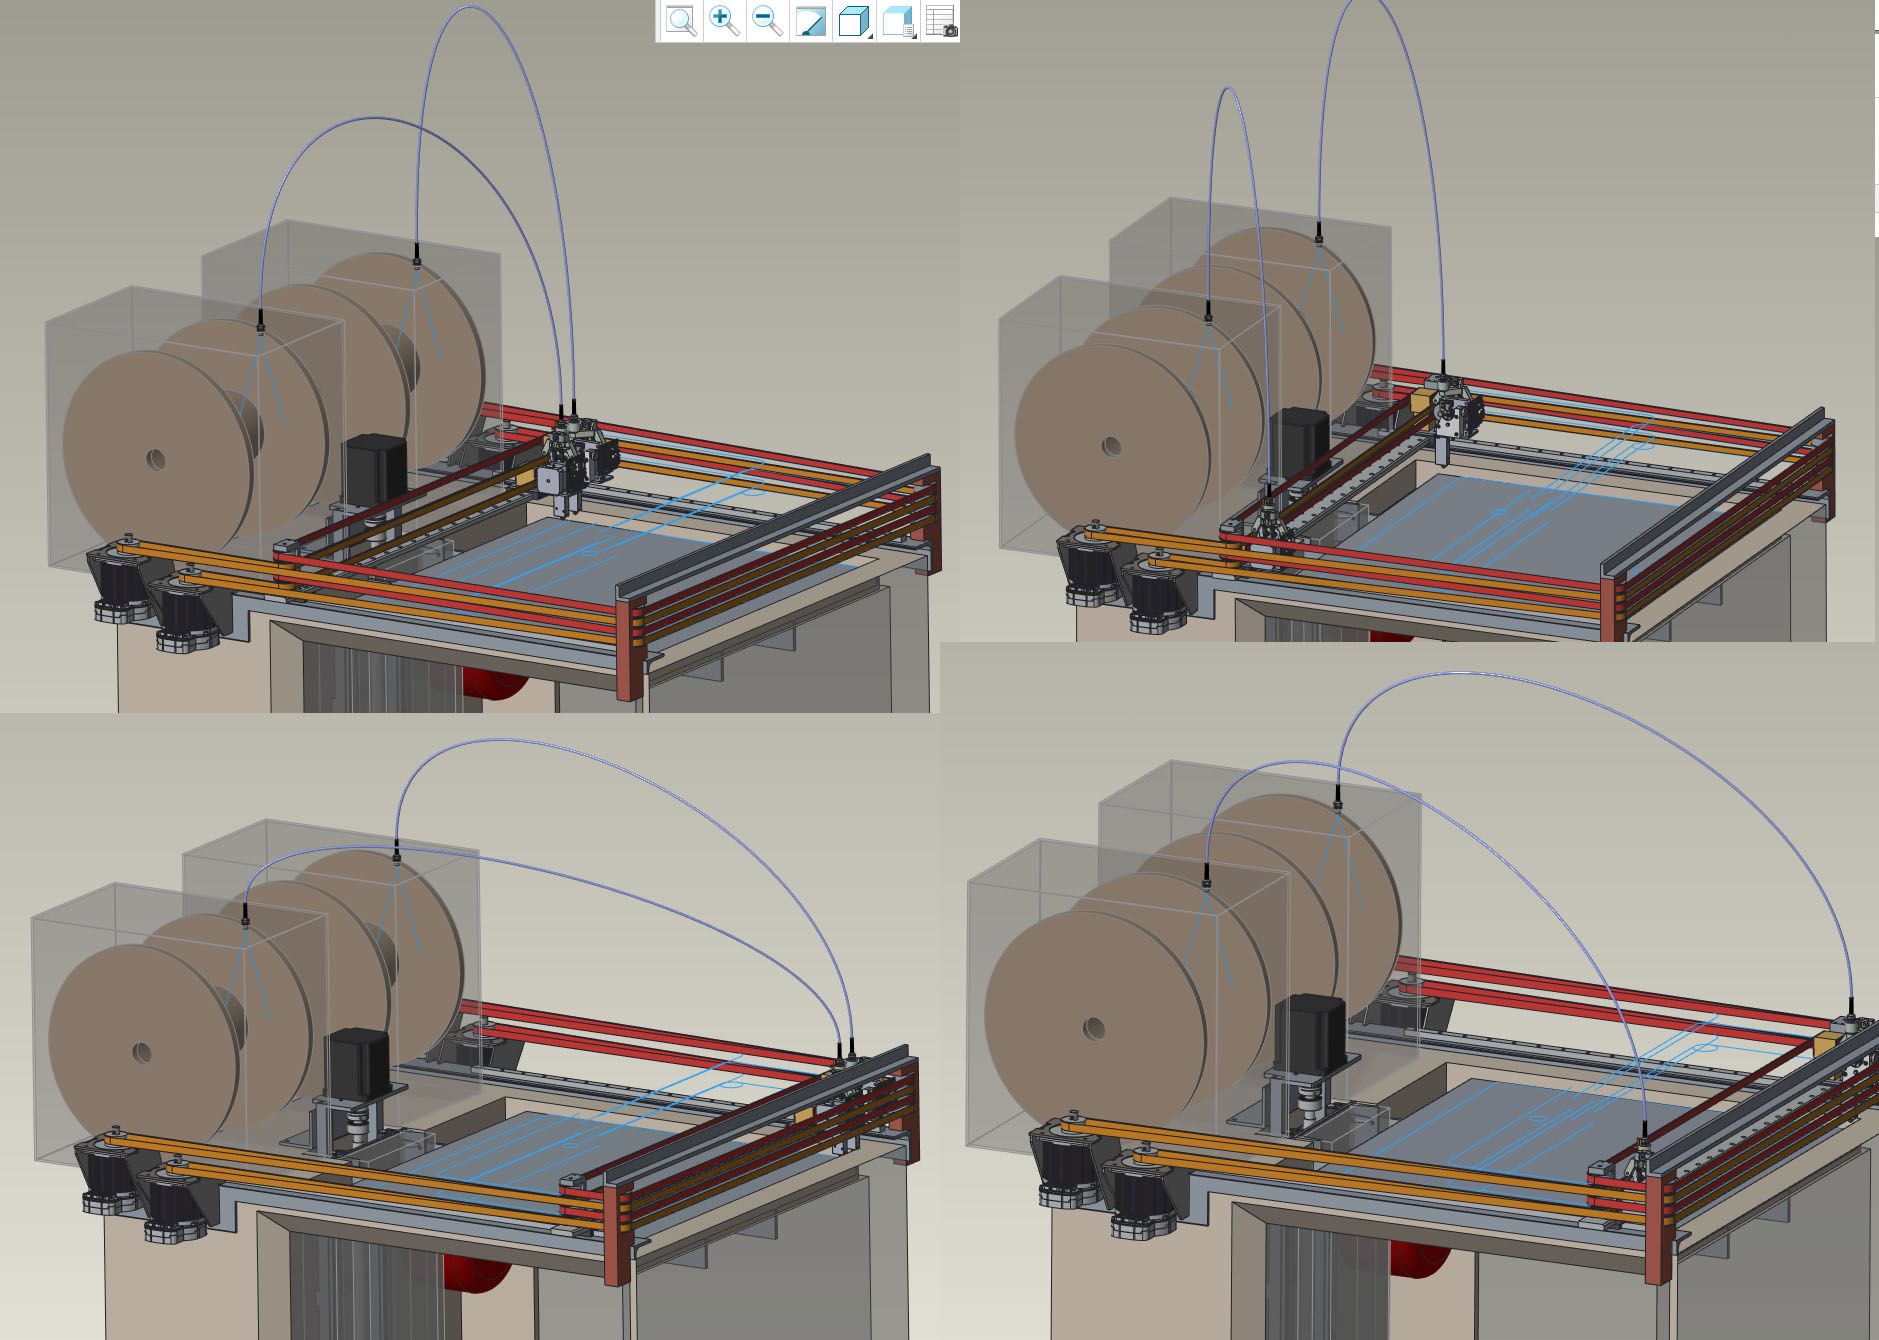
Doing a little detail work and came across a potential problem. Its a big printer so I wanted to use a big spool, 5 or 10kg per extruder. The spools would be on top of the printer in a sealed box riding on ball bearings with a teflon tube and a (not shown in CAD) spring 'skyhook' to keep the filaments, water cooler lines, and wiring somewhat tidy and controlled.

The filament direct drive is a E3D Titan Aqua with the standard stepper motor. A 10kg spool is a lot of mass to turn, and with the 50" or so of teflon tube will be a bit of friction in there. I'm thinking the filament drive motor may be hard pressed to keep up. There are two larger filament steppers available from E3D but I only have the 1.1A stepper driver on the 1LC toolboards to drive it. The 1LC is being fed with 24VDC.
Any thoughts on if I need to do something else here to prevent filament starvation problems?
-
@coseng Put the spools on ball bearing rollers (in or out of a box) mounted above the extruders, feeding straight down into them - no Teflon tubing and minimal pull strength required.
-
@mrehorstdmd I was trying to avoid making a high platform to hold 50-60lbs or so but it may be the best overall solution.
-
@coseng You're worried about the extruder pulling the filament, but you also have to worry about the XY motors. They'll be jerking at the spool as they move the extruder quickly around the bed. It's best to keep everything as close to the center of the bed and as short a path as possible, that way the jerking on the spool is minimized.
-
@mrehorstdmd With a teflon tube fixed at both ends (fixed length) how would the XY motors be tugging on the spools for anything more than drawing filament out? Without one there will definitely be tugging/slack which is possibly a reason not to do the top mount.
-
@coseng The extruder only pulls filament off the spool at a few mm/sec. Say the X axis is 2m long and the spool is at a fixed location near one end of the X axis. Now let's say the extruder is printing a layer of a part near the end of the X axis where the spool is located. When it finishes that layer on that part it has to travel to the other end of the X axis to print a layer on another part. Travel speed is set to 200 mm/sec. Now the extruder carriage motion is going to try to pull 2m of filament off the spool at 200 mm/sec. The XY motors are going to have to be able to accelerate the extruder carriage against the rotational inertia of the large filament spool (plus friction in the teflon tube). If they can't, you may get skipped steps.
Slicers generally place parts to be printed at the center of the bed, which means that most of the time the extruder carriage will be orbiting the bed center. That means that it's best to try to keep the spool over the center of the bed because it results in the shortest path between the spool and the extruder carriage, most of the time. If you must use a teflon tube to guide the filament (not sure why you would need to) to the extruder carriage, positioning the spool at the center of the bed will allow the shortest teflon tube to be used (assuming you feed the filament straight down to the extruder.
-
@mrehorstdmd said in New heated enclosure printer:
Now the extruder carriage motion is going to try to pull 2m of filament off the spool at 200 mm/sec
Why?
If you consider a situation where the printhead is not printing (filament speed at stepper is 0), the carriage is moving from close to the spool to an extreme position, and the teflon tube is fixed at the spool box and the printhead, how can any filament be pulled off the spool? The filament already occupies the full length of the teflon tube, which does not change length. This is the reason to use a feed tube for the filament. The teflon tube changes in shape from a tall arch when the printhead is near the spool and a squat arch when it is far away, but the arc length of the arch remains the same so all the spool ever sees is the filament feed requirement.

Adding whatever filament speed is needed for printing does not change the situation.If you have a spool above the printhead feeding down into the center of travels and the feed is a bare filament from the exit of the spool to the printhead, this exposed length of filament does change (pythagorean theorem) as the printhead moves and this would contribute directly to filament tension, causing spool rotation when the distance increases and spool slack when it decreases. This may not make much of a difference on smaller spools, but I think with a 10kg spool it would be a problem.