Bug? In Retraction and Movement Junction
-
Have you tried jerk policy 1 yet? (M566 P1)
The default jerk policy is 0, which replicates the behaviour of earlier versions of RRF (jerk is only applied between two printing moves, or between two travel moves, and only if they both involve XY movement or neither does). Changing the jerk policy to 1 allows jerk to be applied between any pair of moves.
Can you share an example config file and retraction settings?
-
@Phaedrux Not seen this one, will have to look in to it. Thank you.
-
The printer in this test is a customized version of a Prusa Bear MK3
- Independent Z axis motors
- Bondtech Direct Drive
- Genuine V6
- Ultistik Flexplate
- 10mm Rods on Y axis
- Pinda Probe (however I have not set up temp compensation yet
 )
) - Duet2Wifi
Duet Web Control 3.1.1
RepRapFirmware for Duet 2 WiFi/Ethernet 3.1.1 (2020-05-19b2)
Duet WiFi Server Version: 1.23
*Note: This is literally my best printing RRF machine, however prints on it are useless for final product/use so I have to print anything I plan to actually use on my Prusa mini
Requested files:
config.g
test gcodeImage: Test print of the gcode.
Filament: Fillamentum Vertigo Grey (unfortunately my slicing settings are slightly off for this brand of PLA but shows a more clear example of the issue)
This issue is less apparent but still there with the generic pla I was printing with yesterday with the same settings.
The test gcode prints 2 of these side by side at once, with no zhop, no wipe/coast and with pressure advance.

Image: Machine in question

-
@jatmn Here's your problem... Your jerk settings are very low!
M205 X3 Y3 Z2 E3 ;set max instantaneous speed change in mm/secRemember that RRF uses mm/min not mm/s.You'll be wanting values in the range of 500mm/min (particularly for your extruder!). FYI, I run my BMG with an underpowered pancake stepper at 750mm/min jerk with no problems.With it so low atm, your printer is having to wait at the end of the line for the extruder to actually carry out the retract move. If you put on somepressure advance too (I don't see it in your config though), you'll also get the same problem where the extruder settings limit your carriage speeds on printing (coordinated) moves
Edit: Just realised your using M205 which is in mm/s (I usually use M566 which is in mm/min...). It's still a bit low though
-
Those values are in mm/sec not mm/min im not using the default M566 version your referring to.
https://duet3d.dozuki.com/Wiki/Gcode?revisionid=HEAD#Section_M205_Set_max_instantaneous_speed_change_in_mm_sec -
Regardless of mm/sec or mm/min they are still very low.
For example my typical jerk values are x900 y900 z60 e3000 in mm/min on a basic corexy
-
Made some tests by feedback noted so far.
Top down
#1 Gcode Provided with no changes
#2 Gcode Provided with firmware change M566 P1
#3 Gcode Provided with firmware changes M566 P1 & I changed M205 ... E50No notable difference in the issue.

-
Maybe post your config-override.g as well for completeness? Since you do run an M501 at the end...
-
Also do you get the same results with pressure advance turned off? I see M572 D0 S0.05 in the cylinder gcode.
Can you send me the stl also? I want to see how your gcode, vs my gcode varies.
-
config-override.g as requested
; config-override.g file generated in response to M500 at 2020-06-08 22:33
; This is a system-generated file - do not edit
; Heater model parameters
M307 H0 A114.3 C401.1 D2.6 S1.00 V23.8 B0
M307 H1 A571.4 C175.6 D5.1 S0.25 V24.1 B0
; Workplace coordinates
G10 L2 P1 X0.00 Y0.00 Z0.00
G10 L2 P2 X0.00 Y0.00 Z0.00
G10 L2 P3 X0.00 Y0.00 Z0.00
G10 L2 P4 X0.00 Y0.00 Z0.00
G10 L2 P5 X0.00 Y0.00 Z0.00
G10 L2 P6 X0.00 Y0.00 Z0.00
G10 L2 P7 X0.00 Y0.00 Z0.00
G10 L2 P8 X0.00 Y0.00 Z0.00
G10 L2 P9 X0.00 Y0.00 Z0.00
Pressure advance turned off as requested
same first 3 as before
#4 Gcode as Provided with firmware changes M566 P1 & M205 ... E50 change as well as setting pressure advance to 0.0
Made the stop point worse, as well as started to cause issues for the start point.

Requested STL model
STL Model
However this request actually makes zero sense, it does not matter what my slicer is generating, I already clearly stated I can 100% reproduce the issue in nearly any slicer.
Also as mentioned, I do not see this issue with Marlin-powered machines with similar configurations or hardware. -
Did another test because people appear to be fixed on the fact that my z axis speeds are too low.
#1 is the same as the included gcode in the initial request.
#2 is with the following changes as well as pressure advance turned off in the gcode.M566 P1 M201 X800.00 Y800.00 Z2000.00 E5500.00 ;Z changed from Z200 to Z2000 M203 X12000.00 Y12000.00 Z7500.00 E5000.00 ;Z changed from Z750 to Z7500 M205 X3 Y3 Z3 E50 ;Z changed from Z2 to Z3 to match XY
This results more or less in the same print I did prior with pressure advance turned off.
It did however make my z axis quite fast and make some really funny winey soundsYou might say that it appears to reduce alot of the banding along the z axis however this appears to mostly be from the rods getting cleaned up and relubricated from the repeated test prints today. This machine has sat mostly abandoned for a few weeks until recently due to the issues.
-
Hi, I finally was able to look at your config on my laptop rather than phone.
Can you try these settings on that cartesian machine?
M566 X900 Y900 Z120 E3000               				; set maximum instantaneous speed changes (mm/min)
M566 P1                                            ; Set jerk policy to mimic Marlin and uses jerk between all moves.
M203 X12000 Y12000 Z600 E6000          				; set maximum speeds (mm/min)
M201 X4000 Y4000 Z300 E3000             				; set accelerations (mm/s^2)
M204 P800 T2500								   ; set print and travel accel
M572 D0 S0.035 ; PRESSURE ADVANCE
M207 S1 R0.0 F3000 T1500 Z0.0 ; firmware retraction
Also can you make sure your motors are set to somewhere in the range of 60-85% of their rated max?
I'm not super familiar with idea maker, but if it has RepRapfirmware gcode flavour, make sure you're using that.
Turn off any jerk or accel control in the slicer if present.
Turn off any coasting or wipe.
Turn on retract on layer change.
Inner perimeter first, outer perimeter second, then infill.
Give firmware retraction a try if you aren't already. It makes tuning retraction during a print quite easy.Those are usually things that make for an obvious seam.
If that appears to improve it a bit, then try tuning pressure advance. https://duet3d.dozuki.com/Wiki/Pressure_advance#Section_Methods_of_finding_the_right_amount_of_pressure_advance
Oh and you might find these macros handy for tuning as well.
https://forum.duet3d.com/topic/6181/tuning-macros-menus-accel-jerk-retraction-pressure-advance -
@Phaedrux said in Bug? In Retraction and Movement Junction:
M566 X900 Y900 Z120 E3000 ; set maximum instantaneous speed changes (mm/min) M566 P1 ; Set jerk policy to mimic Marlin and uses jerk between all moves. M203 X12000 Y12000 Z600 E6000 ; set maximum speeds (mm/min) M201 X4000 Y4000 Z300 E3000 ; set accelerations (mm/s^2) M204 P800 T2500 ; set print and travel accel M572 D0 S0.035 ; PRESSURE ADVANCE M207 S1 R0.0 F3000 T1500 Z0.0 ; firmware retraction
Retuned the motors to 70% of rated max (double-checked the specs first of each motor) which resulted in a slightly higher value on most of them, extruder went down slightly.
Slicing - Ideamaker
- RRF is already set (they have this setting because the Raise3D E2 is RRF)
- Jerk & acceleration control has always been turned off but verified it off
- Coast & wipe has been off for the duration of this testing as requested earlier, confirmed this is still off.
- Retraction on layer change has always been on but verified it on
- Inner perimeter first, outer perimeter second, then infill is default settings in ideamaker but confirmed they were still set
- Set to Firmware retraction in machine settings in Ideamaker
- New Gcode
Image
#1 Original Gcode and firmware/slicer settings as outlined in the initial request of print examples.
#2 Changes as noted above as requested, with the new included gcode.
#3 Same as #2 but changed firmware value of M572 to 0.05 per original gcode to attempt a better start point

Observations
There does not appear to be a real meaningful change in this configuration.
The only real difference has somehow resulted in a now detuned start point that has resulted in it actually under extruded slightly now, which is why I ran an additional test with my old known "good" value for pressure advance which no longer appears to be accurate with these changes. I am guessing this is in relation to your set 1.5mm retraction where I was using 1.25mm or the possible slight speed differences in our retraction settings.Additional
Im not sure why everyone is still obsessed with Pressure Advanced Tuning.
As I have mentioned, I think a few times now.
In all my tests, yes it can significantly impact start points. However, it has little to no impact on the stop points.
My issue is STOP points not Start points.
In my past tuning, I have tested values from 0.0 to 2.0 in increments of 0.05 and in some ranges when I felt I was close to increments of 0.005
Yes, I have run literally 100's of prints on shapes like this little rod stl trying to tune this issue. It is nothing to do with the STL, I can download any stl from any website or any stl someone generates themselves I can reproduce this issue every single time in any slicer on any of my machines running RRF.
I am not kidding I have literally filled my trashcans many many times with these tiny prints, 25KG+ is a lot of these little buggers. -
@jatmn said in Bug? In Retraction and Movement Junction:
I am guessing this is in relation to your set 1.5mm retraction where I was using 1.25mm or the possible slight speed differences in our retraction settings.
Yes, it's 1mm of retraction but the speeds are likely different to yours. You'd have to tune that as well.
@jatmn said in Bug? In Retraction and Movement Junction:
However, it has little to no impact on the stop points.
I'm not sure why you think that. It would have an impact on both. Think about what it's doing. It's shifting the amount of extrusion forward or back in time. It's reducing the amount of extrusion before a stop.
Do you have an example print of the perfect seam you're aiming for? I would say the settings I gave you produced a bit nicer of a seam compared to the first one, but maybe that's just what I want to see and it's hard to tell from a photo. You've got it in hand, so if you think it's no better, I'll take your word for it. But if that's no good, what does perfection look like?
-
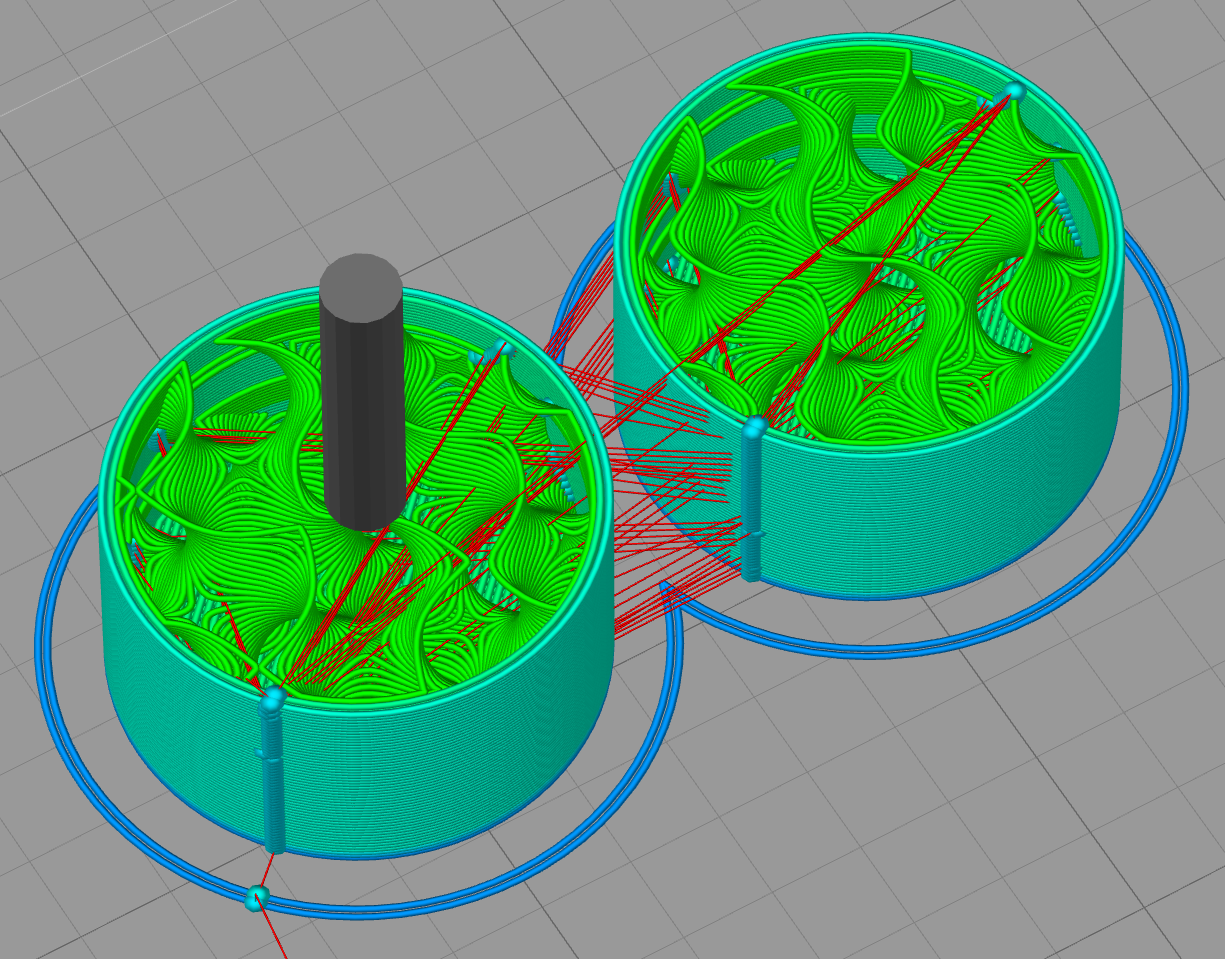
Whilst I wait for my prints to finish, I thought I'd stick this up. I opened up your gcode in simplify3d to see where the retraction points were:

You can see that you're retracting on both the inner and outer layers of the shell.
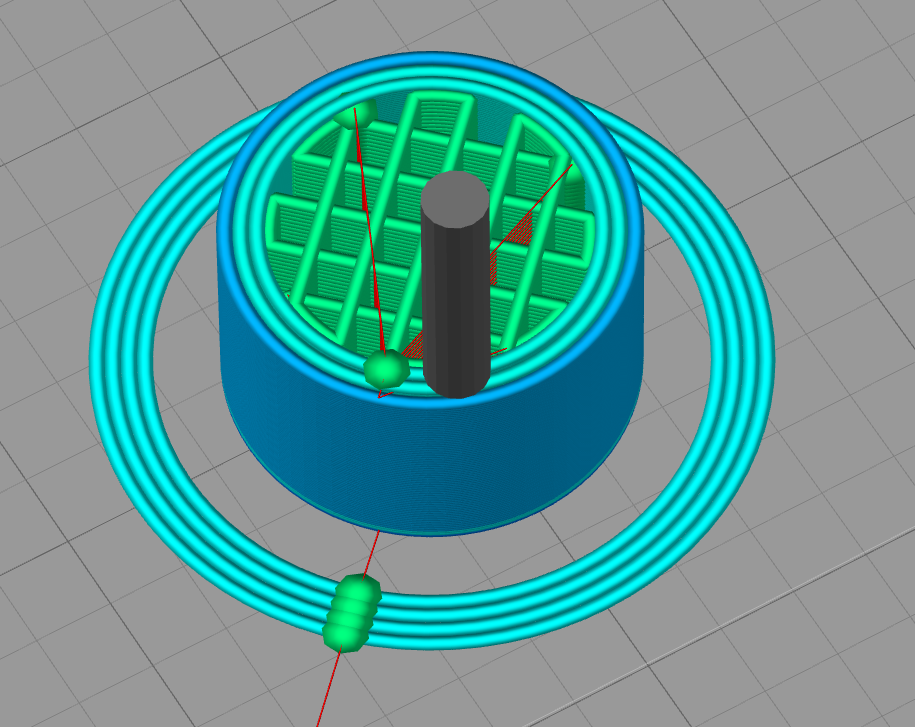
With my stock simplify3d settings a single print of your STL looks as follows:

Yes I'm doing three shells, but I'm only retracting at movements and layer changes (both turned on). There is no alignment of retractions.
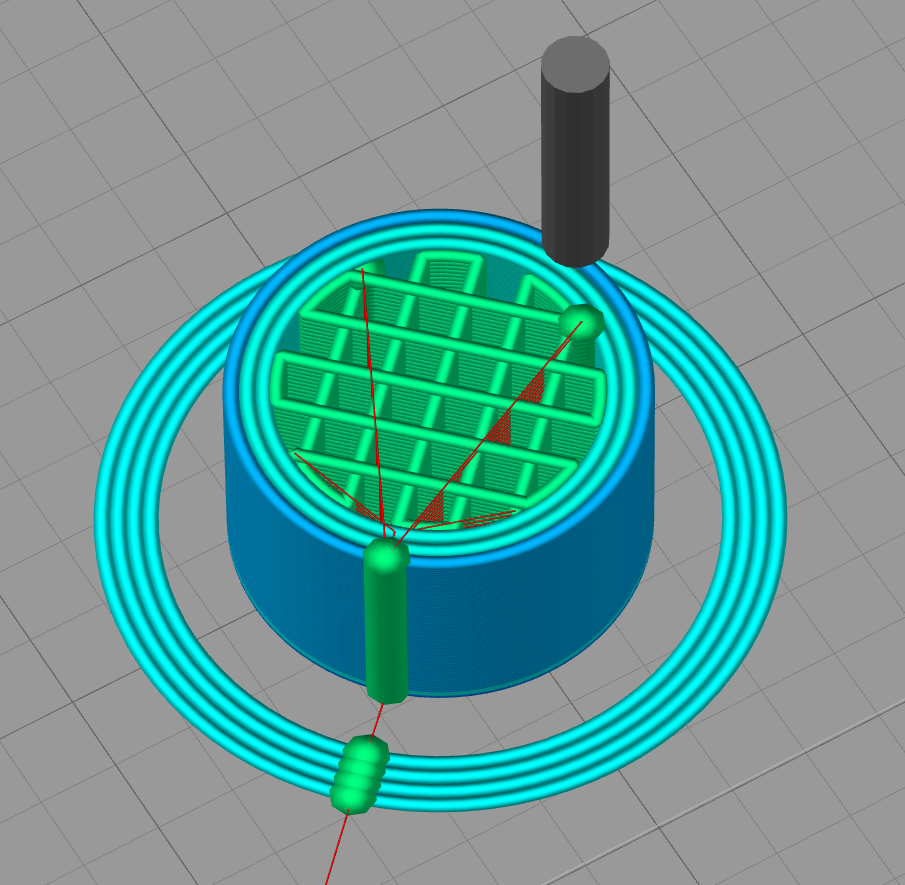
I'm currently printing one inside-out, and one outside-in print to see how they differ.
At least according to the slicer, for outside-in I'll see retractions on the outer shell of the print:

-
I scaled down the model so I could get the prints out a little faster. Cut it down to 10mm and was more than enough to show the behavior. Top print is outside-in, bottom print is inside-out. The results don't match what I would have anticipated from the slicer here. Both have visible seams. With inside-out looking marginally worse.

-
Anyone can view the configuration for this printer here:
https://github.com/opsensai/sk-go-duet-config/blob/master/config.g
-
@jatmn said in Bug? In Retraction and Movement Junction:
However, it has little to no impact on the stop points.
I'm not sure why you think that. It would have an impact on both. Think about what it's doing. It's shifting the amount of extrusion forward or back in time. It's reducing the amount of extrusion before a stop.
I know this is how it's supposed to work in theory. (or by design)
However literally every one of my tests proves otherwise, or at least the results of the print are proven otherwise.
This is significantly more clearly shown when you run a 1.75mm or 2.85mm Filament on a 1mm nozzle (Which I have noted to have done already)
With an excessively high Pressure Advance value you can cause a significantly delayed start point resulting in a measurable gap between the stop and start points. (on one test I had a 1.5mm gap between the points!)
However, with that, you can still have this over extrusion effect on the stop point even with those settings.
Sorry, I don't have a picture of that, it was a test I had done about 2-3months ago.As for the result I am looking for, something like this.
Top is Original #1 test from this thread
Bottom is a random print I just did on my Prusa mini

Here is a video that details the 2 prints above
Grey is off mentioned test machine, Red is Prusa mini
Video Link(also screw Akismet.com spam checker flagging my posts as spam when I edit them)
-
@davekeogh Those are some clean prints, but I do clearly see my issue on them.
-
@jatmn Just had a quick flick through this thread so I might have missed something. But in a recent post, you mentioned a 1mm nozzle. Is that what you are using? If so, that is the most likely cause of your issues. It most certainly explains why you don't need to use pressure advance because it is highly unlikely that there would be any build up of pressure that needs to be compansated for.
Have you tried a more "normal" size nozzle?
Another thing, have you ruled out all mechanical defects? Are all the gears and hobbed bolts secure on their shafts inside the extruder?