Motor noise and print quality
-
@sethipus No sarcasm at all, I was just wondering why the prices were so much higher than I paid, including German sales tax and hoping you hadn't been ripped off.
Amazon don't trade in Sweden yet, so things like Prime are unavailable to me. -
Yeah, Prime is kind of a game changer for those who can access it. The free shipping, combined with it being free 2-day shipping, is pretty awesome. It's not always hard to find a lower price somewhere else, but if that other place adds shipping charges, it's usually hard to find something that's overall cheaper to my door than Amazon. In my case I probably could have saved a couple dollars in exchange for waiting for 2-4 weeks for the steppers to arrive from China, versus satisfying the natural desire for immediate gratification by getting them in two days. Not a hard choice.
If it turns out the .9 degree versus 1.8 degree change in steppers, and the consequent reduction in the magnitude of any effects on print quality from the acceleration and deceleration of individual motor steps really does solve my "corrugated effect" surface artifacts, I will be overjoyed. This is a problem that's plagued many of my prints since I first built the D-bot. The texture is only very slightly tactile if you run your fingers over it. It's about 80% visual in that with shiny filaments like PETG, under the right lighting conditions, it just sticks out like a sore thumb and makes the surface look a lot less smooth than they really are.
-
@sethipus said in Motor noise and print quality:
This is a problem that's plagued many of my prints since I first built the D-bot.
it was driving me crazy. i did so many changes to my printer until i changed the motors.
on the plus side, the rest of the printer was also improved because of the tinkering i did along the way. -
OK, my 0.9 degree steppers arrived today, so I ran a test. I have some good news and some bad news.
I printed a small faceted vase with my original 1.8 degree steppers still installed. Swapped out the steppers for the new 0.9 degree ones, doubled my steps setting in the config.g, rebooted, then printed the exact same vase gcode file with the new 0.9 degree steppers running the show.
-
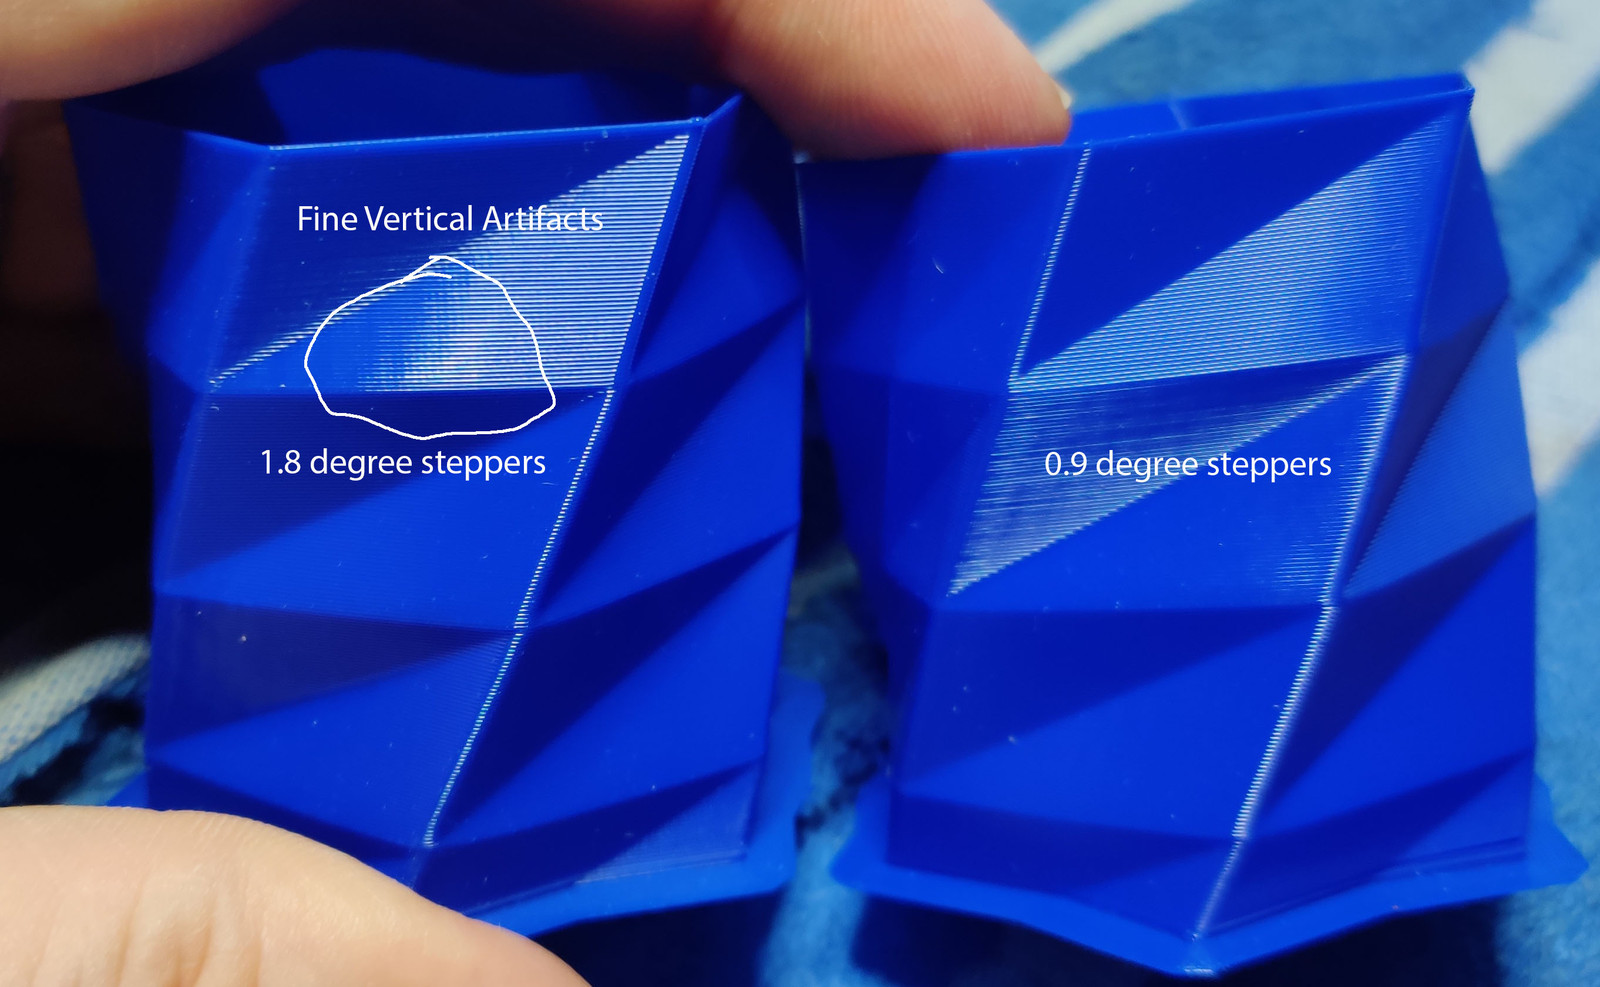
Good news: There does seem to be subtle improvement in the surface quality of the vase printed with the 0.9 degree stepper, with a much smaller and more subtle fine vertical artifact that I could see if I looked really closely at the surface of the print from the 1.8 degree steppers being essentially eliminated.
-
Bad news: the "corduroy effect" that I see on flat surfaces with reflected light on shiny filament printed structures did not go away, and that was more noticeable than the VFAs that did go away.
Here's a photo showing the fine VFAs on the left-side vase, which was printed with the 1.8 degree steppers in my X/Y motion system. There are moire and other effects with my phone camera that make it difficult to photograph these things, but those VFAs are not visible in person in the vase on the right.
Here is a photo from further back and with a slightly different lighting angle that shows the coarser and more visible "corduroy effect" that I see on lots of flat surfaces that I print.
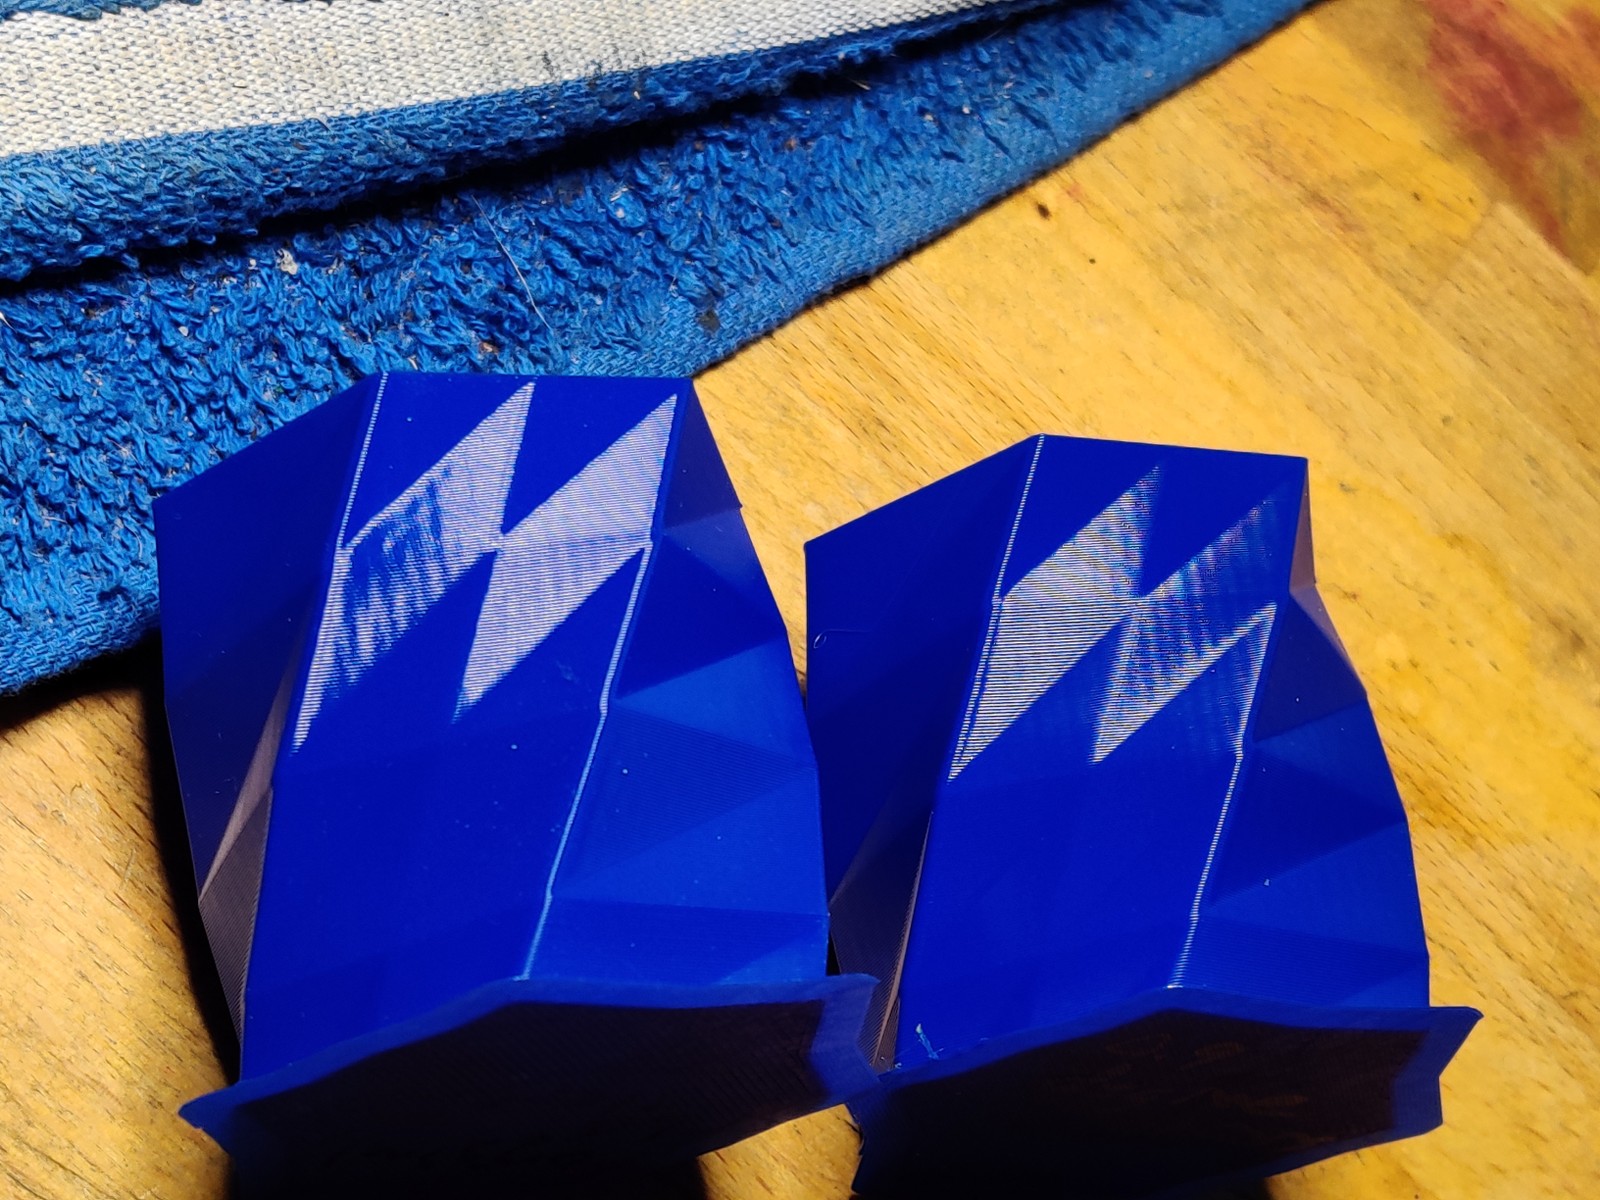
Bottom line is that my printed surfaces do look better at a more subtle level, and artifacts that I can in fact see in the 1.8 degree stepper prints do not show up with the 0.9 degree stepper print, but the more visible corduroy effect is still something which eludes me. Still not sure what that comes from.
I doubt it's a an extruder stepper issue from the extruder still using 1.8 degree steppers, since the BMG clone I'm now using is around a 4:1 reduction, plus microstepping, so it's hard to believe that with the fairly large "wavelength" of this periodic effect this is caused by ideosyncrasies with the stepper during single steps. In fact I think I can prove that it isn't: I'll print the vase using .3mm layers and again using .2mm layers (these were with .25mm layers) and then see if the wavelength of this effect changes or stays the same. I believe from past prints I've done with different layer heights that in fact the wavelength will stay the same.
-
-
The predominant vertical features I can see in those pictures appear coarse, more like ~2mm in pitch? Belts and pulleys are your next target then. I've had a few crap 'GT2' pulleys from ebay and the gates E3D pulleys didn't perform best in the linked Prusa forum post on vertical artefacts.
Back to the vertical fine artefacts I think you can see them on both, but they are much shorter than the big pattern. They are likely to improve with a 0.9 stepper on the extruder, but as a poster on the BIG Prusa forum post says it's a whole pile of problems and you've got to tackle the coarse ones first, which in this case looks suspiciously like belts.
Before going too in depth disconnect your drive belts and make sure the axis move freely and don't get noticeably tight near the extents (and often spring away from if let go) of their travel.
...I'm a few steps behind. Shelved development work Ormerods to get a few test platforms based on P3Steel chassis working.
-
@sethipus So, not a cure-all then? Kind of expected but it looks like an improvement at least.
My major problem at the moment is the bugs that seem to be creeping in to the latest releases of Cura.
I had a model with lots of supports printing yesterday and even though I'd set "avoid supports when travelling", every layer, I could see the head doing a travel move straight over the tops of the supports at the rear of the model, making a nice noise as it did it! Thankfully, it didn't manage to dislodge the supports as they were printed on top of a brim. The next print with supports will have to be done with agonising "lift Z when travelling" settings.
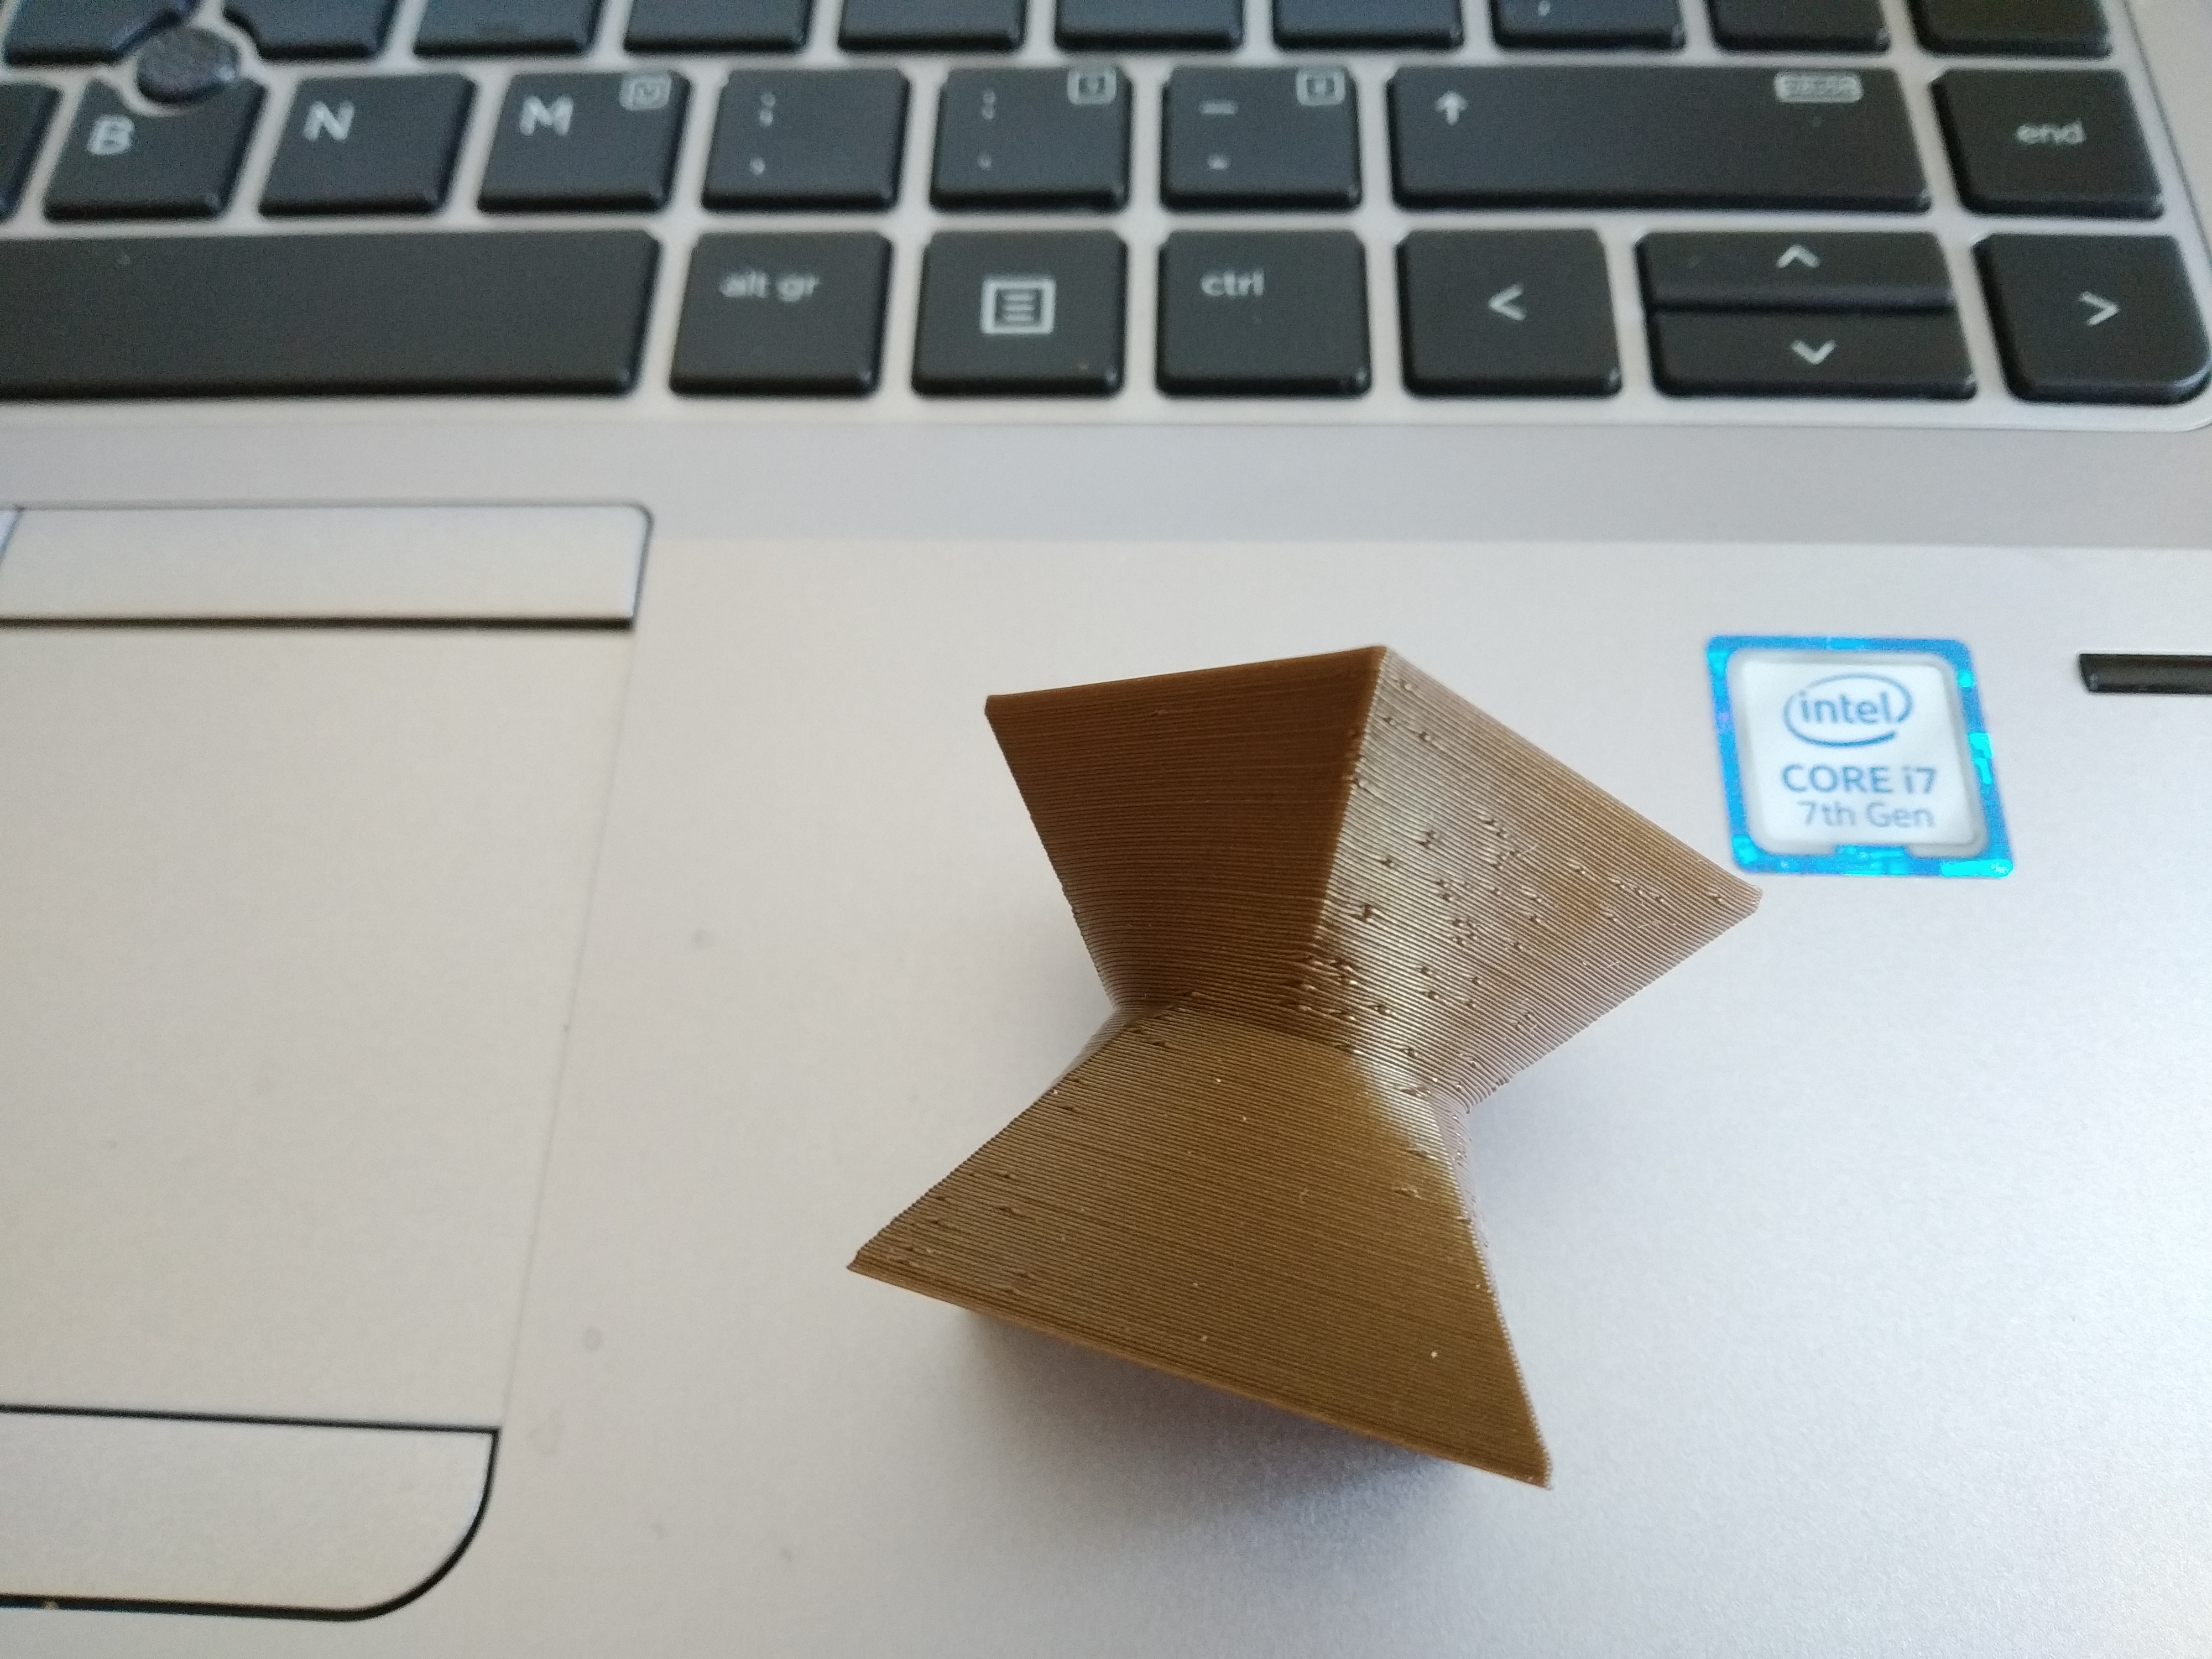
Then there's the settings for trying to hide the Z-seam. Does this look anything like "sharpest corner" to anyone?
-
@doctrucker said in Motor noise and print quality:
Prusa forum post on vertical artefacts
@doctrucker, yeah those bands are as close as I can measure 2mm apart, so it's gotta be belts or pulleys or something. I recall a couple years ago going through some agonizing about that, and at the time I replaced some idlers that in the D-Bot by default are just two stacked flanged bearings with toothed idlers to see if that made a difference, and it didn't. Gonna have to start over here. Just ordered some genuine Gates belt and a couple Gates pulleys for my steppers. My D-Bot was built with probably just some generic Chinese gt2 belt, so maybe that'll make a difference. Once the belts and those two pulleys are replaced, assuming the banding doesn't disappear, I'll figure out my next move and look into replacing other idlers in the mechanism again. Sigh.
@grizewald yeah it wasn't a cure-all, though I believe it did subtly improve the surface in that, aside from that 2mm pitch fine banding pattern, the surface otherwise is a little smoother. I don't regret going to the .9mm steppers. I haven't used Cura in a quite a while. I started with Cura, then used a pirated copy of S3D for a while, then after a while I observed that between Cura and S3D I was more and more using S3D only, so I forked out and bought it legit (I thought of the pirated copy as a sort of ad hoc extended trial...). The last version of Cura I used was many versions ago (for one thing, I was gone for the last year on a military deployment, so everything had been updated while I was out). I'm also experimenting right now with Slic3r. I recall the last time I went through all this there were features in each slicer I used that weren't in the others, and I recall thinking if I could just combine the best aspects of every slicer into one program that would be amazing. I just printed a couple things using the gyroid fill in Slic3r and quite liked it, though my first impression was that it's just a gimmick. Maybe it is. Btw in that photo you posted those zits would be annoying as hell. In S3D I force all layers to start in the same spot, and try to orient the print so that spot is on the backside of whatever I'm printing, if it has a backside.
Anyhow, to the topic of this thread, I do think that the .9 degree steppers can improve surface quality, but there are other things that cause surface problems, and at least in my experience the other things have more of an effect than the resolution of the steppers.
-
@sethipus is it this the d-bot from thingiverse:
https://www.thingiverse.com/thing:1001065
That's the one I built for a previous employer. I had serious vertical lines too. I was originally running a v0.6 duet on it and hoped that swapping to a Duet 2 would help, but it didn't. Last thing I did was add a twist in the belt so the tooths weren't running over the bearings, probably a bit I missed in the build manual. That helped a bit but didn't really nail it.
Not looking forward to that fight on my new machine!
Edit: using three screws did remove a lot of the bounce from the elevator.
-
Turns out it was my mistake with the print head hitting my supports. For some reason, the "avoid supports when travelling" option only works if you enable combing.
To get the zits hidden, I'll need to manually position the seam. Cura seems to have trouble working out where the sharpest corner of the model is sometimes.
I've been playing with the latest Slic3r recently, but I find that the code it produces doesn't print anywhere near as well as Cura does. On the other hand, Cura's material settings don't really work like I'd expect them to. The relationship between print settings, printer settings and material settings is much more logical in Slic3r than in Cura.
I've not tried S3D as I'm allergic to software running on my Linux systems that has phone home licensing systems and I'm yet to be persuaded that it's worth $150 more than free.
-
@sethipus said in Motor noise and print quality:
the more visible corduroy effect is still something which eludes me. Still not sure what that comes from.
Definitely looks like belt tooth vibrations. I had similar on my Dbot until doing a belt flip to get the smooth side of the belt running on the sooth bearing surfaces of the idlers. I tried toothed idlers as well, but it didn't help as much. I think the bend radius is just too small. Smooth side fixed it completely though.
-
@doctrucker said in Motor noise and print quality:
@sethipus is it this the d-bot from thingiverse:
https://www.thingiverse.com/thing:1001065
That's the one I built for a previous employer. I had serious vertical lines too. I was originally running a v0.6 duet on it and hoped that swapping to a Duet 2 would help, but it didn't. Last thing I did was add a twist in the belt so the tooths weren't running over the bearings, probably a bit I missed in the build manual. That helped a bit but didn't really nail it.
Not looking forward to that fight on my new machine!
Edit: using three screws did remove a lot of the bounce from the elevator.
Yeah, that's the D-bot I built, except for my modifications to the stock configurations. For example, I built mine with a Duet Wifi right from the beginning, used an E3D Chimera hot endend, and used a printed, belted 4:1 reduction extruder I found on Thingiverse (replaced a week or so ago with a BMG clone). I've since upgraded my printed to 3-leadscrew/1 stepper belted configuration and a few other mods. One of the biggest mods is that my printer no longer uses mini wheels for the X/Y motion system. Instead, I designed some slider blocks that fit in between the print carriage and Y gantry's rail mount plates that uses Igus tribofilament pads that fit down into the v-slots and simply slide. I've also recently designed my own print carriage rear plate that integrates a cooling duct for a blower fan that greatly reduces the physical extent in the Y direction of my print carriage. My next project is to convert to 24V from 12V and replace the build surface with a cast and ground aluminum plate I purchased, that is much thicker than, and a little larger in X/Y than the stock 200x300mm build plate.
As far as the vertical lines go, what I did previously was replace all the stacked bearings where the gt2 belt teeth were riding over the smooth idler with toothed idlers. At the time I thought I saw an improvement, but if it really was an improvement the vertical 2mm-pitch subtle banding is still there. Fingers crossed that there was something crappy about the cheap gt2 belt I was using, and that genuine Gates belt eliminates that. Other than toothed idlers, high quality pulleys, and genuine Gates belt, I have no idea what else to try. I'd been hoping that this wasn't to do with the belts at all and it was this stepper-based FVA this thread is about, but as I've seen firsthand it was not.
-
@phaedrux said in Motor noise and print quality:
@sethipus said in Motor noise and print quality:
the more visible corduroy effect is still something which eludes me. Still not sure what that comes from.
Definitely looks like belt tooth vibrations. I had similar on my Dbot until doing a belt flip to get the smooth side of the belt running on the sooth bearing surfaces of the idlers. I tried toothed idlers as well, but it didn't help as much. I think the bend radius is just too small. Smooth side fixed it completely though.
I've got new Gates belt arriving in a couple days. When I install it I'll look closely at the belts and see where doing a belt flip is to be done and give it a try. I was also suspect of the belt flipping idea, but I can't argue with success, and if it works, it works.
ETA: ok, just looked at the printer closely. Did you simply flip the belt in between the stepper and the first turn, where the belt rides in the upper side frame member v-slot grooves?
-

The important thing to remember is to only flip the constant length sections.
In this photo the sections I flipped are K and J. First it flips on J and then stays flipped around the back side, and then flips again for K. This way the teeth are only making contact with the motor drive teeth. The rest of the idlers contacts are all on the smooth side.
For me, on a 300x300mm dbot the flip didn't seem to have any negative effects, but if you have a 200mm length for K and J maybe it's too tight? Something to keep an eye on.
Using genuine gates belts here as well. That also seemed to make an improvement for me.
-
So, I've just installed the new motors, but I wish I'd thought twice before installing 16 tooth pulleys.
For the first, the smaller diameter of the 16 tooth pulley breaks the belt geometry - my A and G sections are no longer parallel to the Y axis. The second problem is that while I was tightening one of the set screws for the beta motor, the head sheared off my ball headed driver and is now stuck inside the screw!
Hopefully, I can cut a couple of slots into the side of the set screw for a flatbade screwdriver without destroying the stepper motor's bearings.
Once I can get the 16 tooth pulleys off and put the original ones back on, I'll give the printer a test! If I can't get the pulley off, I'll have to cut some slots in the motor mounts so that I can move the motors inwards slightly.

-
Doh! that sucks about the ball head breaking off in the set screw. Good luck getting that off. I've made a lot of progress on my end. I've reprinted new versions of my upper frame corner braces that will make maintenance and adjustment far easier, and also got new genuine Gates belt. I'm going back from toothed idlers to the smooth stacked-bearing configuration, and will add a twist to the belts to keep the flat sides against the idlers. Combined with the move to the 0.9-degree steppers, and getting my config.g sorted out so I'm now running with 16x + 16x interpolation on all axes, my printer is quieter and should be delivering the best quality I've ever seen. Oh, over the last couple weeks I also got pressure advance and non-linear extrusion sorted out too, which contribute to that.
-
@sethipus Thanks, I might be needing that luck!
I feel there is going to be some Dremel assisted violence visited upon the pulley today. I can't see any way to defend the stepper's bearings against the use of a hammer to slot the set screw, so cutting a slot through the pulley and into the set screw with a cutting disc would appear to be my only option. If slotting it fails, I'll just cut straight down along the flat part of the stepper's spindle and hope the cut misses the broken ball end. I don't much rate a cutting disc's chances against tool steel, even if it's cheap and nasty tool steel.
I printed a tall sculpture over the last couple of days and noticed a mechanical problem which I need to look at. When the printer was performing a 100mm/s travel move in the +X direction, the print head would clip the support layer it was travelling over with a loud 'snap'. If it wasn't for the fact I'd anchored the sculpture with a brim, I'm pretty sure the collisions would have knocked the print over. Even though that didn't happen, the resulting wobble lead to increasingly poor finish as the print got taller.
I found the Bondtech BMG remarkably immune to non-linear extrusion effects when I tested it. It was only when I got to 5mm/s extrusion that the amount of filament extruded would start to differ from what was commanded, so I've left that uncorrected for the moment.
-
@grizewald
search for bearing puller. that might be an option.
something like this
http://www.pro-lift-montagetechnik.com/WebRoot/Store15/Shops/78156040/54AF/9EA4/B9C8/6142/1A49/C0A8/2AB9/AA72/00130_5t_Abzieher_hydraulisch_3arm_beschnitten_jpg_ml.jpg -
otherwise i wish you luck

-
@grizewald said in Motor noise and print quality:
@sethipus Thanks, I might be needing that luck!
I feel there is going to be some Dremel assisted violence visited upon the pulley today. I can't see any way to defend the stepper's bearings against the use of a hammer to slot the set screw, so cutting a slot through the pulley and into the set screw with a cutting disc would appear to be my only option. If slotting it fails, I'll just cut straight down along the flat part of the stepper's spindle and hope the cut misses the broken ball end. I don't much rate a cutting disc's chances against tool steel, even if it's cheap and nasty tool steel.
I rate the chances pretty highly actually. If you're going slow even if you hit the ball head your cutting disc should go through it just fine.
I printed a tall sculpture over the last couple of days and noticed a mechanical problem which I need to look at. When the printer was performing a 100mm/s travel move in the +X direction, the print head would clip the support layer it was travelling over with a loud 'snap'. If it wasn't for the fact I'd anchored the sculpture with a brim, I'm pretty sure the collisions would have knocked the print over. Even though that didn't happen, the resulting wobble lead to increasingly poor finish as the print got taller.
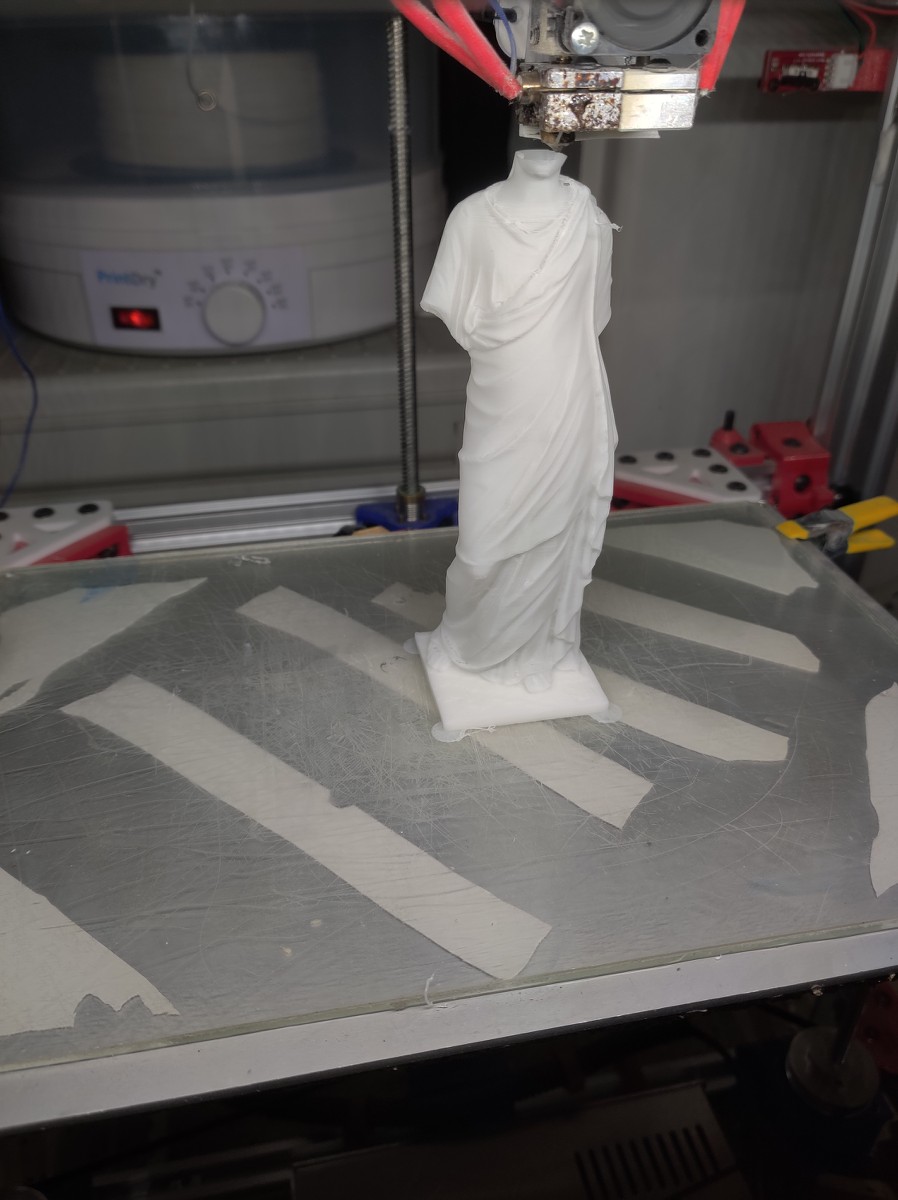
I've had that happen before. It's not always mechanical. It's possible the support structure is just curling up a little. Had that sort of thing happen many times. In fact, between reading your post and replying to it I heard a noise I didn't like the sound of. I'm printing a Greek statue in vase mode, and in a particularly tight fold of the woman's robe the head was making a very sharp turn, and apparently part of a line curled up just enough that it was starting to hit and get worse with each go around. I had to pause it twice and, with a little knife, cut a shaving of plastic off that was sticking up. As the fold continued up the statue it was happening again after a couple go arounds, and I ended up just very gently putting my fingers around the statue and holding it just enough to resist the gentle bump by the nozzle, and after several go arounds it got past that point and the problem was averted. I'll probably have some tiny little quality hiccup at that spot if I look at it carefully, but I did save the print. (so far, it's not finished yet, and I worry about the top of the head)
I found the Bondtech BMG remarkably immune to non-linear extrusion effects when I tested it. It was only when I got to 5mm/s extrusion that the amount of filament extruded would start to differ from what was commanded, so I've left that uncorrected for the moment.
I admit I set my non-linear extrusion parameters using my previous extruder, which was a belted, single-drive extruder. The values obtained were very small, and I haven't changed them, and they don't seem to be hurting me. I think I'll go through the tests again this weekend with the BMG clone and see how much different results I get. I don't think they'll change much until I get up to 6mm/s or so, because I believe a lot of the reduction I was seeing in feedrate at higher speeds was due to backpressure in the melt chamber, which hasn't changed, and didn't slip until the 5-6mm/s range.
-
Victory!
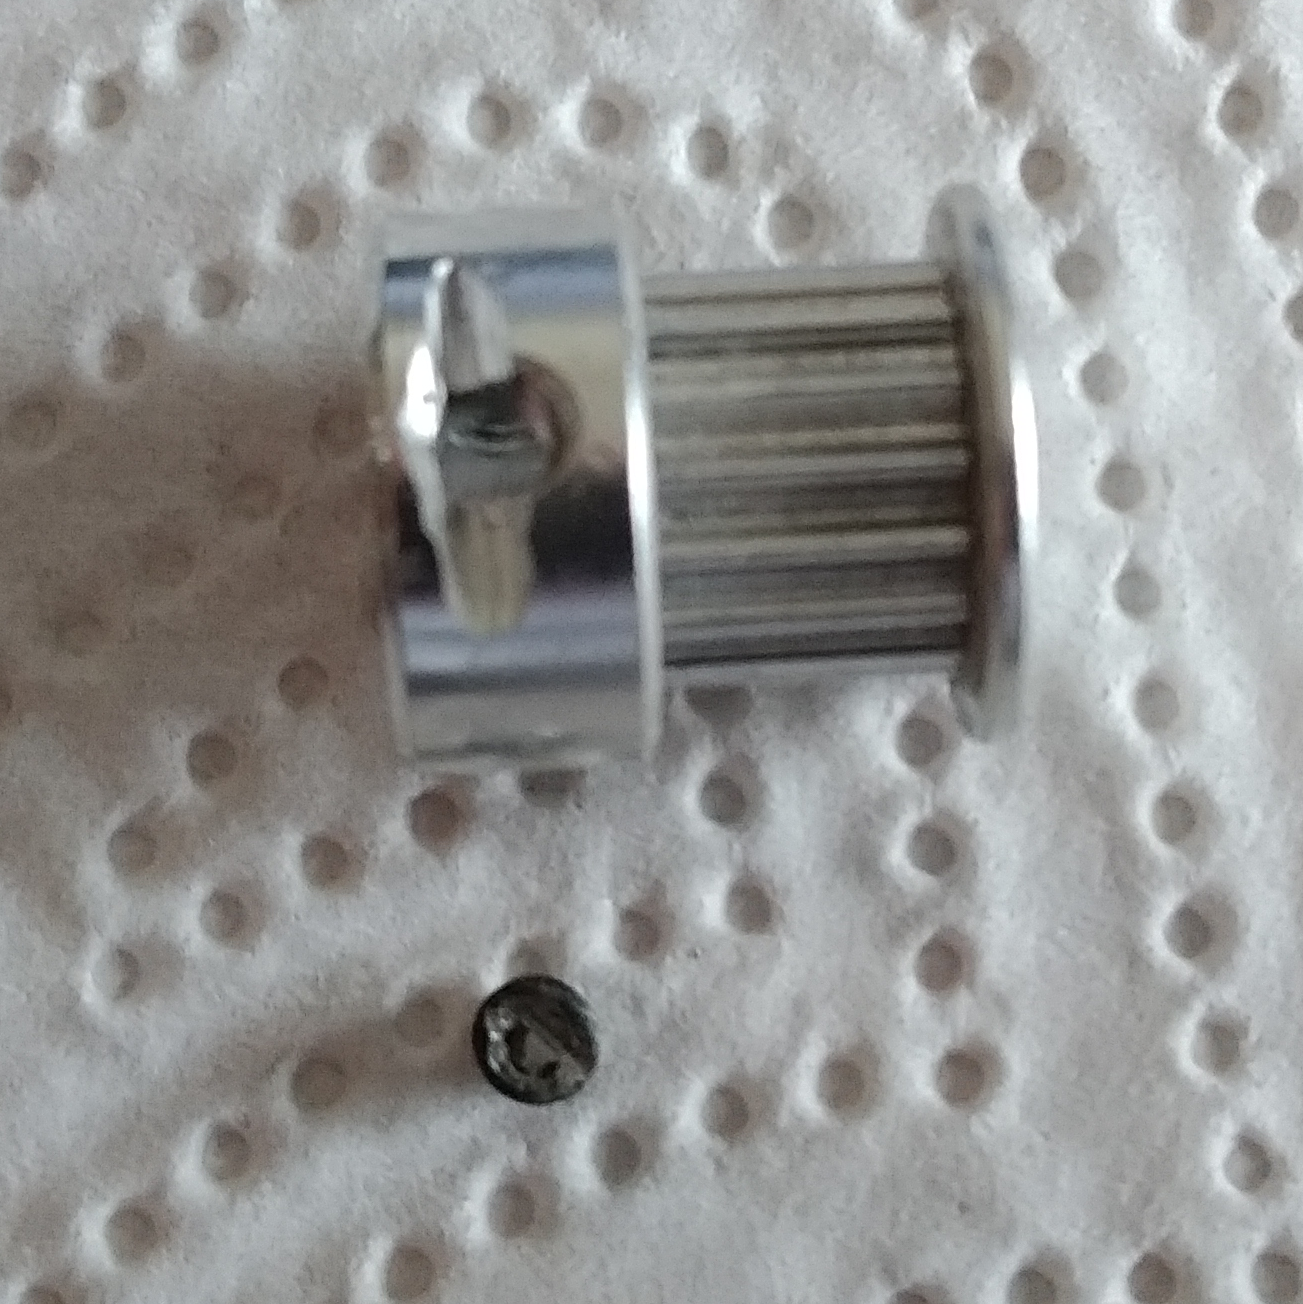
I saw the tiniest of sparks as the disc cut into the remains of the ball end. Looking at the cut, I reckon my ball end driver was no harder than the set screw.

So, time to get the original pulleys on and do some testing.