@jay_s_uk I quickly looked into it and this might be the way! I reached the stallguard sensitivity, which are present in "my" Caribou's config.g, but it's true there might be adjustments to apply.
I will continue from here, thanks a lot for looking at this! I hope I can find the issue, and update here
Best posts made by yetanotherusername
-
RE: Printer go brrr when I modify steps/mm for Yposted in Tuning and tweaking
-
RE: Printer go brrr when I modify steps/mm for Yposted in Tuning and tweaking
@yetanotherusername Well, solved it!
I highly suggest people in the future looking at this issue to read carefully the Sensor stall detection documentation.
The fix was about adding more juice to Y.
In homey.g (and homez.g too):
G1 H1 Y-225 F3600 ; move quickly to y axis endstop and stop there (first pass)in 00-Functions/CurrentSenseHoming:
M913 X50 Y50 Z60 ; set the x, y, and z drivers current percentage for non-print moves, per config.gI gave a +10 to Y, because the original was Y40.
Latest posts made by yetanotherusername
-
RE: Printer go brrr when I modify steps/mm for Yposted in Tuning and tweaking
@yetanotherusername Well, solved it!
I highly suggest people in the future looking at this issue to read carefully the Sensor stall detection documentation.
The fix was about adding more juice to Y.
In homey.g (and homez.g too):
G1 H1 Y-225 F3600 ; move quickly to y axis endstop and stop there (first pass)in 00-Functions/CurrentSenseHoming:
M913 X50 Y50 Z60 ; set the x, y, and z drivers current percentage for non-print moves, per config.gI gave a +10 to Y, because the original was Y40.
-
RE: Printer go brrr when I modify steps/mm for Yposted in Tuning and tweaking
@jay_s_uk I quickly looked into it and this might be the way! I reached the stallguard sensitivity, which are present in "my" Caribou's config.g, but it's true there might be adjustments to apply.
I will continue from here, thanks a lot for looking at this! I hope I can find the issue, and update here -
RE: Printer go brrr when I modify steps/mm for Yposted in Tuning and tweaking
@jay_s_uk Not directly my configuration, because I'm using the one from Caribou at https://caribou3d.com/de/content/13-caribouduet-software , but I've been reading gcodes for almost a week and haven't found a specific settings for the Y homing.
I read the function
homey.gthat should "just" stop when the motor hits the limit switch:[truncated] G1 H1 Y-225 F2000 ; move quickly to y axis endstop and stop there (first pass)and in
config.gI can read the sensorless settings:M574 Y1 S3 ; configure sensorless endstop for low end on yhttps://reprap.org/wiki/G-code#M574:_Set_endstop_configuration
But I just can't find what else I miss. Also, I don't understand why changing ysteps (or xsteps, because I also checked if it was something just with Y), lets the homing fail. I can't correlate the things
-
RE: Printer go brrr when I modify steps/mm for Yposted in Tuning and tweaking
@jay_s_uk Hi! I forgot to mention that when steps/mm are set to 200, it works. It works for X, and it also works for Y. It homes. In fact, I didn't even realize about this issue until I printed a cube which didn't turn out very cubish.
Just so I know, after modifying ysteps, do you mean that there's a sensorless value to adjust?
-
Printer go brrr when I modify steps/mm for Yposted in Tuning and tweaking
This is a Prusa MK3 clone with Duet board printer and few other customization.
I mounted, both for X and Y axes, 0.9 degree motors.In
config.gthe value of them should be:M350 X16 Y16 Z16 E16 I1 M92 X200.00 Y200.00 Z400.00 E668.00And if for the X axis this is correct, which means I managed to print a 25x25 mm cube with X=24.8, the Y resulted in 31mm.
The reason is I mounted a 10mm GT2 belt on Y. I must update the steps/mm for Y.
I used the online tool to calculate it: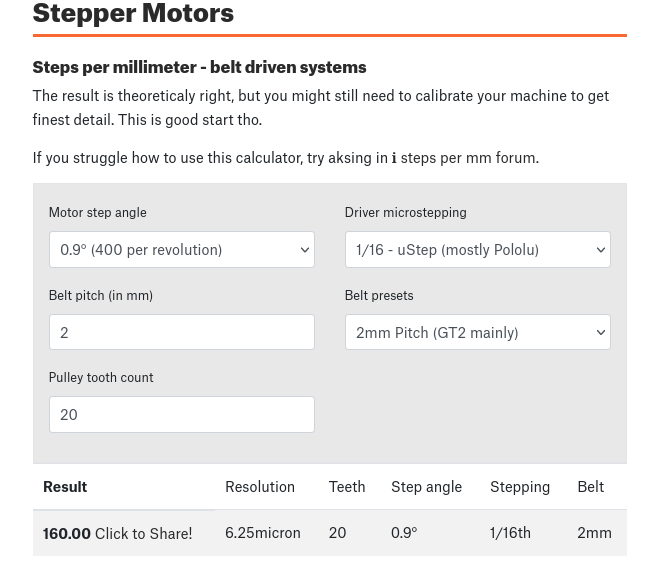
And as soon as I update my config.g:
M350 X16 Y16 Z16 E16 I1
M92 X200.00 Y160.00 Z400.00 E668.00
The homing for Y stops working. The printer moves the bed all the way to the back and keeps on moving it even after it reached its end, literally sounding
brrrrrrrbecause the motor tries to move something that's already at its end.
Obviously it fails Y homing.Is there something I do wrong? Or why does it behave so?
-
RE: Accelerometer question, because no data is recordedposted in Duet Hardware and wiring
@yetanotherusername
UPDATE: Solved. I restore to factory default.
I had some ETH cables around. I made a cable out of those wires, and it works! But..
Where's my graph?
Does anybody know why graphs are not shown?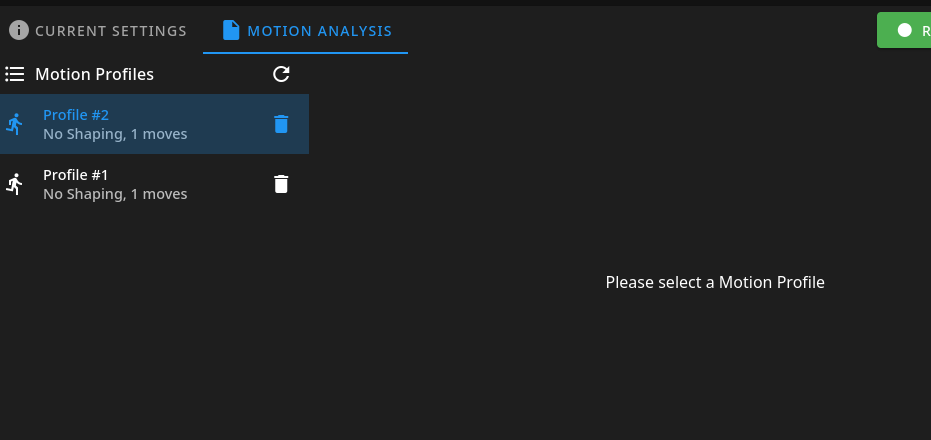
-
RE: Accelerometer question, because no data is recordedposted in Duet Hardware and wiring
@Alex_ZHANG After I got it working, and updated this post, it only took 1 day for the cable to break! I was recording data and then when going to open the graph file (from DWC) it said "no data".
Pins are extremely fragile, and some of them just broke. I noticed it broke when the M955 couldn't find any accelerometer.How did you create your cable from HDMI? Isn't the HDMI cable pretty thick to use? Or did you just cut it open and took the wires inside out?
I'm in the process of finding a better cable. I have plenty of HDMI but no sacrificable usb 3.
-
RE: Accelerometer question, because no data is recordedposted in Duet Hardware and wiring
@Phaedrux Hi, about the DWC, no that was not a typo, but I missed that there was an updated version and I downloaded it from zip and installed. Now it runs on DWC 3.4.6, thanks for the hint!
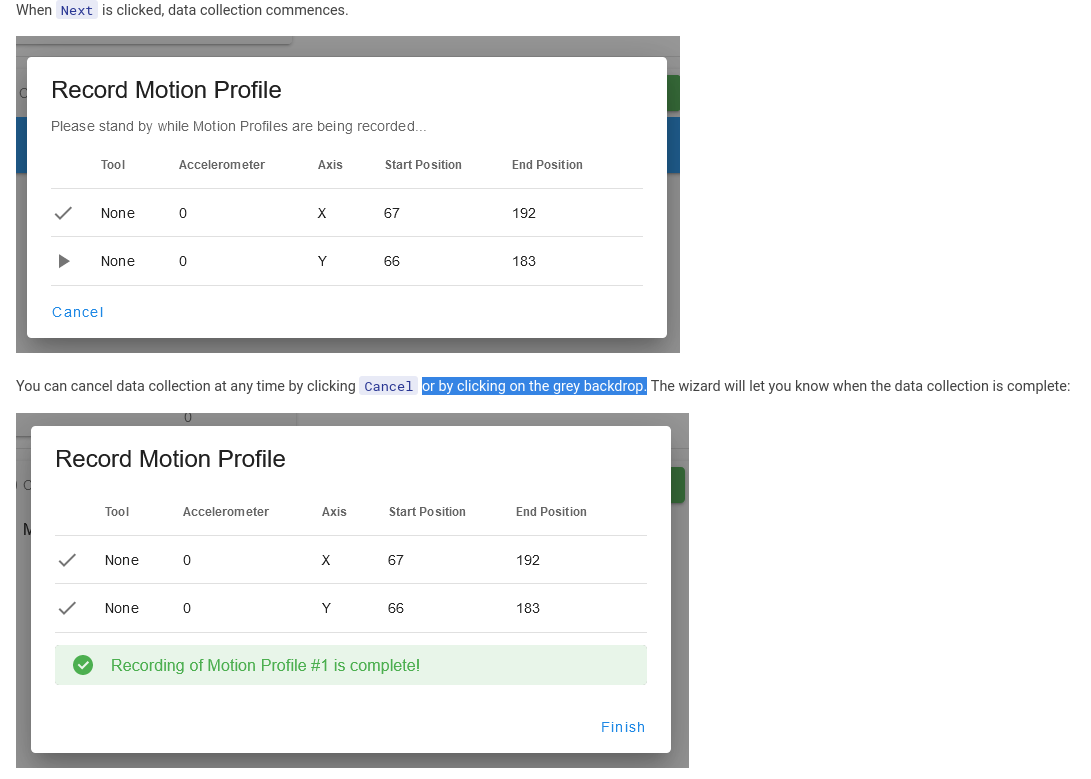
About the issue itself, it is solved. It looks like to be a visual bug. The data is recorded, but that window in the screenshot, in very rare cases only (so far, only once) it shows the "Finish" button when the procedure is done.
I have to click outside of it and when I move to the tab "Motion Analysis", there I have my recorded data.The wizard tells me nothing, I hjave to click on the "grey backdrop".
About the cable, it's a 30cm flat cable and it works. Yes I read about the USB3 linked in the doc but it seems the cable is fine!
Thanks however for your answer! I literally got it working yesterday evening.
-
Accelerometer question, because no data is recordedposted in Duet Hardware and wiring
Hello! Trying to get the accelerometer working on a Duet2 Wifi v3.4.6 (PanelDue v3.4.1 and Duet Web Control v3.4.5).
I followed step by step this page: https://docs.duet3d.com/en/User_manual/Connecting_hardware/Sensors_Accelerometer
And made this cable here (pins are soldered).
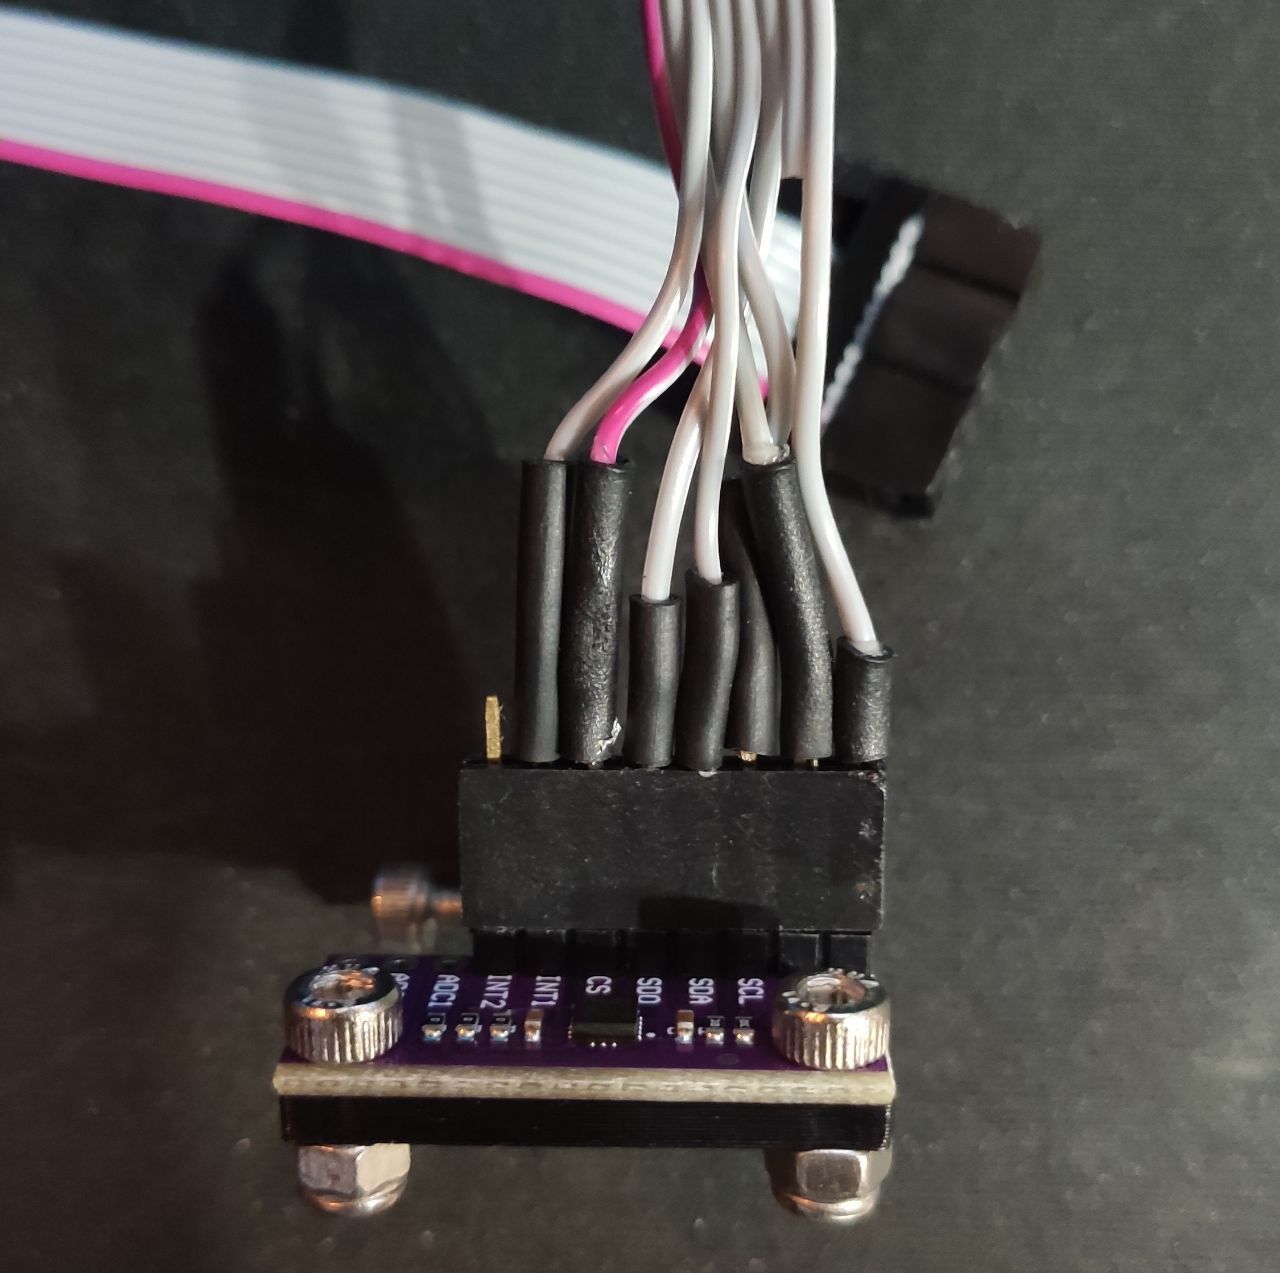
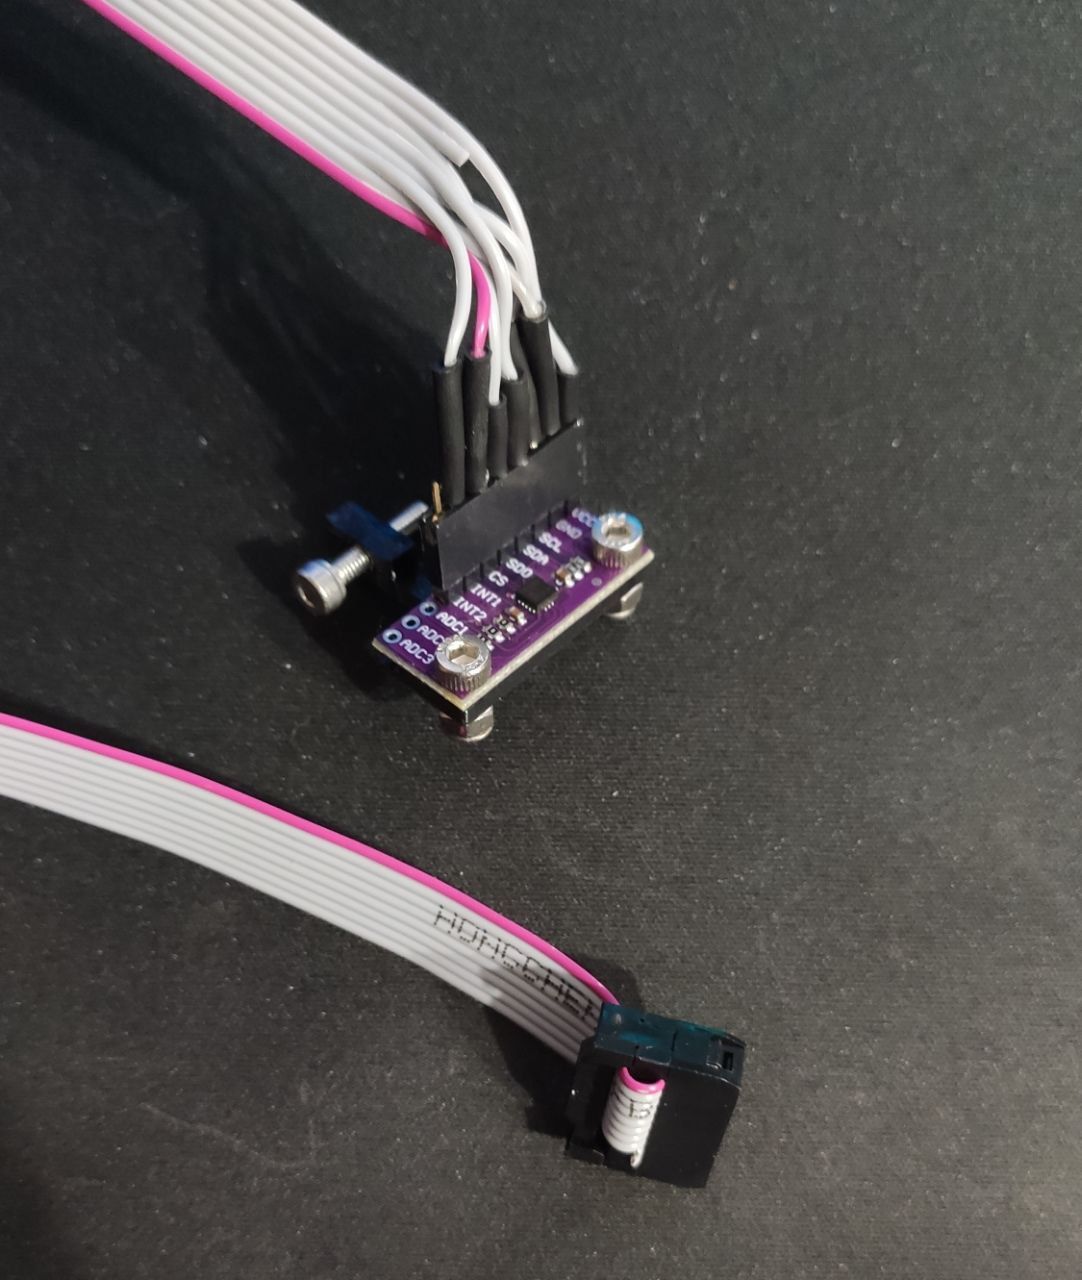
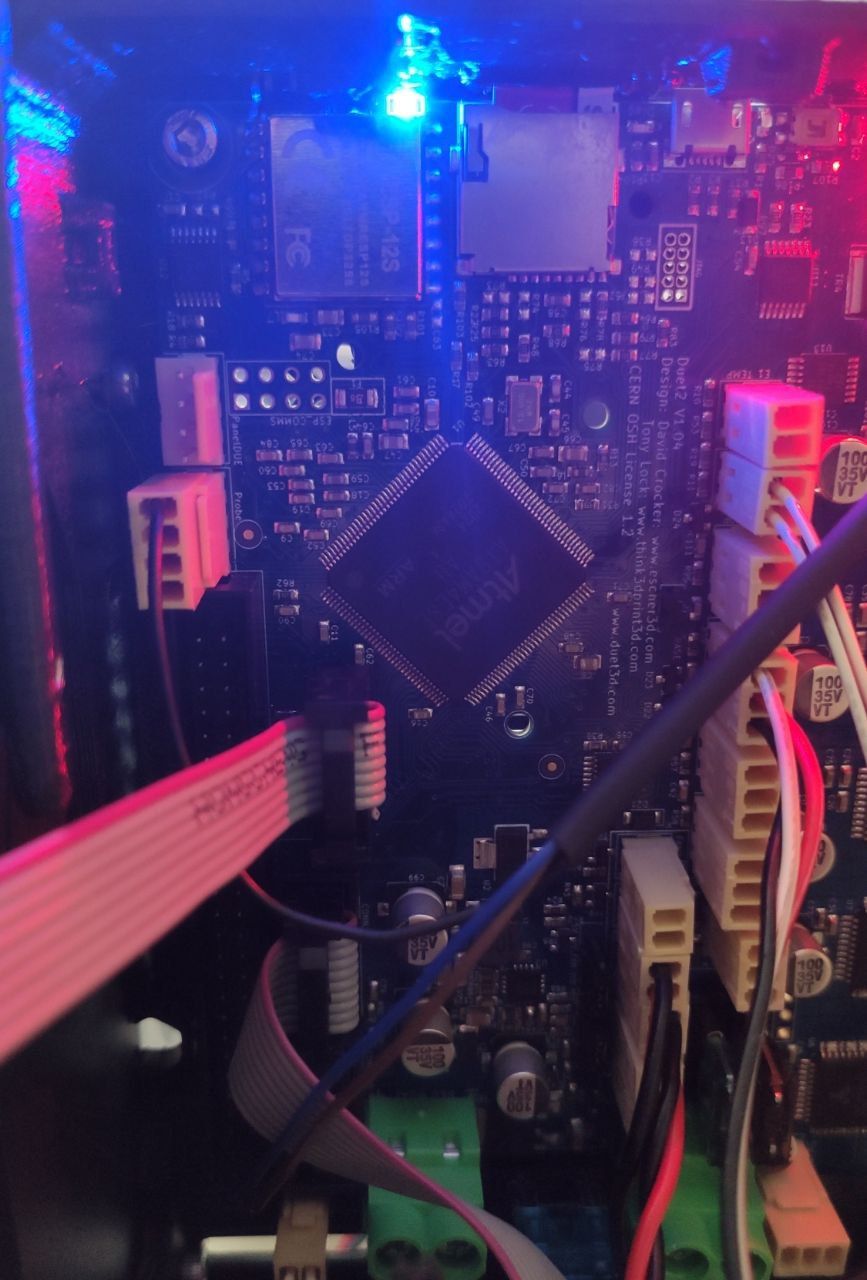
I used the wiring table of the link above, and the connection are as follows:
Wire# 	Accelerometer signal 	Duet 2 WiFi 	Comment
1 	CS 	                SPI.CS2 	Red wire
2 	GND 	                GND
3 	INT1 	                SPI.CS1
4 	SCL 	                SPI_SCK
5 	SDA 	                SPI_MOSI
6 	SDO 	                SPI_MISO
7 	-  	                -
8 	VCC 	                VCC
With a multimeter I located the VCC and GND respectively on pins 8 and 2 of the Temp. Daughterboard.
This: https://docs.duet3d.com/duet_boards/duet_2_wifi_ethernet_maestro/duet_2_we_wiring_latest.png
After that:
- I connected this cable to the Mainboard (mb_1) and to the LIS3DSH sensor (sensor_2)
- Turned the printer ON
- Sent
M955 P0 C"spi.cs2+spi.cs1"using the web console - Installed the Input Shaping Plugin and configured it
- Started the procedure / repeated / reboot / repeat [...]
The printer homes all axes first and then starts. I select to calibrate X only. It moves once left and then right and then stops with dialog box that won't update anymore. All I can do is
Cancel.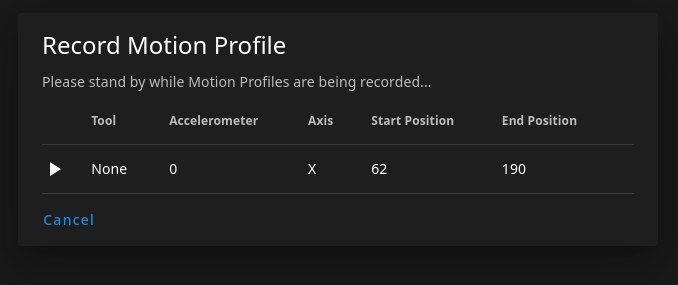
Can anybody help please me? I checked the cable multiple times. VCC and GND have signal (multimetere'd). And when I was making the cable I used a lab PSU to test each wire.
Would be nice to know how to test if the accelerometer works, or if it doesn't (faulty / broken).