Can't run pressure advance g-code
-
I was sure pressure advance had been working (and I know I've run the code below before and observed the changes in the print) but I wanted to fine tune it and now I cannot run the layer change gcode below. I've tried it in PrusaSlicer and SuperSlicer.
{if layer_num== 1}M572 D3 S0.00
{elsif layer_num== 25}M572 D3 S0.025
{elsif layer_num== 50}M572 D3 S0.030
{elsif layer_num== 75}M572 D3 S0.035
{elsif layer_num== 100}M572 D3 S0.040
{elsif layer_num== 125}M572 D3 S0.045
{elsif layer_num== 150}M572 D3 S0.050
{elsif layer_num== 175}M572 D3 S0.055
{elsif layer_num== 200}M572 D3 S0.060
{endif}
Since the code isn’t resulting in any changes I've tried putting it in a few places in the slicer. The Duet documentation says to put in it Printer Tab > Custom Gcode in PrusaSlicer. The closet in PrusaSlicer seems Template Custom G-code. Is that the place to put it?
My drive mapping is as follows:
M569 P0 S1                                ; physical drive 0 goes forwards
M569 P1 S1                                ; physical drive 1 goes forwards
M569 P2 S1                                ; physical drive 2 goes forwards
M569 P3 S1                                ; physical drive 3 goes forwards
M584 X0 Y1 Z2 E3                       ; set drive mapping
What am I missing? Thank you.
Duet Ethernet 1.02 or later (duetethernet102) Firmware: RepRapFirmware for Duet 2 WiFi/Ethernet 2.04 (2019-11-01b1) -
@gbartsch
I place this sort of test code in PrusaSlicer 'Printer Settings' tab. Select 'Custom G-Code' and use the 'After layer change G-Code' box. You could also use the 'Before layer change G-code' box.Give that a try.
-
@tas Thank you.
I've tried 'Before layer change G-code' but I'll try 'After layer change G-code'.
I've also tried 'Template Custom G-code' and that didn't work.
This was easy last time I ran this so don't know why it's difficult this time. Both PrusaSlicer and SuperSlicer have been updated a few times so maybe something changed with them?
-
@gbartsch
I noticed you are using D3 in your M572 code. Should it not be D0? That is what I use but I only have one extruder on my printers. -
@tas Sorry for my tardiness in replying.
I also have one extruder and was sure I used D0 previously when I successfully ran the g-code
But my drive mapping is as follows, so isn’t my extruder D3?
M569 P0 S1 ; physical drive 0 goes forwards M569 P1 S1 ; physical drive 1 goes forwards M569 P2 S1 ; physical drive 2 goes forwards M569 P3 S1 ; physical drive 3 goes forwards M584 X0 Y1 Z2 E3 ; set drive mapping -
@gbartsch drives for extruders start at 0 so even though you have driver 3 mapped to the extruder, it's the first extruder driver and is therefore D0
-
@jay_s_uk Thank you. I'll run through this again using D0.
-
Well, I've run the g-code numerous times with small to extreme levels of pressure advance to no effect. I've put a line in my filament g-code with no effect. I give up for now.
-
@gbartsch you could use https://ellis3dp.com/Pressure_Linear_Advance_Tool/ before giving up, that tool generates the ramp up of PA values itself and it works really well IMO.
-
@oliof Thank you. My firmware is 2.04 (2019-11-01b1) so am not sure if it can work. I ran the print but could see no variance in the pattern. I used a natural PLA because that was in the machine so couldn't get a decent picture. I'll change to an opaque filament and run it again and post a picture.
-
Why such old firmware?
-
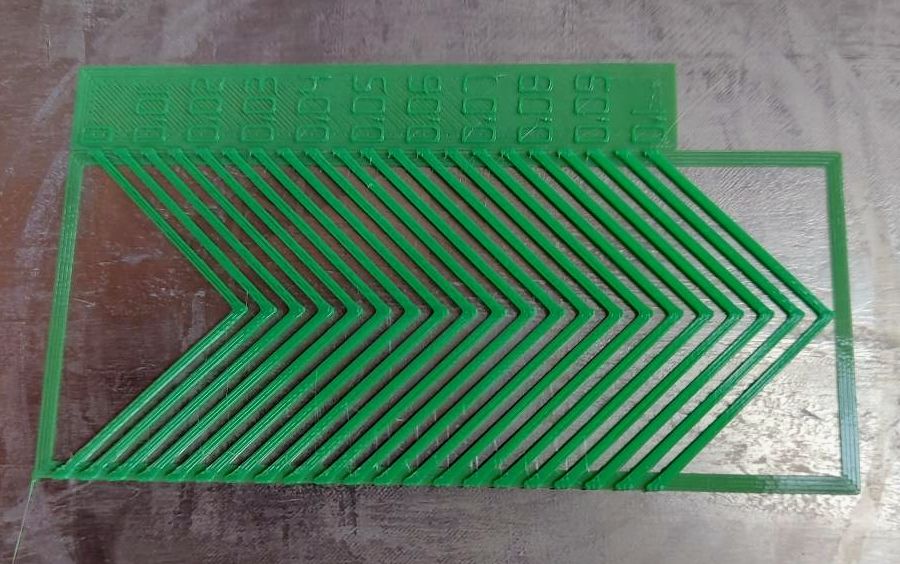
This is the result of the pressure advance test. I see no variation. Maybe my firmware is too old for this script to work?

-
@Phaedrux I'm clueless and not sure I could upgrade it without goofing something up. My friend set up my Duet and has moved away so I'm still using this. It's been working so I haven't needed to upgrade so far but it seems I should learn how.
-
@gbartsch No reason to update firmware if you're still happy with how it's running. But if you do decide to give it a try, start a new thread and we'll be happy to help you along.
If the script isn't doing it for you I would try the living tuning method. Plop a cube down in the slicer and stretch it out in one axis so you have a long flat rectangle with rectilinear infill. Then start the print and manually send the gcode command to enable PA and send a new value to increase it and see how it changes.
Unless you have a very long bowden setup even a small amount of PA is better than no PA. Somewhere in the 0.02 to 0.04 range is probably going to be usable on a direct drive or short bowden.
-
@Phaedrux Thanks a lot! I'd really appreciate help with upgrading the firmware. I'll look into the procedure and then likely make a post with some questions.
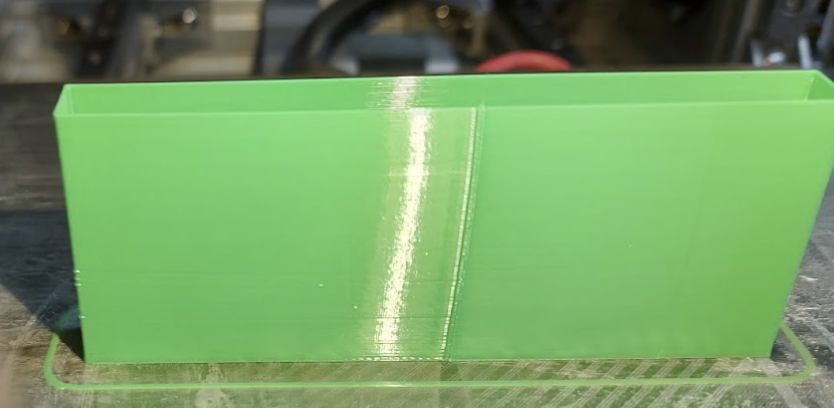
I printed this shape at 60mm/sec and manually sent codes from M572 D0 S0.025 to M572 D0 S0.085. I don't see any difference in the seam.

-
@gbartsch said in Can't run pressure advance g-code:
I'll look into the procedure
this is what I usually tell people.
If you still have access to DWC. Upload these zip files, one at a time in the system tab. Don't extract them first. Reboot after each. Use M115 in the gcode console to verify the firmware has been applied.
https://github.com/Duet3D/RepRapFirmware/releases/download/2.05.1/Duet2Firmware-2.05.1.zip
https://github.com/Duet3D/RepRapFirmware/releases/download/3.0/Duet2and3Firmware-3.0.zip
https://github.com/Duet3D/RepRapFirmware/releases/download/3.3/Duet2and3Firmware-3.3.zip
https://github.com/Duet3D/RepRapFirmware/releases/download/3.4.5/Duet2and3Firmware-3.4.5.zipThat will get your firmware and DWC up to date.
You can see the change logs here:
https://github.com/Duet3D/RepRapFirmware/wiki/Changelog-RRF-3.xFor your config, might be a good idea to run through the configurator tool and generate a fresh set for RRF3.
https://configtool.reprapfirmware.org/StartBackup your existing config files in the sys folder in case you want to switch back to RRF2. It’s easy to switch back and forth, just upload the zip file for the version you want and then upload your config files.
These documents will come in handy during the conversion.
https://duet3d.dozuki.com/Wiki/RepRapFirmware_3_overview
https://docs.duet3d.com/en/User_manual/RepRapFirmware/Migration_RRF2_to_RRF3
https://docs.duet3d.com/en/User_manual/Reference/Gcodes -
@Phaedrux Thanks! I'll read the sources you suggest.
So this is incremental upgrade method is used because the firmware is so old? But you don't recommend I do that?

I should use the configurator and skip the above steps?
I'm wondering if I could use a file compare tool (I use Beyond Compare) to look inside new versus old files? That might help with finding settings that need to move over?
I have a disability so will have to wait for someone to help me remove/re-insert the MicroSD card so I can backup my current config.
-
Uploading the zip files is usually a pretty quick and easy way to get up to date if you already have a working board. The fallback would be to use bossa to flash the firmware directly, but then you also have to manually place the correct files and update the DWC files manually. The zip file upload just takes care of everything for you.
You would still need to use the config tool to generate a new config file set that would work with RRF3. You would need to know the details of your printer setup before hand to make it easier. If you uploaded your current files it would be possible to provide you with a basic config set.
You don't need to remove the SD card to create a backup of the config files on the card since you can download them from DWC, but having a full copy of the card contents is always a good idea anyway.
-
@Phaedrux Ah! OK, this is starting to make a little sense. Now I am getting intrigued and would like to upgrade the firmware so my machine would the have the newest version of firmware and DWC and learn to how to do it.
Because this is off-topic from the pressure advance question should I do as you suggested and start a new thread? I really appreciate you being willing to help me. I'm sure if I can learn, anyone could and such a thread might be useful to others.
-
Sure you can start a new thread. Include your config.g and homing files. Go through the config tool and try and create a new config set and include that as well and we can compare to see how far off it is.