Robot prototypes, robot kinematics
-
Last night was crimping time. A big thanks to the Duet team to deliver more crimp pins than mathematically necessary!
I followed https://docs.duet3d.com/en/How_to_guides/Wiring_your_Duet_3 "crimping the connectors". Additional to those information:
From datasheet I learned to that the crimp pin bare wire clamp for the deisolated part is 2.1 mm long. I'm using Jokari 20050 to deisolate, one of the best tools I ever bought (starts at 6 mm, 2.1 mm by eye). I tried crimping the bare wire first with PA-20, but found far better to crimp the clamp for insulation first, then making sure all single little wires are inside the remaining open clamp, then crimp the bare wire.
To connect wires, I use Wago 221-2411, where deisolation shall be 11 mm according to datasheet, but I reduced it to 7 mm. The wire colors are not standardized, I found all color combinations at my steppers. I standardize myself to red-blue-green-black for new wires like the Mini5+ wiring diagram. I find out pairing of the stepper wires by mearuring resistance.
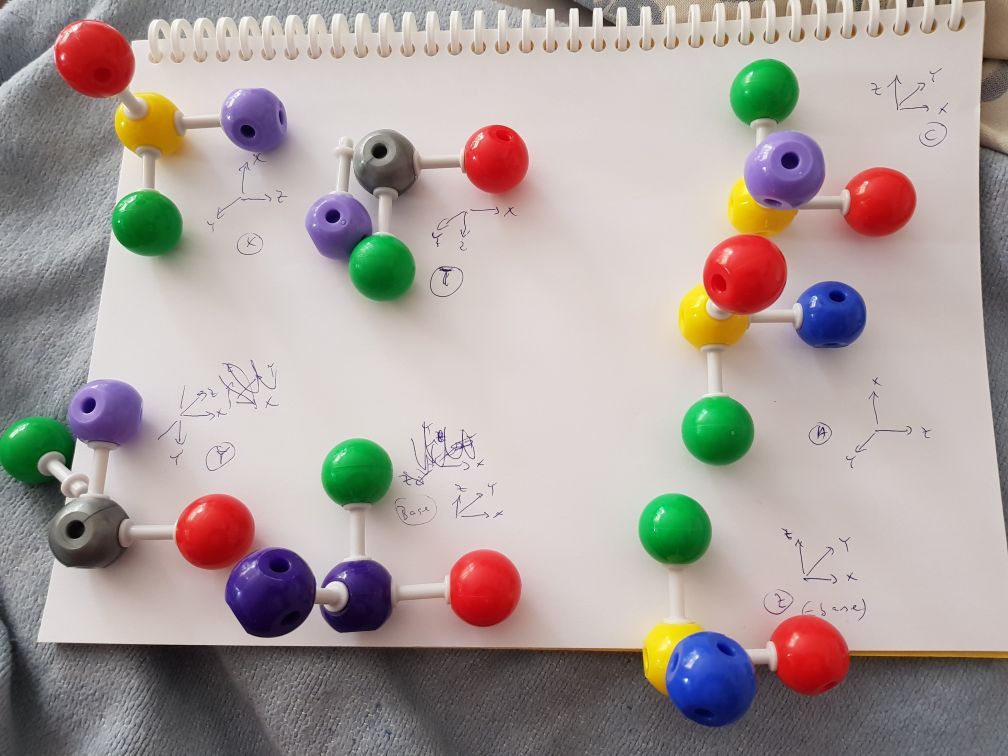
I have lost my way the last days to find out CNC 5 axis Denavit-Hartenberg parameters. This is my picture to find the solution:

Right are from top to down C-A-Z (workpiece mode, inverted Dns), left are from bottom to top Y-X-tool.
(the colors are different, because I only have a small chemistry tool set. Shall be red-green-blue each)It is still wrong *). One wrong -90 instead of +90 rotation or wrong Z direction, and everything is wrong. I make a new approach today, but I think the best tool in the future will be the DWC RobotViewer and I will start updating it to the new parameters.
*) riddle: find the error

-
I want to give update information every week, so
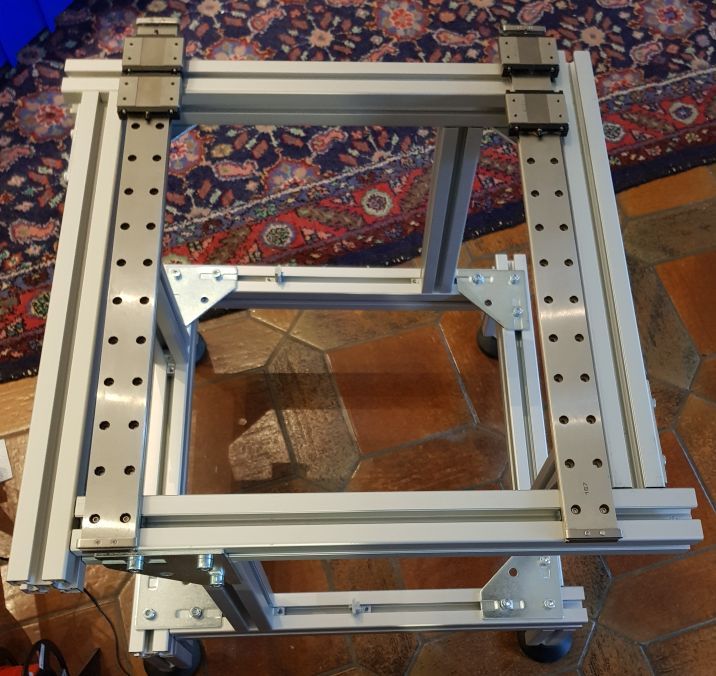
- I build the CoreXY

I've created the frame to be flexible width, so I can assemble the linear guides on them. It is quadratic, so I can rotate the lower part by 90 degrees to be able to change from AC to BC fast.
I thought about to build it flexible enough for CoreXZ, but it needs too much time to change configuration. The code should work for CoreXZ F parameter, I've compared it with Cartesian results.
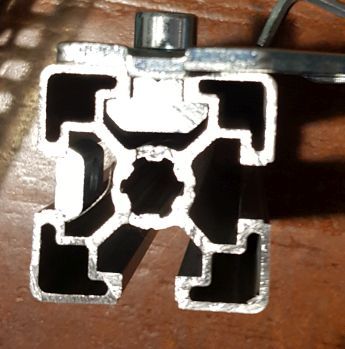
A pitfall:

the height of the nutstone on top is so big that the plate is not firm, better use the nutstone on the left side. The versions with spring are better than the ones on top, because they can be added and remove later, after extrusion assembly.
Firmware: I dived deep into the RRF code, because I had (and still have) some missing knowledge about how the code works, but I'm improving. CoreXY should work, I compared it with Cartesian kinematics results.
I started using Atmel ICE. I saw two approaches: using the elf file and debug inside Atmel (now Microchip) studio, which has best support for ICE, or using Eclipse and using GDB and OpenOCD. I'll tell the experience.
-
@JoergS5 Thanks for the update! I have a Open5X machine to experiment with your build on - just need to find the time. Probably after Fromnext now.
-
@T3P3Tony until then I'll have tested the firmware with the prototype. I build the prototype as stable as possible, so I can use it as CNC for light tasks also.
-
This post is deleted! -
I want to give an update. Time is passing surprisingly fast!
I had constant errors in the code calculating the robot kinematics for AC based systems. I searched for a bug, but in fact it was a gap of knowledge:
I was not aware that each rotation orientation has two AC solutions, e.g. A-20 C 30 has a second solution A20 C-150 (i.e. A is mirrored, and C 180 difference). That's BTW the reason for the singularity at (0,0) to snap the C axis with infinite velocity. When trying to switch at other places, XYZ have infinite velocity.
I thought the AC angles and rotation axis is a 1:1 relation, but it is not the case.
To sum up, one rotation matrix => 2 quaternion solutions. rotation matrix => two AC solutions. AC => one rotation matrix. quaternion => one rotation matrix.
I've changed the code to respect the two solutions, have to test the code again and proceed. Sorry for the delay, especially Tony.
I'll solve the A 0 degree singularity case by setting A velocity to 0 (in the segment which crosses 0,0), but this will result in an inexact line. Better to remain in the A negative or positive region or remain at A=0 when trying to print at (0,0).
-
Interesting project. Thanks for keeping the community updated. I have added 5 axis kinematics to Marlin firmware and was invited by Tony to join this discussion. I can offer to compare some return values of your kinematics functions with mine which are copied from LinuxCNC (https://github.com/DerAndere1/Marlin/blob/kinem2/Marlin/src/module/penta_axis_trt.cpp). Is there anything else I can do?
Quote:
"Better to remain in the A negative or positive region or remain at A=0 when trying to print at (0,0)."Agreed. According to my knowledge, this is the typical approach.
Best regards
DerAndere -
@DerAndere thank you for your offer, I appreciate it and we should work together on it.
I calculated the 5 axis angles by calculating AC angles directly until now. But was trapped by calculation errors when changing the sign of A angles and when crossing from -180 to +180. And this method doesn't work for 6 axis robot. Quaternion based calculations also don't converge for 6 axis robot.
I've changed now to a different method to use skew-symmetric matrices, this works much better and uses a 6 row jacobian matrix to calculate the generalized inverse.
When I have the changed methods tested, I will check in into github.
Do you have a preference how to transfer the test data between us? I can provide the Denavit-Hartenberg parameters and the angles I use for testing.
-
@DerAndere the problem I currently have is from the approach to create a general solution for all serial robot types. I have to be aware of all possibilities.
For example, all actuator joints and arms are parameters and can be prismatic or rotary. For a 5 axis Prusa or CoreXY based printer, the XYZ arms are e.g. robot arms which can have different angles than 90 degrees. Calibration could result in setting 89 degrees instead of 90. The robot kinematics will calculate the necessary A and C angles to be correct for every line segment.
-
@JoergS5 yes, your DH parameters could be a good starting point. According to https://docs.duet3d.com/User_manual/Machine_configuration/Configuring_RepRapFirmware_for_a_Robot_printer the DH parameters are configured with M669 D, right? I assume your current work in progress will be added to your 3.5-dev branch. If not, let me know where to find the latest and greatest version.
-
@DerAndere I will test today and tomorrow and then check in tomorrow evening. This code will have a current version for a CoreXY AC with M669 B"robotType=CoreXY" which has the tested DH parameters.
A first view:
The parameters look like this:
D!0:10:0:0:0 // C
D!1:0:0:0:-90:0:180 // A
D!2:0:180:0:-90:0:0 //
D3:300:0:0:-90 // Z and rotate to base
D5:0:-90:0:0:0:-90 // Y
D6:0:0:0:-90:0:0 //X
D7:0:0:0:0:0:0The CoreXY X and Y connected drives are defined by
P"mapDriveLetterDn=0X6:1Y5:2Z3:3A1:4C0"
where X6 means X is assigned to D6.
D7 is where the tool offsets are added.axisTypes=PPPRR
To use this setting for a Prusa style printer, the XY must be decoupled from CoreXY by using no name for the robotType and just setting the parameters.
-
@DerAndere I can only continue at the beginning of next week, so here is an update to allow you starting:
I've checked in the newest tested version, which should work correctly with CoreXY. I deactivated speed limit and angle limit violation warnings/errors, so this should not stop any printing. LogLevel is set to 0 by default and should not be set, because the many console messages of logging produced buffer problems.
The RRF fork is a compilable version, but changes of the other RRF projects may brake the code, so making an own fork and getting the updates from Duet master would be easiest to fix it. The important files are all in Movement/Kinematics/RobotKinematics*.* and the Kinematics.h/.cpp have a few additional lines to define the K13 mode.
The homing is only through setting of the A values, not by M208 values.
To work with Open5x or other 5 axis printers, the following must be changed:
- one possibility is to let robotType empty and simply define axisTypes, the D and A parameters. P paramters if needed.
- I've added a robotType=Open5x to the RobotKinematics4.cpp file, a developer can change the settings inside it and recompile
For Open5x (or other Prusa like), the D parameters need to be changed so that after the CA next is not the Z axis, but the Y axis. Then Z and X.
I've uploaded the compiled Mini 5+ binaries to
https://github.com/JoergS5/RRFRobotBinaries
so if you happen to test with Mini 5+ (I use it together with the Mini2), you can use those. The uf2 is sufficient. The RRF is 3.5 based. I used it with a 3.4 DWC, the basic functions work with this combination.When you have a working D configuration for Open5x, I can replace the current placeholder in the source. I can help begin of next week if you have no success.
-
I've done some testing yesterday with 6 axis robot setup. The skew-symmetric kinematics works good, only - as always - in singularity crossing situations there are problems. So I'll proceed with this algorithms.
I primarily tested CoreXY, but I decided to stop developing the prototype for it and change to Prusa like printer, so I can make a proposal for the Dn parameters. I stop CoreXZ, after reading a bit about it I doubt that it's useful, because the 1:3 gear means uneven Z movements. If someone needs it, please tell me, I have the algorithm for it and compared with K2 cartesian, it worked correct.
The kinematics with PPPRR, i. e. XYZ with prismatic axes (including CoreXY), find a solution fast, only 1 or a few iterations for long distances, so it's fast. 6 axis need about 5 iterations on average to find the solution. (with precision requirement 1e-5 mm or degrees).
Update Dec 8: I found (and fixed) a bug yesterday in the quaternion section of the code. The edge situations are a beast for the orientations (the same for Euler angles, Quaternions, AC angle calculations).
-
Last weekend I searched for the reason why skew and quaternion results were different in my methods. The reason was in the end simple, as always in retrospect... The skew symmetric matrix must be normalized for the published formulae to work correctly (the w=1).
Now there is a nice match between quaternions and skew and I can proceed.
Let me describe how my development works, if someone is interested:
- I try to find test data in the internet, but in most cases without success. So I have to build them my own, which is very time consuming. Life would be much easier if for formulae an example would be given.
- I create methods, rotationToQuaternions for example, and the oppsosite, quaternionsToRotations (I call it forward and inverse methods)
- I create random data/matrices/angles/properties million of times and verify that applying the forward and inverse methods result in the starting data. Rounding errors must be accepted, but in most cases if the errors are too high, it is due to a bug in the methods. For float, I accept errors in the region of 1e-7 to 1e-8 for single calculations and worst 1e-4 if the calculation is very complex. A very common bug is confusing radians with sin or cos values, because they are similar for low angles.
- a different validation method is to compare my implementation with a library, I e. g. compared the results of the generalized inverse with Eigen
- another test method is unit testing in the spirit of JUnit. I use it when refactoring methods as well
Unfortunately, there are books with errors in the formulae (I have one book with an error on every third page), so I have to verify the formulae. With examples this could be deteced.
An enlithing article to understand the difference between ZYX transformations and infinitesimal angle changes (DH/rotation matrix vs quaternion/skew) is "Derivative of Rotation Matrix... by Fumio Hamano. I can recommend reading it. Both aspects build the core of the robot kinematics.
I have to clean up the code again and verify that the kinematics works.
-
This post is deleted! -
 undefined JoergS5 referenced this topic