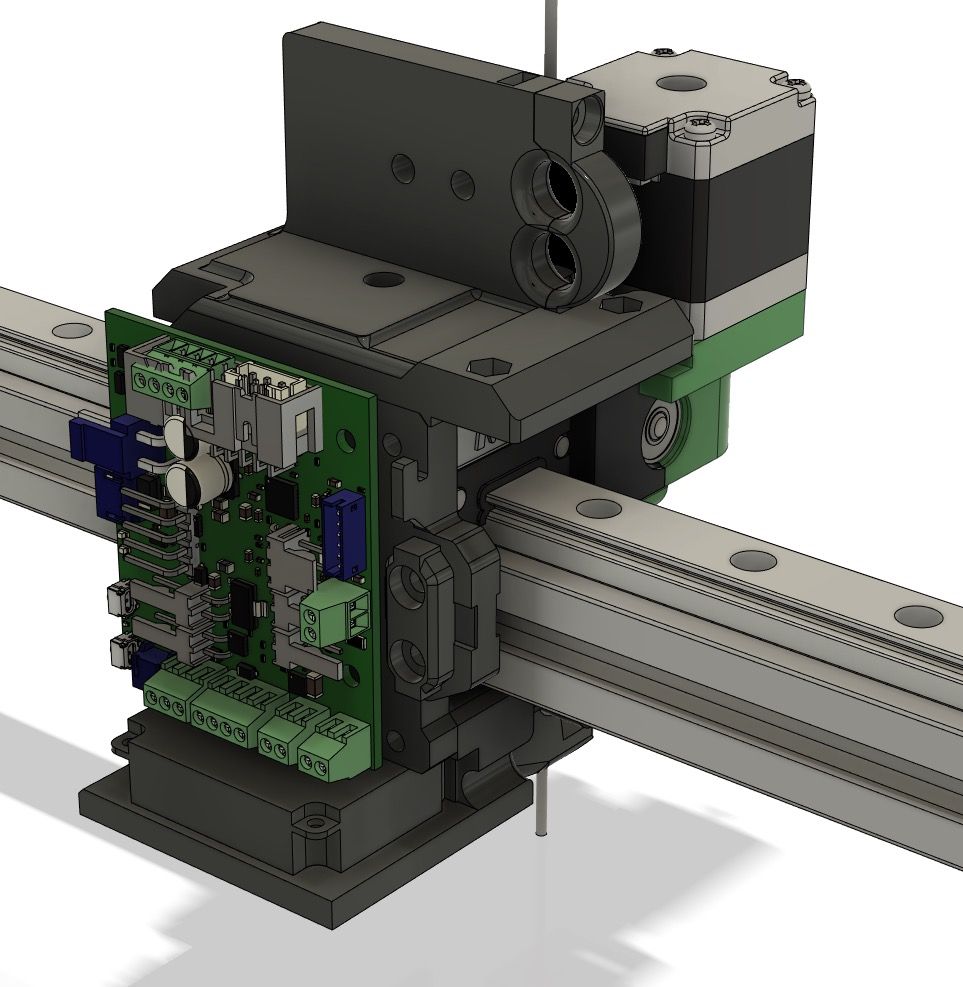
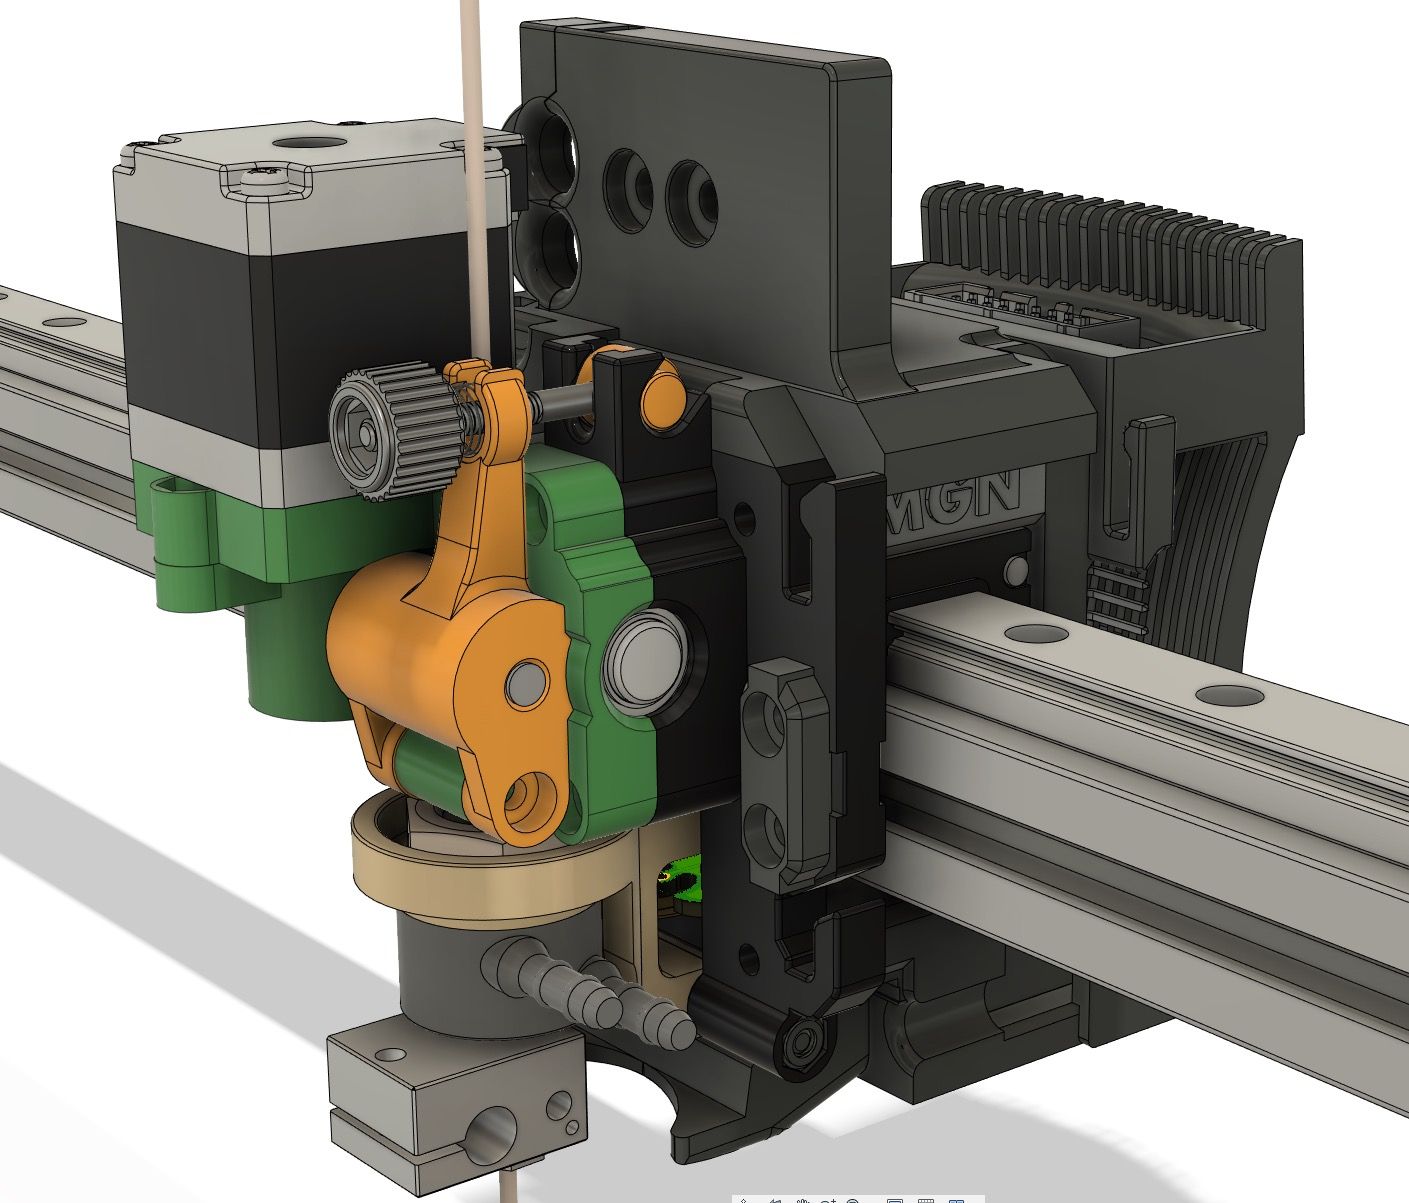
To verify, if I have the following, using the toolboard...
-
There are two inputs, as part of IO0 and IO1. Therefore, you are correct, three devices that need inputs = more wires back to main or expansion boards.
I am curious why you would put a BLtouch probe on a tool, instead of on the carriage. It retracts after all...
Or perhaps you are putting a toolboard on "the" carriage. In which case some of the carriage's functionality, beyond being just a tool, will indeed need wiring back to the 6HC or 3HC.
-
@Nuramori said in To verify, if I have the following, using the toolboard...:
I would still need to wire back to the duet3, at least ONE of the following, and not be able to use the toolboard connections?
optical x-endstop
z-probe (worst case, a BLTouch, which needs a servo/out pin - the sole five pin io)
magnetic filament sensor.Given the three, I am going to suspect that in addition to the three wires (two power, one ethernet cable), I'll need however many additional wires necessary for the odd device out?
I'm looking at a way of supporting using the TEMP1 connector as an endstop input. You would need to take the power and ground for the optical endstop from the IO_0 connector. Alternatively, if the Z probe isn't a BLTouch, then the output pin on IO_0 could be used as an input.
Perhaps a passive aggressive way of asking if there may be a future toolboard that adds one more five pin IO connector

An additional 3-pin connector has already been included in the next design revision.
-
I was going to put the tool board on the carriage/gantry (BLVcube) so your latter case would be correct.

I made my own custom patch board that I use now- so that a 16 pin idc cable as well as the heater power goes back to the duet3 to handle the connections for the bltouch, pt1000, fan, leds, and optical endstop. With the tool board I can replicate that with even less wire bulk and more functionality/flexibility. I can’t get 5v at the head it seems (very easily) for the leds, but I can work something out.
-
I actually have a question about the bltouch - I saw in the rc4 notes that the only types of probes supported are types 8 and 9. Isn’t the bltouch a type5? It seems to imply that a bltouch can’t be used with the tool board.
-
DC,
As someone who LITERALLY just opened the package containing my new 1LC Toolboard, is there a way we can make a BLTouch work with the board alone, or do we have to run extra wiring? -
@Nuramori said in To verify, if I have the following, using the toolboard...:
I was going to put the tool board on the carriage/gantry (BLVcube) so your latter case would be correct.
Got it. Not a toolchanger. So at the moment, the toolboard will plug in all the tool things, and the other endstops and probes will have to be wired back like any other printer.
As @dc42 said there may be a future rev that would make this a little cleaner.
P.S. Depending on many physical things about your printer, you may want a cover, or stubs, or other, to prevent a crushing incident...
-
@PastThePoint said in To verify, if I have the following, using the toolboard...:
DC,
As someone who LITERALLY just opened the package containing my new 1LC Toolboard, is there a way we can make a BLTouch work with the board alone, or do we have to run extra wiring?It should run from io0. If the firmware supports this... worth a try
Wiring:
BLtouch 3 pin connector:
- BLt black to io0.gnd
- BLt red to io0.5V_EXT
- BLt orange to io0.out
BLTouch 2 pin connector:
- Black no connection (or if you are really OCD like me, also to io0.gnd, two wires WILL fit in that crimper, darnit!)
- White io0.in
Configuration, assuming your tool board is board 1:
M558 K0 P9 C"^1.io0.in" H5 A5 T6000 S0.02   ; Z probe BLtouch - Set the height of the bed when homing G28.  Combined with content of bed.g as invoked by G32, levels bed. Also used for Mesh.
					                        ; Hn = dive height
				                            ;   A bigger dive height prevents a situation where the bed is out of alignment by more than the dive height
                                            ;   on any corner, which can crash the hot-end into the bed while moving the head in XY.
                                            ;   Probing speed and travel speed are similarly reduced in case the Z probe isn't connected properly (or
                                            ;   disconnects later after moving to a point) giving the user more time to stop.
                                            ; An = Number of times to probe each point.
                                            ; Tnnn = Travel speed between probe points.
                                            ; Snnn = Tolerance when probing multiple times. Two readings inside this window and we move on.
G31 K0 X0 Y0 Z0                           ; Ensure probe has no offsets
M950 S0 C"^1.io0.out"                       ; Servo Control Pin for BLtouch.
NOTE: You may very will want offsets in G31. I'm doing some odd things with a toolchanger right now and have them forcibly turned off
/sys/deployprobe.g: (you can create this with the web interface, system tab)
M280 P0 S10/sys/retractprobe.g;
M280 P0 S90It is best if your home and/or bed files use G30 commands instead of G1 H2 (or whatever G1 Hx). Example of my homez.g: (yours may need to be slightly different)
; Home Z Axis G90 G1 X150 Y150 F10000 ; Move to the center of the bed M564 H0 ; Just in case bed is on probe at start. G91 ; G1 Z1 F50 ; M564 H1 ; G90 ; M280 P0 S160 ; And reset the probe, again, just in case. M558 F500 ; Set the probing speed G30 M558 F50 ; Set a slower probing speed G30 -
@Danal there are other things in that fusion file image that are turned off, and is only showing a few things turned on. It’s going to be a revision to my current print head I designed.

-
Looks like fun. I see liquid connections. Bwaaa ha ha ha !
-
@Danal hehe yeah. I have a zesty kryo with about 600 hours on it. No issues so far


-
@Danal The latest notes seem to say the tool board can only be used with z probe types 8 and 9. That seems to exclude type 5, which is the bltouch. Can you verify this?
-
I'm a power user, not internal to Duet in any way, and can really only ask @DC42. To your point, BLt may not be there (yet) in the tool board firmware. Those release notes you pointed out certainly seem to verify that.
Truthfully, in my mind anyway, the BLT is more "part of the carriage" that "part of the tool", and I'd just run its wiring back to an io port on the main 6HC board. That's how I have mine hooked up.
That's a long winded way of saying that the use case is off the main track, and I can see how it would be lower on the tool board firmware priority list. Of course, the above documentation is still good for a main board port, just change the board number and port number to match where the BLt is plugged in.
-
Thanks. I currently have migrated from the duet2 to the duet3 and it’s been working very well for awhile now. I am currently designing a new printhead, and saw the tool head board as an opportunity to elegantly minimize the connectivity wire nest, even more than what I’ve been able to do with a custom patch board.
I’ll keep an eye out for the revision that David alludes to.

-
@Nuramori said in To verify, if I have the following, using the toolboard...:
@Danal The latest notes seem to say the tool board can only be used with z probe types 8 and 9. That seems to exclude type 5, which is the bltouch. Can you verify this?
bltouch is type 9.
-
@dc42 said in To verify, if I have the following, using the toolboard...:
@Nuramori said in To verify, if I have the following, using the toolboard...:
@Danal The latest notes seem to say the tool board can only be used with z probe types 8 and 9. That seems to exclude type 5, which is the bltouch. Can you verify this?
bltouch is type 9.
Doh! Of course!! Thank you Dave.
-
@dc42 hah. I saw H5 in Danal’s snippet, and didn’t look at mine. I had H9 and now feel silly. Lol. Thanks. :).
-
Well, color me purple. Or something. I indeed do have an H5 coded in there. Bigger than life. Checked my config.g to be sure I didn't copy from the wrong printer. There it is again. Big 'ol 5. Cinco. Pięć. Cinq. פֿינף. Pent. خمسة. Quīnque. пять. No matter what language I try, it still comes after four and before six. And it is nowhere nearдевять. Sheesh.
And I indeed do have a BLtouch. And it deploys and retracts like a champ.
Hmmm.... It seems that D3 pins and macros do a LOT.
I will certainly change it to H9. Hope that doesn't break anything...

-
-
@droftarts said in To verify, if I have the following, using the toolboard...:
@Danal @Nuramori In M558, H5 is the dive height, P parameter is the probe type. In Danal’s close snippet earlier he did have P9, and H5. So that’s correct!
Ian
Well, darn it, after all my smart-alek typing, I was wrong about being wrong.
P not H. Hmmm...
Anyway, THANK YOU @droftarts
-
I’m loving this thread for levity. Lol.
Making things more complicated than obvious is always entertaining.
Sorry guys. I need more rest.