Pressure Advance seems to not be working.
-
@Samuel235 said in Pressure Advance seems to not be working.:
I'm currently using CURA so I'm unable to force a seam to be in the middle of a flat face
It can be done in Cura.
https://ultimaker.com/en/resources/52343-shellThe options may be hidden by default. Use the gear icon on the shell heading to see any hidden options.
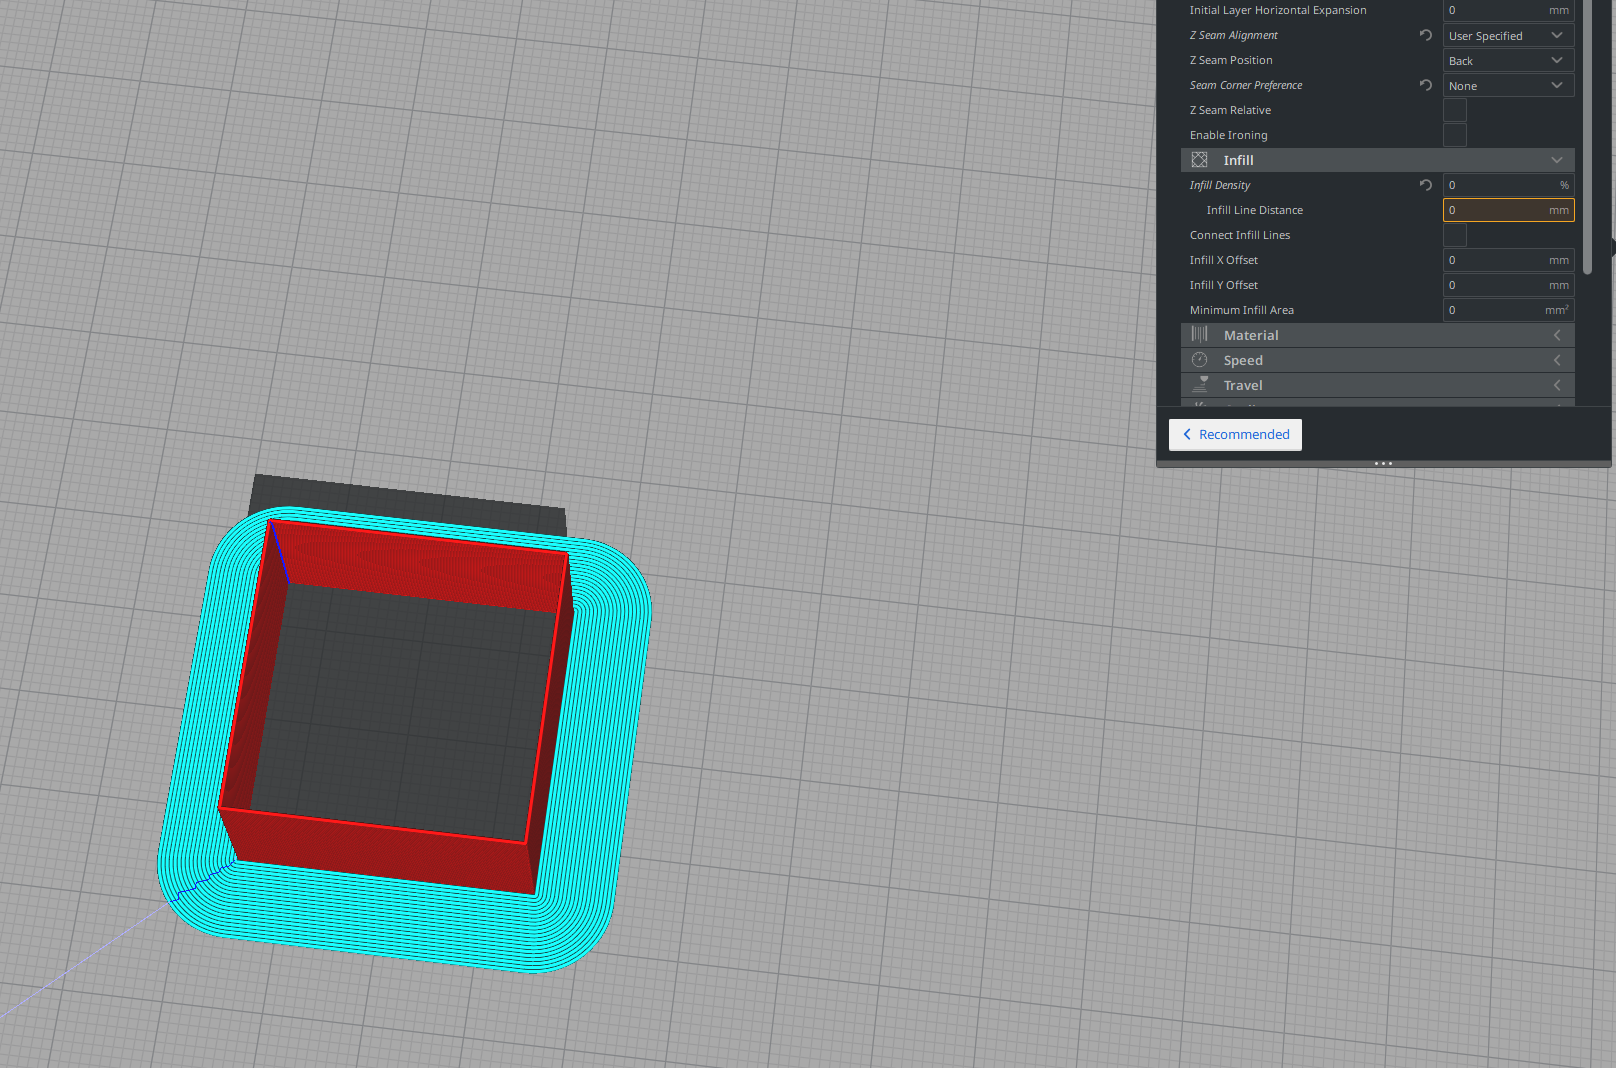
Z seam alignment - User specified
Z seam position - back
Seam corner preference - noneProduces the desired result. That's in 4.4.1. In older versions there was an X and Y position you could specify. The setting is still there in the settings visibility filter, but it's not being shown and I'm not sure what's blocking it. Regardless, setting it to back, front, left, or right works to align it to a face.
-
@Phaedrux - Im on 4.2.1 and the XY position will not put it in the middle of a flat face for me and a few others I chat to. I will try their update shortly to see if that new option works for me.
-
@Samuel235 The corner preference must be none as well.
-
I have just updated my Cura, and still facing the same issues:

Will attempt to find a work around later today using another slicer.
-
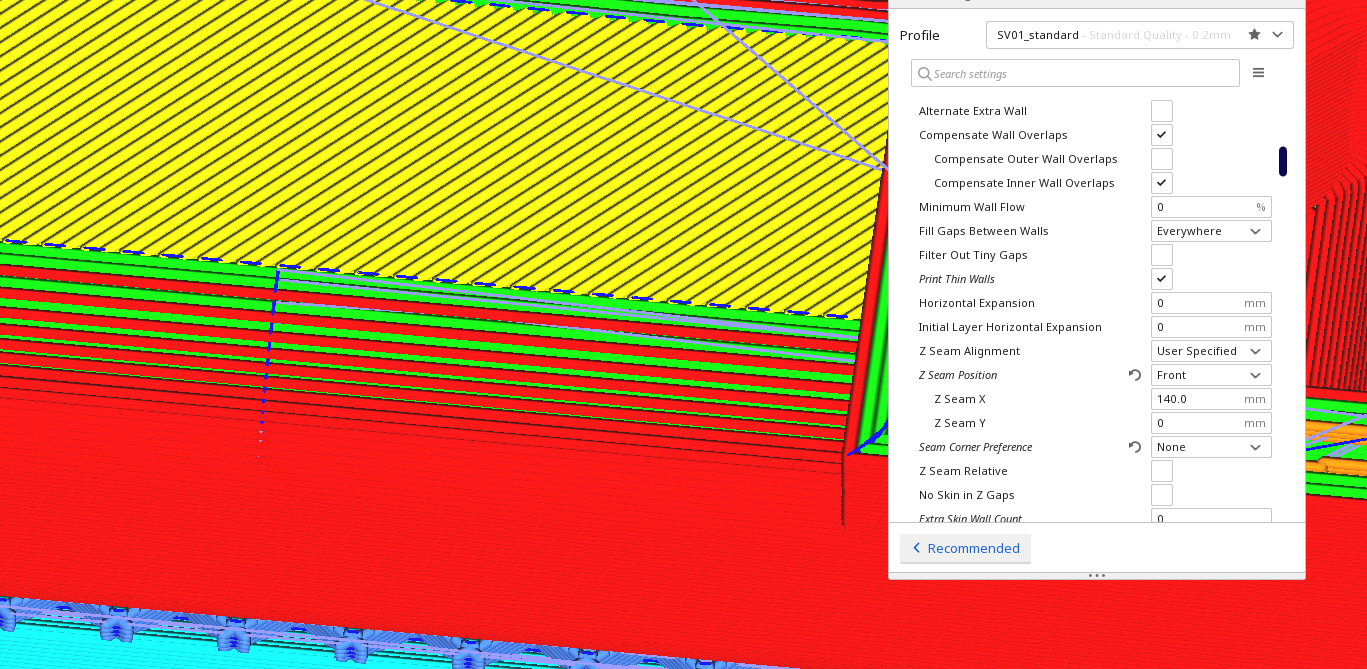
Re getting the z-seam in the middle of a flat face using Cura. Well, it can't be done using the UM releases but my Cura builds do now provide that capability. Setting the z-seam to user-defined and seam corner preference to none will enable this feature. You can find my releases at https://www.dropbox.com/sh/s43vqzmi4d2bqe2/AAADdYdSu9iwcKa0Knqgurm4a?dl=0. Please read the README.md file there for more info.
Here's an example, you can see the travel moves associated with the z-seam to the left of the middle of the flat area at the botttom of the image.

-
@burtoogle said in Pressure Advance seems to not be working.:
Well, it can't be done using the UM releases but my Cura builds do now provide that capability.
Just one more reason to use your builds.
@Samuel235 I was going by memory on the settings and didn't realize that the stock Cura does not allow this.
-
@Samuel235 For what it's worth, setting the seam to a corner of the cube is also usable, it just makes finding the smoothest transition a little harder. You can also use a cylinder, but then you miss out on the corner bulge tuning.
-
Oh awesome, thank you for including your build @burtoogle!
@Phaedrux - I have been using a cone, I imagine this to be the same as a cylinder for the sake of this test, just the layers would get quicker as they go up, and I ranged from 0.1 to 0.9 PA, I didn't get any change in apperance of the seam at all across the range of PA values unfortunately. I will try with a cube tomorrow to test.
-
A cone might be ok. I think the fact the size is changing as it goes up would make it harder to see the difference in the seam since the layer time is a confounding factor.
The cube is probably the best option for this because you get up to speed over the 100mm length and the corners show the bulge and the seam on the face is clearly visible.
-
Currently printing a 100mm cube with a single skin, no infil. Seam is in the middle of the face at the back with the build of Cura linked above (Thanks @burtoogle). I have PA changing its value from 0.05 to 0.9 in 0.05 increments every 25 layers. Will see how this turns out.
-
Cube just completed:
As you can see throughout the range of 0.5 to 7 PA value there is no difference. This was with a jerk value of 8000mm/min. I’m dropping that jerk down to 4000mm/min now for another test. Should i expect to see any improvements with lowering the extruder acceleration value too?
-
@Samuel235 something isn't right. There should definitely be some noticeable difference over such a wide range of 0.5 to 7.
What command are you using?
Can you post your config?
-
Nothing has changed from the settings i posted originally, other than change to the extruder current limit. Do you want me to post them again (Asking as i’m not at my system at the moment but will get to it if needed) so you can confirm any typos were not made or something? I don’t believe there is anything i would have typoed as It was just a change of number not a command or anything.
-
How are you changing the PA value? Via the console during the print, or is it scripted into the gcode file?
I'm thinking it may not actually be getting applied because there should definitely be some visible result. At a value of 7 you'd likely see the extruder reversing dramatically.
-
@Phaedrux - its hardcoded into the code, but i confirm it changes every 25 layers using the command line console. The extruder behaviour changes each time PA changes, i can confirm that. But nothing changes in the print.
Im thinking PA is working but something is masking its effects, hence why i was thinking of changing jerk and possibly acceleration on the extruder.
-
Are you still getting hiccups?
-
@Phaedrux - This is a M122 just ran (around an hour after the print finished, this would still be reporting from the print, right?):
M122 === Diagnostics === RepRapFirmware for Duet 2 WiFi/Ethernet version 2.03 running on Duet WiFi 1.02 or later + DueX5 Board ID: 08DGM-956GU-DJMSN-6J1F4-3SJ6N-1BNBF Used output buffers: 6 of 24 (20 max) === RTOS === Static ram: 25680 Dynamic ram: 94256 of which 308 recycled Exception stack ram used: 492 Never used ram: 10336 Tasks: NETWORK(ready,524) HEAT(blocked,1236) DUEX(suspended,156) MAIN(running,1668) IDLE(ready,160) Owned mutexes: === Platform === Last reset 75:55:33 ago, cause: software Last software reset at 2019-12-31 18:44, reason: User, spinning module GCodes, available RAM 10232 bytes (slot 2) Software reset code 0x0003 HFSR 0x00000000 CFSR 0x00000000 ICSR 0x0441f000 BFAR 0xe000ed38 SP 0xffffffff Task 0x4e49414d Error status: 16 Free file entries: 10 SD card 0 detected, interface speed: 20.0MBytes/sec SD card longest block write time: 378.3ms, max retries 0 MCU temperature: min 40.0, current 54.9, max 59.0 Supply voltage: min 23.9, current 24.4, max 24.6, under voltage events: 0, over voltage events: 0, power good: yes Driver 0: standstill, SG min/max 0/1023 Driver 1: standstill, SG min/max 0/1023 Driver 2: standstill, SG min/max not available Driver 3: standstill, SG min/max 0/1023 Driver 4: standstill, SG min/max not available Driver 5: standstill, SG min/max 0/270 Driver 6: standstill, SG min/max 0/281 Driver 7: standstill, SG min/max 0/284 Driver 8: standstill, SG min/max 0/291 Driver 9: standstill, SG min/max not available Date/time: 2020-01-03 22:40:42 Cache data hit count 4294967295 Slowest loop: 149.85ms; fastest: 0.08ms I2C nak errors 0, send timeouts 0, receive timeouts 0, finishTimeouts 0, resets 0 === Move === Hiccups: 0, FreeDm: 169, MinFreeDm: 145, MaxWait: 156472642ms Bed compensation in use: mesh, comp offset 0.000 === DDARing === Scheduled moves: 0, completed moves: 0, StepErrors: 0, LaErrors: 0, Underruns: 0, 0 === Heat === Bed heaters = 0 -1 -1 -1, chamberHeaters = -1 -1 Heater 0 is on, I-accum = 0.0 Heater 1 is on, I-accum = 0.5 === GCodes === Segments left: 0 Stack records: 4 allocated, 0 in use Movement lock held by null http is idle in state(s) 0 telnet is idle in state(s) 0 file is idle in state(s) 0 serial is idle in state(s) 0 aux is idle in state(s) 0 daemon is idle in state(s) 0 queue is idle in state(s) 0 autopause is idle in state(s) 0 Code queue is empty. === Network === Slowest loop: 379.69ms; fastest: 0.00ms Responder states: HTTP(0) HTTP(0) HTTP(0) HTTP(0) FTP(0) Telnet(0) Telnet(0) HTTP sessions: 1 of 8 - WiFi - Network state is running WiFi module is connected to access point Failed messages: pending 0, notready 0, noresp 8 WiFi firmware version 1.23 WiFi MAC address 5c:cf:7f:76:71:05 WiFi Vcc 3.32, reset reason Turned on by main processor WiFi flash size 4194304, free heap 24672 WiFi IP address 192.168.0.26 WiFi signal strength -52dBm, reconnections 0, sleep mode modem Socket states: 0 0 0 0 0 0 0 0 -
@Samuel235 said in Pressure Advance seems to not be working.:
this would still be reporting from the print, right?
As long as you haven't run a M122 or power cycled the count should still be from the print.
well I'm all out of ideas. Do experiment with different jerk and acceleration values, but usually the higher values would just mean giving pressure advance room to manage the extruder position rather than limiting it.
-
@DIY-O-Sphere said in Pressure Advance seems to not be working.:
Maybe the jerk value for the extruder is too high.
While setting up PA today, I had the same issue. After decreasing jerk to 1000 mm/min I was able to print the test cube.That's a common case with a geared extruder.....You will find that also documented in other threads
-
Should i try changing the acceleration of XY, just thinking back, on that cube the seam would only cause PA to activate pretty much only on the seam itself, nothing before or after it was instantly on the seam and then stopped as it increased Z to the next layer.
Just putting it out there that maybe my CY acceleration os causing PA to have no time to perform its work?