Looking for help Duet 6HC for a Core XY printer
-
I am trying to learn the Duet 6HC by installing it in a core xy printer. I can not for the life of me get the printer to move in the correct direction, home etc. I have a Tronxy X5S that I purchased just to learn on, I removed the electronics and wired up the Duet.
I have built several other printers from kits and want to be able to make CNC machines in the future. I have decent training in electronics and wiring, so everything works from that perspective. It simply goes the wrong way.
I have tried to find my error and spent weeks looking at posts here, I have moved my end stops to match the "A" motor. I seem to be missing what everyone else knows. What is zero, what is the correct polarity of the coordinates for the machine? Is there a good book or manual explaining this?
Should I just rebuild it to be a cartesian printer? Is that easier?
Any help would be appreciated. -
@pilot375 maybe start by posting your config
-
@jay_s_uk That would have been smart!
; Configuration file for Duet 3 (firmware version 3.3)
; executed by the firmware on start-up
;
; generated by RepRapFirmware Configuration Tool v3.3.10 on Wed Dec 01 2021 11:33:12 GMT-0500 (Eastern Standard Time); General preferences
G90 ; send absolute coordinates...
M83 ; ...but relative extruder moves
M550 P"Duet 3" ; set printer name
M669 X-1 0 Y1
0 Y1 0 Z0:0:1 ; select CoreXY mode
; Network
M552 S1 ; enable network
M586 P0 S1 ; enable HTTP
M586 P1 S0 ; disable FTP
M586 P2 S0 ; disable Telnet; Dual Z
: M584 X0.0 Y1 Z2:3 E4 ; Set drive mapping - 2 Z right, 3 Z left; Drives
M569 P0.0 S0 ; physical drive 0.0 goes forwards
M569 P0.1 S0 ; physical drive 0.1 goes forwards
M569 P0.2 S0 ; physical drive 0.2 goes forwards
M569 P0.3 S0 ; physical drive 0.3 goes forwards
M569 P0.4 S1 ; physical drive 0.4 goes forwards
M584 X0.0 Y0.1 Z0.2:3 E0.4 ; set drive mapping rem for dual Z above
M350 X16 Y16 Z16 E16 I1 ; configure microstepping with interpolation
M92 X80.00 Y80.00 Z400.00 E94.00 ; set steps per mm
M566 X600.00 Y600.00 Z180.00 E94 ; set maximum instantaneous speed changes (mm/min)
M203 X6000.00 Y6000.00 Z180.00 E1200.00 ; set maximum speeds (mm/min)
M201 X500.00 Y500.00 Z20.00 E250.00 ; set accelerations (mm/s^2)
M906 X1200 Y1200 Z1500 E1000 I30 ; set motor currents (mA) and motor idle factor in per cent
M84 S30 ; Set idle timeout; Axis Limits
M208 X0 Y0 Z0 S1 ; set axis minima
M208 X400 Y400 Z400 S0 ; set axis maxima; Endstops
M574 X1 S1 P"!io0.in" ; configure switch-type (e.g. microswitch) endstop for low end on X via pin !io0.in
M574 Y1 S1 P"!io1.in" ; configure switch-type (e.g. microswitch) endstop for low end on Y via pin !io1.in
; M574 Z1 S2 ; configure Z-probe endstop for low end on Z; Z-Probe
M558 P3 C"!^io3.in" H5 F120 T6000 ; set Z probe type to switch and the dive height + speeds
G31 P4 X0 Y0 Z2.5 ; set Z probe trigger value, offset and trigger height
M557 X15:300 Y15:300 S20 ; define mesh grid; Heaters
M308 S0 P"temp0" Y"thermistor" T100000 B4138 ; configure sensor 0 as thermistor on pin temp0
M950 H0 C"out0" T0 ; create bed heater output on out0 and map it to sensor 0
M307 H0 B1 S1.00 ; enable bang-bang mode for the bed heater and set PWM limit
M140 H0 ; map heated bed to heater 0
M143 H0 S120 ; set temperature limit for heater 0 to 120C
M308 S1 P"temp1" Y"thermistor" T100000 B4138 ; configure sensor 1 as thermistor on pin temp1
M950 H1 C"out1" T1 ; create nozzle heater output on out1 and map it to sensor 1
M307 H1 B0 S1.00 ; disable bang-bang mode for heater and set PWM limit
M143 H1 S240 ; set temperature limit for heater 1 to 240C; Fans
M950 F1 C"out 7" Q500 ; create fan 1 on pin out7 and set its frequency
M106 P1 S1 H-1 ; set fan 1 value. Thermostatic control is turned off
M950 F0 C"out 8" Q500 ; create fan 0 on pin out8 and set its frequency
M106 P0 S1 H1 T45 ; set fan 1 value. Thermostatic control is turned on
M950 F2 C"out 9" Q500 ; create fan 1 on pin out9 and set its frequency
M106 P2 S1 H-1 ; set fan 1 value. Thermostatic control is turned off; Tools
M563 P0 D0 H1 F0 ; define tool 0
G10 P0 X0 Y0 Z0 ; set tool 0 axis offsets
G10 P0 R0 S0 ; set initial tool 0 active and standby temperatures to 0C; Custom settings are not defined
; homeall.g
; called to home all axes
;
; generated by RepRapFirmware Configuration Tool v3.3.10 on Wed Dec 01 2021 11:33:12 GMT-0500 (Eastern Standard Time)
G91 ; relative positioning
G1 H2 Z5 F6000 ; lift Z relative to current position
G1 H1 X335 Y-335 F1800 ; move quickly to X or Y endstop and stop there (first pass)
G1 H1 X335 ; home X axis
G1 H1 Y-335 ; home Y axis
G1 X-5 Y5 F6000 ; go back a few mm
G1 H1 X335 F360 ; move slowly to X axis endstop once more (second pass)
G1 H1 Y-335 ; then move slowly to Y axis endstop
G90 ; absolute positioning
G1 X30 Y30 F6000 ; go to first bed probe point and home Z
G30 ; home Z by probing the bed; Uncomment the following lines to lift Z after probing
;G91 ; relative positioning
;G1 Z5 F100 ; lift Z relative to current position
;G90 ; absolute positioningThanks for any help!
-
@pilot375 I have a TronXY X5S, so I feel your pain! However, if you take it one step at a time, you will be fine.
First, check you have
M669 K1early in your config.g. As @jay_s_uk says,posting your whole config.g would help, as well as sendingM115in the console and sending the response. For more info on config changes, see https://docs.duet3d.com/en/User_manual/Machine_configuration/Configuration_coreXYNext, X0 Y0 origin position. On the X5S, the motors are usually at the ‘back’, so the origin should be at the front left. It doesn’t matter where the endstops are at the moment, but if yours is like mine, this is where the endstops are too.
Then, get the motors going the correct direction. See https://docs.duet3d.com/en/User_manual/Machine_configuration/Configuration_coreXY#testing-motor-movement
This should get the motors wired the correct way around, and moving the correct direction.Do the above, and let us know how you’re getting on.
Ian
-
Thanks everyone!
I have been looking at those pages and I believe maybe the motors may be running in the correct direction, maybe my homing code is all wrong, or I am missing something fundamental.
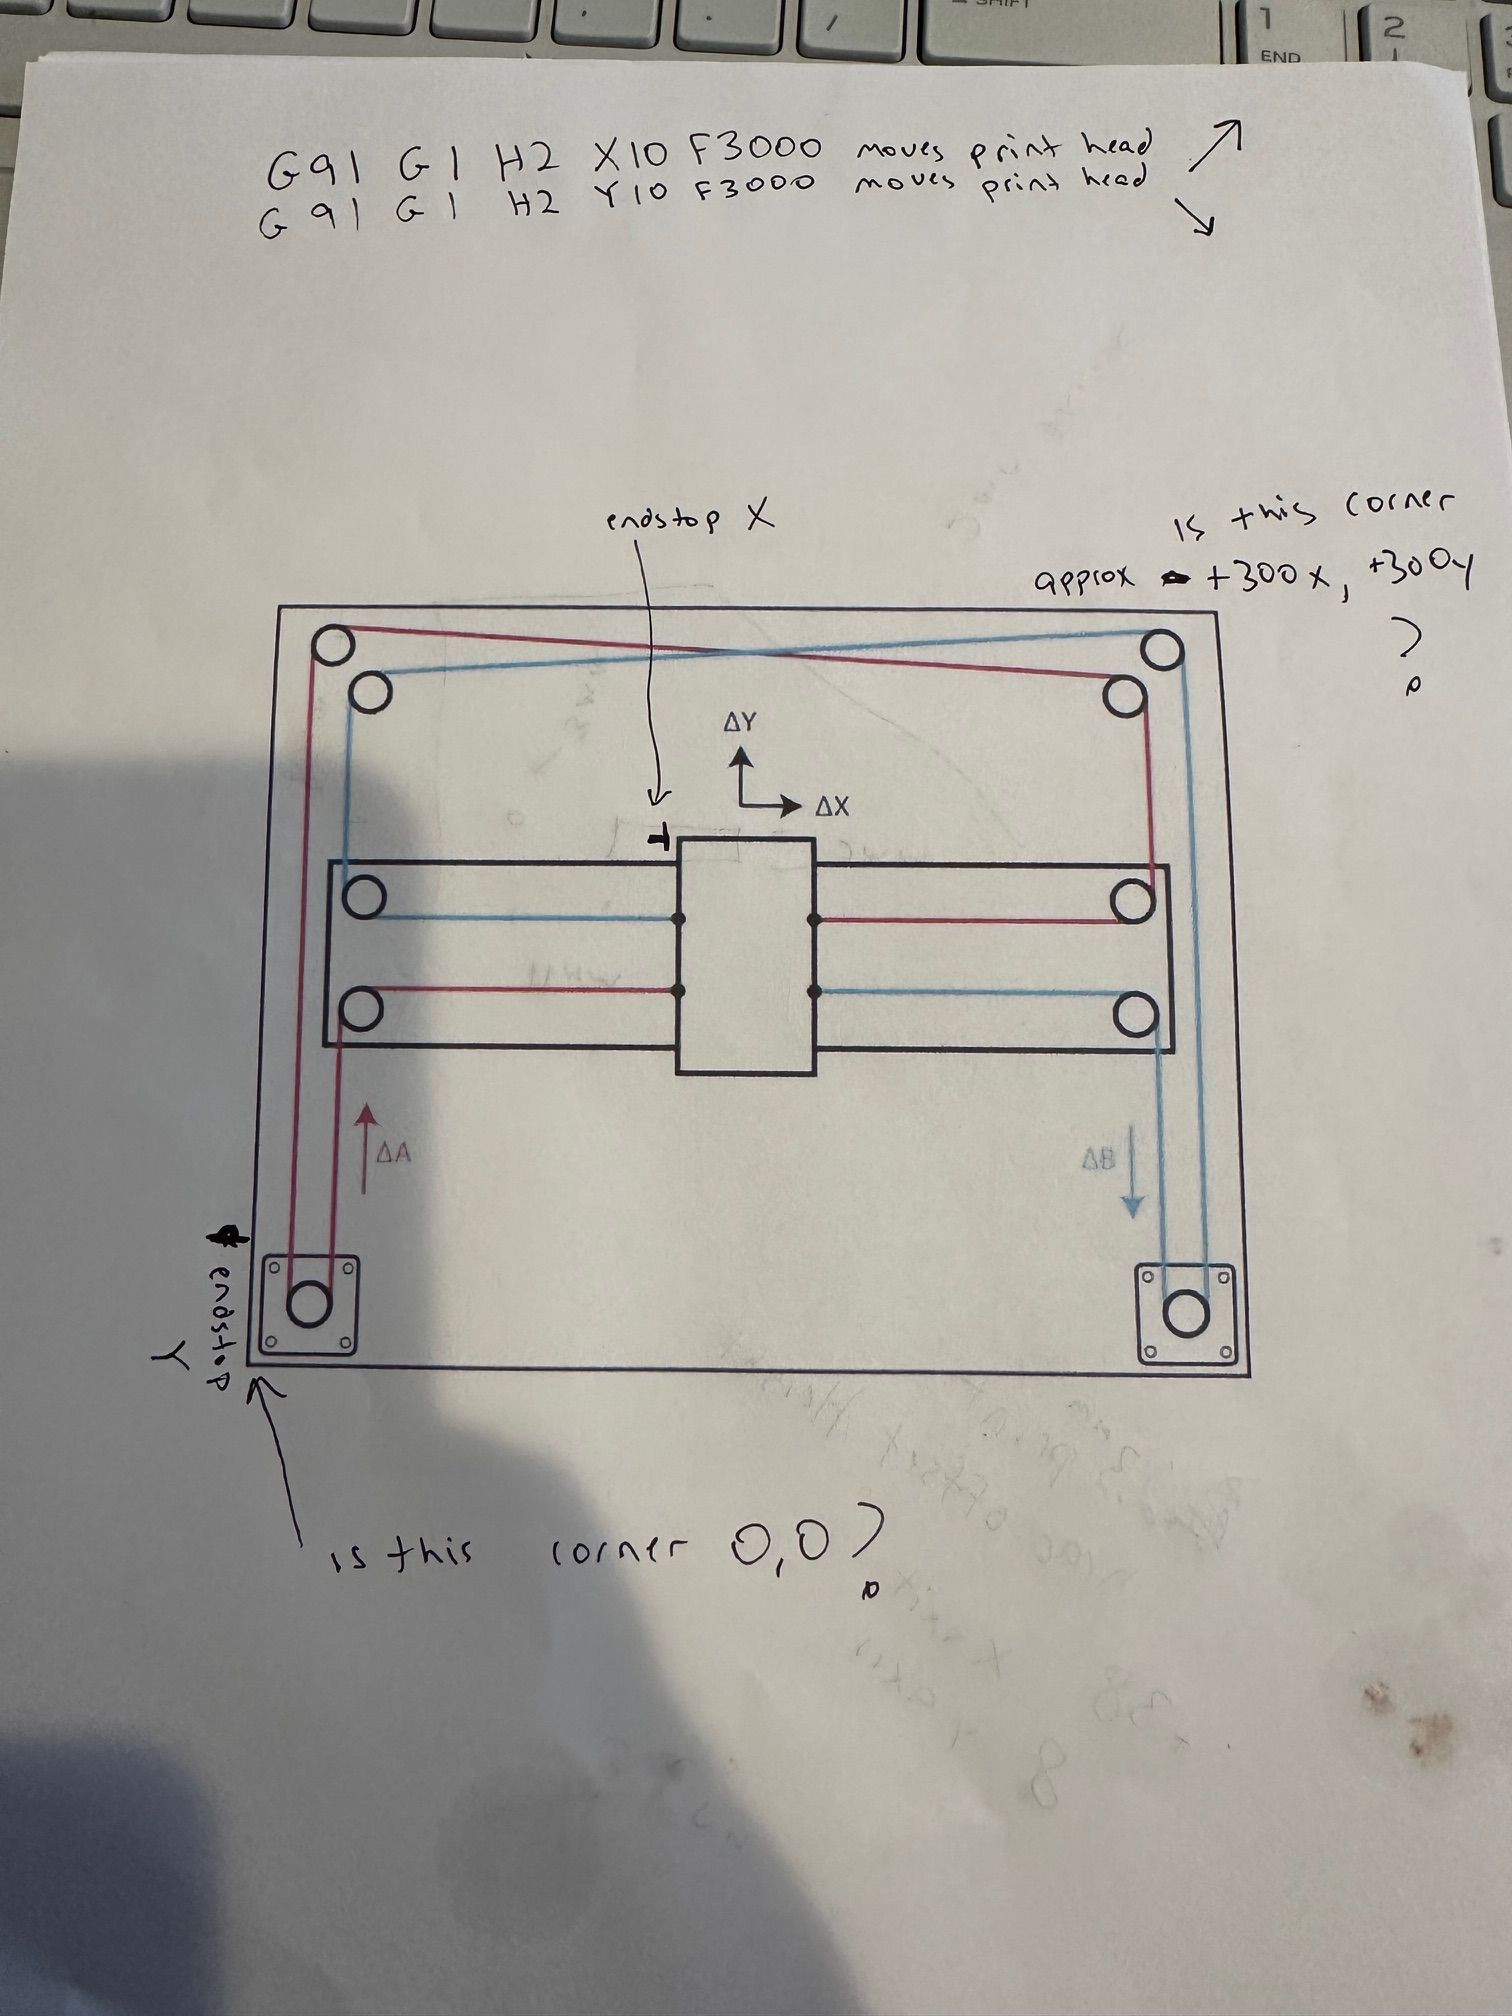
I moved the endstop switches as seen in the pic plus drew in arrows for directions print head moved when codes were entered. I also indicated where I think 0,0 and positive 300x and +300Y (or whatever the correct number is) Maybe I don't understand something.

12/23/2023, 3:40:33 PM m115
FIRMWARE_NAME: RepRapFirmware for Duet 3 MB6HC FIRMWARE_VERSION: 3.3 ELECTRONICS: Duet 3 MB6HC v1.01 or later FIRMWARE_DATE: 2021-06-15 21:45:56Here is my home all code.
G91 ; relative positioning
G1 H2 Z5 F6000 ; lift Z relative to current position
G1 H1 X335 Y-335 F1800 ; move quickly to X or Y endstop and stop there (first pass)
G1 H1 X335 ; home X axis
G1 H1 Y-335 ; home Y axis
G1 X-5 Y5 F6000 ; go back a few mm
G1 H1 X335 F360 ; move slowly to X axis endstop once more (second pass)
G1 H1 Y-335 ; then move slowly to Y axis endstop
G90 ; absolute positioning
G1 X30 Y30 F6000 ; go to first bed probe point and home Z
G30 ; home Z by probing the bed -
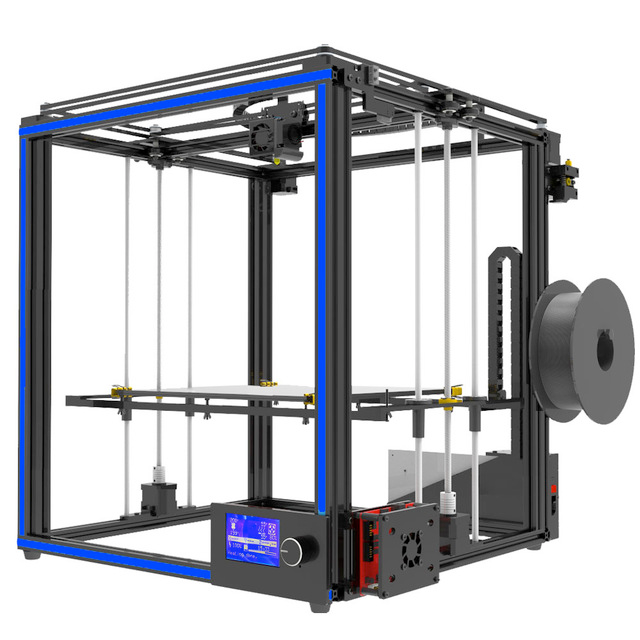
@pilot375 I have my TronXY orientated the other way around, with the motors and wiring at the back, and the nozzle in front of the X axis, like this picture:

So where you're saying X300 Y300, I have mine as home. On mine, the X homes at the minimum end, and Y at maximum end, ie to the front right, with X0 Y0 being front left.But it doesn't really matter, if you prefer the motors at the front! If you keep it as-is, and leave the endstops where they are, your homing is wrong for X, as it should home at the minimum end, eg:
...
G1 H1 X-335 Y-335 F1800 ; move quickly to X or Y endstop and stop there (first pass)
G1 H1 X-335 ; home X axis
G1 H1 Y-335 ; home Y axis
G1 X5 Y5 F6000 ; go back a few mm
G1 H1 X-335 F360 ; move slowly to X axis endstop once more (second pass)
G1 H1 Y-335 ; then move slowly to Y axis endstop
...
Ian
-
@droftarts said in Looking for help Duet 6HC for a Core XY printer:
G1 H1 X-335 Y-335 F1800 ; move quickly to X or Y endstop and stop there (first pass)G1 H1 X-335 ; home X axisG1 H1 Y-335 ; home Y axisG1 X5 Y5 F6000 ; go back a few mmG1 H1 X-335 F360 ; move slowly to X axis endstop once more (second pass)G1 H1 Y-335 ; then move slowly to Y axis endstop
Thanks for that! When I do that, the carriage moves towards the "b" motor, not the "A" motor. I would gladly move the switches back to where I currently call 300,300 to match yours if it would be easier.
Thanks!