Heating fault on hot end
-
@itsthejoker Have you run a heater tune and if so, did you correctly add the results into your configuration files?
-
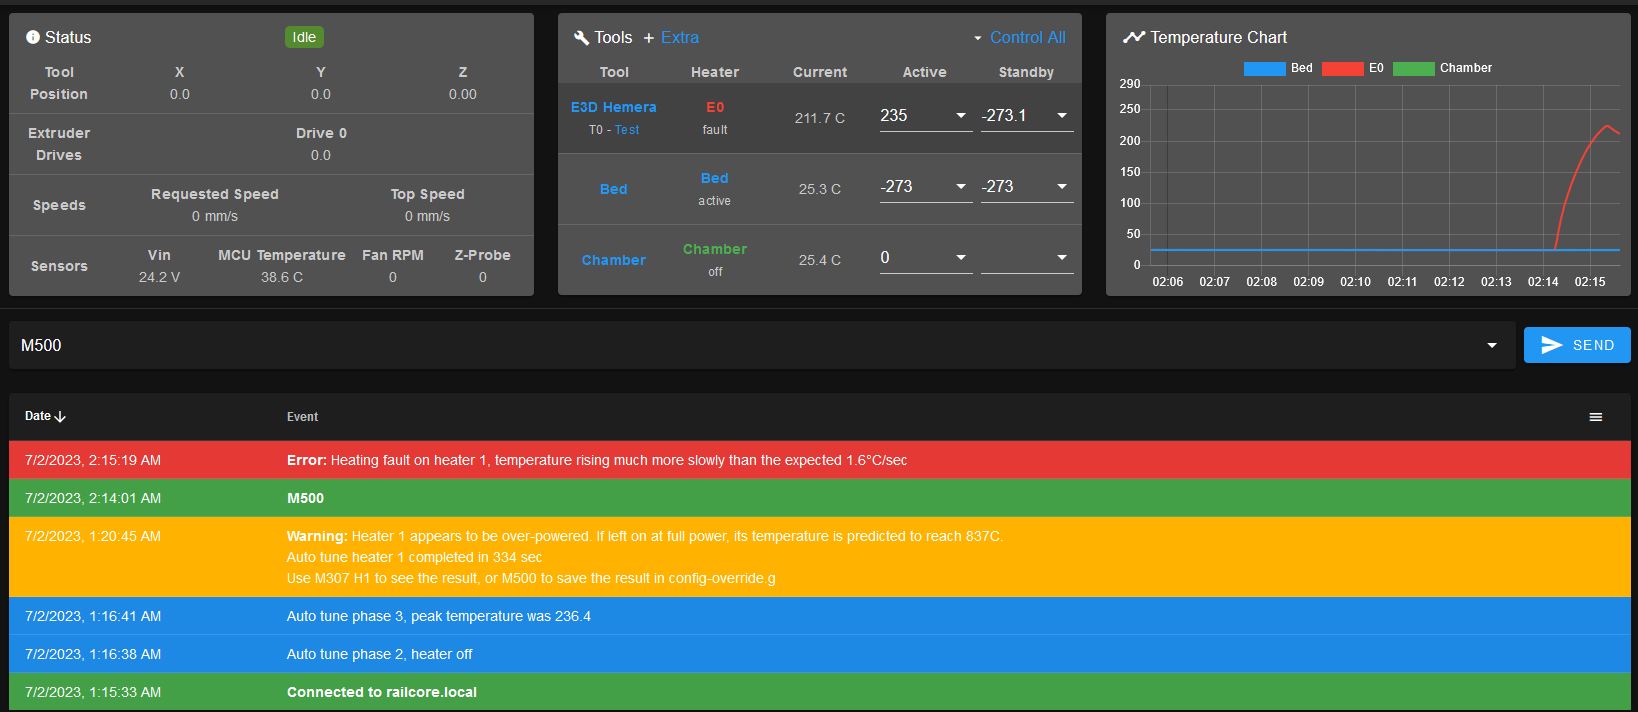
@deckingman I tried to run a PID tune yesterday but it wouldn't complete; I didn't save the error. Running a new one now.
-
@deckingman It completed, then got farther than before in the heating. I requested 235 and it tapped out at around 225.

-
@itsthejoker Can you post your config.g and config override.g if you use it. Also the M307 result from the latest tune.
-
@deckingman Roger that.
M307 H1
Heater 1 model: gain 812.0, time constant 265.2, dead time 0.6, max PWM 1.00, calibration voltage 24.2, mode PID, inverted no, frequency default
Computed PID parameters for setpoint change: P97.2, I7.703, D40.8
Computed PID parameters for load change: P97.; Configuration file for RailcoreII 300ZL Series Printers ; Do NOT change this file. All customizations should occur in config-user.g ; Debugging M111 S0 ; Debug off M929 P"eventlog.txt" S1 ; Start logging to file eventlog.txt M550 P"RailCore" ; Machine name and Netbios name (can be anything you like) M552 P0.0.0.0 ; Use DHCP M552 S1 ; General preferences M555 P2 ; Set output to look like Marlin M575 P1 B57600 S1 ; Comms parameters for PanelDue G21 ; Work in millimetres G90 ; Send absolute coordinates... M83 ; ...but relative extruder moves ; Axis and motor configuration M669 K1 ; CoreXY mode ; Drives M584 X0 Y1 Z5:6:7 E3:4:8:9 ; Map Z to drivers 5, 6, 7. Define unused drivers 3,4,8 and 9 as extruders M569 P0 S1 ; Drive 0 goes forwards (change to S0 to reverse it)| X stepper M569 P1 S0 ; Drive 1 goes backwards(change to S1 to reverse it)| Y Stepper M569 P2 S1 ; Drive 2 goes forwards | Unused M569 P3 S1 ; Drive 3 goes forwards | Extruder S1 for Bondtech, S0 for Titan M569 P4 S1 ; Drive 4 goes forwards | Extruder (unused) M569 P5 S0 ; Drive 5 goes backwards | Front Left Z M569 P6 S0 ; Drive 6 goes backwards | Rear Left Z M569 P7 S0 ; Drive 7 goes backwards | Right Z ;Leadscrew locations M671 X-10:-10:333 Y22.5:277.5:150 S7.5 ;Front left,(-10,22.5) Rear Left (-10.,227.5) , Right (333,160) S7.5 is the max correction - measure your own offsets, to the bolt for the yoke of each leadscrew ; Axis and motor configuration M350 X16 Y16 Z16 E16 I1 ; Set 16x microstepping for axes & extruder, with interpolation. M574 X1 Y1 Z0 S1 ; Set homing switch configuration (x,y at min, z at max) IF YOU NEED TO REVERSE YOUR HOMING SWITCHES CHANGE S1 to S0 M906 X650 Y500 Z600 E500 I60 ; Motor currents (mA) - WARNING: Conservative - May trigger stallguard (and prematurely during homing) if sensorless. ; M201 X500 Y500 Z02 E500 ; Accelerations (mm/s^2) - WARNING: Conservative M201 X800 Y800 Z02 E500 ; Accelerations (mm/s^2) - WARNING: Conservative M203 X3000 Y3000 Z50 E1800 ; Maximum speeds (mm/min) - WARNING: Conservative ; M566 X200 Y200 Z5 E10 ; Maximum jerk speeds mm/minute - WARNING: Conservative M566 X400 Y400 Z5 E10 ; Maximum jerk speeds mm/minute - WARNING: Conservative M92 X200 Y200 Z1600 ; Steps/mm for X.Y M92 Z1600 ; Steps/mm for Z - TR8*2 / 1.8 deg stepper or TR8*4 / 0.9 deg stepper M92 E837 ; Extruder - 0.9 deg/step (ProjectR3D kit with E3D stepper MT-1701HSM140AE or Standard Titan stepper 42BYGHM208P4.5-15-X2) ; It doesn't seem to matter what the M906 command says -- the current never changes and stepper 6 overheats. This command fixes it, though M913 X75 Y75 Z60 E65 ; Set axis minima:maxima switch positions (Adjust to suit your machine and to make X=0 and Y=0 the edges of the bed) ; These values are conservative to start with, adjust during commissioning. M208 X0:250 Y0:250 Z-0.2:230 ; Conservative 300ZL/T settings (or 250ZL) ; Thermistors M305 P0 S"Bed" T100000 B3950 R4700 H0 L0 ; BOM thermistor values. Put your own H and/or L values here to set the bed thermistor ADC correction M305 P1 S"E0" T100000 B4725 C7.06e-8 R4700 H0 L0 ; E3D Semitec 104GT2 thermistor values. Put your own H and/or L values here to set the first nozzle thermistor ADC correction M305 P2 S"Chamber" T100000 B4725 C7.06e-8 R4700 H0 L0 ; Heated Chamber ;Heaters M570 S360 ; Print will be terminated if a heater fault is not reset within 360 minutes. M143 H0 S80 ; Maximum H0 (Bed) heater temperature (Conservative) M143 H1 S230 ; Maximum H1 (Extruder) heater temperature (Conservative and in case extruder has PTFE lining) M140 S-273 R-273 ; Standby and initial Temp for bed as "off" (-273 = "off") M141 H2 ; Heated Chamber ; Default heater model M307 H0 A270.7 C90.4 D6.7 B0 S1.0 ; Default Bed Heater Parameters, before tuning / if config-override.g is missing M307 H1 A508.1 C249.0 D3.8 S1.00 V24.2 B0 ; Default Tool Heater Parameters, before tuning / if config-override.g is missing ; Fans M106 P0 H-1 ; Disable thermostatic mode for fan 0 M106 P1 H-1 ; Disable thermostatic mode for fan 1 M106 P2 H-1 ; Disable thermostatic mode for fan 2 M106 P0 S0 ; Turn off fans M106 P1 S0 M106 P2 S0 M106 P3 S0 M106 P4 S0 M106 P5 S0 M106 P6 S0 M106 P7 S0 M106 P8 S0 ; Tool definitions M563 P0 D0 H1 ; Define tool 0 G10 P0 S-273 R-273 ; Set tool 0 operating and standby temperatures(-273 = "off") ; Z probe M558 H10 A1 T3000 S0.02 ; Z probe - raise probe height. ; H10 - dive height ; A bigger dive height prevents a situation where the bed is out of alignment by more than the dive height ; on any corner, which can crash the hot-end into the bed while moving the head in XY. ; Probing speed and travel speed are similarly reduced in case the Z probe isn't connected properly (or ; disconnects later after moving to a point) giving the user more time to stop. M557 X50:200 Y50:200 S150 S150 ; Set Default Mesh (conservative) M98 P"config-user.g" ; Load custom user config M501 ; Load saved parameters from non-volatile memoryI'm going to change out the wires again because I found another spare; though I don't think it'll fix it, it's worth trying

-
@itsthejoker I still need to see the contents of your config-override.g. You posted config-user.g which seems to something specific to Railcore users. At the end of your config.g file you have M98 P"config-user.g" which will load that file and overwrite some of the commands in your config.g. But then you you have M501 which will load config-override.g and as it's name implies, any commands in there will override anything in both config.g and config-user.g. I haven't yet seen anything in your configuration files which reflect the result of the PID tuning you did - that's why I need to see what's in config-override.g.
-
I've just noticed that you are running a very old version of firmware from 2020. There have been a lot of changes to the heater tuning algorithm since then. Might be worth upgrading (although coming from 2.05 is quite a lot of work).
-
@deckingman Oh crap, I'm sorry, reading comprehension failure on my part. Config override attached:
; config-override.g file generated in response to M500 at 2023-07-02 02:14 ; This is a system-generated file - do not edit ; Heater model parameters M307 H0 A304.4 C773.3 D9.3 S1.00 V24.1 B0 M307 H1 A812.0 C265.2 D0.6 S1.00 V24.2 B0 M307 H2 A340.0 C140.0 D5.5 S1.00 V0.0 B0 M307 H4 A340.0 C140.0 D5.5 S1.00 V0.0 B0 M307 H5 A340.0 C140.0 D5.5 S1.00 V0.0 B0 M307 H6 A340.0 C140.0 D5.5 S1.00 V0.0 B0 M307 H7 A340.0 C140.0 D5.5 S1.00 V0.0 B0 G10 L2 P1 X0.00 Y0.00 Z0.00 G10 L2 P2 X0.00 Y0.00 Z0.00 G10 L2 P3 X0.00 Y0.00 Z0.00 G10 L2 P4 X0.00 Y0.00 Z0.00 G10 L2 P5 X0.00 Y0.00 Z0.00 G10 L2 P6 X0.00 Y0.00 Z0.00 G10 L2 P7 X0.00 Y0.00 Z0.00 G10 L2 P8 X0.00 Y0.00 Z0.00 G10 L2 P9 X0.00 Y0.00 Z0.00 -
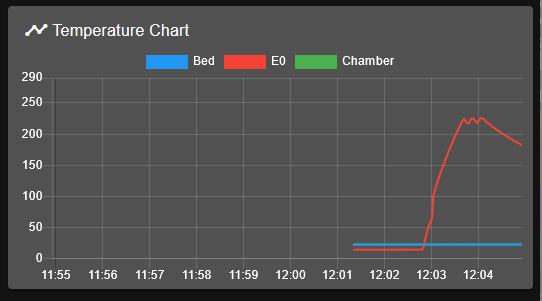
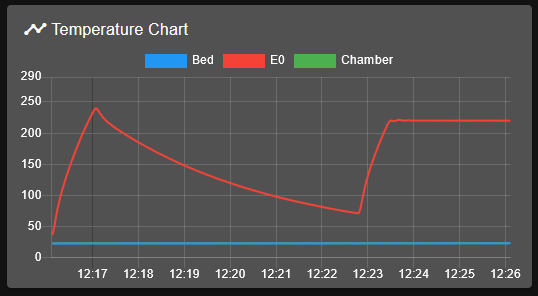
@deckingman I just finished replacing the cable with a custom one and it makes it all the way to 220 in one go now and doesn't trigger the heater fault -- haven't changed anything else. Running a PID tune now, then will post the M307 results from the tune. Maybe this is just cable 'going bad' as opposed to breaking entirely. Two in a row though is weird.

-
M307 H1
Heater 1 model: gain 853.7, time constant 199.1, dead time 1.6, max PWM 1.00, calibration voltage 24.2, mode PID, inverted no, frequency default
Computed PID parameters for setpoint change: P25.8, I1.443, D29.1
Computed PID parameters for load change: P25.
and now it's rock solid. I'm so confused. Guess it's test print time?
-
I actually wrote a long rambling post on heater and thermistor cables and the fun you can have with either poor connector contacts and also poor crimp joints. After writing the story and my examples I decide to not post it because the temperature graph you posted did not support my theory of what you were seeing.
I have seen more trouble with heater and sensor cables (and intermittent thermocouples) than any other failures short of operator failures. I have gone to PT1000 sensor for a lot of my temperature sensing needs. -
Test print went perfectly. I'll run another longer one, and if that works I'll look at updating the firmware (though I definitely don't want to lol).
-
@itsthejoker I'm by no means any sort of expert on the process of tuning the PID parameters but I have a gut feeling that it can be an iterative process - especially with powerful heaters such as yours. It seems to me that it can take a few attempts with each attempt giving somewhat better control than the last. I don't know that for sure so no doubt someone will shoot me down in flames if I'm wrong. It's a gut feeing I have although based on empirical evidence. In your case, you can see the difference in time constant between success tuning cycles. Maybe it's just coincidental or maybe it takes some time for the heater itself to "settle down".
With a powerful heater you have a very high gain, so it's more likely to overshoot the set temperature. This tendency to overshoot needs to be "tamed" but if it's tamed too much, then you can end up with too slow a rise time which is what you were seeing at first. I have a feeling that, now that you have a PID model that works, you won't have any more problems.
-
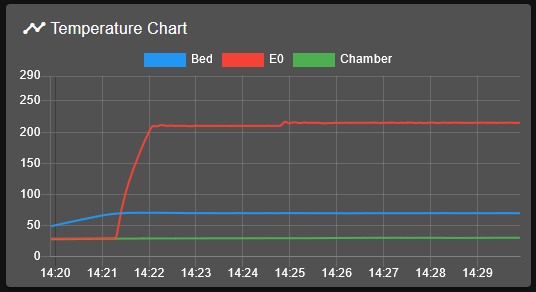
@deckingman we're in the same boat then; everything seems to be happy now with the latest wire change, so I suppose I'll keep an eye on it and see what happens? The current temperatures look great and totally expected (with the exception of the mild curve on the rise):

 Thanks a lot for taking a look and I'm sorry this isn't a more satisfying ending lol
 -
@itsthejoker The main thing is that your issue seems to be fixed - despite the fact that we're not 100% sure why (I still think it's just that the tuning cycle needs to be repeated a few times, especially with high powered heaters).