Polar Swingarm printer
-
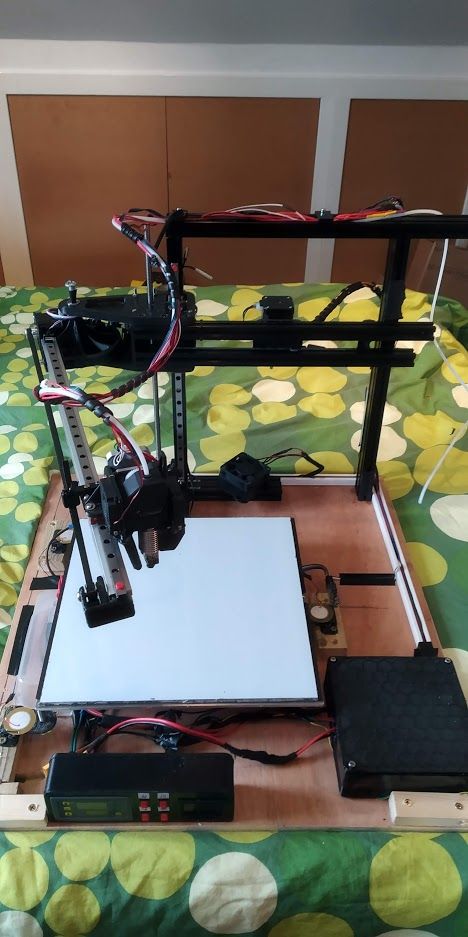
So I asked a few months ago about what this kinematics would be classed as and David helpfully pointed out it was just a polar but moving the arm and not the bed.
As I've been forced to take 3 weeks holiday by work due to the current Pandemic, so I thought I'd give it a go making one! Reusing all the hardware off my old printer, I have put this together...

31*32cm build area but in theory with a bigger bed and enclosure could print a 50cm radius semicircle with very little changes to the mechanics.
It's surprisingly stiff and has a ~30:1 ratio on the swingarm stepper so hopefully enough torque and resolution. If this works out I'll replace the 2020 of the swingarm with 20mm carbon tube so reduce the inertia and get some aluminium plate laser cut to replace the existing mechanism as that is the main source of flex.
Now I've just taken a backup of my old settings and just about to dive into the firmware setup, I'll report back with how it goes!
-
It prints! (video)
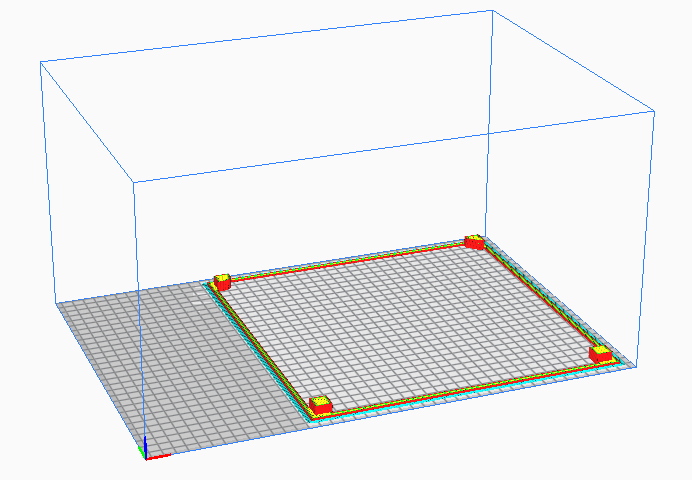
Very happy to have got it going and the ease of changing stuff from DWC2 really helped. I have had to do a bit of a tweak in Cura to get the correct build area but nothing silly, just blanking off the unprintable area.

I've ordered a lighter swingarm (65g vs 265g) which should reduced the inertia of the beam which seems to be a bigger issue than the inertia of the hotend as the arm swings much faster when nearer the pivot. I will also get a smaller stepper for the hotend as currently using a fairly heavy duty one that's overkill with the 3:1 ratio.
I am going to hold off on the metalic pivot pieces as reckon I can get a big improvement with a better designed version of what I'm already using with some cross bracing. Will update with progress!
-
Awesome with another odd printer.
How is the rotational stiffness of your "tower"? It looks like it's one single 2040 which seems a bit skimpy. Those alu extrusion have very poor torsional stiffness, the rectangular ones like the 2040 you have are better. A round or square tube is a lot stiffer. It looks like you plan to add another rail on the other tower, probably a good idea.
How are you gearing down 1:30? Two step belt gearbox?
-
Yeah it's odd but seems to work ok an efficient use of the parts I had. It wouldn't work trying to print quick with the current setup, but I use a 1mm nozzle so 50mms is my max print speed anyway.
The both vslot are glued and tapped into the base so not going anywhere, plus there is a vslot wheel in the second piece to stop the rotation, this works well and was in the parts bin so easy to do on lockdown.
The gearbox is 1:3 (20:60) and 1:10.2 (20:204). I might play with dropping the 20t drives to 16 to see if the added resolution is noticeable.
-
So quick update... Swingarm resolution and torque would definitely benefit from being higher. Currently got a 1:30ish ratio on a 1.8 degree NEMA 17 but gonna swap in a 0.9 degree NEMA 23 I've got in a box somewhere (after finding it) will probably have to change the gearbox a bit as the NEMA 23 has an 8mm shaft so will have a dig for a pulley to fit it. Also going to use double belts on the gearbox to swingarm to hopefully stiffen that link up a bit.
This when tied with reducing the moment of inertia by replacing extruder stepper (45mm to 22mm NEMA 17) and beam, this will reduce it by about 45% (when hotend 1/2 way along swingarm) so hopefully by my maths with the increased torque this will allow accelerations of 5x what I currently can manage.
While on the subject of stiffening up I'm going to add a bit of torsional stiffness to the mechanism as while there isn't much flex getting rid of what's there will definitely help.
Will hopefully be able to do an update later this week as got some other projects I need to do in the meantime.
-
This seems like a really good candidate for a bowden setup to remove the motor/extruder mass entirely.
-
@Phaedrux Yeah, I'd did chuck a Bowden setup on it to see if that improved anything but there wasn't a massive improvement near the pivot as the MOI of the swingarm/beam seems the be a much greater issue than that of the hotend assembly, due the swingarm moving much quicker when the hotend is nearer the pivot. (Bad ringing near pivot) The precision/torque issue is then more apparent at longer reaches due to the arm deviating by as much as ~0.5mm when getting caught on a existing printed track, the Bowden did help slightly with this but not enough to keep with it at the moment. The hope is 3x more torque, double the resolution, improved stiffness and lighter beam will help massively.
I also print flexible filaments fairly often and a 600mm Bowden (that's fairly curved at points) really doesn't work well with the softer filaments in my experience.
I have considered the zesty nimble (or making something like it as like the challenge) or maybe a igus linear square drive along the swingarm powering the direct drive extruder but reckon that could be as heavy as a pancake stepper.
-
So another nightly update as did end up making some changes today, plus keeping this as a build diary for me or anyone else that may wish to copy.
So stiffening up the pivot made a massive difference, the 3-4mm of play was causing the hotend to bounce on contact at speed and therefore skip sometimes. One issue this has revealed is the pivot is also non adjustable/preload able so sags a little which so a bit annoying, but skew compensation will be my friend to get an adjustable version printed. (Already tested as works pretty well. I've also found a lighter stepper on the drawer ( 132g Vs 254g) that I'll chuck on the extruder in the morning as that should improve it too.
It's now at a point where printing within 350mm of the pivot excedes my old (and admittedly worn out) Cartesian printer so really looking forward to where I can take this, with a higher torque swingarm stepper I should be great right to the furthest reach.
-
Cool design, although I do not see the benefit apart from fewer parts needed and the coolness factor.
This give me hope, really want to start one of the 3D printer ideas I've had for some time a robot arm. Of course mostly for the coolnes factor not so much because I think it'll work better then most existing designs.
-
@Nemesis1782 Yeah, there are a few benefits over other formats apart from the need for fewer parts and coolness but for me those were two of the biggest driving factors.
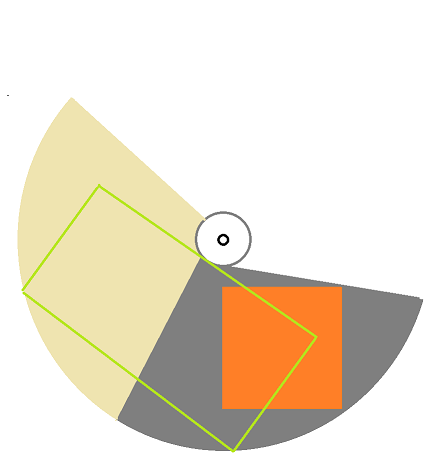
Other pluses to this design were that I have a fairly limited space for this printer to live (60cm60cm50cm) but will hopefully be moving in a couple of years to somewhere I can give it more space, so this would with only a small change to the mechanics (increase the sweep of the arm) and firmware be able to print a 55cm radius 2/3 circle assuming I can make a bed that big, going for a nicely ratioed rectangular area of 64x38cm which is pretty impressive for a printer so compact.
As a very rough indication of useable area of the printer I am using the filled orange square at the moment but the current unchanged mechanics can reach the grey area (if no wall in the way) It would be a small change to the mechanics to be able to add the tan area (only needing a new pivot piece) which would in theory allow the non filled green area. Doing this would leave the bed without an edge on the y=0 axis that would require either a bit more slicer trickery or the ability to move the axis (x,y,z) relative to the polar coordinates. Either that or a plugin to modify the gcode after slicing?

Brother currently asleep from a nightshift so can't really do a test video (it resonates through his wall), but the new swingarm (1/2 the weight, 3x as stiff + adjustable to allow squaring up) and NEMA23 powering it is a massive improvement and seems to match where I had my old cartesian in terms of speed and quality. Not yet tuned speed and accelerations as suspect ringing could be pretty bad it high jerk and acceleration values but only one way to find out!
-
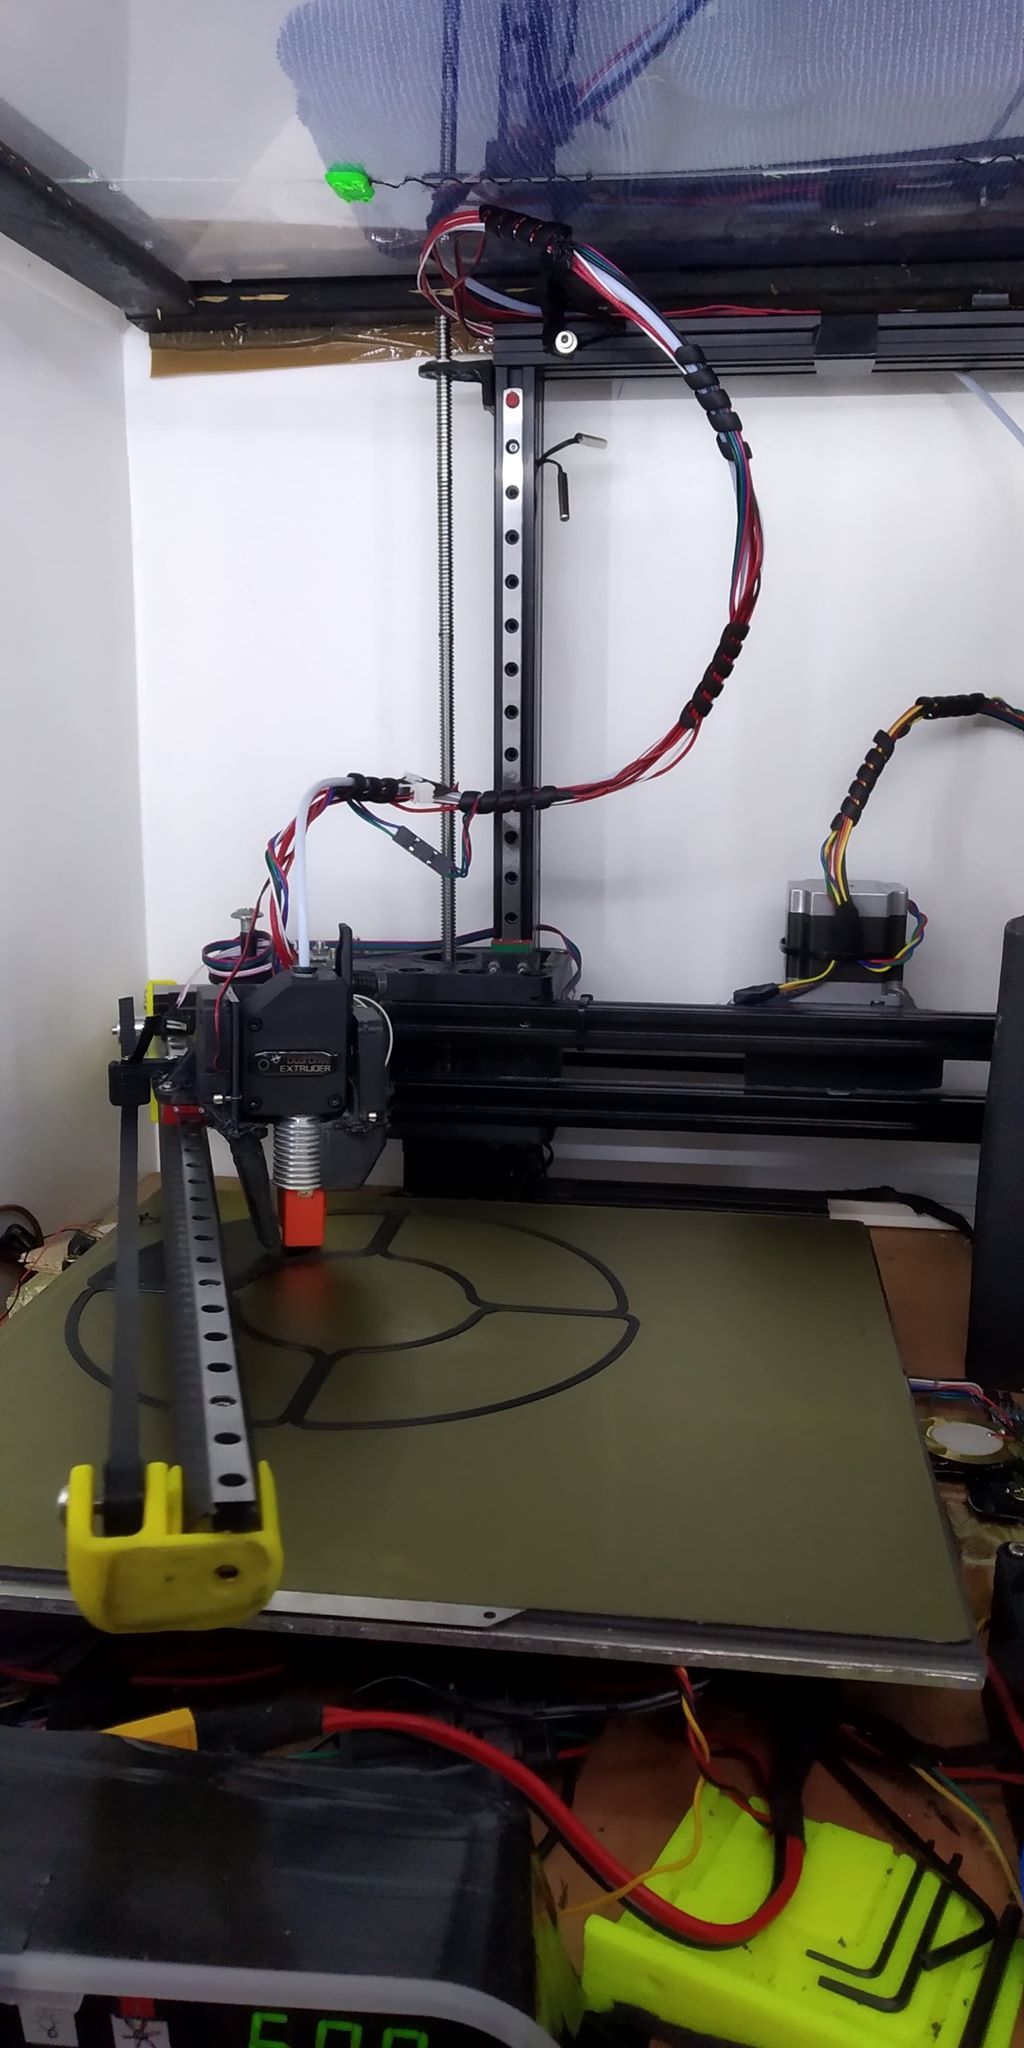
Got a quick video whilst doing a semi test print on the V2 of the printer. Carbon swingarm, NEMA23 and lighter hotend all come together to work really well - youtube link (using up some terrible old filament to make a spool drawer set, colour change via a pause and swap filament)


Printing with a 1mm nozzle/ 0.5mm layer so approaching max flow rate of the volcano at ~50mm/s in that video and reaches vmax pretty quickly which is nice as only way to get quicker from there is a supervolcano! In the purpose of testing I am going to try upping the acceleration to the point where the ringing becomes noticeable but other than that I'm very happy and now gonna get on with other projects.
-
Very cool. I wonder, could you add another swing arm at the other side to overlap the first and have kind of an IDEX setup?
-
@Phaedrux balanced duplicator?
-
@Phaedrux I guess I could but the 1st arm would need a way of getting out the way as currently it would hit. Also it'd definitely need new firmware!
I have looked at (and I'm looking at) a tool change method as don't think it'd be too tricky to implement as there's a large unused area off to the right when looking at the machine. I reckon a magnetic based system could work with dual hotends and wouldn't require a duex.
-
@oliverracing, nice woven carbon tube

Have you measured the arm drop with the hotend in the inner vs outer position?
I see you have piezos under the bed, it should show up in the bed leveling mesh.It's quite brave to do direct drive with such a long arm, you must be getting some ghosting in the outer position?
I love your build even if I sound critical.
-
@bondus yeah, was £6 and saved 200g+ on the swingarm so worth it.
About 1.5mm drop end to end although the first 0.5mm (measured by eye) is in the section between the pivot end stop and the edge of bed (50mm) so seems to preload a bit and then not increase much. I do wonder if a machined aluminium pivot would be worth it but then i think this has cost me less than £40 to covert and I'm like nah!
1mm over 30cm is something I'm very happy about (version No.1 was 8mm) and is around the tolerances of the scrap aluminium I used for the bed (being a cheapskate as had it already and was flat to a steel ruler) and with the peizo leveling prints great.
Direct drive was the only option for the filaments I use and might look into lighter solutions but at the moment it's fine and I haven't noticed and ghosting from it
I have just printed a new centre console for my car (kit car) so very happy with the results, as that's the reason I have a printer!
-
1mm! But a machine does not have to be more precise that what you need. And as long as you keep the corners of the printed parts round the ghosting will not affect the prints.
It's easy to become a machine snob, chasing those last 100ths at any cost
-
@bondus yeah, 90% of what I print gets smothered in plastic filler and painted or is a no visible part for my kit car so that final bit of precision really isn't high priority for me.
Thinking about it I can't think of any parts I've printed that are "show" parts.
Plan is today is to do a test on a single wall cube to see if I can push the acceleration as high as possible (already know the max flow rate and therefore speed of my extruder) Will test near and far from the pivot as not 100% sure if the beam inertia will play a bigger part than the "wobble" from the flex at far reaches