Motor noise and print quality
-

The important thing to remember is to only flip the constant length sections.
In this photo the sections I flipped are K and J. First it flips on J and then stays flipped around the back side, and then flips again for K. This way the teeth are only making contact with the motor drive teeth. The rest of the idlers contacts are all on the smooth side.
For me, on a 300x300mm dbot the flip didn't seem to have any negative effects, but if you have a 200mm length for K and J maybe it's too tight? Something to keep an eye on.
Using genuine gates belts here as well. That also seemed to make an improvement for me.
-
So, I've just installed the new motors, but I wish I'd thought twice before installing 16 tooth pulleys.
For the first, the smaller diameter of the 16 tooth pulley breaks the belt geometry - my A and G sections are no longer parallel to the Y axis. The second problem is that while I was tightening one of the set screws for the beta motor, the head sheared off my ball headed driver and is now stuck inside the screw!
Hopefully, I can cut a couple of slots into the side of the set screw for a flatbade screwdriver without destroying the stepper motor's bearings.
Once I can get the 16 tooth pulleys off and put the original ones back on, I'll give the printer a test! If I can't get the pulley off, I'll have to cut some slots in the motor mounts so that I can move the motors inwards slightly.

-
Doh! that sucks about the ball head breaking off in the set screw. Good luck getting that off. I've made a lot of progress on my end. I've reprinted new versions of my upper frame corner braces that will make maintenance and adjustment far easier, and also got new genuine Gates belt. I'm going back from toothed idlers to the smooth stacked-bearing configuration, and will add a twist to the belts to keep the flat sides against the idlers. Combined with the move to the 0.9-degree steppers, and getting my config.g sorted out so I'm now running with 16x + 16x interpolation on all axes, my printer is quieter and should be delivering the best quality I've ever seen. Oh, over the last couple weeks I also got pressure advance and non-linear extrusion sorted out too, which contribute to that.
-
@sethipus Thanks, I might be needing that luck!
I feel there is going to be some Dremel assisted violence visited upon the pulley today. I can't see any way to defend the stepper's bearings against the use of a hammer to slot the set screw, so cutting a slot through the pulley and into the set screw with a cutting disc would appear to be my only option. If slotting it fails, I'll just cut straight down along the flat part of the stepper's spindle and hope the cut misses the broken ball end. I don't much rate a cutting disc's chances against tool steel, even if it's cheap and nasty tool steel.
I printed a tall sculpture over the last couple of days and noticed a mechanical problem which I need to look at. When the printer was performing a 100mm/s travel move in the +X direction, the print head would clip the support layer it was travelling over with a loud 'snap'. If it wasn't for the fact I'd anchored the sculpture with a brim, I'm pretty sure the collisions would have knocked the print over. Even though that didn't happen, the resulting wobble lead to increasingly poor finish as the print got taller.
I found the Bondtech BMG remarkably immune to non-linear extrusion effects when I tested it. It was only when I got to 5mm/s extrusion that the amount of filament extruded would start to differ from what was commanded, so I've left that uncorrected for the moment.
-
@grizewald
search for bearing puller. that might be an option.
something like this
http://www.pro-lift-montagetechnik.com/WebRoot/Store15/Shops/78156040/54AF/9EA4/B9C8/6142/1A49/C0A8/2AB9/AA72/00130_5t_Abzieher_hydraulisch_3arm_beschnitten_jpg_ml.jpg -
otherwise i wish you luck

-
@grizewald said in Motor noise and print quality:
@sethipus Thanks, I might be needing that luck!
I feel there is going to be some Dremel assisted violence visited upon the pulley today. I can't see any way to defend the stepper's bearings against the use of a hammer to slot the set screw, so cutting a slot through the pulley and into the set screw with a cutting disc would appear to be my only option. If slotting it fails, I'll just cut straight down along the flat part of the stepper's spindle and hope the cut misses the broken ball end. I don't much rate a cutting disc's chances against tool steel, even if it's cheap and nasty tool steel.
I rate the chances pretty highly actually. If you're going slow even if you hit the ball head your cutting disc should go through it just fine.
I printed a tall sculpture over the last couple of days and noticed a mechanical problem which I need to look at. When the printer was performing a 100mm/s travel move in the +X direction, the print head would clip the support layer it was travelling over with a loud 'snap'. If it wasn't for the fact I'd anchored the sculpture with a brim, I'm pretty sure the collisions would have knocked the print over. Even though that didn't happen, the resulting wobble lead to increasingly poor finish as the print got taller.
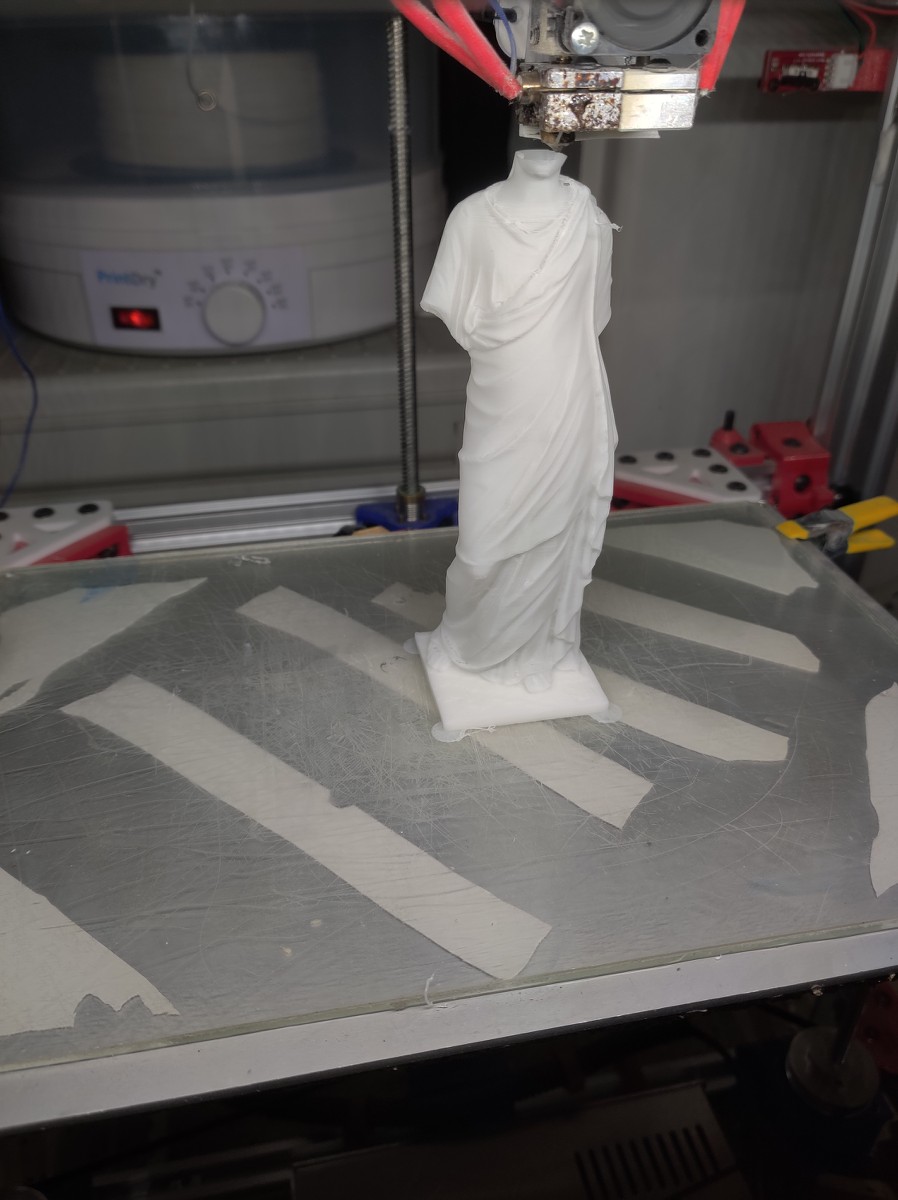
I've had that happen before. It's not always mechanical. It's possible the support structure is just curling up a little. Had that sort of thing happen many times. In fact, between reading your post and replying to it I heard a noise I didn't like the sound of. I'm printing a Greek statue in vase mode, and in a particularly tight fold of the woman's robe the head was making a very sharp turn, and apparently part of a line curled up just enough that it was starting to hit and get worse with each go around. I had to pause it twice and, with a little knife, cut a shaving of plastic off that was sticking up. As the fold continued up the statue it was happening again after a couple go arounds, and I ended up just very gently putting my fingers around the statue and holding it just enough to resist the gentle bump by the nozzle, and after several go arounds it got past that point and the problem was averted. I'll probably have some tiny little quality hiccup at that spot if I look at it carefully, but I did save the print. (so far, it's not finished yet, and I worry about the top of the head)
I found the Bondtech BMG remarkably immune to non-linear extrusion effects when I tested it. It was only when I got to 5mm/s extrusion that the amount of filament extruded would start to differ from what was commanded, so I've left that uncorrected for the moment.
I admit I set my non-linear extrusion parameters using my previous extruder, which was a belted, single-drive extruder. The values obtained were very small, and I haven't changed them, and they don't seem to be hurting me. I think I'll go through the tests again this weekend with the BMG clone and see how much different results I get. I don't think they'll change much until I get up to 6mm/s or so, because I believe a lot of the reduction I was seeing in feedrate at higher speeds was due to backpressure in the melt chamber, which hasn't changed, and didn't slip until the 5-6mm/s range.
-
Victory!
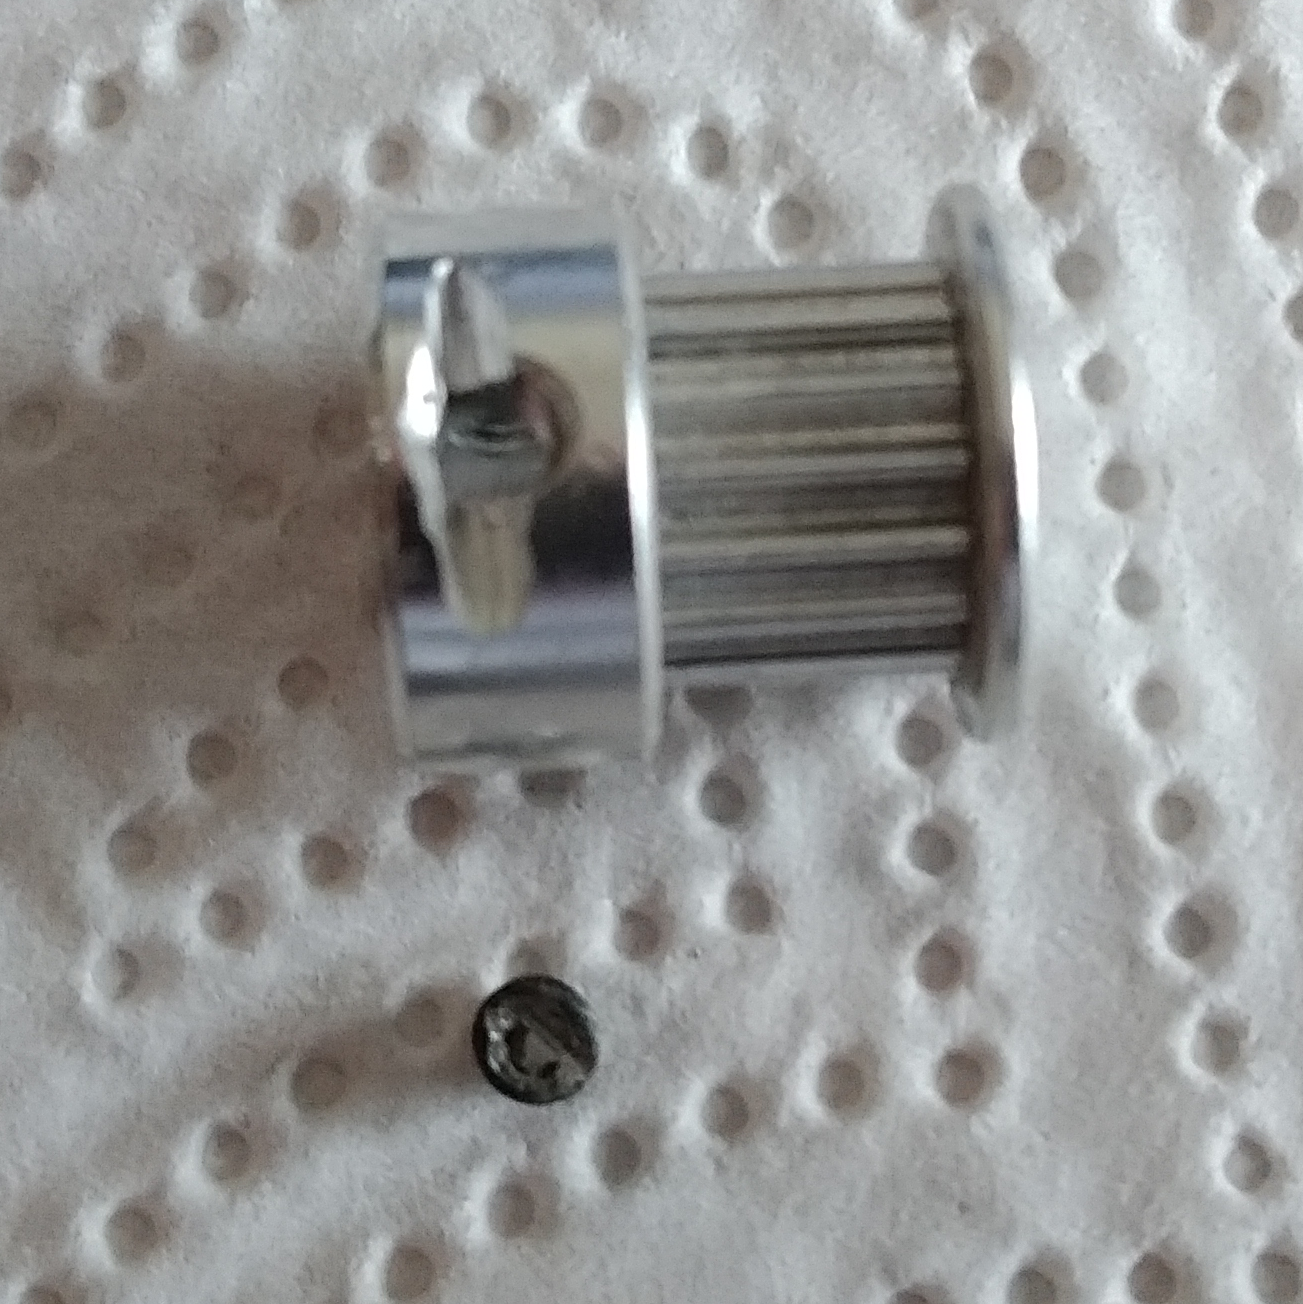
I saw the tiniest of sparks as the disc cut into the remains of the ball end. Looking at the cut, I reckon my ball end driver was no harder than the set screw.

So, time to get the original pulleys on and do some testing.
-
Interesting. Changing to 0.9 degree steppers had a significant effect on how noisy the printer is. Old and new figures:
Print speed Noise (dbA) - 1.8 degree steppers
60mm/s 51.5
90mm/s 55.3
120mm/s 52.5With 0.9 degree steppers
60mm/s 54.0
90mm/s 53.4
120mm/s 56.1It'll be interesting to see what the print looks like when it's finished.
-
Well, I can't say that the 0.9 degree motors made any particular difference, apart from making the printer nearly twice as loud at 60mm/s and over twice as loud at 120mm/s!
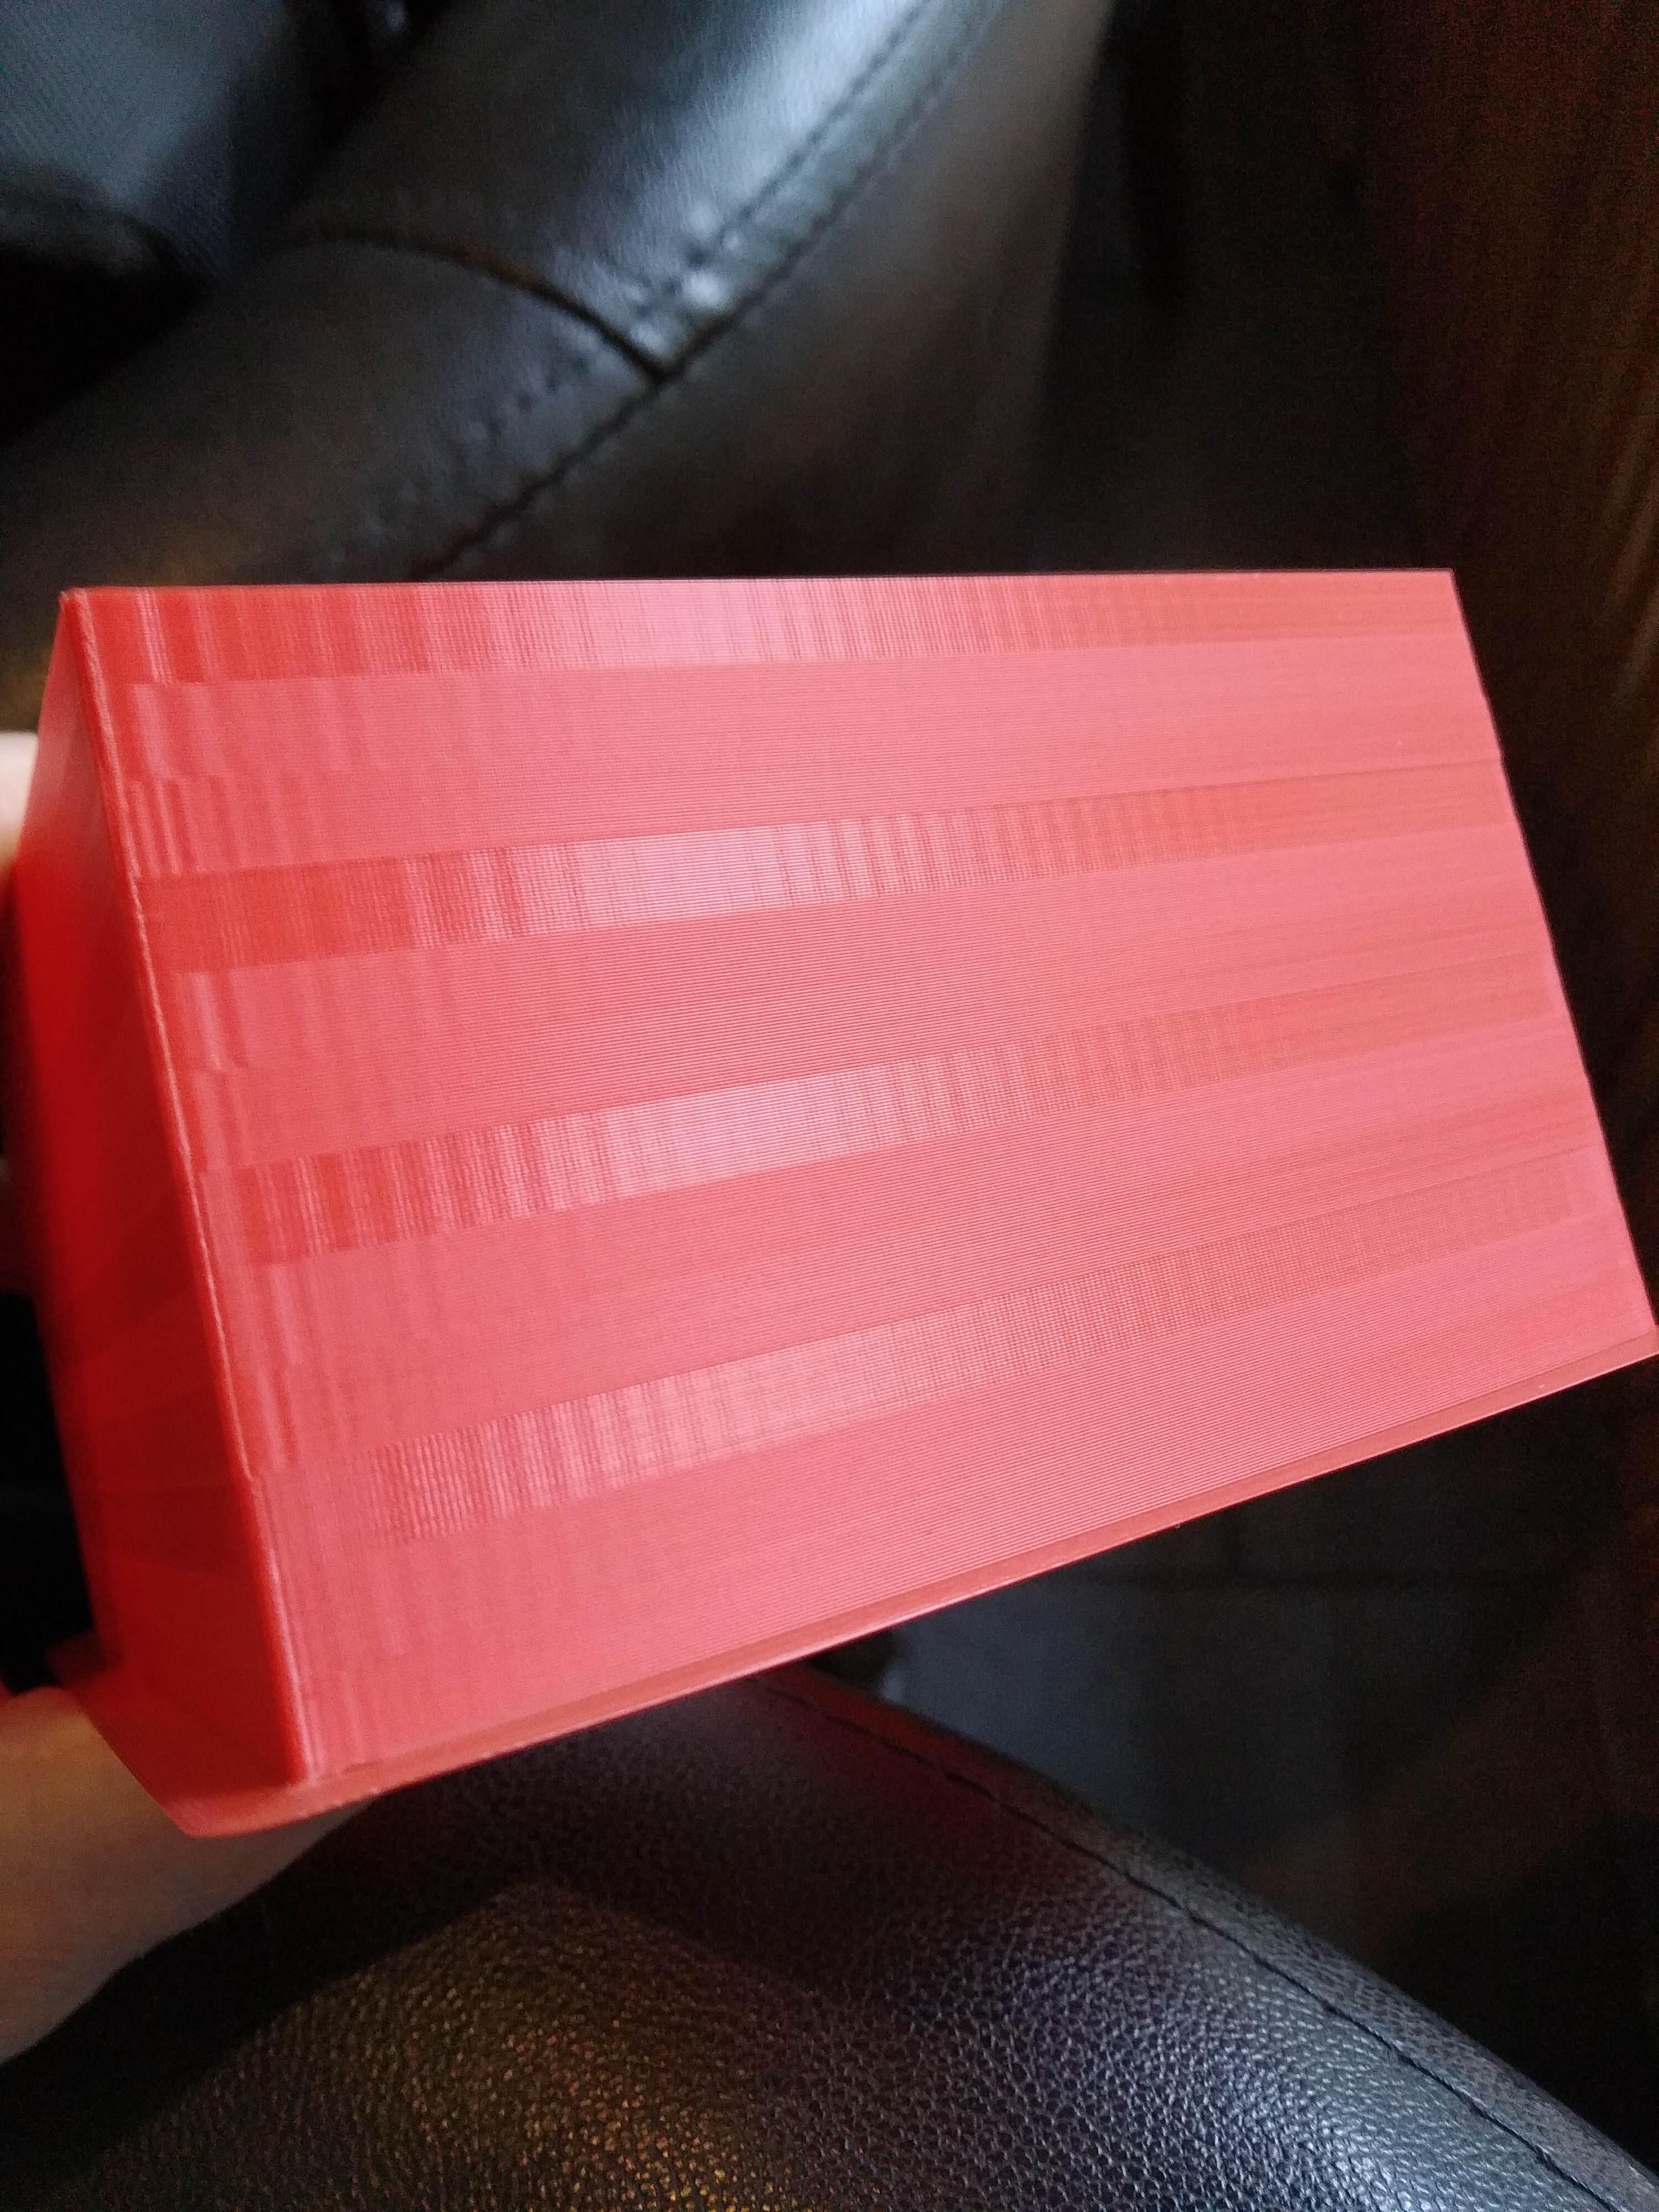
The 120mm/s layer is still the smoothest, unwanted vertical artefacts are still present at around the same frequencies and ringing is distinct and worsens with acceleration.
These various artefacts are pretty annoying on some prints, so I guess I'll have to carry on with the various tweaks to be found here on the forum and see if I can improve things.
-
It looks like you're getting a much finer and more closely spaced vertical artifact, and then a much wider spaced and broader artifact, that looks very much like the "corduroy effect" I talked about with my prints, that has an ~2mm wavelength and thus is almost certainly connected with the gt2 belts. I don't recall what printer you're using @grizewald, but is it using gt2 belts to drive the X/Y access? And if so, are there places where your toothed belts are running around idler pulleys, whether smooth or toothed?
I've just reprinted the corner braces for my (massively customized) D-Bot, and I'm going to install the smooth pulleys in those braces, and tonight rebuild the top end of the printer with the smooth pulleys, and install new belts with a twist in them so that toothed belt is never wrapping around smooth idlers (ie: the flat back side of the belts will wrap around the idlers). Phaedrux reported that he'd been seeing the same corduroy effect as I do, and that when he stopped toothed belt from wrapping around his idlers on the 2mm-pitch toothed side this corduroy effect went away. I should be in a position to confirm or deny that with my printer something either tonight or at least sometime this weekend.
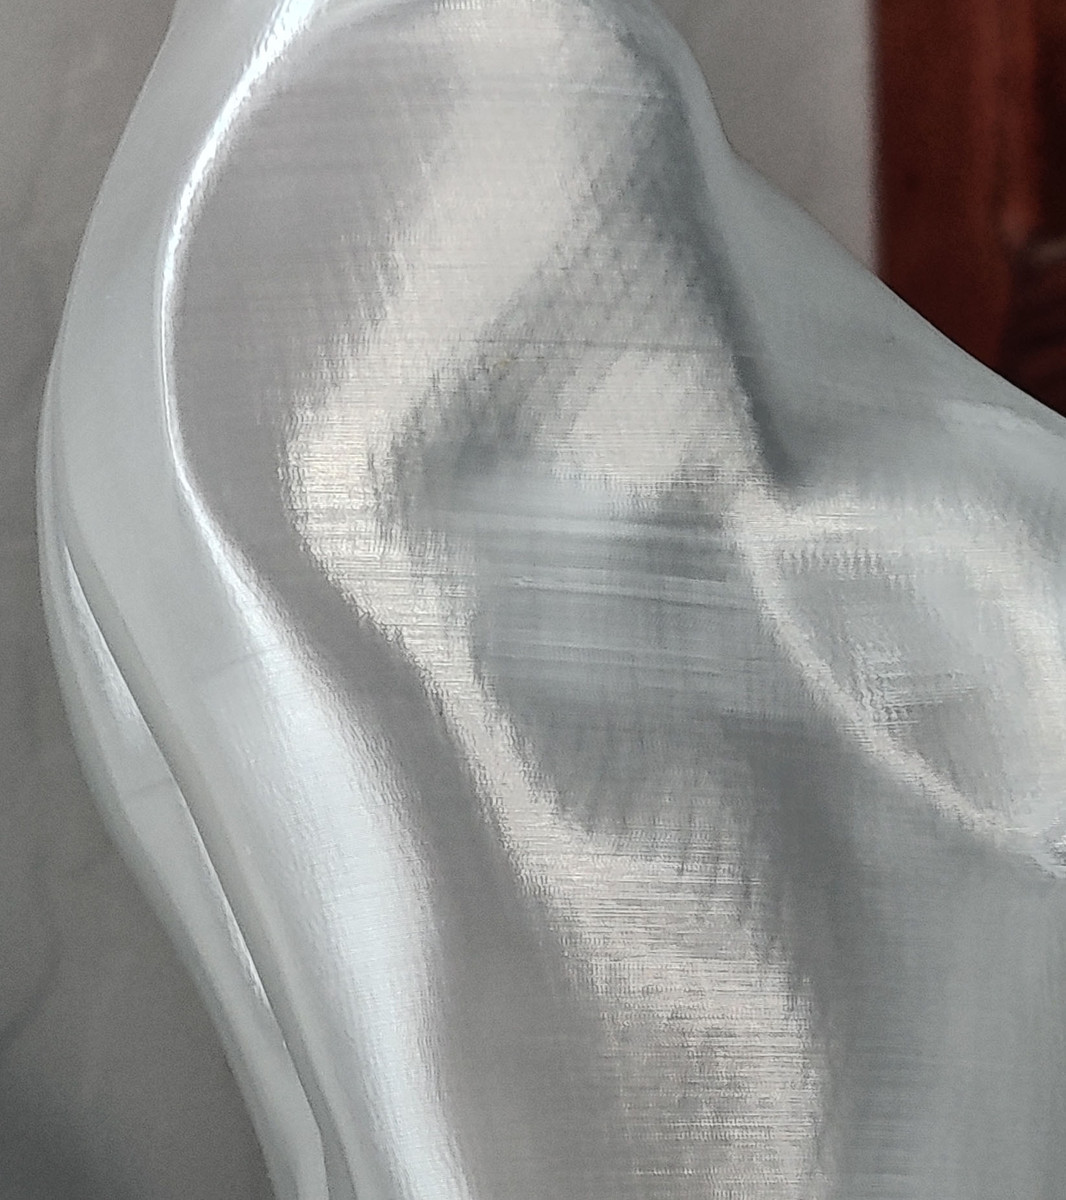
That corduroy effect obviously is all lined up like in your photo on flat surfaces like boxes and whatnot, but on curved surfaces it still shows up in very distracting patterns, as in this little snippet from another vase-mode print. It's this I'm hoping goes away after my work on the belts and pulleys this weekend.
-
@sethipus said in Motor noise and print quality:
I don't recall what printer you're using @grizewald, but is it using gt2 belts to drive the X/Y access? And if so, are there places where your toothed belts are running around idler pulleys, whether smooth or toothed?
My printer is the V-Core from RatRig. They've just released version 2, so the pictures for version 1 are no longer present on the site, but it's big Core-XY based on OpenBuilds parts with a nominal 300 x 300 x 300mm build volume.
It looks like this:
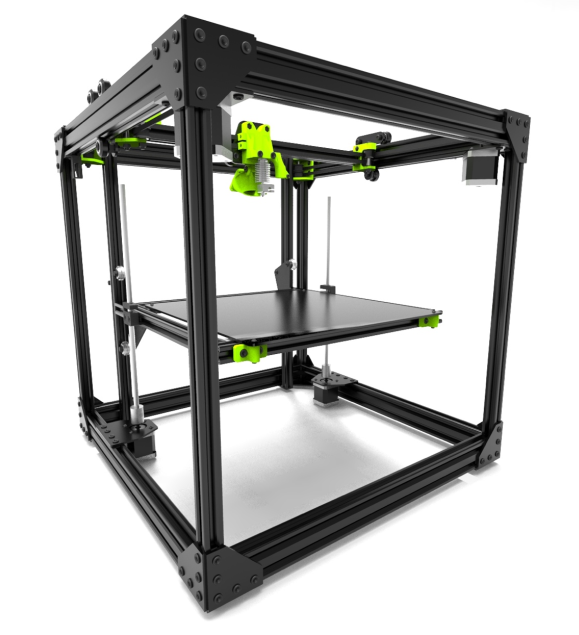
It does use GT2 belts and apart from the pulleys, the belts go around OpenBuilds smooth idlers. It would be very difficult to arrange twists in the belts so that every idler had a smooth belt side running around it.
-
@grizewald said in Motor noise and print quality:
@sethipus said in Motor noise and print quality:
I don't recall what printer you're using @grizewald, but is it using gt2 belts to drive the X/Y access? And if so, are there places where your toothed belts are running around idler pulleys, whether smooth or toothed?
My printer is the V-Core from RatRig. They've just released version 2, so the pictures for version 1 are no longer present on the site, but it's big Core-XY based on OpenBuilds parts with a nominal 300 x 300 x 300mm build volume.
It looks like this:
It does use GT2 belts and apart from the pulleys, the belts go around OpenBuilds smooth idlers. It would be very difficult to arrange twists in the belts so that every idler had a smooth belt side running around it.
I had a close look at my D-Bot's setup and a single twist (per belt) immediately after the stepper itself, on the outer belt run (ie: not the one that must remain parallel) will ensure that the back side of my belt runs against the idlers for the rest of the run. When I first tried addressing the corduroy effect, I swapped out the smooth idlers for toothed ones, but it didn't really help. There is this microscopic jump in the X and Y motion as each tooth engages (or each ridge on the belt hits a smooth idler) that results in very slight extrusion rate differences on a printed straight line, and that's what's causing this effect.
Anyhow, CoreXY is CoreXY and I'd be surprised if your printer's belt runs are really any different than mine in this regard. Is there really no way to introduce a twist in the outer belt run away from each stepper, to get smooth belt backside against the idlers?
ETA: I really wish I'd built my D-Bot to the 300x300x300 version. I built mine to the 200x300x300 version. In theory it wouldn't be too hard to change mine, just four lengths of v-slot rail and a new build platform, but I just can't bring myself to do it. What concerns me more than that extra 100mm of Y axis is getting my printer enclosed. I've tried printing PC and nylon and ASA and whatnot without an enclosure without a lot of success (well, had more success with the nylon than the other two). My biggest thing is that I've got things that would be inside the enclosure if I just put a large box over it that I don't really want heated, like the power supply, Duet Wifi controller, and steppers, plus the bowden tube is sticking up from the extruder, which is mounted to the top rear frame rail. One of my next big upgrade projects will be to move everything that might be heat sensitive out of the build volume area, and figure out some attachment points or whatever for some materials that can enclose the build volume itself.
-
@grizewald said in Motor noise and print quality:
It does use GT2 belts and apart from the pulleys, the belts go around OpenBuilds smooth idlers.
that is certainly something that could cause the 2mm issues on your prints.
-
I looked at the belts again and you're right - if I put a twist in the J and K lengths, my belts will indeed travel with the smooth sides against the smooth idlers all the way around.
I just have to modify a part and print it as the upper belt holder won't work with the belt the other way around. So that's next in my print queue!
-
@sethipus The DBot isn't a very good candidate for enclosure. It's way more work than it's worth IMO. I've made do with a plastic shroud that can hang around the entire printer on it's stand. It's like a loose curtain. At the top is an exhaust duct. It works fairly well with ASA, etc, both with chamber temp and fume exhaust, but it's not perfect. 40c at best.
A design like the Voron2 or RailCore II that are designed from the ground up for enclosure would be perfect... if you want another new printer.
-
@phaedrux said in Motor noise and print quality:
@sethipus The DBot isn't a very good candidate for enclosure. It's way more work than it's worth IMO. I've made do with a plastic shroud that can hang around the entire printer on it's stand. It's like a loose curtain. At the top is an exhaust duct. It works fairly well with ASA, etc, both with chamber temp and fume exhaust, but it's not perfect. 40c at best.
A design like the Voron2 or RailCore II that are designed from the ground up for enclosure would be perfect... if you want another new printer.
I totally hear ya. I do want to move my power supply out of the build area, and I could design a new Duet Wifi controller box that hangs off the side rather than being centered within the left-side frame. I think I could get the bottom enclosed, the sides, front, and rear without too much trouble. The top might be "well enough" enclosed with a little plastic bag-like tent that is tall enough not to disturb the bowden tube. You're 100% right that it's not optimal at all, but I think it could be done. I've got parts (including parts on my printer) that are from ASA, but I've struggled a lot with it warping. My attempts at PC blends almost all ended in warped parts. I even had PC-blend parts that stuck to the bed throughout the print, were annealed in place by placing a cardboard box over the completed print and allowed to heat-soak on the build plate for a couple hours, cool down slowly, and then literally warped after I removed them from the build plate. Other than nylon, I've all but given up the other filaments other than PLA and PETG until I can get my printer enclosed.
I'll have to look at those other designs and decide if I need to have another printer project in my future.
-
@grizewald , I replaced all my toothed idlers with smooth ones, put the flip in the belt on the first run from the stepper on the "outside" runs of my CoreXY system so that the flat side of the belt is always bearing on the idler pulleys, and just finished my first print with it.
The flip made a ginormous difference in the surface quality, and utterly eliminated the "corduroy effect" I was seeing. I'm absolutely kicking myself that I didn't do this when I built the printer in the first place. It's unbelievable. Oh well, you live and learn.
Here are two photos of a relatively innocuous portion of a particular figure. The blue one is the new print with the flipped belts and smooth idlers, the clear one is with the belts not flipped and the teeth rolling over toothed idlers.
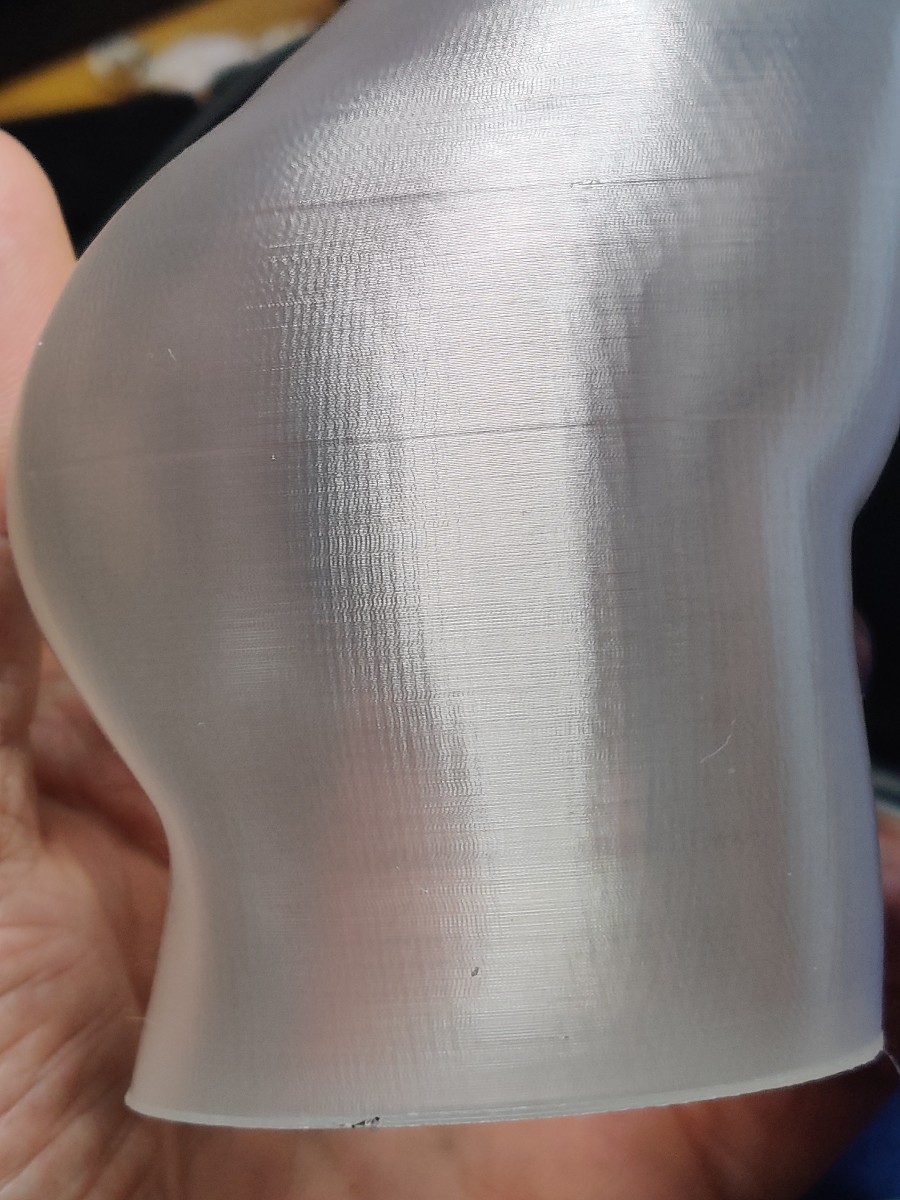
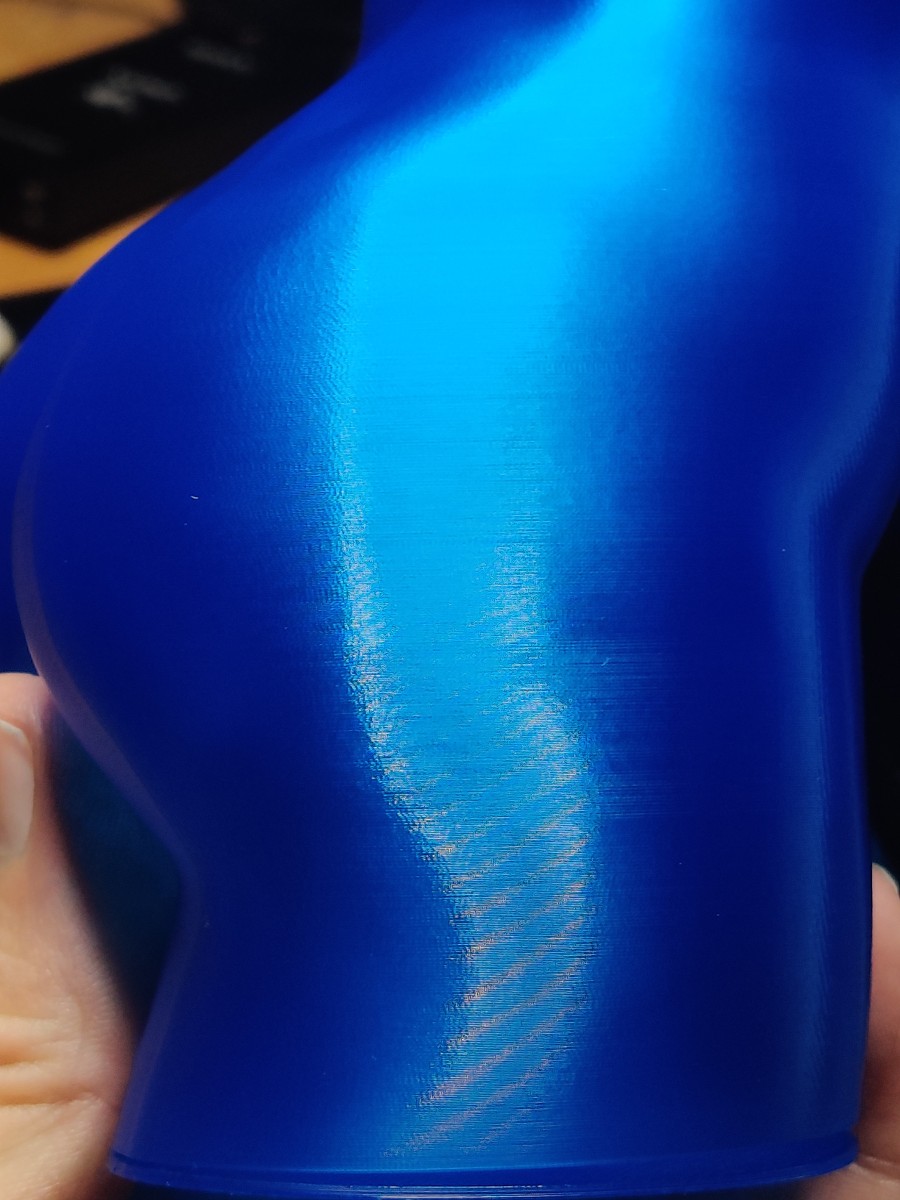
As you can see, in the photo of the blue print all of that corduroy effect is completely gone. That corduroy effect has afflicted every print I've ever made on this printer until now. On highly detailed models with no or few flat or relatively flat surfaces, or with filament that doesn't reflect light that much, it wasn't really noticeable. On shiny flat surfaces it was always highly obvious. I almost can't even believe how much of a difference it's made.
-
@Sethipus already shoved the cause, effect and solution. I build pick and place machines, and one of my prototypes had GT2 belt going around a smooth idler with teeth towards inside. My machine has a microscope looking at the work surface and software to measure position relative to a mark, so I could measure this. FYI, the effect is about 0.01 - 0.015mm max. I would predict that it is visible on a shiny surface, as beautifully demonstrated above.
-
@sethipus That's a very conclusive result!
My efforts to add a twist to the belts ran into a few snags. First I noticed that the clamp which holds my hot end had broken (at the rear where it wasn't visible until I took the printer apart in preparation for twisting the belts), so I had to print a new one in PETG this time to make it less likely to happen again.
Then I needed to redesign my part cooling duct so that I could get better access to the eccentric nut which tightens the hot end carriage wheel against the v-slot profile.Both new parts took a few attempts to get just right and that took up most of my weekend.
I finally got everything back together today and I'm re-printing the test piece now.
Noise figures bear out how much noise was being created by the belt teeth running over the idlers. Now I'm getting:
60mm/s 53.1 dbA
90mm/s 53.6 dbA
120mm/s 54.9 dbAPictures to follow once the print completes!
I noticed that the 0.9 degree steppers get fairly toasty compared to the 1.8 degree ones. Half way through the print, I'm seeing 41C on the motors. I'm running them at 1.6A (80% of rated current).