Achieving dimensional accuracy isn’t as simple as a single scale measurement. I use S3D for slicing and it has X, Y, Z part scaling plus a horizontal offset. I don’t know IdeaMaker well, but I’m guessing X and Y-axis compensations in the Printer Settings dialog work for XY scale. Part Scaling can also work, although I don’t know why they have chosen Width Depth and Height over X, Y, and Z. Under the OTHER tab, XY size compensation may be the same as S3D’s Horizontal Offset.
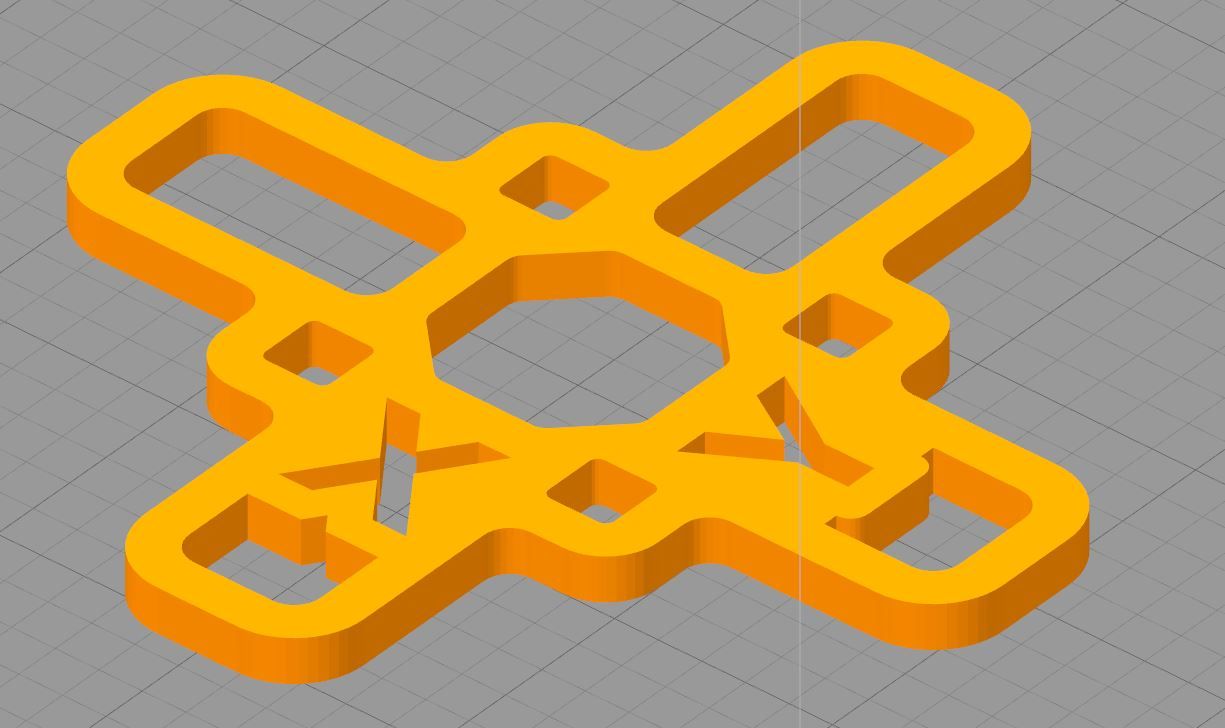
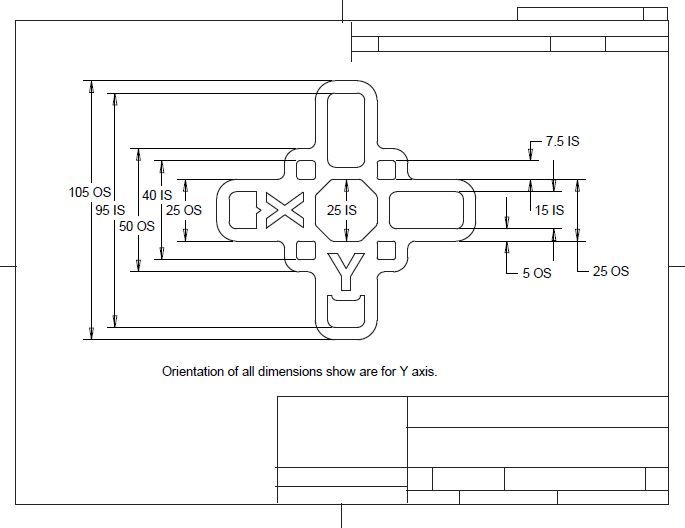
Attached you will find a part I'm calling a Calibration Cross - STL and JPG drawing. It includes internal and external features, both large and small. I have also attached an Excel Spreadsheet (Zipped) which allows you (by trial and error) to see the impact of scaling and horizontal offset values in correcting part dimensions.
Print off a Calibration Cross with no scaling and no horizontal offset. Enter the measured values into the spreadsheet and experiment with different X & Y scale factors as well as the horizontal offset value to minimize the resulting error on all of the measured dimensions. The solver add-in can help narrow in on the best values.
Whenever I’m going to print using a new setup, filament, significantly different print speed, layer height, temperature, etc, I start by running a Calibration Cross and use the spreadsheet to calculate scaling and offset numbers. This technique has proven to be a reliable way to ensure dimensional accuracy on parts. The Z-scale on my N2+ has proven to be quite accurate, so I just use 100% on that.
I can generally achieve part accuracy better than +/- .1mm (.004") on all dimensions.
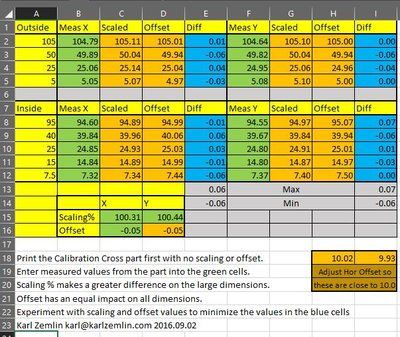
calibration-cross.xlsx
calibration-cross.stl
100mm.stl