@Norder Thank you for your reply, i will look into this.
Posts made by joehsmash
-
RE: Installing an Accelerometerposted in Tuning and tweaking
-
Installing an Accelerometerposted in Tuning and tweaking
good day Gurus,
im currently doing a full tear down on my ROBO 3d r1, i installed a Duet 2 wifi board a couple years ago. i picked up a Duet filament run out sensor, and want to start messing around with an accelerometer to test out input shaping.
other than the dozuki doc, I cant find many videos or support on them. i assume its just not a popular upgrade?
either way what I am wondering is do I just securely attach the accelerometer to the print head? I'm assuming it doesn't matter where?
-
Bl touch issueposted in General Discussion
The weirdest thing and I'm not entirely sure when this started however it seems that sometimes the machine has problems deploying the pin, ill go through 10 prints like normal, and everything is working perfect. than it will have trouble deploying the pin. it just sits there and flashes.
i can reset it just fine, some times I can self test it and it works flawless. other times it will make it 2-6 times on self test before it starts flashing and cant deploy the pin.
think I have a bad BL? or is it just a firmware issue?
-
RE: Ugh its been too long and ive forgotten everything!posted in Duet Hardware and wiring
@bricor ya that did it... not sure why i had such a brain fart... i knew i was following the way some one else did it... i just couldn't find that doc.
ty man I really appreciate it.
-
RE: Ugh its been too long and ive forgotten everything!posted in Duet Hardware and wiring
here is my config.g
; Configuration file for Duet WiFi (firmware version 3)
; executed by the firmware on start-up
;
; generated by RepRapFirmware Configuration Tool v3.1.1 on Mon Jun 01 2020 23:00:11 GMT-0600 (Mountain Daylight Time); General preferences
G90 ; send absolute coordinates...
M83 ; ...but relative extruder moves
M550 P"Joehbo 3D" ; set printer name
M575 P1 S1 B57600 ; Set LCD PanelDue 7 inch; Network
M552 S1 ; enable network
M586 P0 S1 ; enable HTTP
M586 P1 S0 ; disable FTP
M586 P2 S0 ; disable Telnet; Drives
M569 P0 S1 ; X Axis physical drive 0 goes forwards
M569 P1 S1 ; Y Axis physical drive 1 goes forwards
M569 P2 S1 ; Z Axis physical drive 2 goes forwards
M569 P3 S0 ; Extruder physical drive 3 goes Backwards
M584 X0 Y1 Z2 E3 P3 ; Define axis
M350 X16 Y16 Z16 E16 I1 ; Configure microstepping with interpolation
M92 X80.00 Y80.00 Z800.00 E790.00 ; Set steps per mm
M566 X1020.00 Y1020.00 Z24.00 E120.00 ; set maximum instantaneous speed changes (mm/min) (17,17,0.4,5 mm/sec)
M203 X6000 Y6000 Z180 E8000 ; Set maximum speeds (mm/min)
M201 X9000 Y9000 Z100 E10000 ; Set accelerations (mm/s^2)
M204 P1300 T4000 ; Set (P)rinting and (T)ravel Accelerations
M906 X1300 Y1100 Z1100 E1100 I30 ; Set motor currents (mA) and motor idle factor in per cent
M84 S10 ; Set idle timeout; Axis Limits
M208 X-109 Y-111 Z-1 S1 ; Set axis minima
M208 X111 Y117 Z203 S0 ; Set axis maxima; Endstops
M574 X1 S1 P"xstop" ; X End stop
M574 Y1 S1 P"ystop" ; Y End stop
;M574 Z1 S1 P"!zstop" ; Z End stop;Bl Touch
M307 H3 A-1 C-1 D-1 ; Disable the 7th Heater to free up PWM channel 5 on the Duex board.
M574 X1 Y2 S1 ; X home to min. Y home to max. Normally Closed limit switches.
M574 Z1 S2 ; Define Z to use Probe. Home to Min
M558 P9 H5 F500 T4000 X0 Y0 Z1 ; Set Z probe type/mode 5. H=Dive Height. F=Speed the bed moves
G31 P25 X0 Y-26 Z4.92 ; Set Z probe trigger value, offset and trigger height
M376 H0 ; Sets Bed level tapering
M557 X-109:111 Y-111:117 S20 ; define mesh grid
;M558 P5 H5 F500 T4000 X0 Y0 Z1 ; Set Z probe type/mode 5. H=Dive Height. F=Speed the bed moves
;M950 S0 C"exp.heater3" ; assign GPIO port 0 to heater3 on expansion connector, servo mode
;M558 P9 C"zprobe.in" H5 F60 T3000 R0.5 A10 ; Set Z probe type to switch, the axes for which it is used and the dive height + speeds
;M574 Z1 S2 P"exp.heater3" ; Define Z to use Probe. Home to Min
;M671 X-144:144 Y0:0 S0.5 ; leadscrews at left (connected to Z) and right (connected to E0) of X axis; Heaters
; Bed
M308 S0 P"!bedtemp" Y"thermistor" T100000 B4138 ; configure sensor 0 as thermistor on pin bedtemp
M950 H0 C"bedheat" T0 ; create bed heater output on bedheat and map it to sensor 0
M307 H0 B1 S1.00 ; enable bang-bang mode for the bed heater and set PWM limit
M140 H0 ; map heated bed to heater 0
M143 H0 S120 ; set temperature limit for heater 0 to 120C
; Nozzle
M308 S1 P"e0temp" Y"thermistor" T100000 B4138 ; configure sensor 1 as thermistor on pin e0temp
M950 H1 C"e0heat" T1 ; create nozzle heater output on e0heat and map it to sensor 1
M307 H1 B0 S1.00 ; disable bang-bang mode for heater and set PWM limit; Fans
M950 F0 C"fan0" Q500 ; create fan 0 on pin fan0 and set its frequency
M106 P0 S0 H-1 ; set fan 0 value. Thermostatic control is turned off
M950 F1 C"fan1" Q500 ; create fan 1 on pin fan1 and set its frequency
M106 P1 S1 H-1 ; set fan 1 value. Thermostatic control is turned off; Tools
M563 P0 D0 H1 F0 ; define tool 0
G10 P0 X0 Y0 Z0 ; set tool 0 axis offsets
G10 P0 R0 S0 ; set initial tool 0 active and standby temperatures to 0C; Custom settings are not defined
M501
-
Ugh its been too long and ive forgotten everything!posted in Duet Hardware and wiring
i just turned on my retrofitted ROBO R1, I have the duet2 wifi, with the BL Touch.
everything was working fine until stupidly I decided to update the duet files.
i was 3.1.4.2 and upgraded to current 3.4.2.
home x works fine,
home y works fine
bl doesn't work at all any more, I cannot deploy or retract
I cannot home zi have been trying to follow this guide https://betrue3d.dk/bltouch-on-duet-wifi-configuratio-and-usage/#wiring
how ever when i verified the wiring, the guide wanted me to use the heater 7 pin off the main board, except when i set everything up in my config.g it tells me that it heater 7 doesn't exist. so i did what user @dc42 suggested in another post to try to use a different heater. i tried heater 3, only it says that heater 3 doesn't exist either.
Can anyone point me in to the right direction? im completly lost at the moment.
-
RE: pretty sure my mesh isnt working... or isnt working well.posted in Tuning and tweaking
@JoergS5 it was def super weird, i do remember because i had to move the probing to the centre of the bed, i had to be very aware of where the head was, so i shrunk the build volume to confirm, and i guess i never swapped it back.
maybe one day ill mess with it to make it bigger
thank you though!
-
RE: pretty sure my mesh isnt working... or isnt working well.posted in Tuning and tweaking
@JoergS5 & @Phaedrux i believe that was the culprit. i have matched the the mesh coords with the bed coords, also changed the build tak plate and shes smooth as a babys bottom now.

-
RE: pretty sure my mesh isnt working... or isnt working well.posted in Tuning and tweaking
so right now, ive used a 0.05 feeler gauge to where it JUST touches the nozzle using 0.01 movements, than i removed the feeler gauge and dropped the nozzle down another 0.05 which should be touching the bed. only it doesnt actually move the nozzle.
its curious. i tried to send an M92 Z0 how it said that the command is sent how ever my z is still reporting to be a 0.44. when i send an M999 it resets like it should but it wont let me actually zero it.
-
RE: pretty sure my mesh isnt working... or isnt working well.posted in Tuning and tweaking
@Phaedrux how ever isnt the probe tip supposed to be at the same level as the nozzle?
all though the BL touch probes at 5.30mm when i actually touch the nozzle to the bed or atleast touch it to a 0.13mm feeler gauge the z height is set at 0.69mm when it should be 0.13ish
-
RE: pretty sure my mesh isnt working... or isnt working well.posted in Tuning and tweaking
@Phaedrux yes a G30 S-1 give me the values of 5.30 consistantly
-
RE: pretty sure my mesh isnt working... or isnt working well.posted in Tuning and tweaking
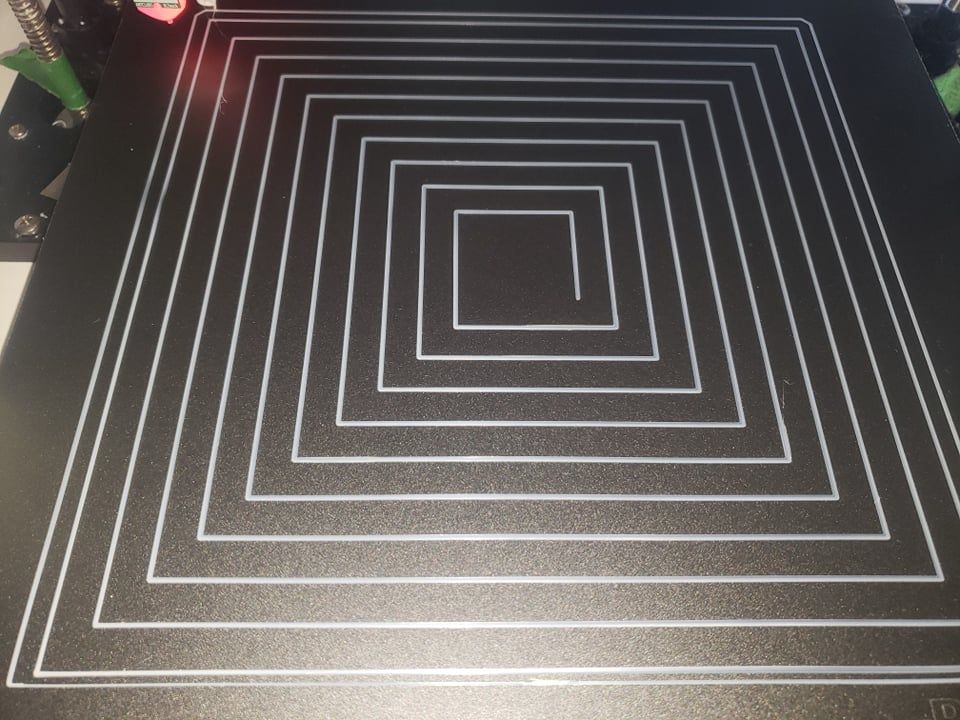
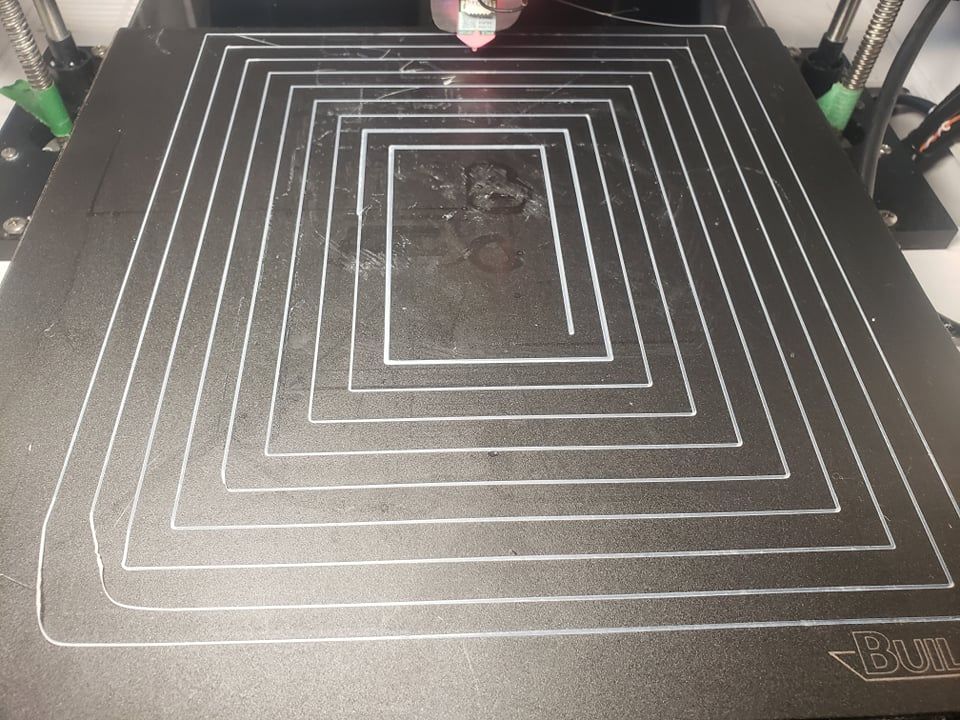
@Phaedrux also, am printing a bed level test now and its absolute rubbish. worse than before lol...
the front side now isnt printing at all haha
-
RE: pretty sure my mesh isnt working... or isnt working well.posted in Tuning and tweaking
@Phaedrux it does, because as stated previously i would have to redesign the BL touch mount which i will once i can actually print things,
i didnt take into account the pin dropping so unretracted its actually around 2 mm off the bed, which is why when you look at the homeall.g i you can see why i raise the z to 10, before i probe.
-
RE: pretty sure my mesh isnt working... or isnt working well.posted in Tuning and tweaking
@Phaedrux better, but still not compensating on my front corner as you can see.

-
RE: pretty sure my mesh isnt working... or isnt working well.posted in Tuning and tweaking
@Phaedrux i just re did my spacing for my probe, and you were correct, it was out.
new measurements were x0 y-26
reprobing the bed now and am going to try a test print
-
RE: pretty sure my mesh isnt working... or isnt working well.posted in Tuning and tweaking
nah, i manually added metal shims under the flexible metal plate. it looks worse than it is, but i have already adjusted the shims and that hump is now gone.
i have lowered the layer height so that its actually too low and its adhering but its clearly not right yet.
-
RE: pretty sure my mesh isnt working... or isnt working well.posted in Tuning and tweaking
@JoergS5 i did notice that i some times get anomalies just like that, but what i have found atleast on my machine is that it was something mechanical or something weird. but ive always sorted it out.

here is the new mesh level, im going to take out the shims in the front portion to lower it, now that its a little more accurate.also it made no difference in the first layer print. more towards the front of the bed, it doesn't adhere.
-
RE: pretty sure my mesh isnt working... or isnt working well.posted in Tuning and tweaking
@Phaedrux i also just realized that my values for the x and y arent even close to the min max set in the config, i made some changes just before i posted the homeall.
i also made the changes to the probing, and its probing each spot twice now, and is probing really slowly.
its on its last line now, ill post the height map when its finished
