I had a similar problem when I first upgraded to firmware 3.
Can you tell me what firmware version you upgraded from?
Also posting your config.g may help.
I had a similar problem when I first upgraded to firmware 3.
Can you tell me what firmware version you upgraded from?
Also posting your config.g may help.
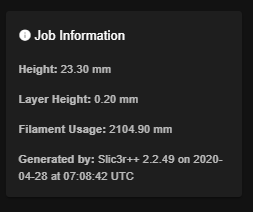
I've just noticed that the layer displayed in DWC is incorrect. I'm using Slic3r++ and the layer height of the print is 0.1mm but 3.01-R10 reports 0.2mm.

I've also tried this with Prusaslicer and it works correctly, so it probably isn't a Duet issue.
Can any one tell me how the layer height displayed is determined?
@Baenwort said in Cura Script to Automatically Probe Only Printed Area:
Does this work for Deltas who don't have their M557 as a x and y coordinate?
No it won't. But it could be modified.
For @Luke-sLaboratory.
This is @mwolter 's code modified to work with Slic3r, PrusaSlicer or Slic3r++. Follow the instructions in the comments to configure Slic3r.
Slightly changed so that the minimum size of the mesh is 3x3 on prints with small base size.
#!/usr/bin/python
"""
	Slic3r post-processing script for RepRap firmware printers which dynamically defines the mesh grid dimensions (M557) based on the print dimensions.
{1}
Usage:
{1}
	Slic3r Settings:
	In Print Settings > Output Options
	1. turn no "Verbose G-code"
	2. in "Post-processing scripts" type the full path to python and the full path to this script
	e.g. <Python Path>\python.exe  <Script Path>\meshcalc.py;

	In Printer Settings > Custom G-code > Start G-code
	Make sure the start g-code contains the M557 command, and that you probe the bed and load the compensation map,  e.g.
	M557 X10:290 Y10:290 S20	; Setup default grid
	G29							; Mesh bed probe
	G29 S1						; Load compensation map

	Script Settings
	probeSpacing = 20 - change this to the preferred probe point spacing in M557

	Note: The minimum X and Y of the probed area is limited to 2 times the probeSpacing.
	This is so that prints with a small footprint will have a minimum 3x3 probe mesh
{1}
Args:
{1}
	Path: The path parameter will be provided by Slic3r.
{1}
Requirements:
{1}
	The latest version of Python.
	Note that I use this on windows and haven't tried it on any other platform.
	Also this script assumes that the bed origin (0,0) is NOT the centre of the bed. Go ahead and modify this script as required.
{1}
Credit:
{1}
	Based on code originally posted by CCS86 on https://forum.duet3d.com/topic/15302/cura-script-to-automatically-probe-only-printed-area?_=1587348242875.
	and maybe 90% or more is code posted by MWOLTER on the same thread.
	Thank you both.
"""

import sys
import re
import math
import os

probeSpacing = 20   		# set your required probe point spacing for M557

def main(fname):
	print("Starting Mesh Calculations")

	try:
		_Slic3rFile = open(fname, encoding='utf-8')
	except TypeError:
		try:
			_Slic3rFile = open(fname)
		except:
			print("Open file exception. Exiting.")
			error()
	except FileNotFoundError:
		print('File not found. Exiting.')
		error()

	lines = _Slic3rFile.readlines()
	_Slic3rFile.close()

	linesNew = calcBed(lines)

	_Slic3rFile = open(fname, "r+")
	_Slic3rFile.seek(0)
	_Slic3rFile.truncate()
	for element in linesNew:
		_Slic3rFile.write(element)
	_Slic3rFile.close()

	return

def error():
	# remove the next 2 lines to close console automatically
	print("Press Enter to close")
	input()
	sys.exit()

def calcBed(lines):
	bounds = findBounds(lines)
	bed = findBed()

	for axis in bounds:
		if bounds[axis]['max'] - bounds[axis]['min'] < bed[axis]:
			print(f'Success: {axis} mesh is smaller than bed')

		else:
			print('Error: Mesh is larger than bed. Exiting.')
			error()

		for limit in bounds[axis]:
			if limit == 'min':
				if (bed[axis]) - bounds[axis][limit] > 0:
					print(f'Success: {axis} {limit} coordinate is on the bed.')
				else:
					print(f'Error: {axis} {limit} coordinate is off the bed. Exiting.')
					error()

			if limit == 'max':
				if (bed[axis]) - bounds[axis][limit] > 0:
					print(f'Success: {axis} {limit} coordinate is on the bed.')
				else:
					print(f'Error: {axis} {limit} coordinate is off the bed. Exiting.')
					error()
	return fillGrid(bounds, lines)

def findBed():
	bed = {
		'X': 0,
		'Y': 0,
		}

	bedCorners = os.environ.get("SLIC3R_BED_SHAPE")
	maxXY = bedCorners.split(',')[2].split('x')
	bed['X'] = int(maxXY[0])
	bed['Y'] = int(maxXY[1])
	print(bed)

	return bed

def findBounds(lines):
	bounds = {
		'X': {'min': 9999, 'max': 0},
		'Y': {'min': 9999, 'max': 0},
		}

	parsing = False
	for line in lines:
		if "move to next layer (0)" in line:
			parsing = True
			continue
		elif "move to next layer (1)" in line:
			break

		if parsing:
			# Get coordinates on this line
			for match in re.findall(r'([YX])([\d.]+)\s', line):
				# Get axis letter
				axis = match[0]

				# Skip axes we don't care about
				if axis not in bounds:
					continue

				# Parse parameter value
				value = float(match[1])

				# Update bounds
				bounds[axis]['min'] = math.floor(min(bounds[axis]['min'], value))
				bounds[axis]['max'] = math.ceil(max(bounds[axis]['max'], value))

	# make sure the bounds are at least 2 x Probe Point Spacing, for small prints.
	if parsing:
		global probeSpacing

		for axis in bounds:
			spacing = (bounds[axis]['max'] - bounds[axis]['min'])/2
			if spacing < probeSpacing:
				probeSpacing = spacing

	print("Bounds are: " + str(bounds))
	return bounds


def fillGrid(bounds, lines):
	# Fill in the level command template
	gridNew = 'M557 X%d:%d Y%d:%d S%d' % (
		bounds['X']['min'], bounds['X']['max'],
		bounds['Y']['min'], bounds['Y']['max'],
		probeSpacing
	)

	# Replace M557 command in GCODE
	linesNew = []
	for line in lines:
		if line.startswith('M557'):
			linesNew.append(re.sub(r'^M557 X\d+:\d+ Y\d+:\d+ S\d+', gridNew, line, flags=re.MULTILINE))
			print('New M557: ' + linesNew[-1])
		else:
			linesNew.append(line)
	return linesNew

if __name__ == '__main__':
	if sys.argv[1]:
		main(fname = sys.argv[1])
	else:
		print('Error: Proper Slic3r post processing command is python3')
		error()
I've updated with improvements so that the console remains open if there is an error, and the probe point spacing automatically reduces in size for small prints.
@Luke-sLaboratory said in Cura Script to Automatically Probe Only Printed Area:
Care to share?
I was afraid that someone would ask that. 
Its butt-ugly code right now. Let me clean it up and I'll post it here.
Thanks @CCS86, what a brilliant idea, and @mwolter, thanks, I used most of your code and got it working on Slic3r.
Works just great.
I never used mesh leveling because of the time involved probing the entire bed before printing. However, now I can, and I'm getting great first layer results.
Cheers guys.
@smoki3 said in Duet Web Control 2.1.1 released:
@insertnamehere I had this also on my duet 2. I now upgraded to RC6 and it is working fine
Thanks, I just needed to update to RC6 and it works now.
I'm having a problem with the parts fan slider not being displayed on the Status page.
I'm using a Berd-air pump as a parts fan connected to the E1 heater output. Previous versions showed the fan slider on the Status page. With with 2.1.1 it is no longer displayed.
The config.sys line is:
M950 F0 C"E1_HEAT" Q15000
However, if I change M950 in config.sys to:
M950 F0 C"FAN3" Q15000
the fan slider is displayed correctly in 2.1.1
@droftarts said in PrusaSlicer 2.2 released:
This one? https://github.com/supermerill/Slic3r
Ian
Yes, that's it.
Another slicer to try is Slic3r++
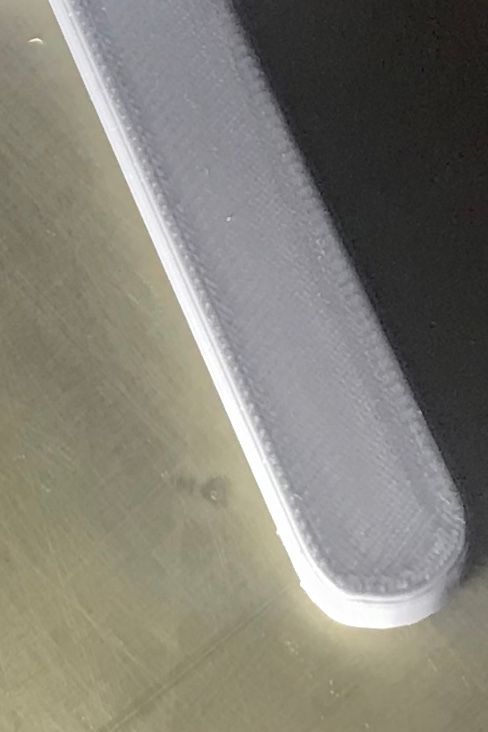
It's a fork of PrusaSlicer, and is currently at 2.2, but also include a lot of extra functionality, like top layer ironing, (see image). Gives great results.

No no, it's a valid question.
The simple answer is that a pullup resistor makes sure the input voltages go to known levels and don't "float" between logic high and low.
If the input circuit from the Piezo requires a pullup resistor on the output and you don't provide it it may not switch reliably or not switch at all. You could see it go high and stay high all the time.
First, try not using a pullup and if the input is not working reliably, turn the pullup on. I'm using a Precision Piezo in digital mode and I need the pullup enabled.
The i parameter is no longer supported in M558.
I'm using the Orion piezo:
M558 P8 C"^!ZPROBE.IN" R0.4 H2 F350 T5000 A5 S0.01
In C"^!ZPROBE.IN" the "^" enables the onboard pullup and the "!" inverts the input.
@dc42 said in RepRapFirmware 3.01-RC3 released:
@insertnamehere said in RepRapFirmware 3.01-RC3 released:
I'm using conditional code to optimized bed leveling.
On occasions when the 2 points used are equal I get an initial deviation of NAN.
3/10/2020, 11:10:16 AM Leadscrew adjustments made: -0.001 -0.001, points used 2, (mean, deviation) before (-0.001, nan) after (0.000, 0.000)
I would expect that when 2 points are the same that the standard deviation for those points would be 0. If I'm wrong, how can I test for NAN in the conditional code?
The NaNs should be gone in the internal build at https://www.dropbox.com/sh/3azy1njy3ayjsbp/AACquxr2m00eV568RZg5QG5wa?dl=0.
Thanks @dc42, it works correctly now.
3/14/2020, 11:17:11 AM Leadscrew adjustments made: 0.000 0.000, points used 2, (mean, deviation) before (0.000, 0.000) after (-0.000, 0.000)
BED LEVELLING COMPLETED
Final Deviation 0.000mm
I'm using conditional code to optimized bed leveling.
On occasions when the 2 points used are equal I get an initial deviation of NAN.
3/10/2020, 11:10:16 AM Leadscrew adjustments made: -0.001 -0.001, points used 2, (mean, deviation) before (-0.001, nan) after (0.000, 0.000)
I would expect that when 2 points are the same that the standard deviation for those points would be 0. If I'm wrong, how can I test for NAN in the conditional code?
@dc42 said in RepRapFirmware 3.01beta1 released:
You've found a bug (the property table wasn't ordered alphabetically after I renamed a property, so the binary search failed). I've fixed it in the latest build at https://www.dropbox.com/sh/3azy1njy3ayjsbp/AACquxr2m00eV568RZg5QG5wa?dl=0. I also added a compile-time check to prevent this happening in future, and an extra property state.upTime.
Firstly, thanks for the quick response. I've tried the fixed firmware and it works great.
Another thing, I use an ATX type 24V supply controlled by the PS_ON pin.
After all axis are homed, if I turn of the 24V supply, the axis remain homed "Blue" on the DWC. If I turn on the ATX supply again I can move all axis as if they are homed. Shouldn't turning of the 24V supply automatically mark all axis as homed : false?
m409
{"key":"","flags":"","result":{"boards":[{"firmwareFileName":"Duet2CombinedFirmware.bin","firmwareVersion":"3.01-beta1+1","iapFileNameSD":"Duet2CombinedIAP.bin","mcuTemp":{"current":39.6,"max":39.9,"min":38.0},"name":"Duet 2 WiFi","shortName":"2WiFi","vIn":{"current":0.7,"max":24.4,"min":0.4}}],"heat":{"coldExtrudeTemperature":160.0,"coldRetractTemperature":90.0,"heaters":[{"current":22.0,"sensor":0,"state":"Off"},{"current":23.2,"sensor":1,"state":"Active"}],"sensors":[{"lastReading":22.0,"name":"","type":"Thermistor"},{"lastReading":23.2,"name":"","type":"Thermistor"}]},"job":{"file":{"filament":[],"firstLayerHeight":0.0,"generatedBy":"","height":0.0,"lastModified":"28115-10-29T03:41:51","layerHeight":0.0,"numLayers":0,"printTime":0,"simulatedTime":0,"size":0},"lastFileName":"","layer":0,"timesLeft":{"filament":0.0,"file":0.0,"layer":0.0}},"move":{"axes":[{"homed":true,"letter":"X","max":300.0,"min":0.0,"userPosition":70.000,"visible":true},{"homed":true,"letter":"Y","max":300.0,"min":0.0,"userPosition":265.000,"visible":true},{"homed":true,"letter":"Z","max":350.0,"min":0.0,"userPosition":4.213,"visible":true}],"calibrationDeviation":{"deviation":0.000,"mean":0.000},"currentMove":{"requestedSpeed":0.0,"topSpeed":0.0},"daa":{"enabled":false,"minimumAcceleration":10.0,"period":0.0},"idle":{"factor":0.7,"timeout":30000},"initialDeviation":{"deviation":0.004,"mean":0.014},"meshDeviation":{"deviation":0.032,"mean":0.099},"printingAcceleration":10000.0,"speedFactor":100.0,"travelAcceleration":10000.0},"network":{"interfaces":[{"actualIP":"192.168.1.142","firmwareVersion":null,"gateway":"0.0.0.0","subnet":"0.255.255.255","type":"wifi"}]},"state":{"currentTool":0,"machineMode":"FFF","status":"Off","upTime":193}}}
I have a Duet Wifi 2 and I've been trying to access Initial Deviation in the Object Model.
If I execute the following line from the console:
echo "Initial Deviation", move.initialDeviation.deviation ^ "mm"
I get an error:
echo "Initial Deviation",move.initialDeviation.deviation ^ "mm"
Error: while executing command: unknown value initialDeviation.deviation
echo "Calibration Deviation", move.calibration.deviation ^ "mm"
responds:
echo "Calibration Deviation", move.calibrationDeviation.deviation ^ "mm"
Calibration Deviation 0.000mm
M409 shows
{"key":"","flags":"","result":{"boards":[{"firmwareFileName":"Duet2CombinedFirmware.bin","firmwareVersion":"3.01-beta1","iapFileNameSD":"Duet2CombinedIAP.bin","mcuTemp":{"current":40.4,"max":44.6,"min":39.9},"name":"Duet 2 WiFi","shortName":"2WiFi","vIn":{"current":24.0,"max":24.4,"min":0.5}}],"heat":{"coldExtrudeTemperature":160.0,"coldRetractTemperature":90.0,"heaters":[{"current":26.7,"sensor":0,"state":"Off"},{"current":27.1,"sensor":1,"state":"Active"}],"sensors":[{"lastReading":26.7,"name":"","type":"Thermistor"},{"lastReading":27.1,"name":"","type":"Thermistor"}]},"job":{"file":{"filament":[],"firstLayerHeight":0.0,"generatedBy":"","height":0.0,"lastModified":"28115-10-29T03:41:51","layerHeight":0.0,"numLayers":0,"printTime":0,"simulatedTime":0,"size":0},"lastFileName":"","layer":0,"timesLeft":{"filament":0.0,"file":0.0,"layer":0.0}},"move":{"axes":[{"homed":true,"letter":"X","max":300.0,"min":0.0,"userPosition":70.000,"visible":true},{"homed":true,"letter":"Y","max":300.0,"min":0.0,"userPosition":35.000,"visible":true},{"homed":true,"letter":"Z","max":350.0,"min":0.0,"userPosition":4.278,"visible":true}],"calibrationDeviation":{"mean":-0.000,"deviation":0.000},"currentMove":{"requestedSpeed":0.0,"topSpeed":0.0},"daa":{"enabled":false,"minimumAcceleration":10.0,"period":0.0},"idle":{"factor":0.7,"timeout":30000},"meshDeviation":{"mean":0.000,"deviation":0.000},"initialDeviation":{"mean":0.003,"deviation":0.001},"printingAcceleration":10000.0,"travelAcceleration":10000.0,"speedFactor":100.0},"network":{"interfaces":[{"actualIP":"192.168.1.142","firmwareVersion":null,"gateway":"0.0.0.0","subnet":"0.255.255.255","type":"wifi"}]},"state":{"currentTool":0,"machineMode":"FFF","status":"Idle"}}}
M558 P1 H3 F300 T6000 A5 S0.015
I used P1 and the analog output of the IR sensor.
If you use the analog output Duet will slow the dive speed down as the probe nears the trigger height. I found this gave more repeatable results.
I've got an Aus3d IR. I can check my config after work tonight and let you know.
@joshi
Another possible solution is to use something like the fanless MeanWell HLG-600H-12A
A 12V supply that has a 5V standby built in and a remote on/off. If you invert the PS_ON signal the Duet can control the 12V directly without high current relays.
Something worth considering at this point is going to 24V. Steppers run faster and quieter and with a 24V heat bed, faster heat up times and higher temperature.
@joshi Do you already have the power supplies? If you don't I can suggest an alternative design.