Hi,
I've been trying to research this and work it out for myself but I'm a little confused so I wondered if anyone here is able to help.
Apologies for any naïve understanding or use of terminologies in advance!
The Problem
I would like to clamp-down a square stock piece to the spoil board and let a suitable probing procedure determine the origin and angle of the stock piece and to adjust the coordinate system accordingly.
What I understand so far
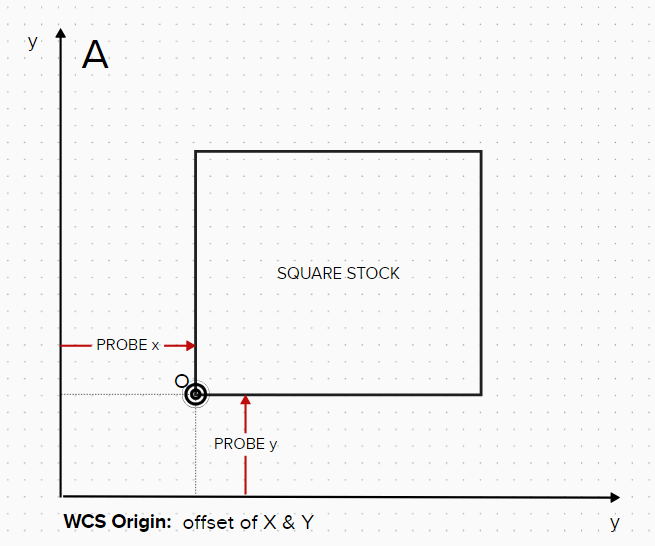
A. Using a probe, I can easily determine the WCS origin of a square stock piece that is perpendicular to the CNC x & y axes (I use G38.2... & G10...). I have already implemented this and use it all the time.

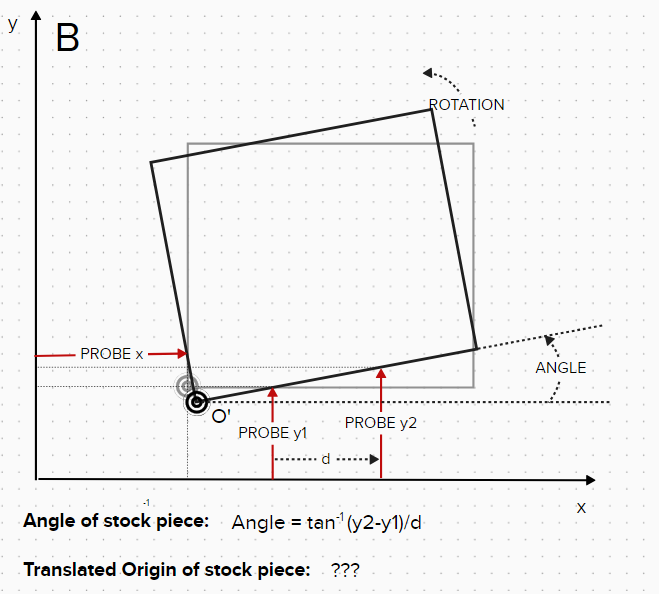
B. By probing the square stock piece in 2 locations along the x-axis I can calculate the angle of the stock piece from the difference in 'y'. I have tested a macro code for this and it gives the correct angle result.

So, my questions are:
-
Using this angle, how can I calculate the true WCS origin of the stock piece (ie, the origin calculated in A will no longer be correct due to the rotation/translation)?
-
What coordinates do I use for A & B in the GCODE R68 Annn Bnnn Rnnn in this scenario?
I realise I can just position the stock as square as possible and it would probably be fine but, since R68 is implemented in RRF, I'd like to understand how to use it.
I welcome any (simplified!) useful information around this if anyone uses it on their Duet/RRF machines?
Many thanks,
Jason
