@dc42 Cool.. thank you very much! I will consider to do the upgrade in the next days. The printer is still in the build phase and I have a lot of other things todo anyway. So I may wait, let's see.
Cheers, Chriss
@dc42 Cool.. thank you very much! I will consider to do the upgrade in the next days. The printer is still in the build phase and I have a lot of other things todo anyway. So I may wait, let's see.
Cheers, Chriss
@dc42 Hi David, I just tested a bit with a very simple setup:
tpost0.g
; tpost0.g
; called after tool 0 has been selected
;
; Wait for set temperatures to be reached
M116 P0
tpost1.g
; tpost1.g
; called after tool 1 has been selected
;

; Wait for set temperatures to be reached
M116 P1
test_macro.g
t0
g1 y100 x100
t1
g1 y100 y100

t-1
And I configured T0 and T1 via the DWC to 205:100. And you guess what? The problem is gone now. 
I have to admit that I do not know how I felt into that rabbit hole at the beginning. I swear that I experienced that. I can remember that I was on the phone with the first time it happened and I spoke with him about it. (Yes, I just called him for confirmation) But I do not know what I have changed in the meantime.
It could be that I configured T1 at that time, I simply don't know and I see no big benefit in speculating more.
That made me to look a bit closer in the slicer generated g-code:
;AFTER_LAYER_CHANGE
;8.3
G92 E0
;_ON_LAYER_CHANGE LAYER=41
G1 E-.2 F7200
; Filament-specific end gcode
G10 S100 P0 ; set temperature ;cooldown
; ##### Chriss
T1

; ##### Chriss END
; Filament gcode
G10 S210 P1 ; set temperature
M116 ; wait for temperature to be reached
G1 Z8.5 F3000
G1 X111.499 Y113.02 F9600
G1 Z8.3 F3000
You can find my tool change gcode from the prusa slicer in the lines 8 till 11. I tested with the slicer generated g-code and the "problem" is back. So I can confirm now that the slicer generated M116 from line 14 is stopping the printer and the printer waits till the old tool has reached the standby temp.
The firmware is still 3.5.4. So my understanding is that the sentence form the M116 docu: "Note that in v3.5, the scope of tool heaters to wait for is limited to the heaters of the currently selected tool of the selected motion system." is not fully tue, isn't it? So I guess that I run into the bug you mentioned.
Cheers, Chriss
@dc42 Hi David, I apologies for the late reply, I lost the focus on that problem.
I will retest it with the P parameter tomorrow. But I can tell you that I had the P parameter in the config at the very beginning and I experienced the issue.
Anyway, I do understand the concept behind the M116 in this way:
"M116" = Wait for every active heaters on the active motion system. That may indicate that all tools at a toolchanger are infected because they belong to the same axes. But that is is not clear to me why it should wait for the standby temp at all. But this is a philosophical question.
"M116 Px" = That waiting should affect the selected tool.
So it was logical to me that I should use the "Px".
The only thing which I have not tested yet is the H parameter. That could do it in this case too, I may need to test that. But anyway, it would be good retest "Px" again to make sure that it works as it should.
Will let you know more tomorrow.
Cheers, Chriss
I have the same behavior with the "P0" and "P1" at the M116. And It is till the case that the tools starts moving as soon as I change the standby temp close to the current temp of the previous tool. So M116 is definitely waiting for the previous tools standby temp. 
I will continue doing the tests...
I write a tiny macro
t0
g1 y100 x100
t1
g1 y100 y100
I started the macro via the DWV, T0 was active wen I started it. The tool drove to y100 x100 picked up the new tool and the head stopped after the pickup and I executed M122 via the CodeConsole
m122
=== Diagnostics ===
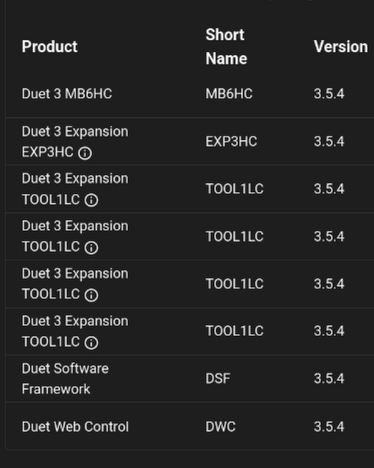
RepRapFirmware for Duet 3 MB6HC version 3.5.4 (2024-11-24 10:47:10) running on Duet 3 MB6HC v1.0 or earlier (SBC mode)
Board ID: 08DJM-956L2-G43S4-6JTDL-3SS6L-1876H
Used output buffers: 10 of 40 (39 max)
=== RTOS ===
Static ram: 155464
Dynamic ram: 93856 of which 2144 recycled
Never used RAM 91528, free system stack 119 words
Tasks: SBC(2,rWait:,1.1%,797) HEAT(3,nWait 6,0.0%,321) Move(4,nWait 6,0.0%,211) CanReceiv(6,nWait 1,0.1%,771) CanSender(5,nWait 7,0.0%,329) CanClock(7,delaying,0.0%,346) TMC(4,nWait 6,9.3%,53) MAIN(2,running,89.5%,139) IDLE(0,ready,0.0%,29), total 100.0%
Owned mutexes: Telnet(MAIN)
=== Platform ===
Last reset 21:21:33 ago, cause: power up
Last software reset at 2025-02-26 14:52, reason: User, Gcodes spinning, available RAM 91424, slot 2
Software reset code 0x6003 HFSR 0x00000000 CFSR 0x00000000 ICSR 0x00400000 BFAR 0x00000000 SP 0x00000000 Task SBC Freestk 0 n/a
Error status: 0x00
Aux0 errors 0,0,0
MCU temperature: min 41.2, current 41.5, max 42.3
Supply voltage: min 23.8, current 23.9, max 24.1, under voltage events: 0, over voltage events: 0, power good: yes
12V rail voltage: min 12.0, current 12.1, max 12.1, under voltage events: 0
Heap OK, handles allocated/used 99/26, heap memory allocated/used/recyclable 2048/632/240, gc cycles 0
Events: 0 queued, 0 completed
Driver 0: standstill, SG min 0, mspos 888, reads 41360, writes 6 timeouts 0
Driver 1: standstill, SG min n/a, mspos 8, reads 41367, writes 0 timeouts 0
Driver 2: standstill, SG min 26, mspos 568, reads 41361, writes 6 timeouts 0
Driver 3: standstill, SG min 0, mspos 280, reads 41361, writes 6 timeouts 0
Driver 4: standstill, SG min 0, mspos 936, reads 41361, writes 6 timeouts 0
Driver 5: standstill, SG min 0, mspos 264, reads 41360, writes 6 timeouts 0
Date/time: 2025-03-07 07:44:43
Slowest loop: 54.58ms; fastest: 0.04ms
=== Storage ===
Free file entries: 20
SD card 0 not detected, interface speed: 37.5MBytes/sec
SD card longest read time 0.0ms, write time 0.0ms, max retries 0
=== Move ===
DMs created 125, segments created 6, maxWait 1762317ms, bed compensation in use: mesh, height map offset 0.000, max steps late 0, min interval 0, bad calcs 0, ebfmin 0.00, ebfmax 0.00
no step interrupt scheduled
Moves shaped first try 0, on retry 0, too short 0, wrong shape 0, maybepossible 0
=== DDARing 0 ===
Scheduled moves 244, completed 244, hiccups 0, stepErrors 0, LaErrors 0, Underruns [0, 0, 1], CDDA state -1
=== DDARing 1 ===
Scheduled moves 0, completed 0, hiccups 0, stepErrors 0, LaErrors 0, Underruns [0, 0, 0], CDDA state -1
=== Heat ===
Bed heaters 0 -1 -1 -1 -1 -1 -1 -1 -1 -1 -1 -1, chamber heaters -1 -1 -1 -1, ordering errs 0
Heater 15 is on, I-accum = 0.0
=== GCodes ===
Movement locks held by null, null
HTTP* is doing "M116" in state(s) 0 9 0, running macro
Telnet* is doing "M122" in state(s) 0
File is idle in state(s) 0
USB is idle in state(s) 0
Aux is idle in state(s) 0
Trigger* is idle in state(s) 0
Queue* is idle in state(s) 0
LCD is idle in state(s) 0
SBC is idle in state(s) 0
Daemon is idle in state(s) 0
Aux2 is idle in state(s) 0
Autopause is idle in state(s) 0
File2 is idle in state(s) 0
Queue2 is idle in state(s) 0
Q0 segments left 0, axes/extruders owned 0x40000003
Code queue 0 is empty
Q1 segments left 0, axes/extruders owned 0x0000000
Code queue 1 is empty
=== CAN ===
Messages queued 18453, received 180246, lost 0, errs 0, boc 0
Longest wait 2ms for reply type 6013, peak Tx sync delay 384, free buffers 50 (min 49), ts 10239/10239/0
Tx timeouts 0,0,0,0,0,0
=== SBC interface ===
Transfer state: 5, failed transfers: 0, checksum errors: 0
RX/TX seq numbers: 59813/59813
SPI underruns 0, overruns 0
State: 5, disconnects: 0, timeouts: 0 total, 0 by SBC, IAP RAM available 0x24cfc
Buffer RX/TX: 0/0-0, open files: 0
=== Duet Control Server ===
Duet Control Server version 3.5.4 (2024-11-25 17:32:26, 64-bit)
Telnet+Executed:
> Executing M122
Trigger+Start:
> Executing M409 K"network" I1 (32 more codes pending)
>> Macro config.g: Idle
Trigger+Pre:
> Executing M409 K"volumes" I1 (32 more codes pending)
>> Macro config.g: Idle
Trigger+ProcessInternally:
> Executing M409 K"volumes" I1 (32 more codes pending)
>> Macro config.g: Idle
Trigger+Post:
> Executing M409 K"volumes" I1 (32 more codes pending)
>> Macro config.g: Idle
HTTP:
Buffered code: M116
Buffered codes: 24 bytes total
>> Doing macro 0:/macros/test.g, started by M98 P"0:/macros/test.g"
>> Suspended code: G1 Y100 Y100
>>> Doing macro tpost1.g, started by T1
Trigger:
>> Finishing macro config.g, started by system
Code buffer space: 4096
Configured SPI speed: 8000000Hz, TfrRdy pin glitches: 0
Full transfers per second: 37.42, max time between full transfers: 71.2ms, max pin wait times: 66.5ms/42.1ms
Codes per second: 0.05
Maximum length of RX/TX data transfers: 5560/720
ok
Here is the tpost1.g at the time of the execution:
root@blimy:~/SD-Card/sys# cat tpost1.g
; tpost1.g
; called after tool 1 has been selected
;

; Wait for set temperatures to be reached
M116
; P1
I have removed the "P1" as a result from previous part of the thread.
Cheers, Chriss
Here some parts of my config:
root@blimy:~/SD-Card/sys/hardware# cat tool* | grep M563
M563 P0 S"Tool 0" D0 H10 F10	; define tool
M563 P1 S"Tool 1" D1 H15 F15	; define tool
M563 P2 S"Tool 2" D2 H20 F20	; define tool
M563 P3 S"Tool 3" D3 H25 F25	; define tool
Heater/fan configs for the tools:
root@blimy:~/SD-Card/sys/hardware# cat tool* | grep M950
M950 H10 C"120.out0" T10	; create nozzle heater output on 120.out0 and map it to sensor 10
M950 F10 C"120.out1" Q50	; create fan 10 on pin 120.out1 and set its frequency
M950 F11 C"120.out2" Q50	; create fan 11 on pin 120.out2 and set its frequency
M950 H15 C"121.out0" T15	; create nozzle heater output on 121.out0 and map it to sensor 15
M950 F15 C"121.out1" Q50	; create fan 15 on pin 121.out1 and set its frequency
M950 F16 C"121.out2" Q50	; create fan 16 on pin 121.out2 and set its frequency
M950 H20 C"122.out0" T20	; create nozzle heater output on 0.out3 and map it to sensor 20
M950 F20 C"122.out1" Q50	; create fan 20 on pin 122.out1 and set its frequency
M950 F21 C"122.out2" Q50	; create fan 1 on pin 0.out9 and set its frequency
M950 H25 C"123.out0" T25	; create nozzle heater output on 123.out0 and map it to sensor 25
M950 F25 C"123.out1" Q50	; create fan 25 on pin 123.out1 and set its frequency
M950 F26 C"123.out2" Q50	; create fan 26 on pin 123.out2 and set its frequency
I do not see a overlap in my sensor config:
root@blimy:~/SD-Card/sys/hardware# cat tool* | grep M308
M308 S10 P"120.temp0" Y"thermistor" A"Tool 0" T100000 B4725 C7.06e-8	; Slice engineering 300C
M308 S15 P"121.temp0" Y"thermistor" A"Tool 1" T500000 B4723 C1.196220e-7 H0	; Slice 450°C
M308 S20 P"122.temp0" Y"thermistor" A"Tool 2" T500000 B4723 C1.196220e-7 H0     ; Slice 450°C
M308 S25 P"123.temp0" Y"thermistor" A"Tool 3" T100000 B4725 C7.06e-8	; Slice engineering 300C
Any my fan config:
root@blimy:~/SD-Card/sys/hardware# cat tool* | grep M950
M950 H10 C"120.out0" T10	; create nozzle heater output on 120.out0 and map it to sensor 10
M950 F10 C"120.out1" Q50	; create fan 10 on pin 120.out1 and set its frequency
M950 F11 C"120.out2" Q50	; create fan 11 on pin 120.out2 and set its frequency
M950 H15 C"121.out0" T15	; create nozzle heater output on 121.out0 and map it to sensor 15
M950 F15 C"121.out1" Q50	; create fan 15 on pin 121.out1 and set its frequency
M950 F16 C"121.out2" Q50	; create fan 16 on pin 121.out2 and set its frequency
M950 H20 C"122.out0" T20	; create nozzle heater output on 0.out3 and map it to sensor 20
M950 F20 C"122.out1" Q50	; create fan 20 on pin 122.out1 and set its frequency
M950 F21 C"122.out2" Q50	; create fan 1 on pin 0.out9 and set its frequency
M950 H25 C"123.out0" T25	; create nozzle heater output on 123.out0 and map it to sensor 25
M950 F25 C"123.out1" Q50	; create fan 25 on pin 123.out1 and set its frequency
M950 F26 C"123.out2" Q50	; create fan 26 on pin 123.out2 and set its frequency
There is no problem with a config, isn't it?
Cheers, Chriss
@droftarts said in Tool changer wait for cooldown... :
- Has he tried running M122 while he says the tool is waiting to cool down? It should report under GCodes which commands it is waiting on. (Please try this)
I configured T0 and T1 to be at 195/100, I activated T0 via the CodeConsole, waited till it was heated up. Changed to T1 and executed M112 via the DWC console:
m122
=== Diagnostics ===
RepRapFirmware for Duet 3 MB6HC version 3.5.4 (2024-11-24 10:47:10) running on Duet 3 MB6HC v1.0 or earlier (SBC mode)
Board ID: 08DJM-956L2-G43S4-6JTDL-3SS6L-1876H
Used output buffers: 1 of 40 (39 max)
=== RTOS ===
Static ram: 155464
Dynamic ram: 93804 of which 2196 recycled
Never used RAM 91528, free system stack 119 words
Tasks: SBC(2,ready,1.1%,797) HEAT(3,nWait 6,0.0%,321) Move(4,nWait 6,0.0%,211) CanReceiv(6,nWait 1,0.1%,771) CanSender(5,nWait 7,0.0%,329) CanClock(7,delaying,0.0%,346) TMC(4,nWait 6,9.5%,53) MAIN(2,running,88.0%,139) IDLE(0,ready,1.2%,29), total 100.0%
Owned mutexes: HTTP(MAIN)
=== Platform ===
Last reset 20:47:26 ago, cause: power up
Last software reset at 2025-02-26 14:52, reason: User, Gcodes spinning, available RAM 91424, slot 2
Software reset code 0x6003 HFSR 0x00000000 CFSR 0x00000000 ICSR 0x00400000 BFAR 0x00000000 SP 0x00000000 Task SBC Freestk 0 n/a
Error status: 0x00
Aux0 errors 0,0,0
MCU temperature: min 40.4, current 41.3, max 41.8
Supply voltage: min 23.8, current 23.9, max 24.1, under voltage events: 0, over voltage events: 0, power good: yes
12V rail voltage: min 12.0, current 12.1, max 12.1, under voltage events: 0
Heap OK, handles allocated/used 99/26, heap memory allocated/used/recyclable 2048/632/240, gc cycles 0
Events: 0 queued, 0 completed
Driver 0: standstill, SG min 0, mspos 888, reads 23697, writes 14 timeouts 0
Driver 1: standstill, SG min n/a, mspos 8, reads 23711, writes 0 timeouts 0
Driver 2: standstill, SG min 25, mspos 632, reads 23703, writes 8 timeouts 0
Driver 3: standstill, SG min 0, mspos 344, reads 23703, writes 8 timeouts 0
Driver 4: standstill, SG min 0, mspos 1000, reads 23703, writes 8 timeouts 0
Driver 5: standstill, SG min 0, mspos 264, reads 23697, writes 14 timeouts 0
Date/time: 2025-03-07 07:10:35
Slowest loop: 656.65ms; fastest: 0.05ms
=== Storage ===
Free file entries: 20
SD card 0 not detected, interface speed: 37.5MBytes/sec
SD card longest read time 0.0ms, write time 0.0ms, max retries 0
=== Move ===
DMs created 125, segments created 6, maxWait 164754ms, bed compensation in use: mesh, height map offset 0.000, max steps late 0, min interval 0, bad calcs 0, ebfmin 0.00, ebfmax 0.00
no step interrupt scheduled
Moves shaped first try 0, on retry 0, too short 0, wrong shape 0, maybepossible 0
=== DDARing 0 ===
Scheduled moves 145, completed 145, hiccups 0, stepErrors 0, LaErrors 0, Underruns [0, 0, 0], CDDA state -1
=== DDARing 1 ===
Scheduled moves 0, completed 0, hiccups 0, stepErrors 0, LaErrors 0, Underruns [0, 0, 0], CDDA state -1
=== Heat ===
Bed heaters 0 -1 -1 -1 -1 -1 -1 -1 -1 -1 -1 -1, chamber heaters -1 -1 -1 -1, ordering errs 0
Heater 15 is on, I-accum = 0.0
=== GCodes ===
Movement locks held by null, null
HTTP* is doing "M122" in state(s) 0
Telnet* is doing "M116" in state(s) 0 9, running macro
File is idle in state(s) 0
USB is idle in state(s) 0
Aux is idle in state(s) 0
Trigger* is idle in state(s) 0
Queue* is idle in state(s) 0
LCD is idle in state(s) 0
SBC is idle in state(s) 0
Daemon is idle in state(s) 0
Aux2 is idle in state(s) 0
Autopause is idle in state(s) 0
File2 is idle in state(s) 0
Queue2 is idle in state(s) 0
Q0 segments left 0, axes/extruders owned 0x40000003
Code queue 0 is empty
Q1 segments left 0, axes/extruders owned 0x0000000
Code queue 1 is empty
=== CAN ===
Messages queued 2839, received 26664, lost 0, errs 0, boc 0
Longest wait 2ms for reply type 6013, peak Tx sync delay 376, free buffers 50 (min 49), ts 1508/1508/0
Tx timeouts 0,0,0,0,0,0
=== SBC interface ===
Transfer state: 5, failed transfers: 0, checksum errors: 0
RX/TX seq numbers: 48709/48709
SPI underruns 0, overruns 0
State: 5, disconnects: 0, timeouts: 0 total, 0 by SBC, IAP RAM available 0x24cfc
Buffer RX/TX: 0/0-0, open files: 0
=== Duet Control Server ===
Duet Control Server version 3.5.4 (2024-11-25 17:32:26, 64-bit)
HTTP+Executed:
> Executing M122
Trigger+Start:
> Executing M409 K"network" I1 (32 more codes pending)
>> Macro config.g: Idle
Trigger+Pre:
> Executing M409 K"volumes" I1 (32 more codes pending)
>> Macro config.g: Idle
Trigger+ProcessInternally:
> Executing M409 K"volumes" I1 (32 more codes pending)
>> Macro config.g: Idle
Trigger+Post:
> Executing M409 K"volumes" I1 (32 more codes pending)
>> Macro config.g: Idle
Telnet:
Buffered code: M116
Buffered codes: 24 bytes total
>> Doing macro tpost1.g, started by T1
Trigger:
>> Finishing macro config.g, started by system
Code buffer space: 4096
Configured SPI speed: 8000000Hz, TfrRdy pin glitches: 0
Full transfers per second: 38.23, max time between full transfers: 77.5ms, max pin wait times: 66.6ms/23.4ms
Codes per second: 1.33
Maximum length of RX/TX data transfers: 5256/720
I was a bit unsure because it looks OKish to me. So I did the same similar test: (same temp settings)
T1 was active
I changed to T0 via the CodeConsole and I was not able to enter any command on the CodeConsole. So I tied to move the tool via the DWC console (G1 Y100) and the head was moving before the the T1 reached its standby temp.
The CodeConsole on the PI was responsive as soon as the T1 reached its standby temp.
I will do some of the other tests soon, this is just an update.
Cheers, Chriss
@Aurimas Cool, so we agree that not everybody can solder 0,25mm² on a usb connector, the connector can not handle more than 5A and it is a very big chunk of metal/plastic.
And nobody came out with any benefit the connector comes with, using per-configured cables from a reseller is nothing I can see on the positive site at all.
@droftarts Hi Ian,
Thanks for your comment. The Slicer is the very first thing I checked, I do not trust the Prusa slicer at all. ")
I was off for some days. Give me some days for the test you and David asked me to too. It may be the case that I made a mistake with the config of the heaters/tools. That could be a very good explanation.
I will come back to this thread.
Cheers, Chriss
@mikeabuilder Thanks for the input, that does not apply to me, I do not use any filament specific config.
@droftarts Hi Ian,
I had the hope to see how the value of P is handed over. The "GetLockedTool" seems to me like it is pointing to the attached tool. Anyway, just guessing. I guess that David can point it out here.
I have the feeling that we end her in a feature request and I will work around that with the H parameter. It seems to me that H will do what I need too.
Cheers, Chriss
@droftarts Good morning Ian,
I gave it a shoot but with the very same result. The active tool waits till the tool which went into standby reached the standby temp.
And that "new" (3.5.1) behavior does not seems to make much sense to me to be honest.
It would be far more logical to me to have:
M116 = wait for all
M116 P0,1,2 = wait for the list of tools
M116 P-1 = wait for all
And maybe a other switch like: "X0" = do not wait for standby temp at all. There are maybe some very rare edge cases where you want to wait till the temp went down.
Cherrs, Chriss
Edit: I was unable to resist and had a quick look into the current code (well at 3.5-dev), I have to admit that I do not fully understand how that value of P is handed over:
if (gb.Seen('P'))
        {
         // Wait for the heaters associated with the specified tool to be ready
          if (!ToolHeatersAtSetTemperatures(Tool::GetLockedTool(gb.GetIValue()).Ptr(), true, lerance, gb.IsFileChannel()))
                      {
              return false;
                        }
                          seen = true;
                 }
I do think to use "H" in the meantime, that looks a bit more promising:
  if (gb.Seen('H'))
              {
                // Wait for specified heater(s) to be ready
                uint32_t heaters[MaxHeaters];
                size_t heaterCount = MaxHeaters;
                gb.GetUnsignedArray(heaters, heaterCount, false);

                for (size_t i = 0; i < heaterCount; i++)
                                                                                        {
        if (!reprap.GetHeat().HeaterAtSetTemperature(heaters[i], true, tolerance, gb.
                                        IsFileChannel()))
                       {
             return false;
   }
         }
                seen = true;
           }
@Aurimas When was the last time you replaced a USB-C connector on a pcb? I guess not once, you would not call it super easy to replace if you did it.
Have you ever compared a USB-C connector with a XT30 2x2? They are far bigger. And have you ever seen a plug where you can solder the wires in? Or crimp them? Many users use cables which are certified for drag chains, one of the USB cables I found are.
Do do you plan to consume 10A over a USB connector?
How to you build cables with custom length?
And almost every USB-C connector to solder on a PCB has a higher price tag than a XT30 2x2 connector. Every XT30 2x2 plug has a lower price than a USB-C cable. What are you talking about?
And how do you explain the weakness at the soldering point when you solder drag chain compatible wires at the cable coming out of the USB-Connector?
Cheers, Chriss
@droftarts So we have misunderstood us. I have this:
tpost0.g:M116 P0
tpost1.g:M116 P1
tpost2.g:M116 P2
tpost3.g:M116 P3
So every tpost has a "M116 with Px" accordingly. I can remember that I stumbled over that when I started to write the config and the effect is present with that config.
We agree that we want to M116 in the tpost, don't we?
Cheers, Chriss
Edit: I just saw that "M116" only (without the P) has effect to the current selected too only. I'm not sure that this is correct. I can remember that I added the "P" later because I saw that "waiting for standby" in the past. But it could be that there was a firmware update since than and all of my memory is not valid anymore.
@droftarts My apologies Ian, I was so focused on the issue that I have forgotten to mention the hardware.
I'm not sure that it was working in the past, maybe but I can not say it for certain.
That is my Toolchanger project which I use to dump some spare time in. I think that I saw that from the beginning but there were so many issues to solve that I was able to run away from that one.
I have to admit that I was indeed a bit confused about the behavior.... I was printing today the first time with a tool change after some hardware fixes. And t0 paused right after the tool pickup, coming from t1. The standby temp on both tools was set to 100°C, I waited a while to understand what is going on. A changed the standby temp of T1 to 140 when the tool was at 143°Cish and T0 started to move/print.
I'm very sure that I used the P on M116 to avoid exactly this behavior.
Cheers, Chriss
@T3P3Tony I akes a while ago for a toolboard with more than one stepper connector too. That would help a lot when you build things like Enraged Rabbit or if you want to power a gantry with a can board.
To be honest: I would love to see more smaller and specialized tool boards.
Why not having a toolbaord which is specialized for a chamber heater? Just some outputs for SSRs and some temp sensors plus a servo?
Why not a board with 2 or 4 stepper drivers and 4-6 I/Os for endstops? (For gantries in a corexy)
Or an toolboard just to control RGB Leds. And why not one like a daughter board which you can be stacked on the toolboard for the head?
And what is about a can multiplexer board? It would be nice to have more than 1 can bus in the system to make it more flexible. The stup setup is not ideal, you hit the 1m limit very easy.
I think that it is easy to come to more idea for boards which are dedicated to a very special usecase.
Cheers, Chriss
@jay_s_uk The XT30 2+x are nice, but that is the idea to get CAN out of the board than? A other connector? Solder pats?
@Aurimas
No no USB is a horrible choice. The connectors are far to big and have my downsides for our usecase. And you need to use other wires anyway, the USB cables do not last long in chains.
Everything is better than this USB connectors.
Hi *,
I have a tiny prodblem with my toolchanger setup, I hope somebody can help my with the setup.
I see that the new tool waits till the old tool has reached its standby temp. That is not very effective and it is not needed at all. Anybody with an idee to work around it?
My tool change g code in the slicer is:
T{next_extruder}
I hand over all of the temps via a custom gcode in the slicer:
;##################### Start g-Code


set global.tool_temp_initial={first_layer_temperature[initial_extruder]}
set global.tool_initial=[initial_tool]

set global.bed_temp_initial=[first_layer_bed_temperature]
set global.bed_temp=[bed_temperature]

set global.tool0_inital=[first_layer_temperature_0]
set global.tool1_inital=[first_layer_temperature_1]
set global.tool2_inital=[first_layer_temperature_2]
set global.tool3_inital=[first_layer_temperature_3]

set global.tool0_all=[temperature_0]
set global.tool1_all=[temperature_1]
set global.tool2_all=[temperature_2]
set global.tool3_all=[temperature_3]

set global.tool0_standby=[idle_temperature_0]
set global.tool1_standby=[idle_temperature_1]
set global.tool2_standby=[idle_temperature_2]
set global.tool3_standby=[idle_temperature_3]

M98 P"/sys/lib/start2.g"
;##################### End of Start g-Code
The start2.g does some tiny things, the most important in this case:
; Set the standby temps to all tools
M568 P0 R{global.tool0_standby}
M568 P1 R{global.tool1_standby}
M568 P2 R{global.tool2_standby}
M568 P3 R{global.tool3_standby}
tpre0.g
G91			; Relative
G1 Z5

G90			; Absolute
G1 X11 Y357 F9000
G91
G1 Y10 F6000

M98 P"0:/sys/lib/coupler-lock.g"

G91			; Relative
G1 Y-30 F6000

M593 P"none"      	; disable input shaping
tfree0.g
G91                     ; Relative
G1 Z5

G90			; Absolute
G53 G1 X11 Y298 F9000	; Go in front of the park position, step 1
G53 G1 Y337 F8000	; Go in front ot the park position, step 2
G91			; Relative
G1 Y30 F6000		; Go into park position
M98 P"0:/sys/lib/coupler-unlock.g"     ; unlock Coupler
G91			; Relative
G1 Y-15	F6000		; Move the coupler out
G90			; Absolute

M106 P10 S0		; Fan off
And the tpost0.g which I think is the problem:
; Wait for set temperatures to be reached
M116 P0
That looks like that: (grep M116 tpost*)
tpost0.g:M116 P0
tpost1.g:M116 P1
tpost2.g:M116 P2
tpost3.g:M116 P3
I had the hope that the M116 is ignoring the standby temp but it does not. And better ideas?
Cheers, Chriss
I see, there are plenty of other good ideas. I like the ides with the stepper endstops from the pic @oliof posted.
Yes, @T3P3Tony, you have the biggest so far. 