@droftarts said in Problem with heaters:
M563 P0 H0 D0 F0
Yeah that solved it! Thank you very much!!!


@droftarts said in Problem with heaters:
M563 P0 H0 D0 F0
Yeah that solved it! Thank you very much!!!


Hi guys, im having a really bad time figuring this one out. I would really appreciate the help...
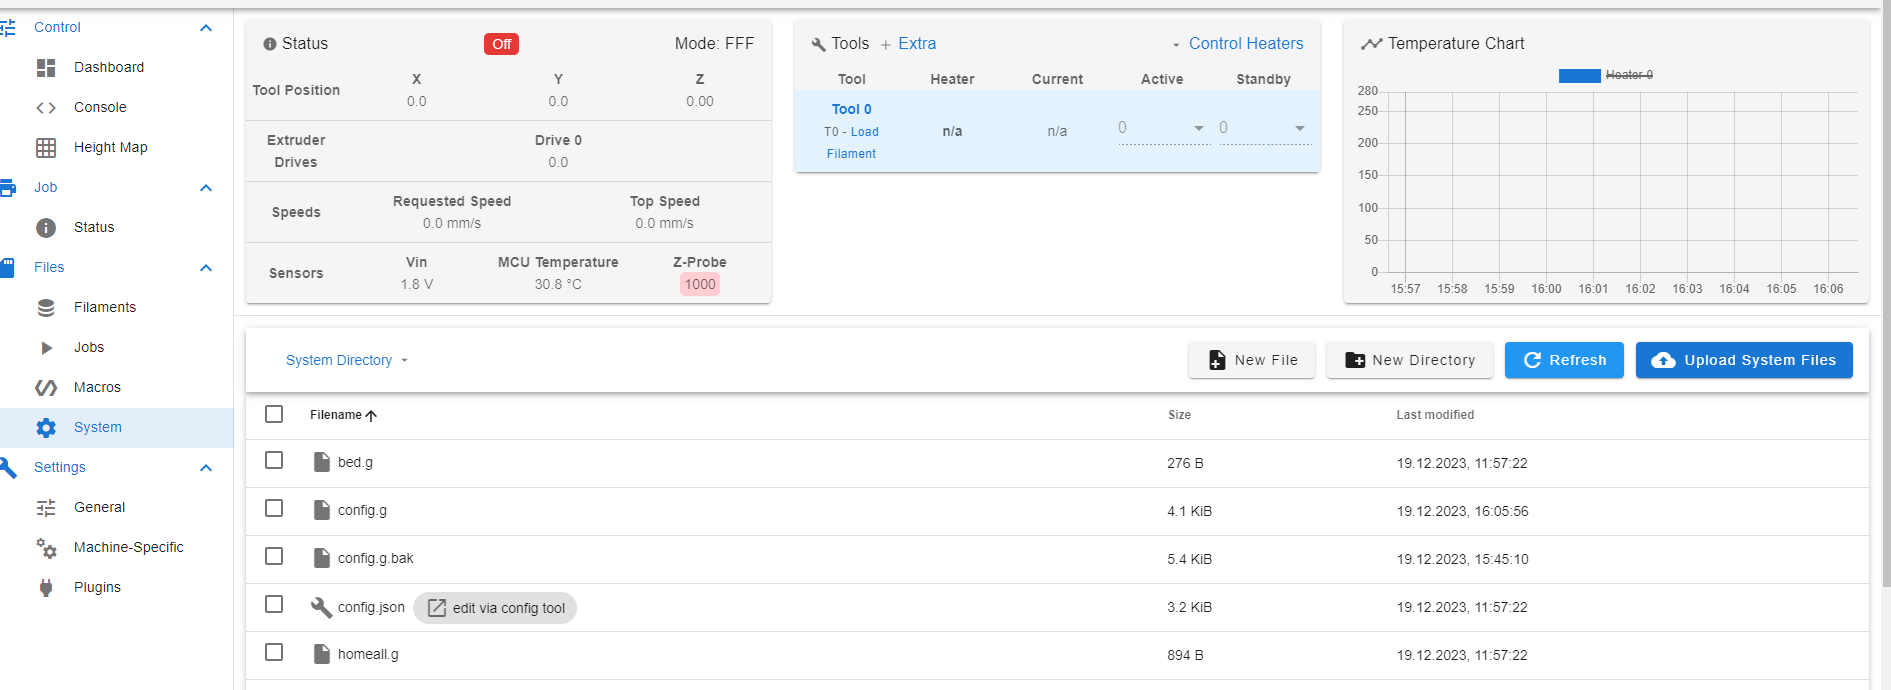
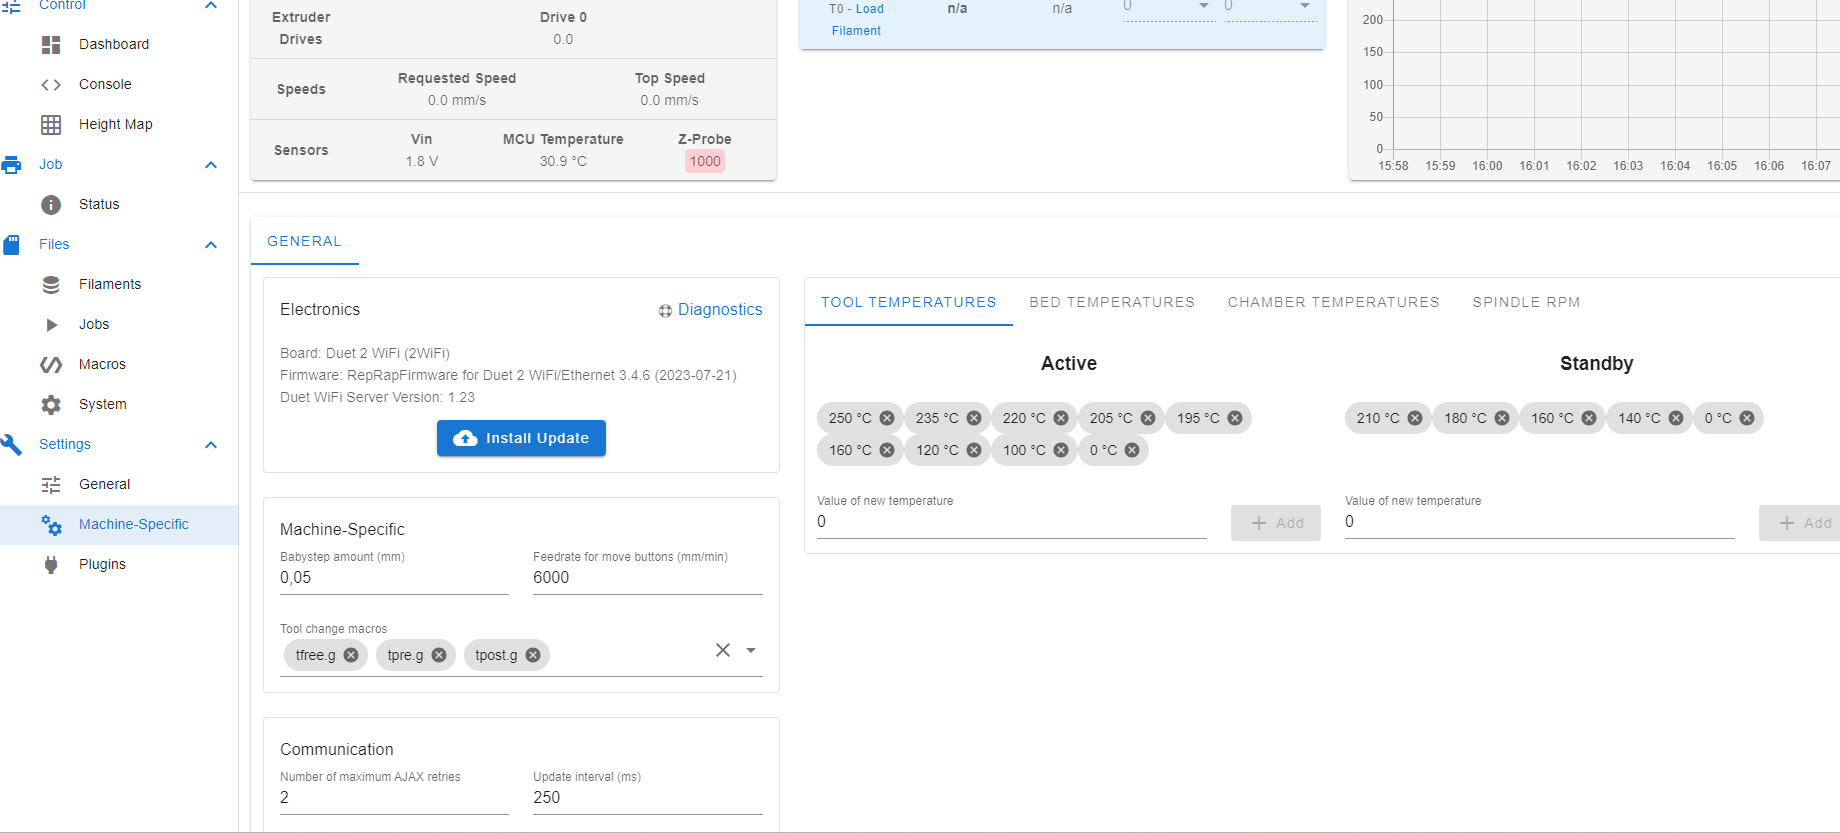
As you can see in the picture: i have no tools/heaters... I cannot start a printing process because of that.
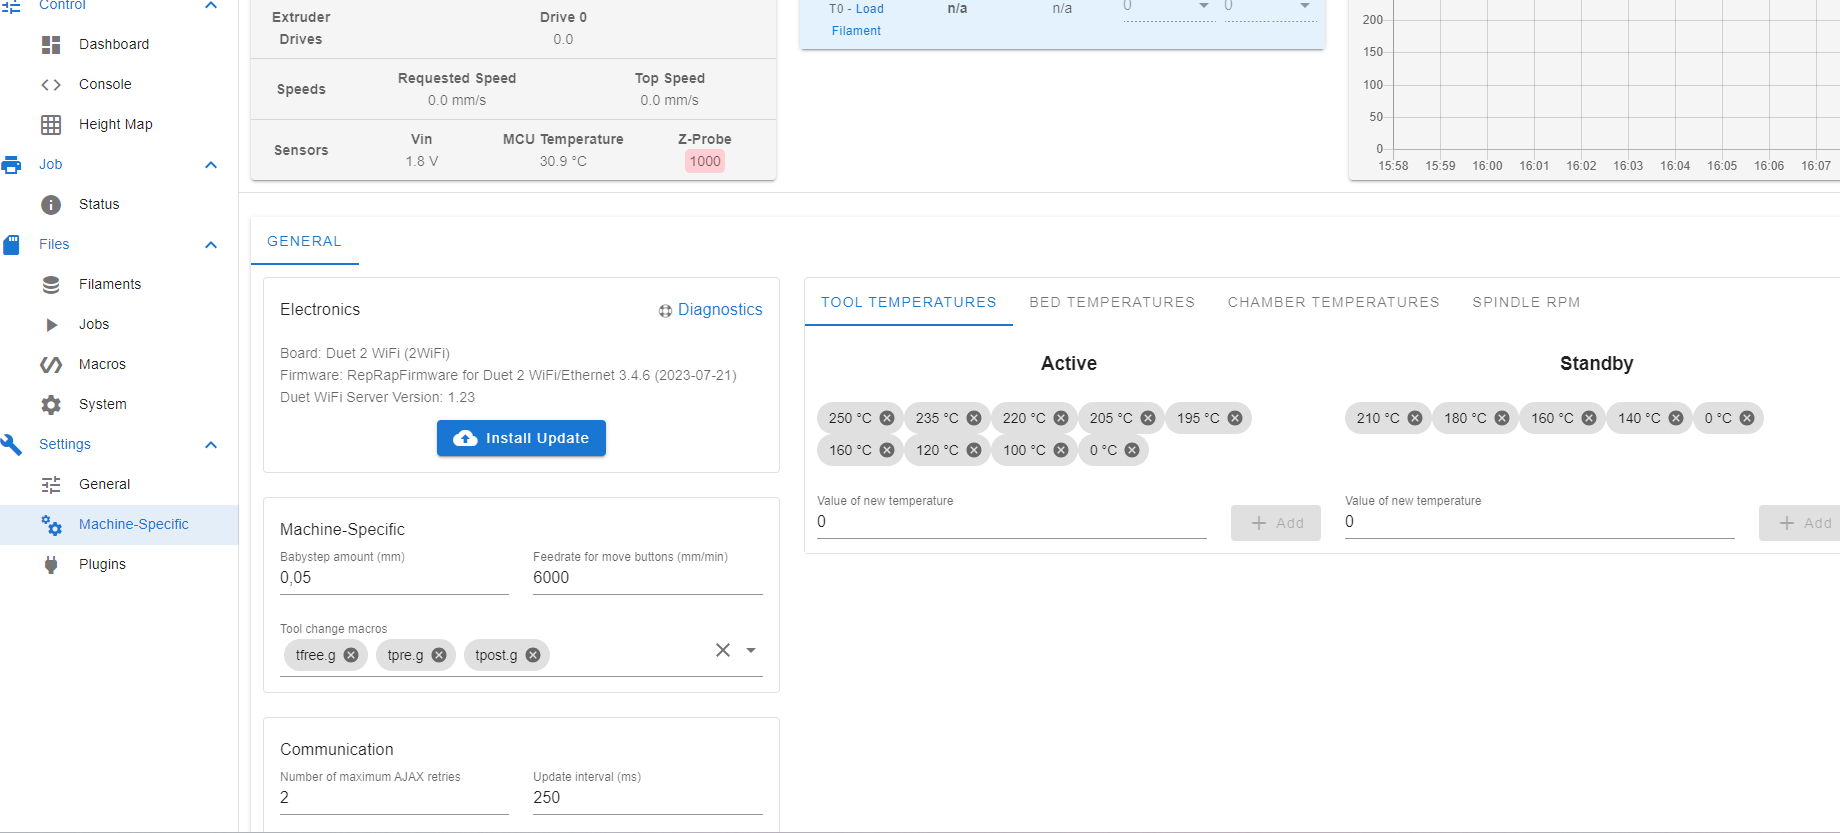
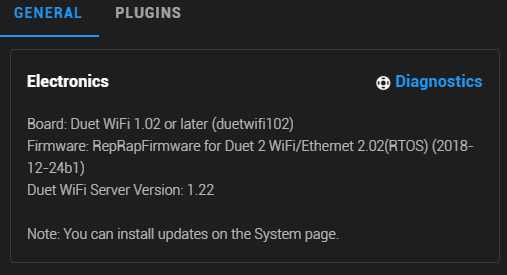
Here you can see the version of my RepRap and so on.
Here is my config:
; Configuration file for Duet WiFi (firmware version 3.3)
; executed by the firmware on start-up
;
; generated by RepRapFirmware Configuration Tool v3.3.16 on Tue Dec 19 2023 12:57:23 GMT+0100 (Mitteleuropäische Normalzeit)

; General preferences
G90                                           ; send absolute coordinates...
M83                                           ; ...but relative extruder moves
M550 P"Modix Big60"                           ; set printer name
M575 P1 B57600 S1							  ; Set auxiliary serial port baud rate and require checksum (for PanelDue)

; Network
M551 P"Big60"                                 ; set password
M552 S1                                       ; enable network
M586 P0 S1                                    ; enable HTTP
M586 P1 S0                                    ; disable FTP
M586 P2 S0                                    ; disable Telnet

; Drives
M569 P3 S1                                    ; Physical drive 3 goes forwards. X-Axis.
M569 P4 S0                     		          ; Physical drive 4 goes backwards. X-Axis 2
M569 P1 S1                                    ; Physical drive 1 goes backwards. Y-Axis.
M569 P0 S1                                    ; Physical drive 0 goes forwards. E0-Extruder.

M569 P5 S0								; Physical drive 5 goes backwards. Z-Axis
M569 P6 S0								; Physical drive 6 goes backwards. Z-Axis
M569 P7 S0								; Physical drive 7 goes backwards. Z-Axis
M569 P8 S0								; Physical drive 8 goes backwards. Z-Axis

M584 X3:4 Y1 Z5:6:7:8 E0					  ; Mapping X to phyisical drive 3 and 4, Y to drive 1, Z to 5, 6, 7, 8 and the Extruder to 0

M350 X16 Y16 Z16 E16 I1                       ; configure microstepping with interpolation
M92 X100.00 Y100.00 Z2000.00 E418.00          ; set steps per mm
M566 X360 Y360 Z30.00 E120.00 P1       ; Set maximum instantaneous speed changes (mm/min)
M203 X6000.00 Y6000.00 Z180.00 E1200.00       ; set maximum speeds (mm/min)
M201 X1000.00 Y1000.00 Z120.00 E250.00           ; set accelerations (mm/s^2)
M906 X1800 Y1800 Z1800 E1200 I30              ; set motor currents (mA) and motor idle factor in per cent
M84 S30                                       ; Set idle timeout

; Axis Limits
M208 X0 Y0 Z-1 S1                              ; set axis minima
M208 X600 Y600 Z600 S0                        ; set axis maxima

; Endstops
M574 X1 S1 P"xstop"                           ; configure switch-type (e.g. microswitch) endstop for LOW end on X via pin xstop
M574 Y1 S1 P"ystop"                           ; configure switch-type (e.g. microswitch) endstop for HIGH end on Y via pin ystop
M574 Z2 S2                                    ; configure Z-probe endstop for  end on Z

; Z-Probe
M558 P5 C"^zprobe.in" H5 F120 T9000           ; set Z probe type to switch and the dive height + speeds
G31 P500 X-14 Y21 Z0.77                           ; set Z probe trigger value, offset and trigger height
M557 X-14:584.5 Y21:619 S66.5                      ; define mesh grid. 100 points

; Heaters

M140 H-1                                      ; disable heated bed (overrides default heater mapping)
M308 S0 P"e0temp" Y"thermistor" T100000 B4725 C7.060000e-8 R4700   ; configure sensor 0 as thermistor on pin e0temp
M950 H0 C"e0heat" T0                          ; create nozzle heater output on e0heat and map it to sensor 0
M307 H0 B0 S1.00                              ; disable bang-bang mode for heater  and set PWM limit
M143 H0 S280                                  ; set temperature limit for heater 0 to 280C

; Fans
M950 F0 C"fan0" Q500                          ; create fan 0 on pin fan0 and set its frequency
M106 P0 S0 H-1                                ; set fan 0 value. Thermostatic control is turned off
M950 F1 C"fan1" Q500                          ; create fan 1 on pin fan1 and set its frequency
M106 P1 S1 H0 T45                             ; set fan 1 value. Thermostatic control is turned on

; Tools
M563 P0 D0 F0                                 ; define tool 0
G10 P0 X0 Y0 Z0                               ; set tool 0 axis offsets
G10 P0 R0 S0                                  ; set initial tool 0 active and standby temperatures to 0C

; Custom settings are not defined
I dont know if this is of any help: i erased the old Firmware, i think it was 2.05 completely. Then I flashed the Duet 2 via Bossa with the Duet2CombinedFirmware.bin that i found here: https://github.com/Duet3D/RepRapFirmware/releases/tag/3.4.6 to the newest stable version 3.4.6.
I use the super volcano hotend. Is there something special to the thermistor there maybe?
Do i have to flash anything else onto the board? Or is the config.g false.. I would really appreciate some help. Thank you
Guys, thank you very much for your help. Now everything looks just fine! The only question is now: how do I configure my spindle?! Is there like a tutorial somewhere for the DWC-CNC?
(I just had to update the RR-Firmware... thats it.. lol)
Wow thank you very much for your help. I'll report tomorrow if everything worked. Thx again 

Nothing, i just cant make the dashboard change into cnc mode: 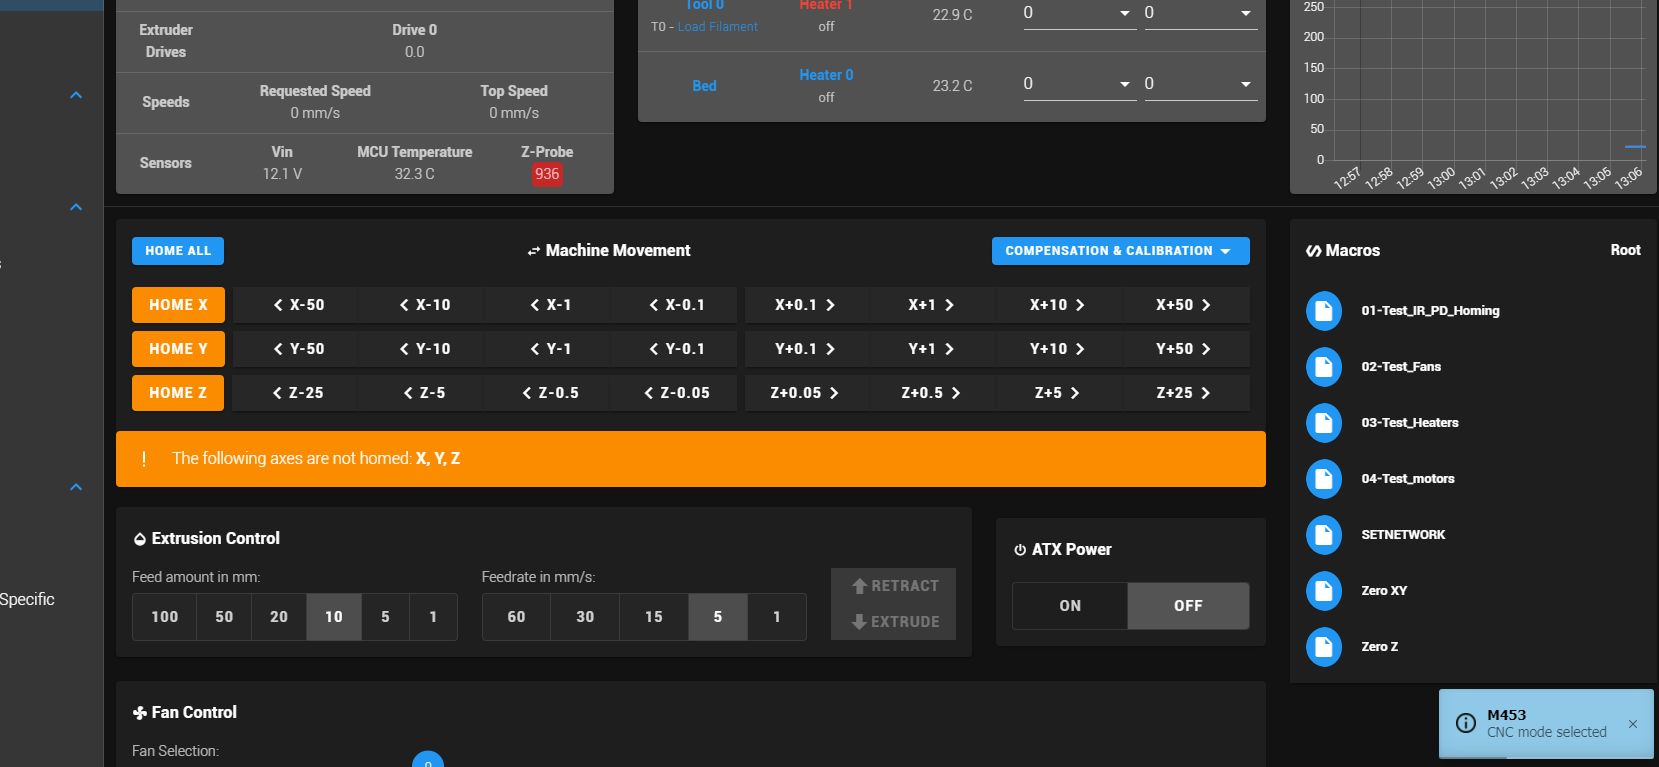
here it states that it is in CNC Mode. After refreshing: nothing changes.
I have no idea what im doing wrong.
But the plugins are there, like jog...
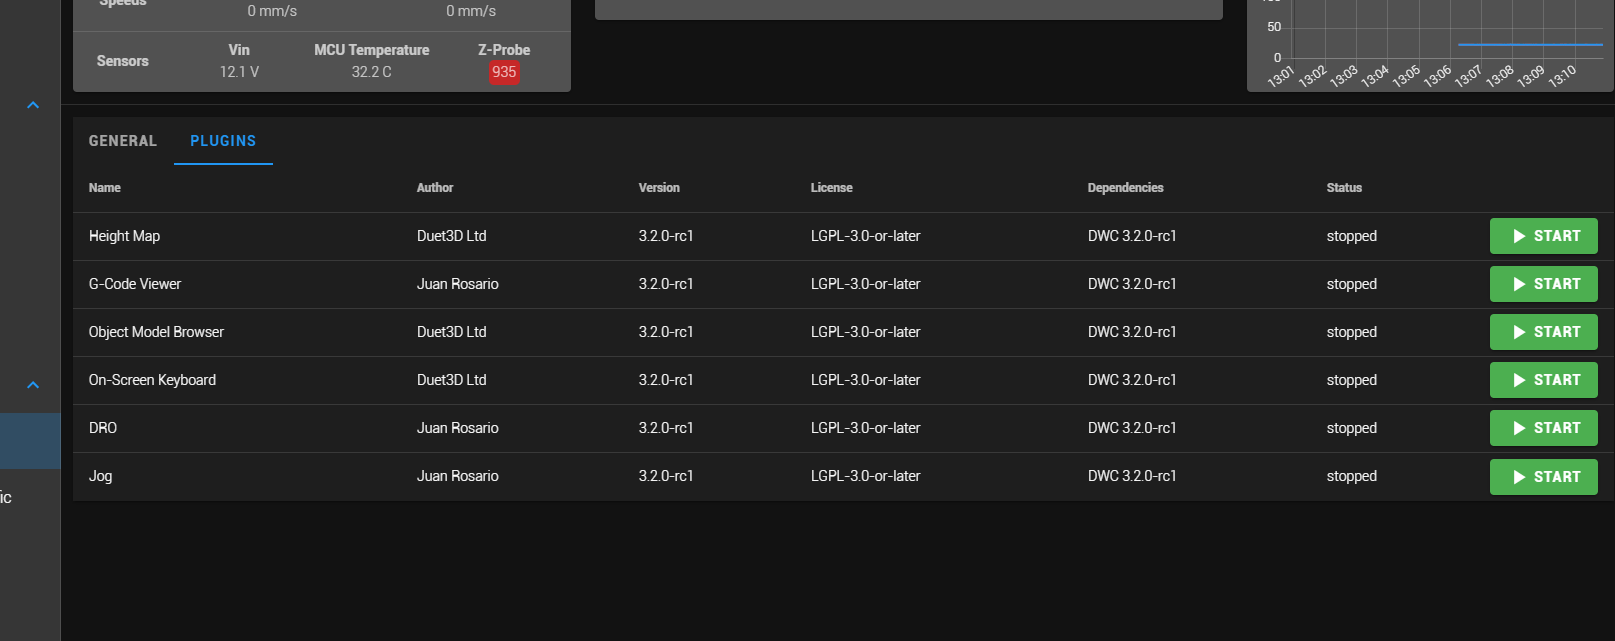
@chrishamm Okey i put the zip.file in the sys-folder:
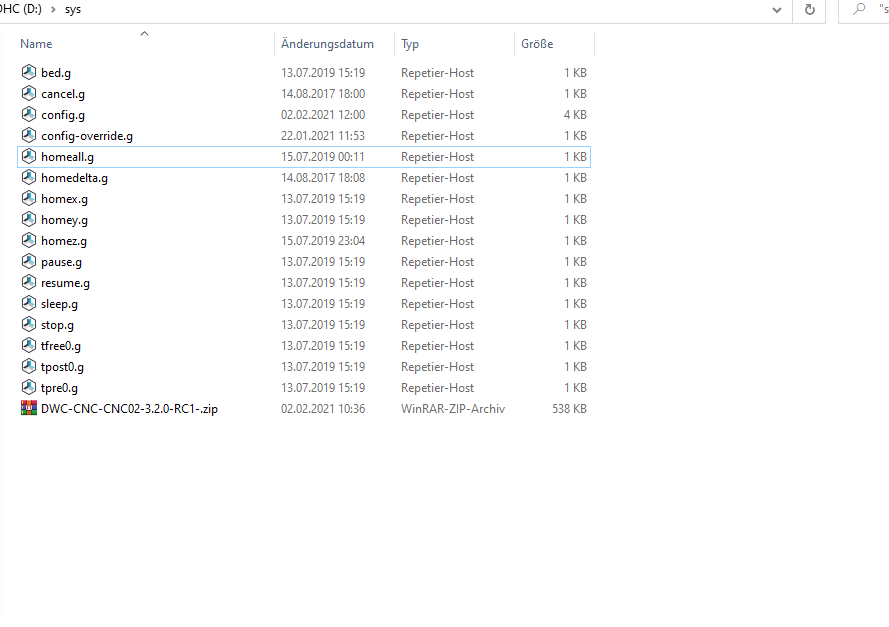
and deleted all the files in the www-folder. Let's see what happens.
No it says this:

Im completely lost with this... lol ^^
@chrishamm And what do I do with the files inside the www-folder then? Erase them?
Hi guys, I'm not really into this whole github thing. I think you are doing AN AMAZING work here. But I have no idea how i can run DWC-CNC on my Duet2wifi... can somebody give an idiot(me^^) a hint?!
(I uploaded the files of the release: 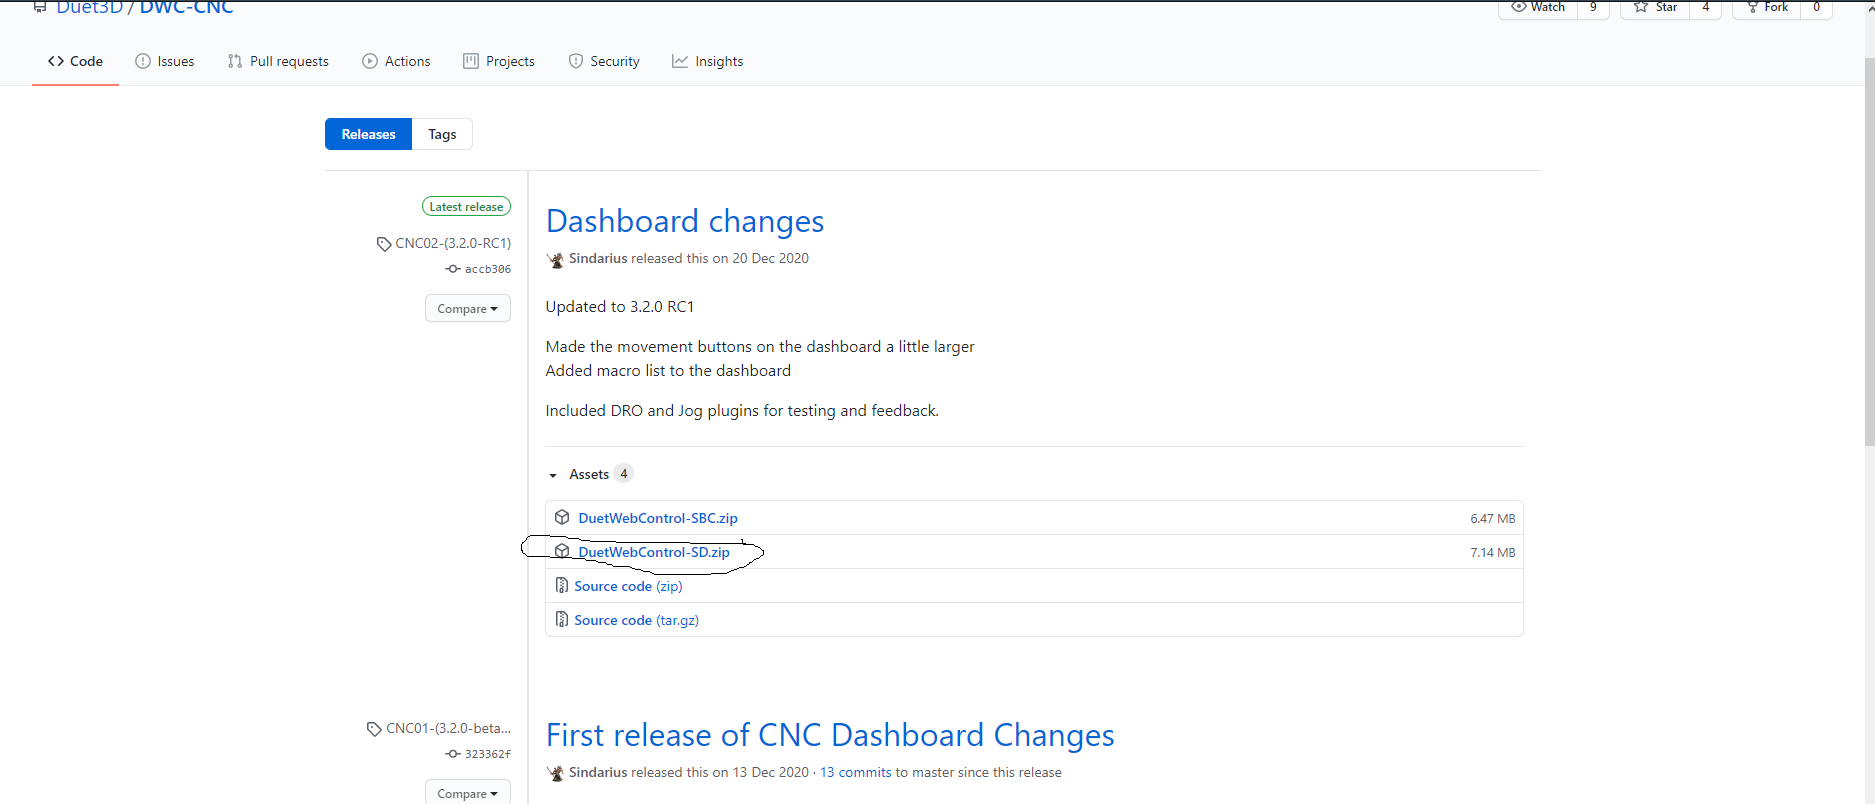
into my www-folder of the SD Card.. But my interface still looks like the 3D-printer interface:
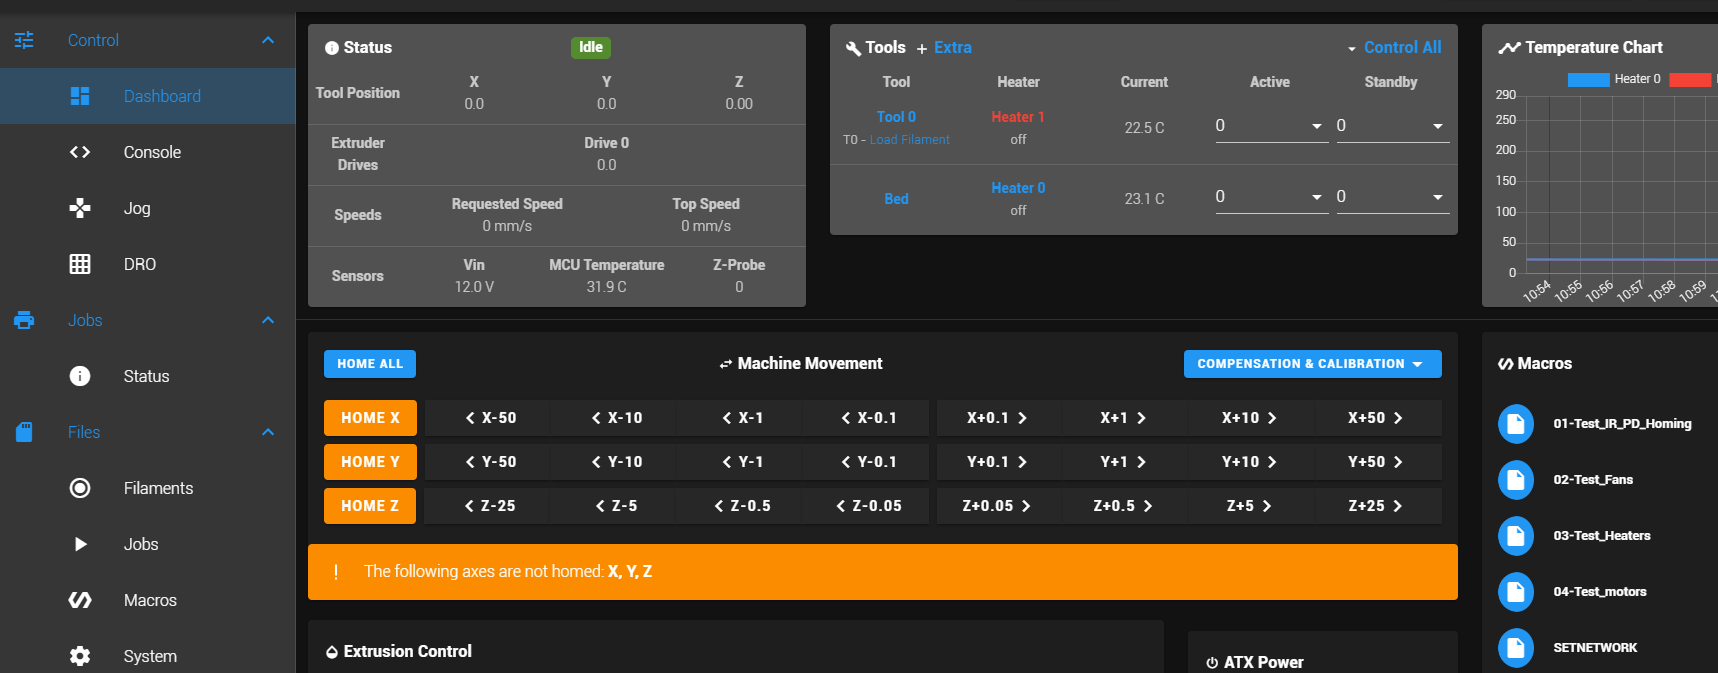
I also added M453 into the config file:
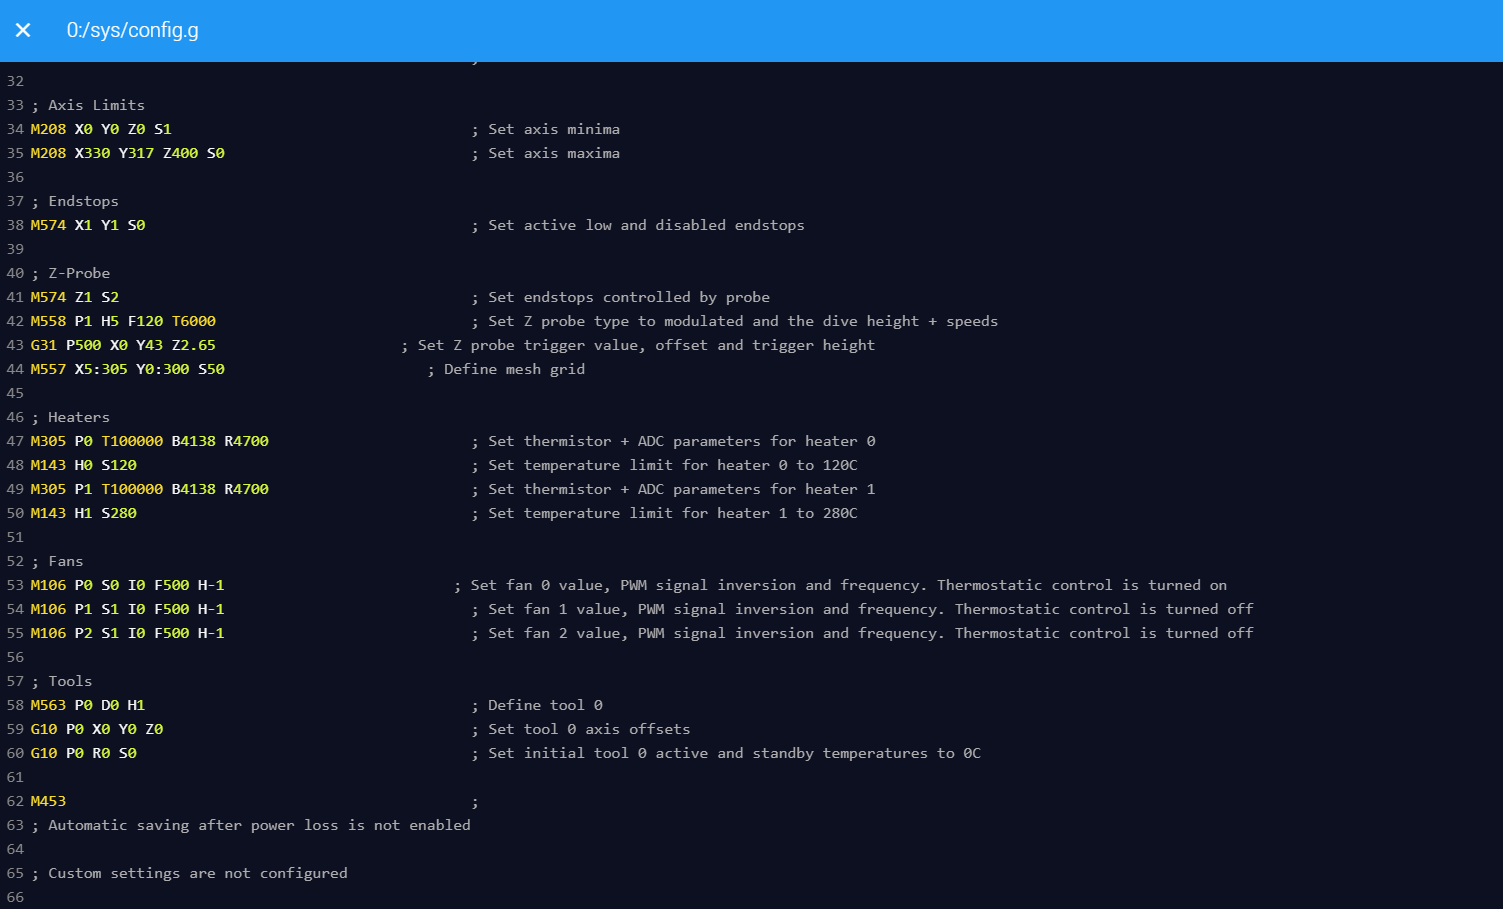
can it be that my firmware is too old?
@3d_druck Hey it might be too late(könnte auch Deutsch ^^)?!?. Have you set the perimeters right? The servos show some weeeeird behaviour if the perimeters arent set right! And the pulsewidth on my machine is 4ms. Everything under 4ms wasnt working at all.
My settings: M569 P5 S0 T4:4:8:0
Hvala ti puno smece  spasio si mi zivot.
@smece thx a lot.. that really saves me from wandering through github and places in the internet where my mind is not suited for. ^^ (smece-- funny name. means garbage in croatian language)
Ohh I know how to make http POST/GET requests with the wifi.h. But how do i channel it to the duet wifi? Do i have to type in the IP-Address of the Duet wifi as the destination for the http request?!?
Yeah I would like to send it over wifi, but with an ESP32. And that is the problem. I dont know where to start. A simple example would save my life ...
Is it possible to send gcode from a ESP32 Controller to the Duet Wifi? I need a little kickstart here becuase I dont know where to begin. Thx a lot for your help.
Guys! Thank you so much. You really saved my life. And yes: Pendant is the word I was looking for(sorry my english is not really good) + I had no clue that I have to use 3.3V Logic. I almost started trying out to connect my Arduino with the Duet: thanks to you I DIDN'T! ^^ I'll post my results here in a couple of weeks. Shouldn't be a big problem. Again: Thank you so much!
@T3P3Tonly: no I do not have a PanelDue connected. Could you post a picture/sketch of the wiring I have to do when using the Duet Wifi Pins(for the PanelDue) with an ESP8266?
Hello, I already tried to find something about the topic but unfortunately I wasn't really successful. The plan is easy: I want my DIY-Controller with buttons to communicate with the Duet Wifi 2 Board. If I press Button X, I want to home Axis X.. if I move the Joystick, I want the toolhead to move... Somehow I need the arduino to send g-Code to the Duet Board. Any suggestions/tutorials/help is more than welcome. I want to know how to start and not break my lovely Duet Wifi Board. ^^
Thank you
Filip
Okey then you should forget the IR Sensor. It's crazy accurate, but not in combination with mirrors or glass. I almost lost my mind with the IR-Sensor, because of the wrong surface I used.(Dont get me wrong: I LOVE the IR Sensor NOW, but it can be a little bi**h on certain surfaces)
Okey I got it: its the material of the bed! I dont know why and I dont really care. I took a piece of a 400x400 mm woodplate and started the whole AutobedCompensation process. Now Z0 is truely Z0 everywhere. Crazy accurate. I also moved the probe closer to the nozzle. Now the offset is only 15mm in the y-axis.
Lessons learned: the probe is great(when you use the right bed material)