RRF 3.4 input shaping preview available
-
@cadetc currently I favour doing a sharp move and collecting data after it has completed. This removes motor and belt noise from the accelerometer output, making it easier to see what is going on. Here is a sample command for the X axis, for a machine set up with X0 Y0 being bed centre:
G1 X-100 F3000 G4 S1 G1 X0 F20000 M400 M956 Pxxx A0 S1000
-
@dc42 with PA enabled the "clunking" noise has returned, usually when printing the infill portion. Disabling PA stopped the clunking, and oddly produced a small layer shift in the X direction and an even smaller one in Y. Definitely some strange extrusion or positioning errors on the part of the print with PA on. With PA off things seemed like previous builds, with some extrusion bubbles or zits in the exact same places as before (these don't happen in 3.3 with PA off). M122 reported some hiccups and errors:
=== Move ===
DMs created 83, segments created 35, maxWait 50682ms, bed compensation in use: mesh, comp offset 0.000
=== MainDDARing ===
Scheduled moves 11545, completed moves 11545, hiccups 1028, stepErrors 5, LaErrors 0, Underruns [0, 0, 0], CDDA state -1
=== AuxDDARing ===
Scheduled moves 0, completed moves 0, hiccups 0, stepErrors 0, LaErrors 0, Underruns [0, 0, 0], CDDA state -1This was all the same config and gcode as uploaded before. If helpful I could get a debug log later of the stepper errors.
-
@skrotz which slicer are you using?
Could be gcode related.
E.g., stock prusaslicer is horrible at producing accurate gcode for very short movements. This pops up a lot in parts of infill.
-
@skrotz are you certain that the clunking doesn't happen using RRF 3.3 with the same gcode?
Edit: I just spotted that you had some step errors - odd that I didn't. I'll check the configuration and run your print again.
-
@skrotz I have now reproduced those step errors. I don't think it will be difficult for me to find the cause because they all show the same particular pattern.
-
@dc42 I got the clunking and step errors too, on 20mm cal cube.
DMs created 83, segments created 48, maxWait 516025ms, bed compensation in use: mesh, comp offset 0.000
=== MainDDARing ===
Scheduled moves 18073, completed moves 18073, hiccups 6217, stepErrors 102, LaErrors 0, Underruns [0, 0, 0], CDDA state -1
=== AuxDDARing ===
Scheduled moves 0, completed moves 0, hiccups 0, stepErrors 0, LaErrors 0, Underruns [0, 0, 0], CDDA state -1
Also layer shift mainly in the X direction. Havent tried w/o pa yet
-
@dc42
I did some testing.
Look like ie3 works best
With PA enabled and zvd - i had a layer shift - mainly in xAfter PA disabled i could finish print with all settings
Counted from bottom - "no IS","ie3", "ie2", "zvdd", "zvd"
first two pictures - x-axis
and next two y-axis
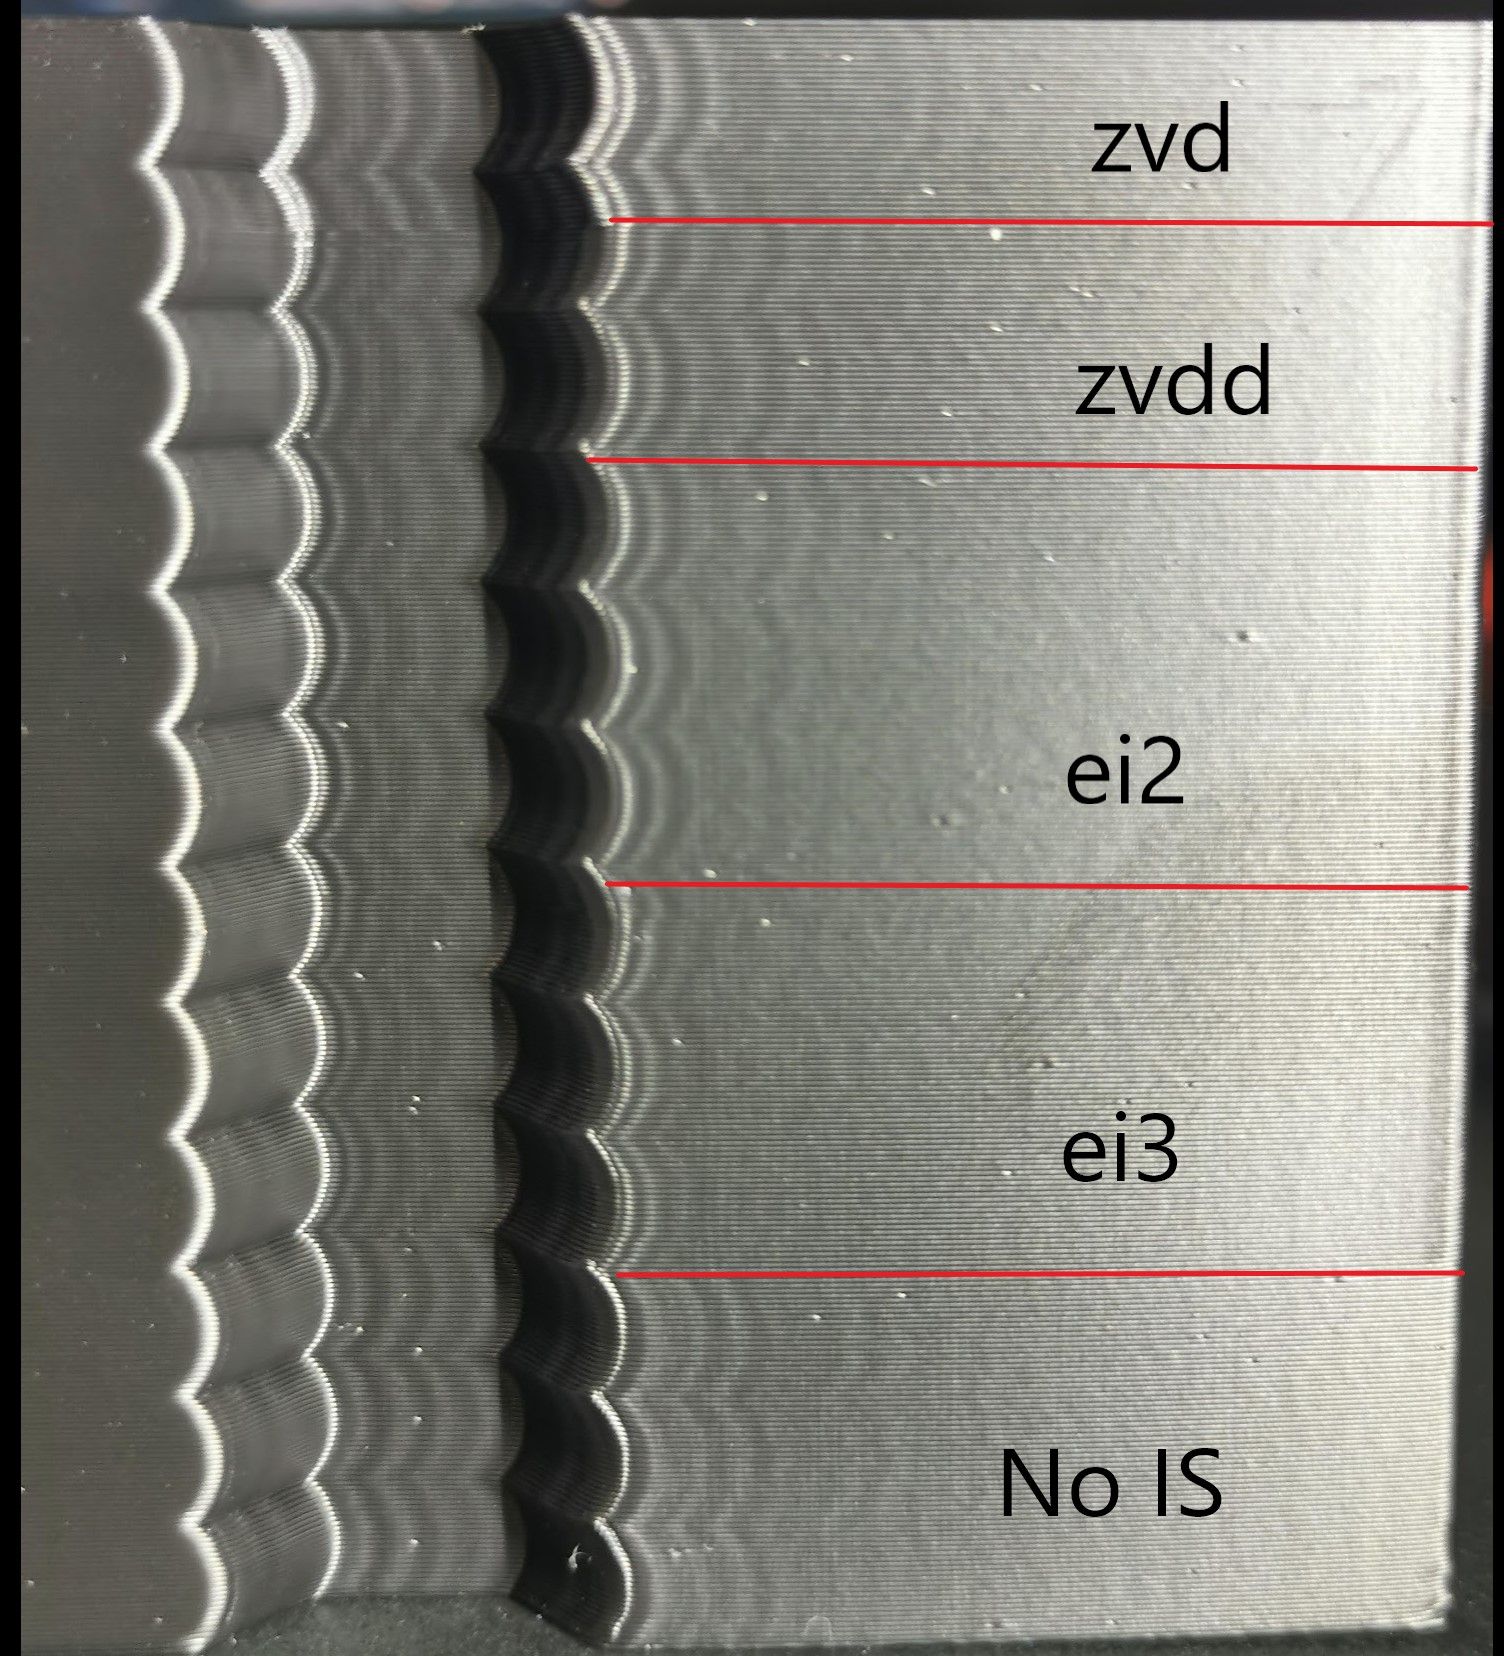
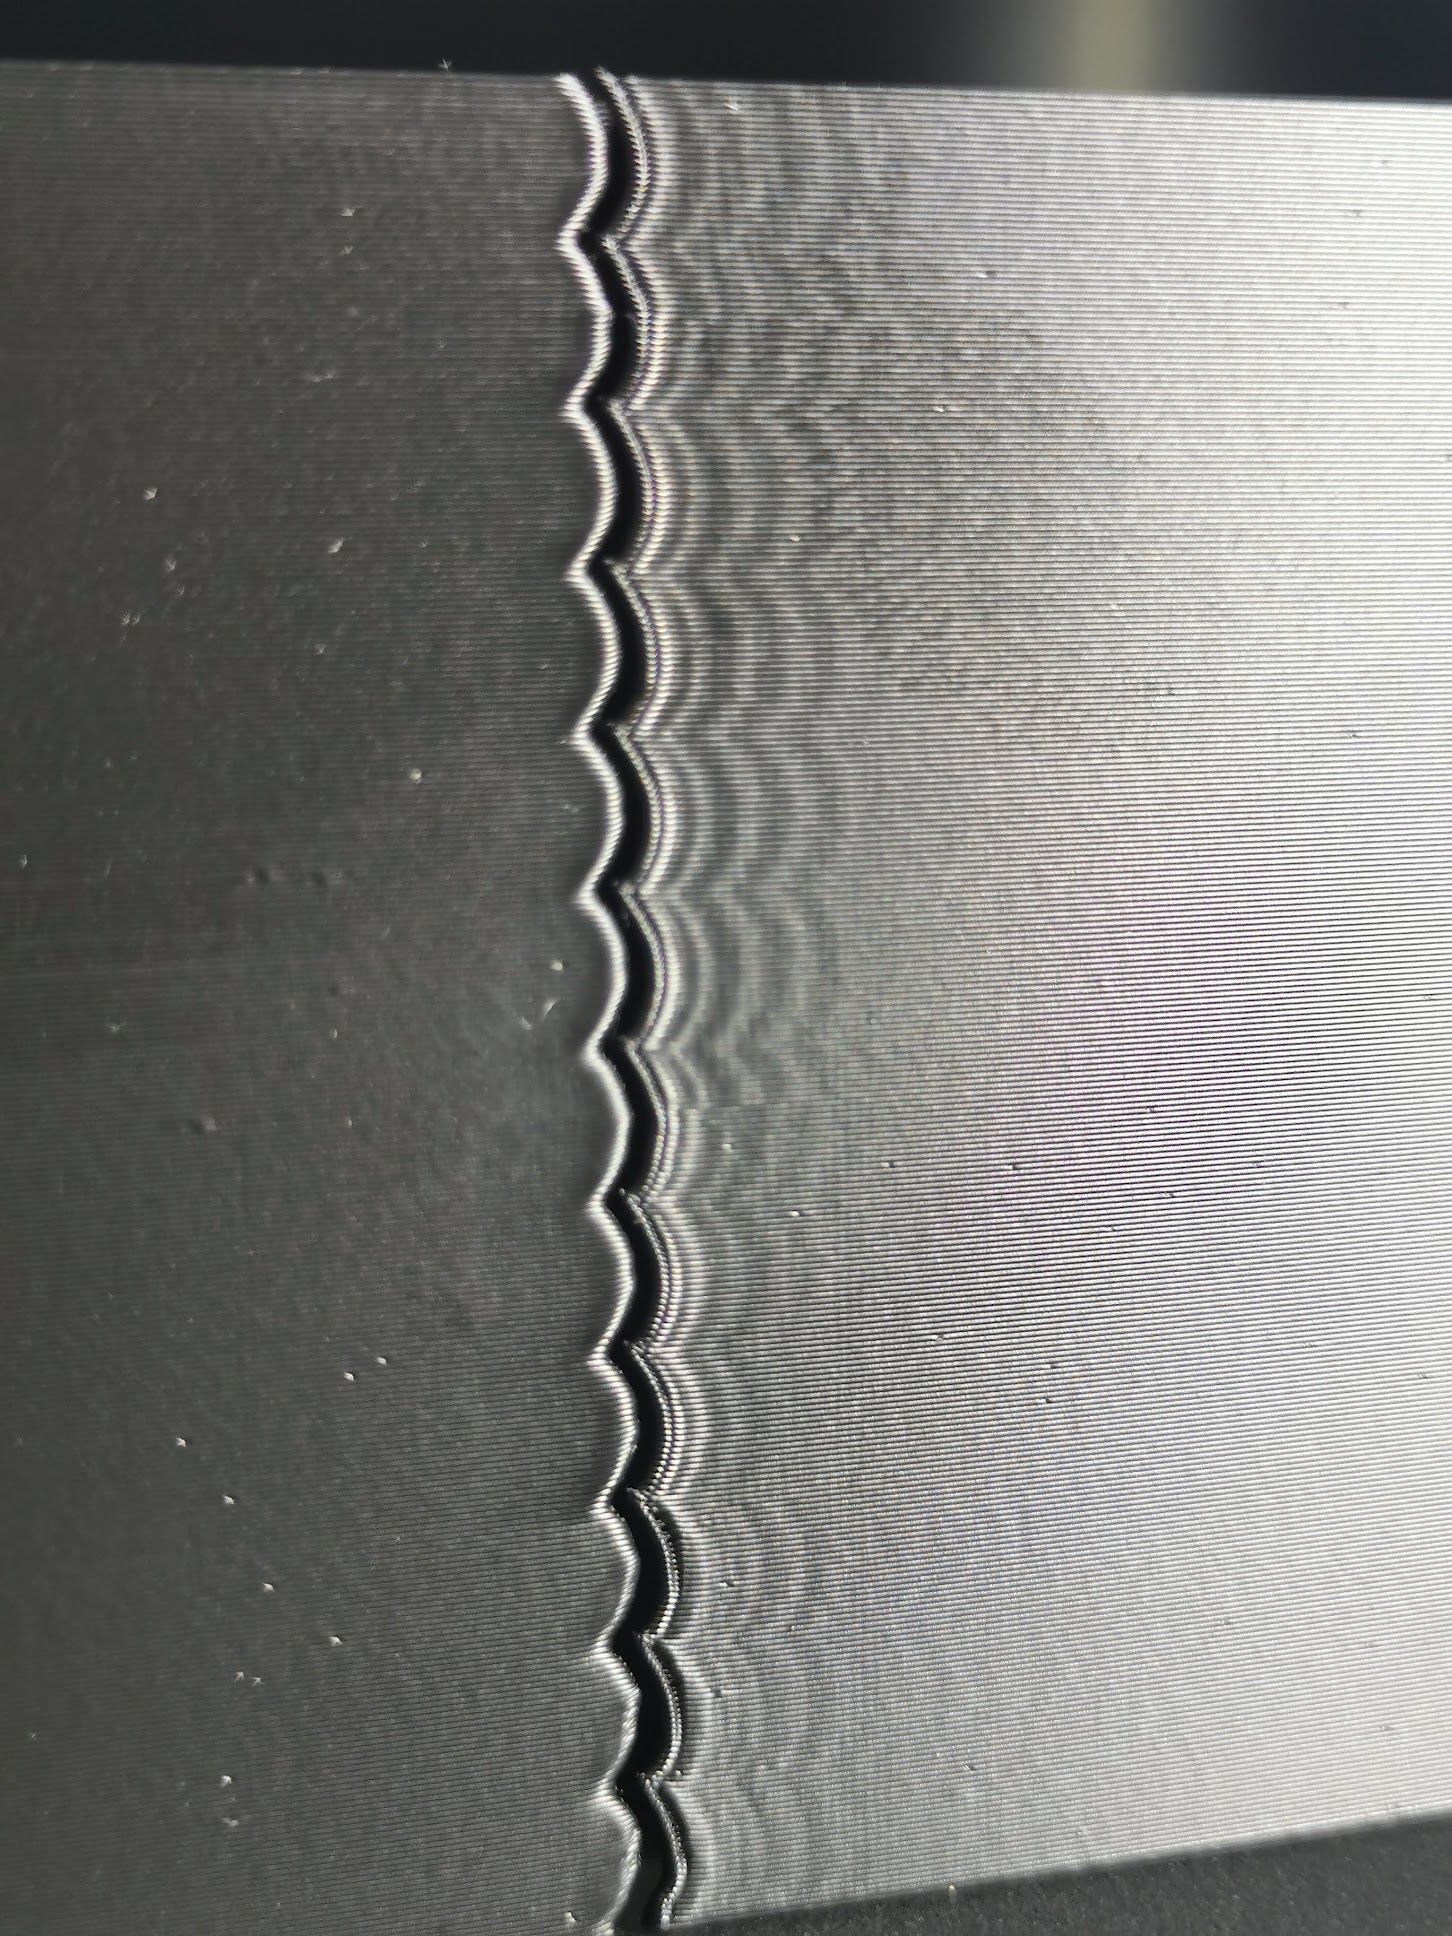
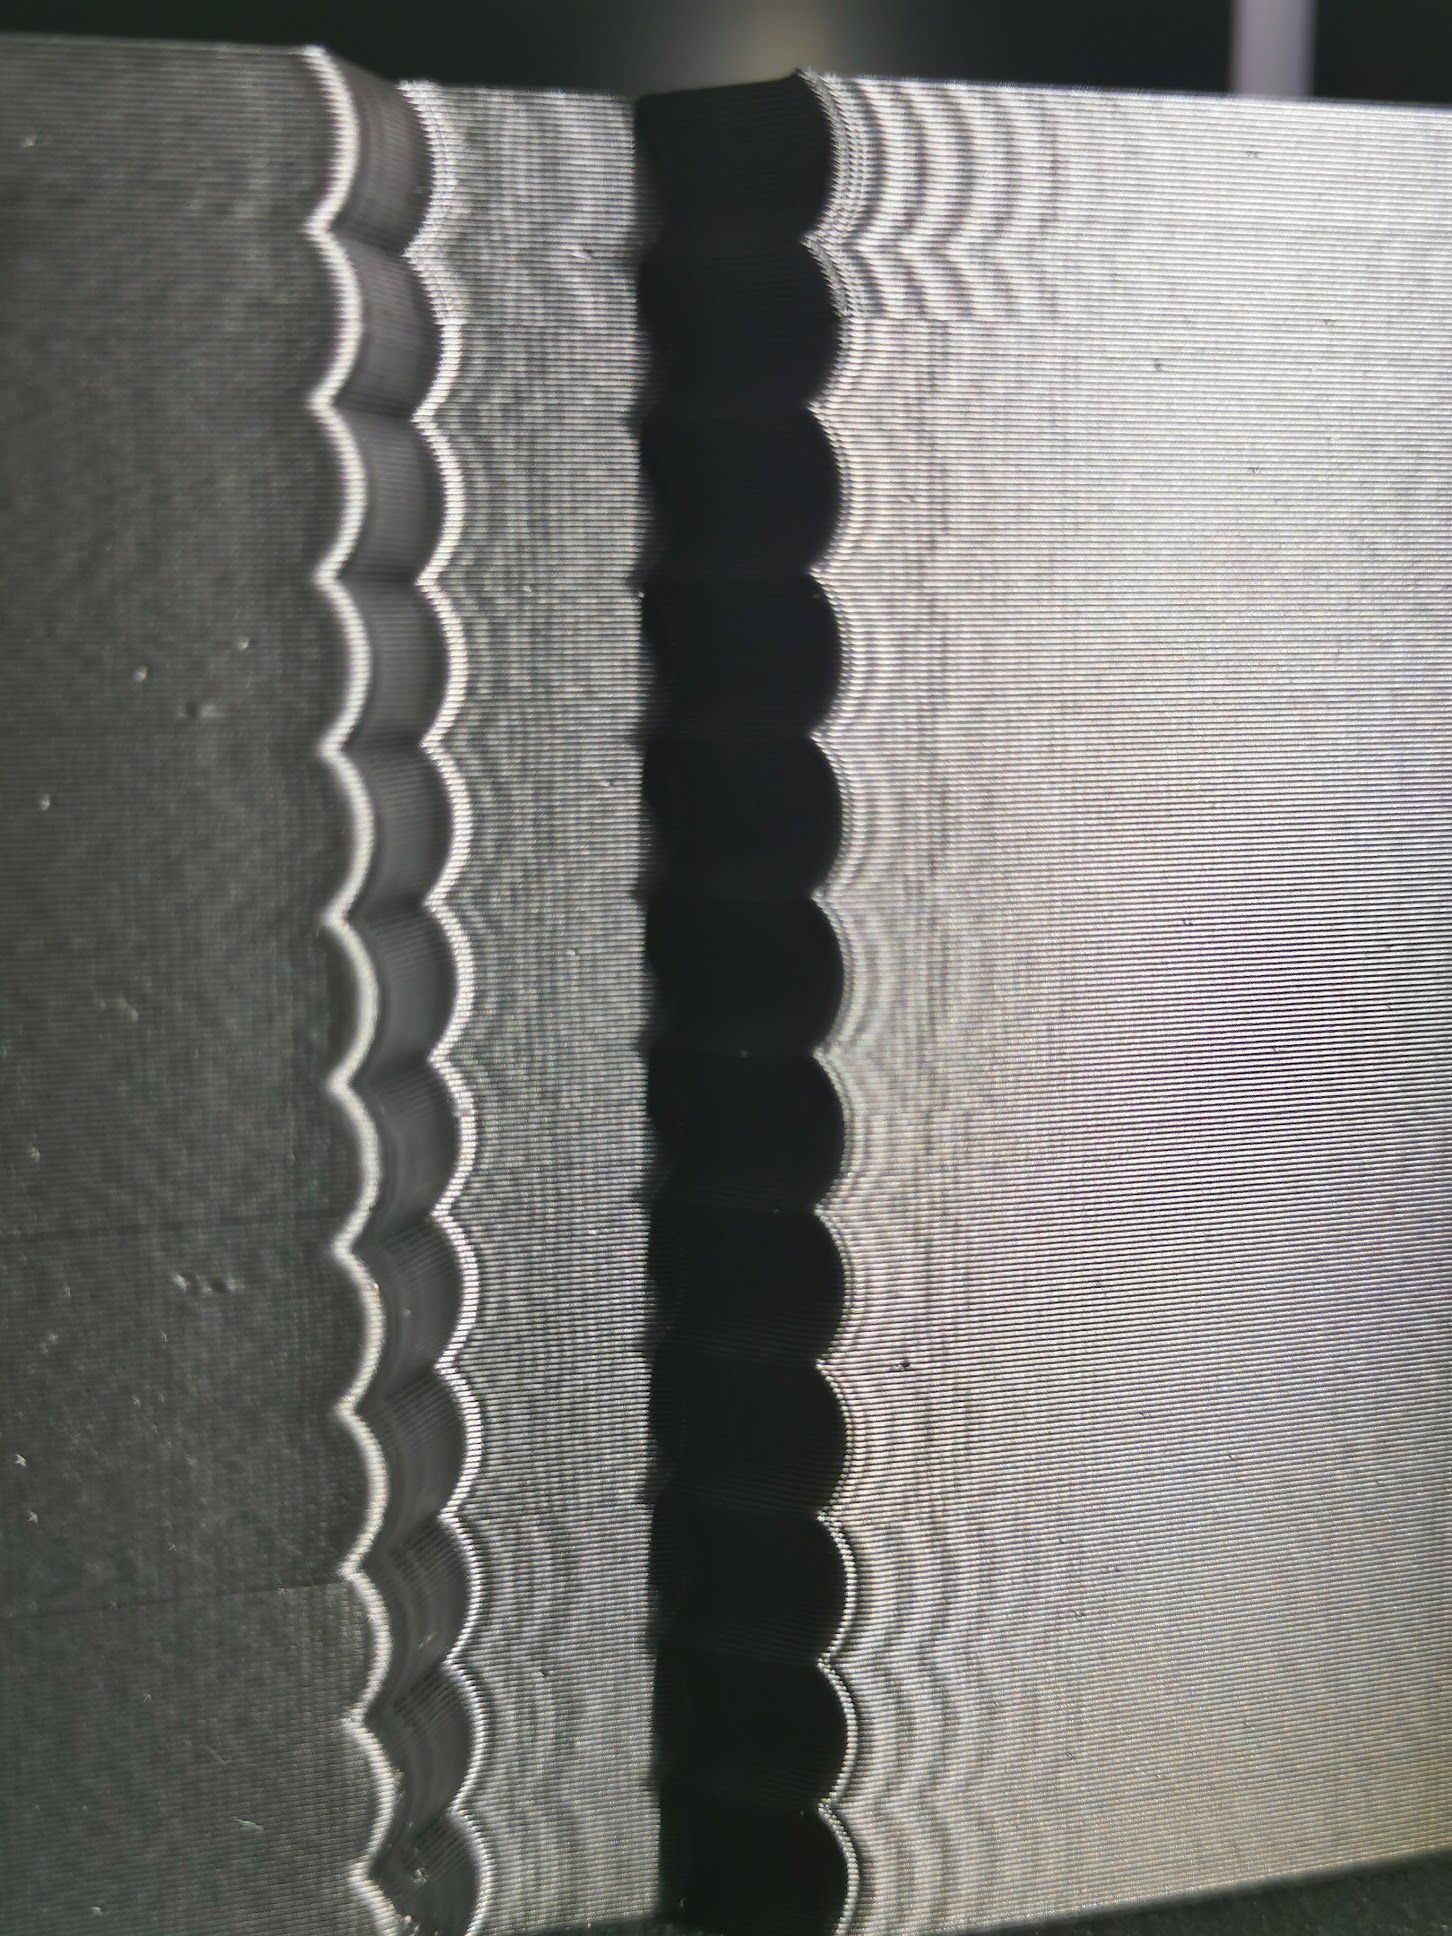
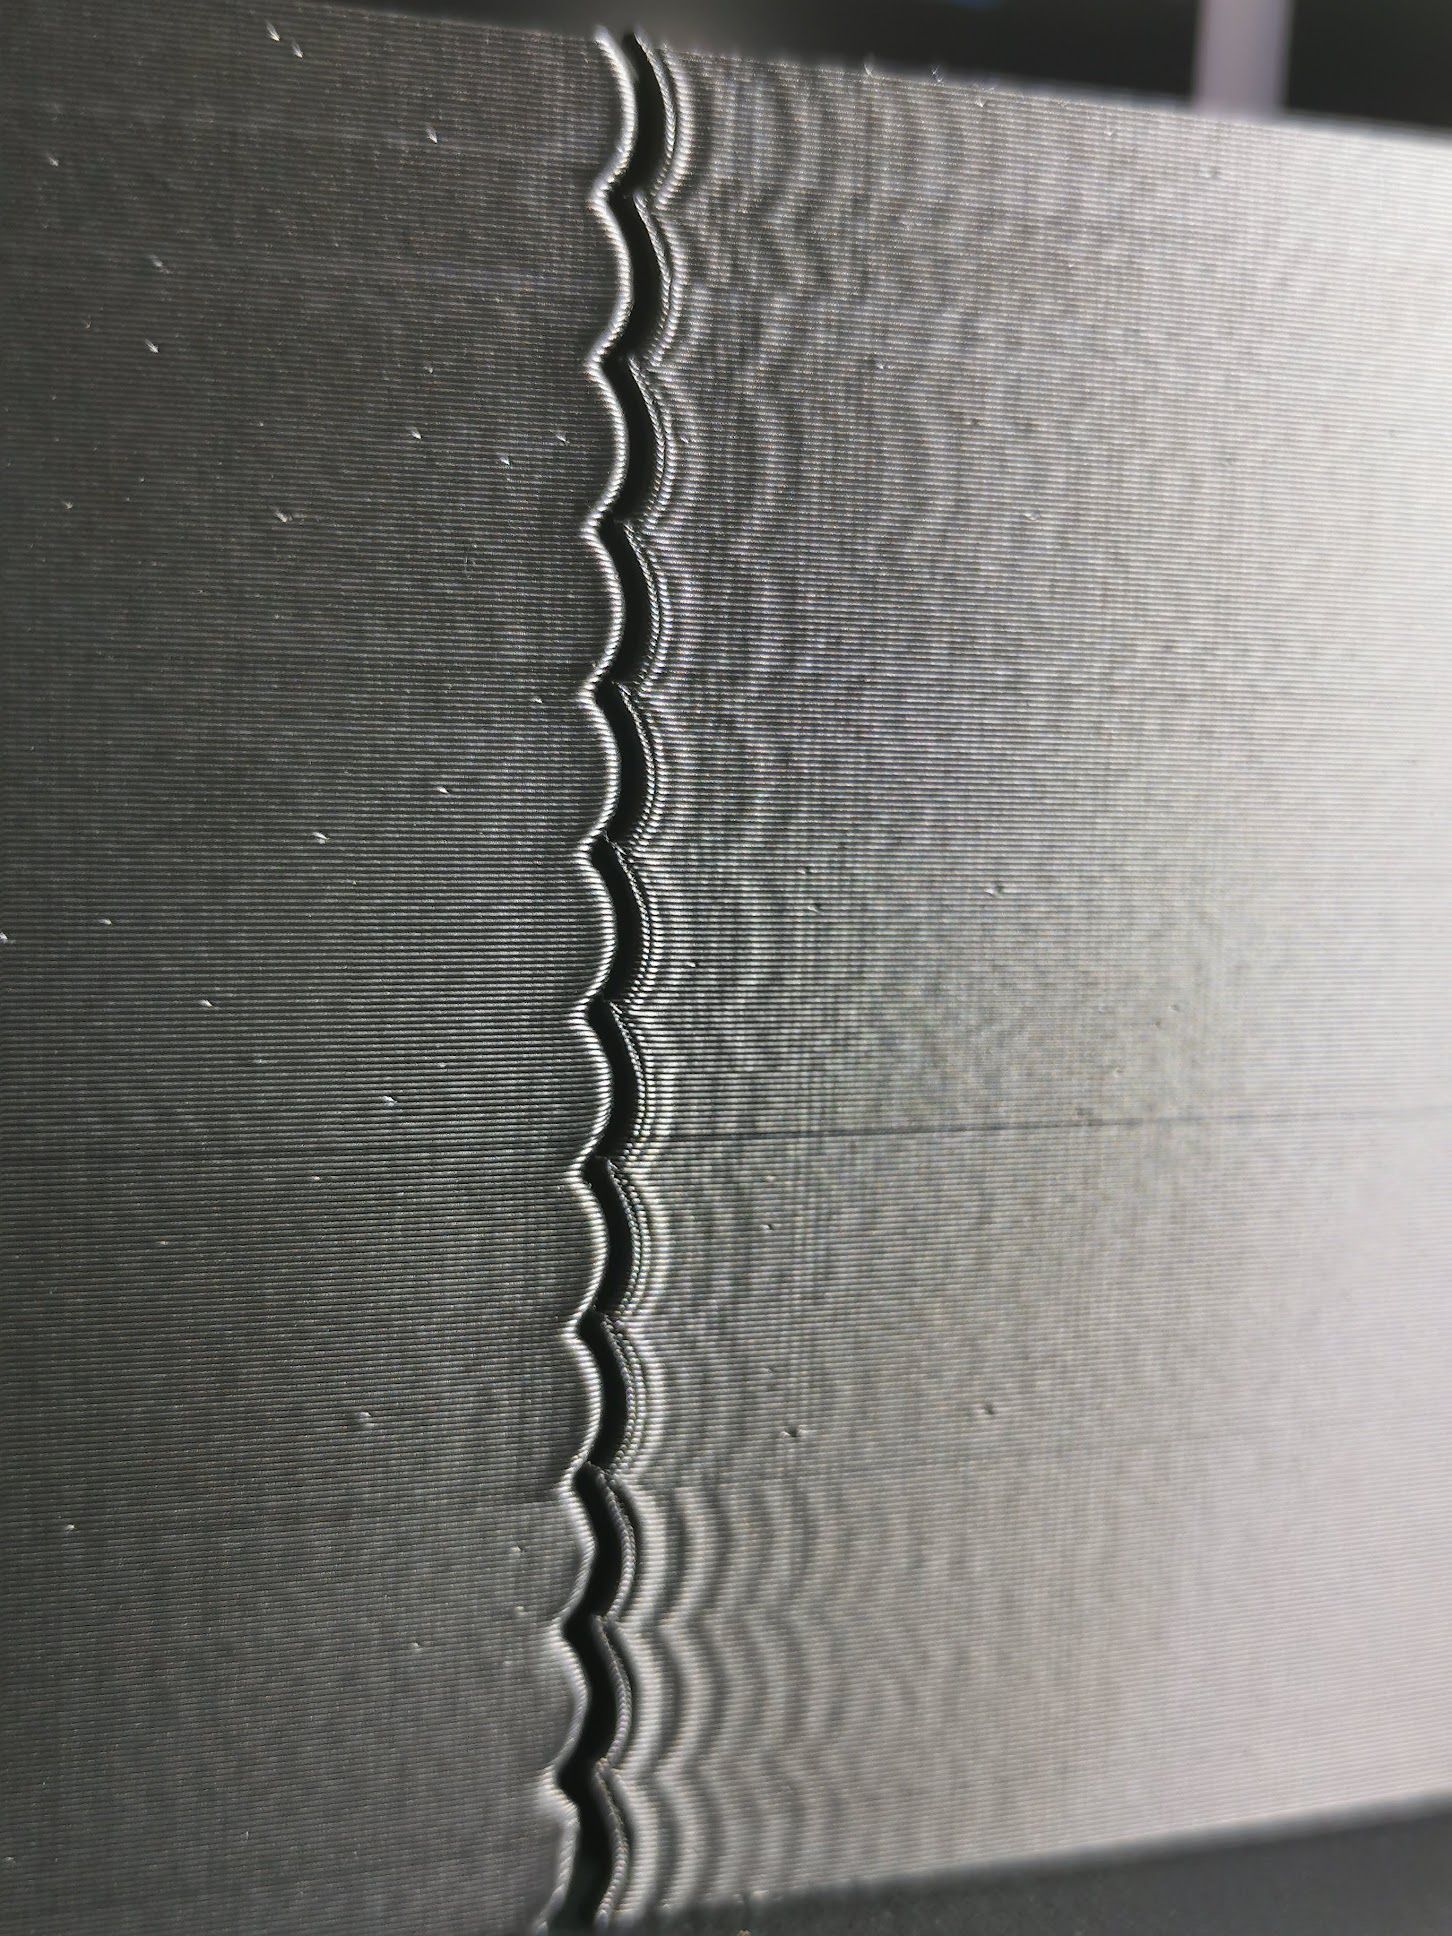
-
@dc42 The clunking is definitely something new from 3.3. I printed about a metric ton of calibration cubes when tuning my printer for various things with PA enabled on 3.3, and never heard noises like that. Of course now I also have input shaping on, so maybe it's the "new normal", but it doesn't sound like things are functioning properly.
I should add that the stepper errors seem to occur near the end of the print, and can't be responsible for the clunking it would seem. Lots of "hiccups" though, the quantity of those would correlate more with the amount of weird noises I hear, maybe..
-
@adrian52 interesting that you got a layer shift also.. I assumed it was related to me disabling PA because it happened at roughly the same point as when I turned off PA to mercifully end the clunking, but sounds like maybe it would have happened no matter what... probably an input shaping bug then.
-
@skrotz @Adrian52 @CadetC @sebkritikel I found and fixed the cause of the stepper errors and associated layer shift, and I updated the binaries at https://www.dropbox.com/sh/ja08b7qdzsl8kjc/AAAwUbkN2XJvurq5CuQTgx5Wa?dl=0. I don't yet know whether this also caused the extruder clunking or that is a different issue.
-
@dc42 with pa at my usual 0.8, and shaping set to ei3, the new binary still gives pauses and clunking. Towards the top of my cal cube I got a big progressive layer shift in the y direction. M122 gave 5908 hiccups in 17015moves, but no step errors or underruns.
I then set pa to 0 at the console, and without changing anything else, the cube printed smoothly with a nice result; 0 hiccups, 0 step errors, 0 underruns in 18073 moves. -
@dc42
Thanks for a update, I'll do test print with change every 25 layers(5mm) as follow "no IS", daa, ei2, ei3, zvdd, zvd -PA set to 0.022 and acceleration 4000, print speed 100m/s -
@dc42
Print finished/stopped - again best results with ei3 - on pictures from bottom -"no IS", daa, ei2, ei3, zvdd, zvd(failed print stopped)
Everything was fine until the zvd was turned on - . below is a picture of the printout and a link to a video showing clunking noise - you would think that the head is blocking on the rails - which of course is not true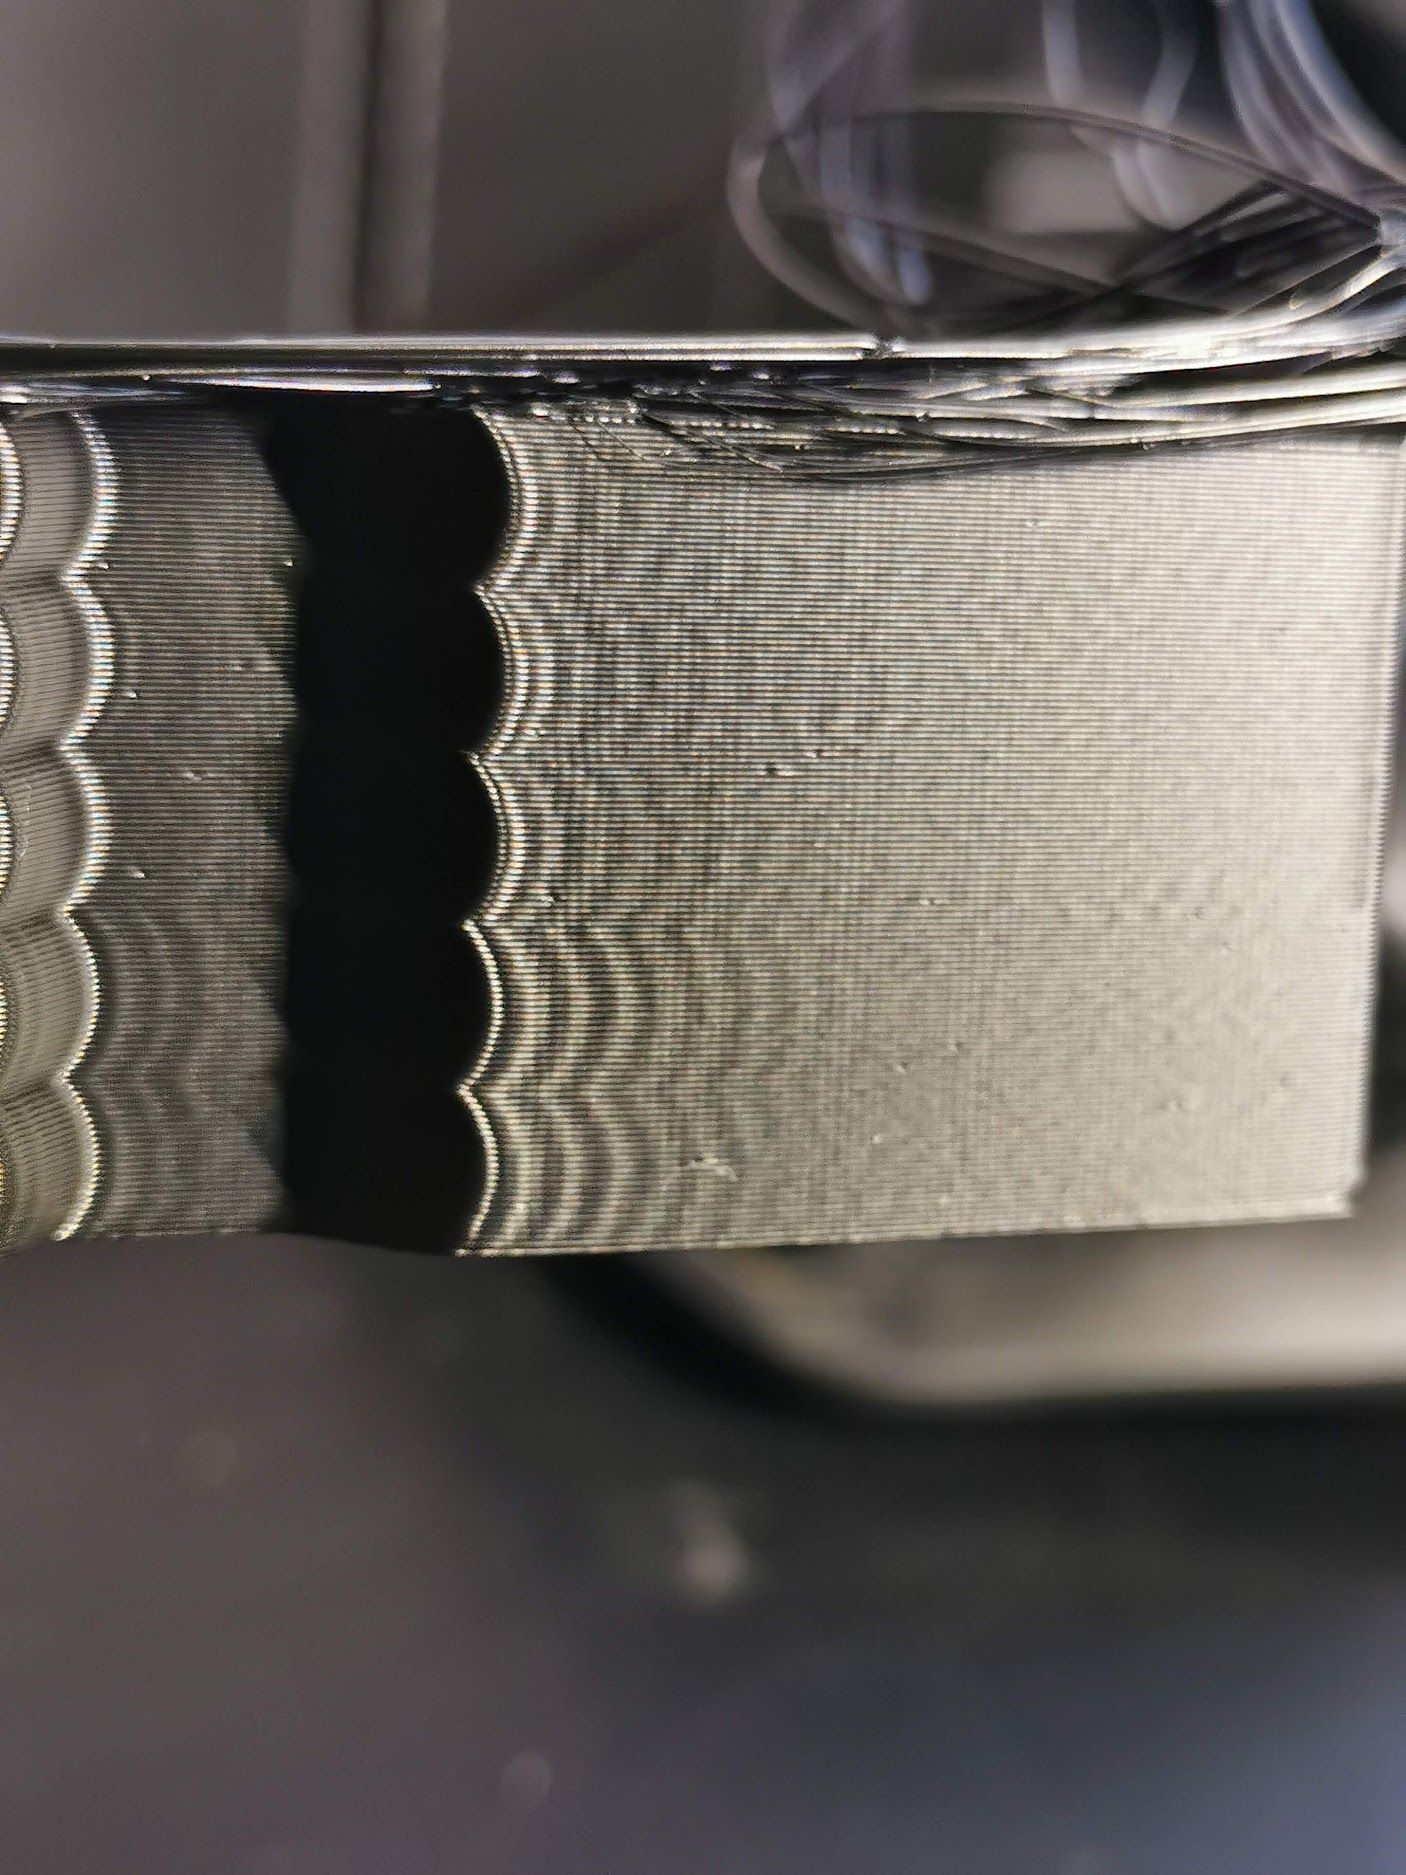
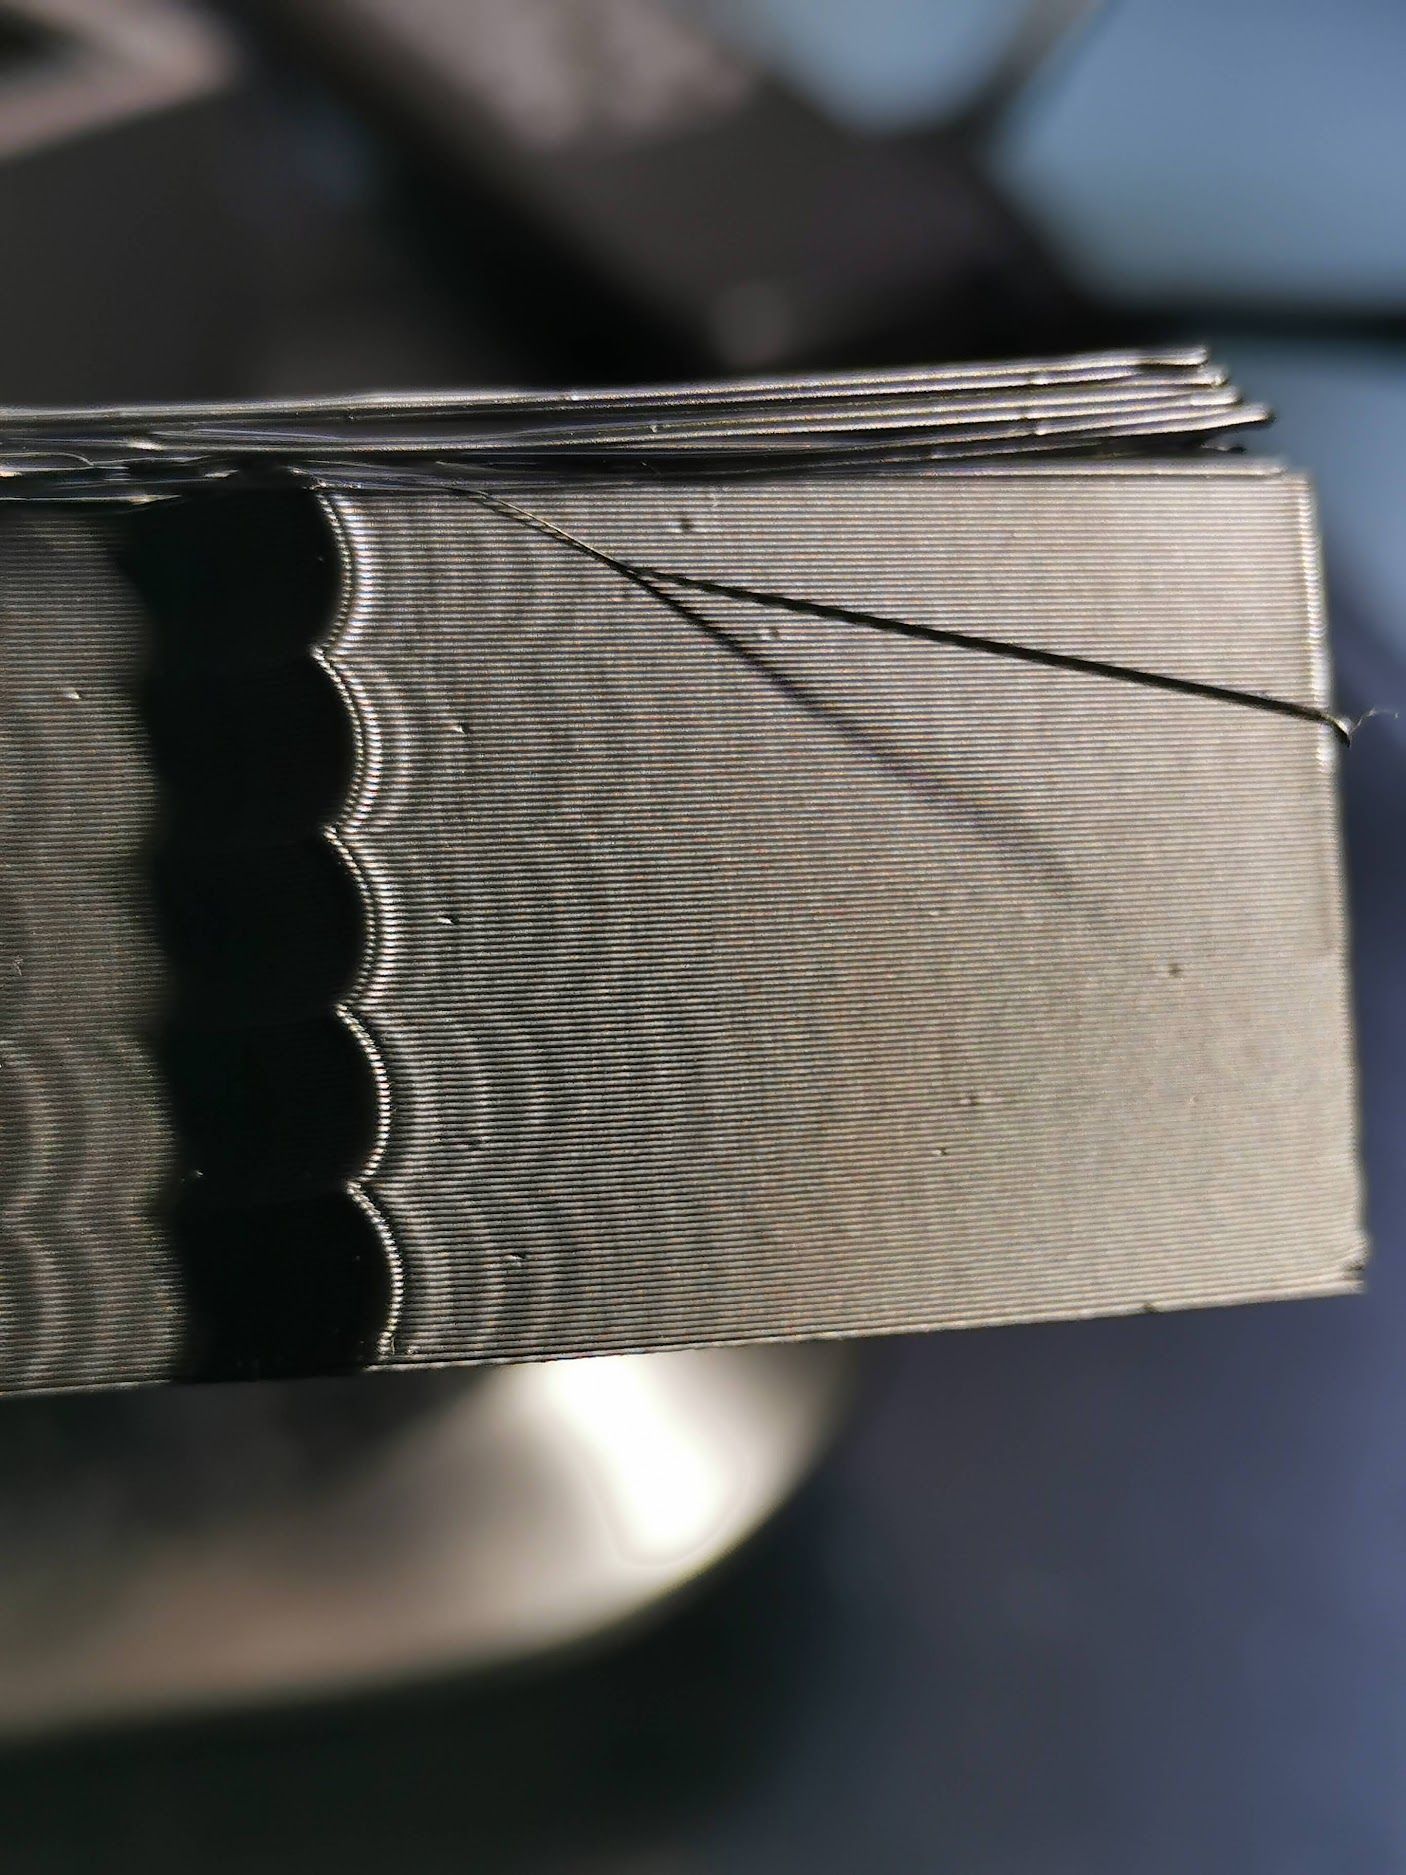
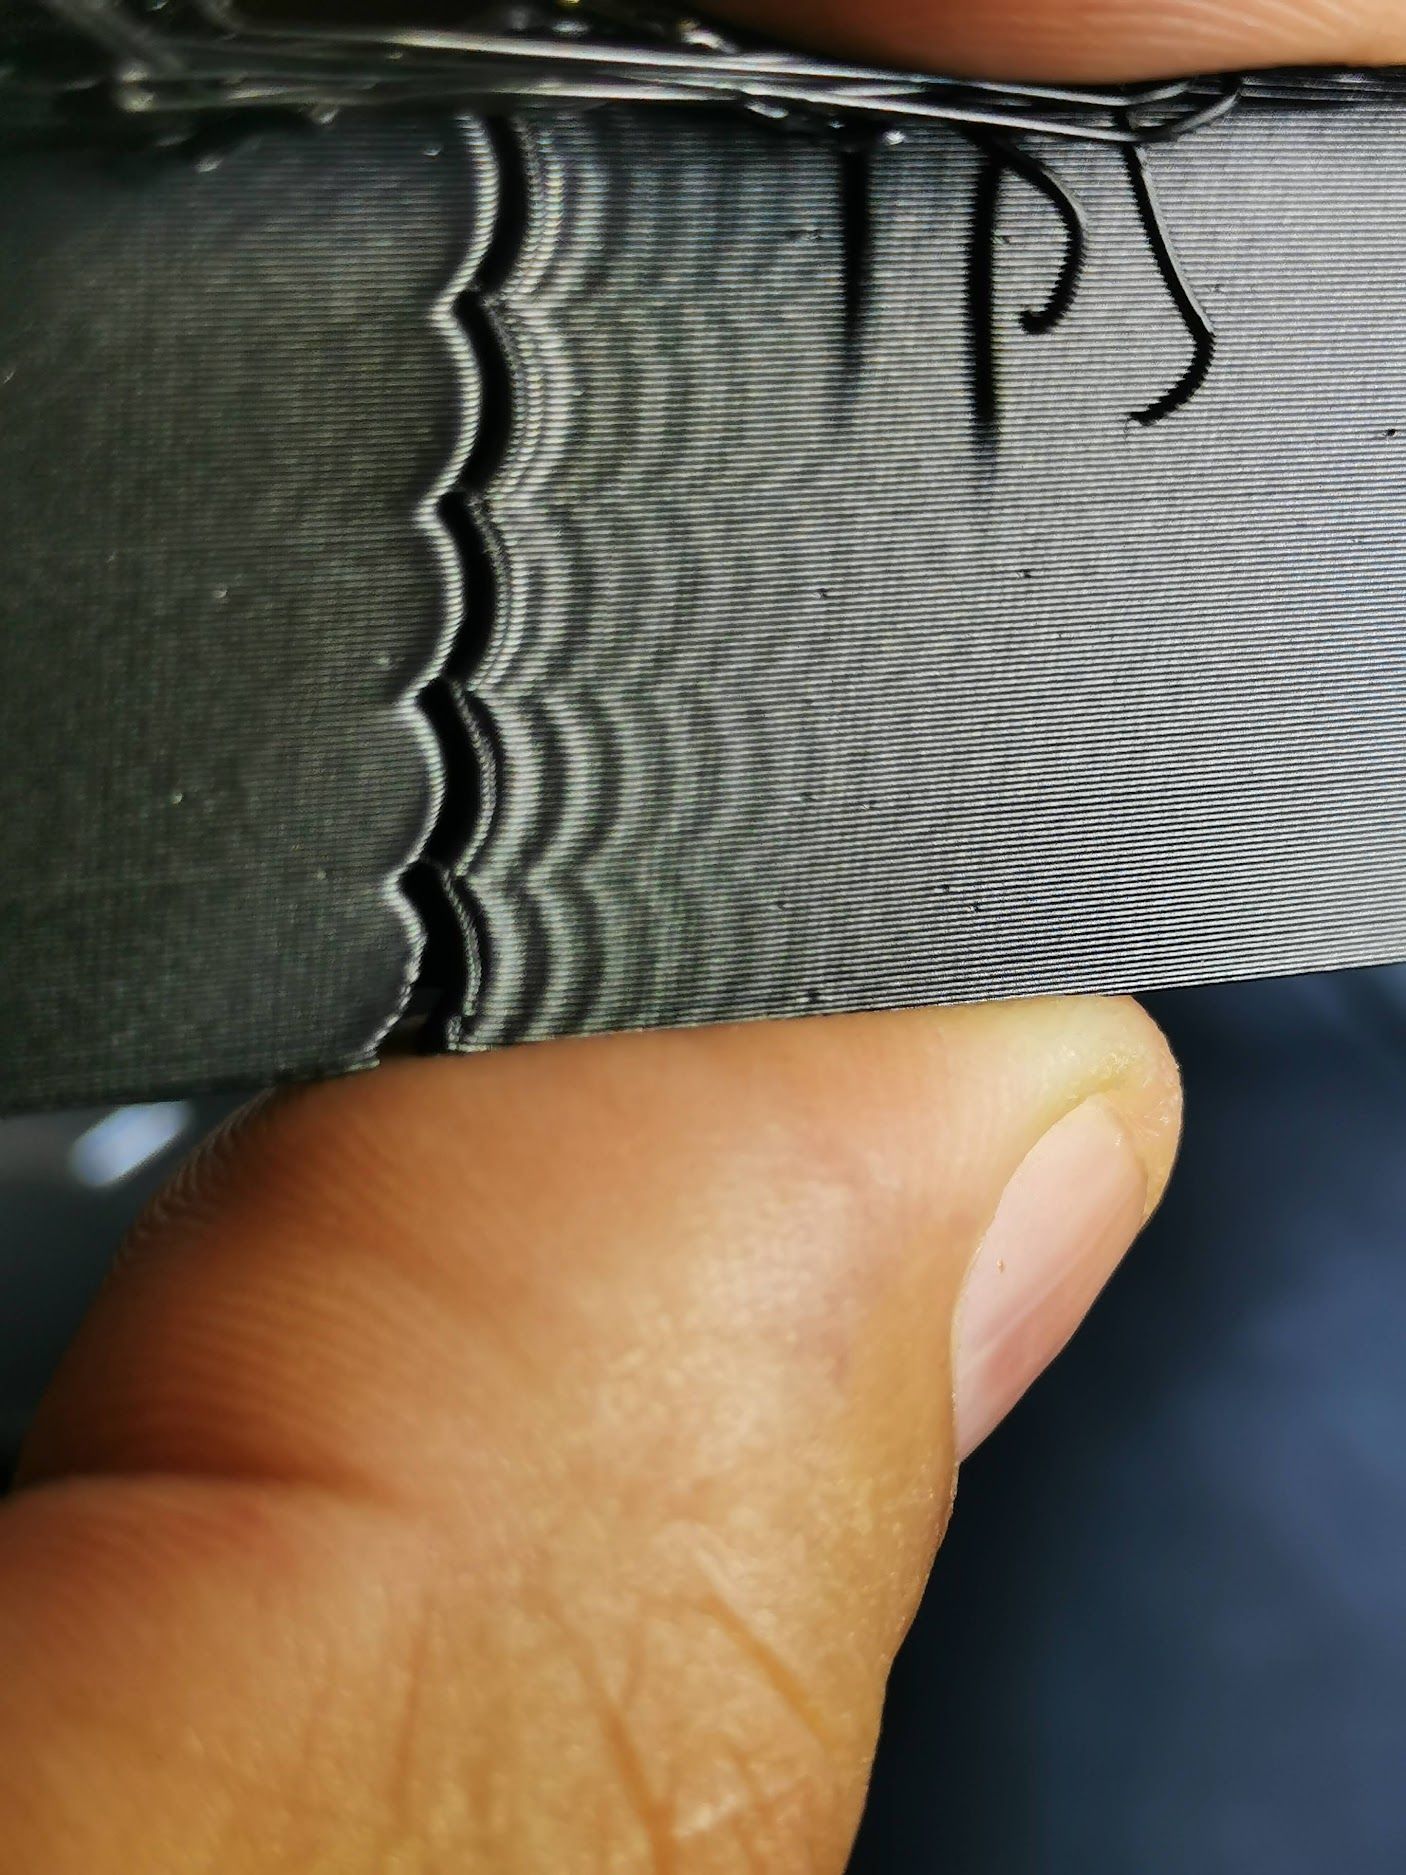
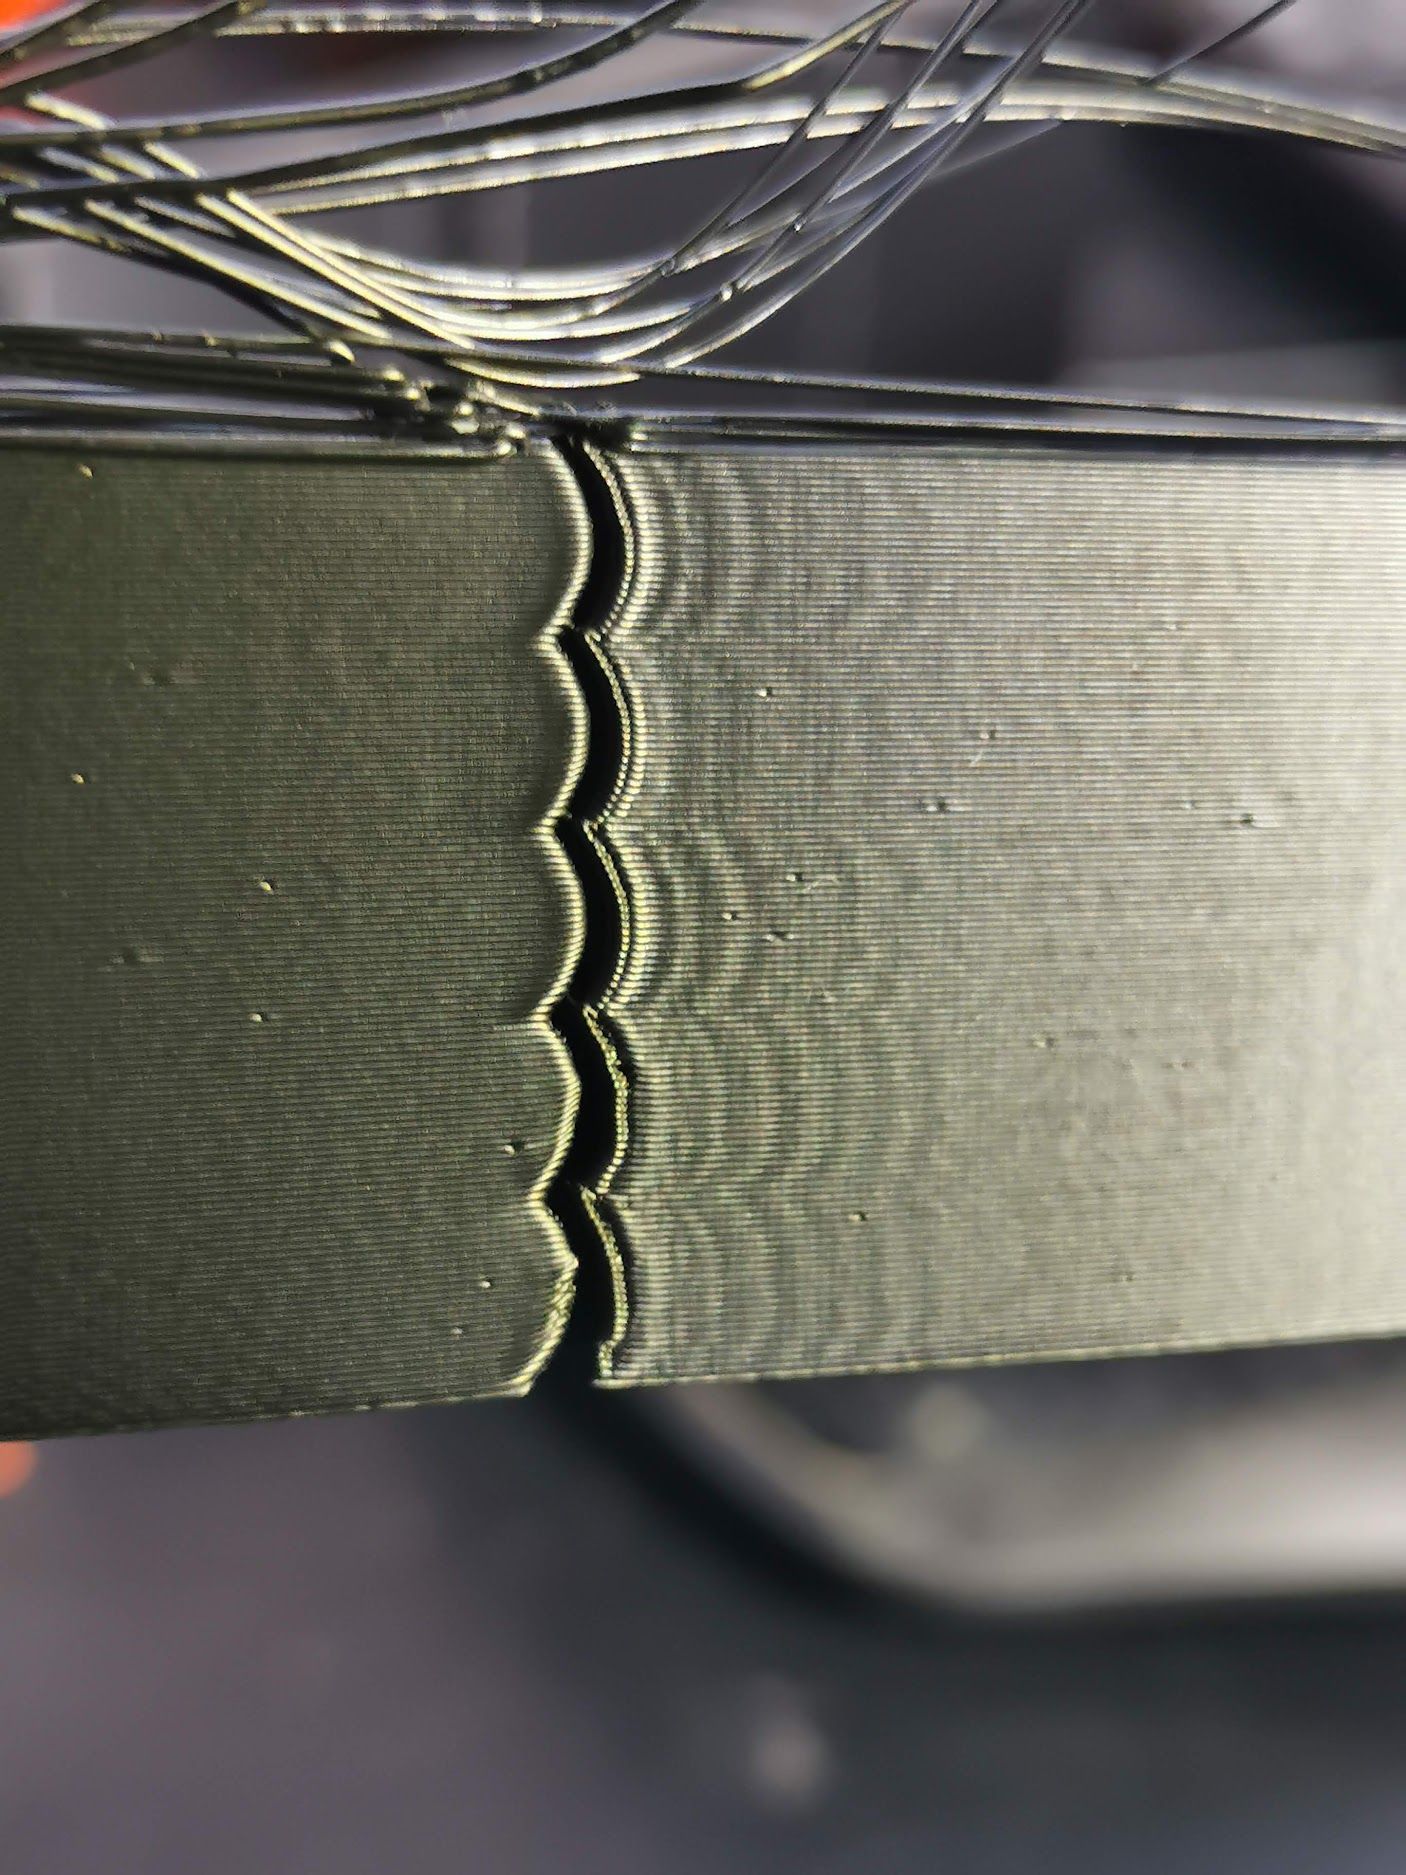
https://photos.app.goo.gl/HxsHQNMvrhbaPJAu5
With PA disabled all is OK
-
@cadetc ei3 has so far seemed to be the best for me as well on my core XY printer in initial testing.
-
@cadetc please post the GCode file and your config.g.g file,then I will try to reproduce it.
-
@dc42 said in RRF 3.4 input shaping preview available:
@cadetc please post the GCode file and your config.g.g file,then I will try to reproduce it.
Gcode
ringing_tower_ABS1h12m.gConfig,g
config (4).g; Configuration file for Duet 3 (firmware version 3) ; executed by the firmware on start-up ; ; generated by RepRapFirmware Configuration Tool v3.2.3 on Sat Apr 17 2021 20:39:32 GMT+0200 (czas środkowoeuropejski letni) ; General preferences G90 ; send absolute coordinates... M83 ; ...but relative extruder moves M550 P"Duet 3" ; set printer name M669 K1 ; select CoreXY mode G4 S5 ;wait for expansion boards to start ; Drives M569 P0.5 S0 ; x axis physical drive 0.5 goes forward M569 P0.4 S0 ; y axis physical drive 0.4 goes forward M569 P0.2 S1 ; Fron right bed physical drive 0.2 goes forwards M569 P121.0 S1 ;extruder physical drive 121.0 goes forwards M569 P0.0 S1 ; Front left bed physical drive 0.0 goes forwards M569 P0.1 S1 ; Rear bed physical drive 0.1 goes forwards M584 X0.5 Y0.4 Z0.0:0.1:0.2 E121.0 ; set drive mapping M350 X16 Y16 Z16 E16 I1 ; configure microstepping with interpolation M92 X160.00 Y160.00 Z800.00 E409.00 ; set steps per mm M566 X1200.00 Y1200.00 Z30.00 E1200.00 ; set maximum instantaneous speed changes (mm/min) M203 X30000.00 Y30000.00 Z1800.00 E3000.00 ; set maximum speeds (mm/min) M201 X4000.00 Y4000.00 Z200.00 E2000.00 ; set accelerations (mm/s^2) M906 X2000 Y2000 Z1200 E800 I30 ; set motor currents (mA) and motor idle factor in per cent M84 S30 ; Set idle timeout M671 X-27.4:147.5:322.4 Y-4.5:324.5:-4.5 S20 ; Axis Limits M208 X0 Y0 Z0 S1 ; set axis minima M208 X290 Y280 Z290 S0 ; set axis maxima M955 P121.0 I41 ; Endstops M574 X2 S1 P"121.io1.in" ; configure active-high endstop for high end on X via pin 121.io1.in M574 Y1 S1 P"io1.in" ; configure active-high endstop for low end on Y via pin io1.in M574 Z1 S2 ; configure Z-probe endstop for low end on Z ; Z-Probe M950 S0 C"121.io0.out" ; create servo pin 0 for BLTouch M558 P9 C"^121.io0.in" H15 F240 T9000 ; set Z probe type to bltouch and the dive height + speeds G31 P500 X-1 Y-32 Z2.50 ; set Z probe trigger value, offset and trigger height M557 X10:290 Y3:290 S30 ; define mesh grid ; Heaters M308 S0 P"temp0" Y"thermistor" T100000 B4138 ; configure sensor 0 as thermistor on pin temp0 M950 H0 C"out0" T0 ; create bed heater output on out0 and map it to sensor 0 M307 H0 B0 S1.00 ; disable bang-bang mode for the bed heater and set PWM limit M140 H0 ; map heated bed to heater 0 M143 H0 S130 ; set temperature limit for heater 0 to 120C M308 S1 P"121.temp0" Y"thermistor" T100000 B4138 ; configure sensor 1 as thermistor on pin 121.temp0 M950 H1 C"121.out0" T1 ; create nozzle heater output on 121.out0 and map it to sensor 1 M307 H1 B0 S1.00 ; disable bang-bang mode for heater and set PWM limit M143 H1 S300 ; set temperature limit for heater 1 to 300C ; Fans M950 F0 C"out7" Q500 ; create fan 0 on pin out7 and set its frequency M106 P0 S0 H-1 ; set fan 0 value. Thermostatic control is turned off M950 F1 C"121.out2" Q500 ; create fan 1 on pin 121.out2 and set its frequency M106 P1 S1 H1 T45 ; set fan 1 value. Thermostatic control is turned on ; Tools M563 P0 D0 H1 F0 ; define tool 0 G10 P0 X0 Y0 Z0 ; set tool 0 axis offsets G10 P0 R0 S0 ; set initial tool 0 active and standby temperatures to 0C ; Custom settings are not defined ; Miscellaneous M572 D0 S0.022 ;enable pressure advance -value of 0.02 M575 P1 S1 B57600 ; enable support for PanelDue M501 ; load saved parameters from non-volatile memory M911 S22 R23.5 P"M913 X0 Y0 G91 M83 G1 Z3 E-5 F1000" ; set voltage thresholds and actions to run on power loss -
@dc42 since it seems like PA is still having issues, I printed a calibration cube with ei3 input shaping on but PA disabled, and things were fine except for it still having the same extrusion bubbles/zits that aren't present in RRF 3.3 with DAA on and PA disabled (or enabled). No stepper errors or hiccups or clunking while printing with PA off:
=== Move ===
DMs created 83, segments created 35, maxWait 23082ms, bed compensation in use: mesh, comp offset 0.000
=== MainDDARing ===
Scheduled moves 11545, completed moves 11545, hiccups 0, stepErrors 0, LaErrors 0, Underruns [0, 0, 0], CDDA state -1
=== AuxDDARing ===
Scheduled moves 0, completed moves 0, hiccups 0, stepErrors 0, LaErrors 0, Underruns [0, 0, 0], CDDA state -1 -
@skrotz does PA still have problems if you turn input shaping off?
-
@skrotz said in RRF 3.4 input shaping preview available:
extrusion bubbles/zits that aren't present in RRF 3.3 with DAA on and PA disabled (or enabled).
I realize this may be a bit of a stretch - are you sure the bubbles/zits problem is not caused by the wet filament? - have you tried going back to RRF 3.3 to check using the same filament that this problem does not exist?
-
@dc42 Is the LIS3DSH already implemented in these beta binaries? If so i could give it a try and check if PA and IS are giving problem also on my build running fine with the stable 3.3. I've already printed some part that i can compare