Remounting my print bed
-
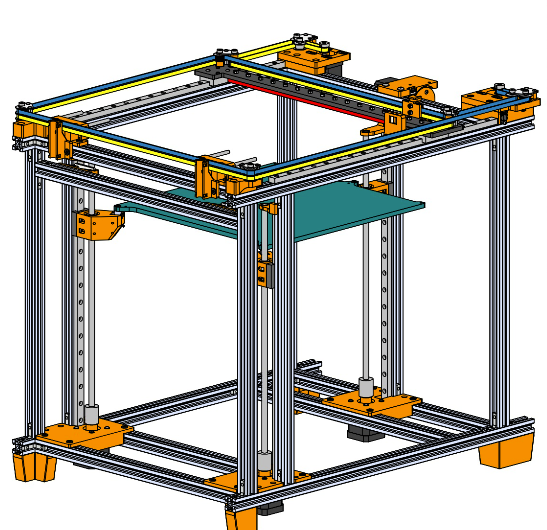
The heavy bed assembly is being supported by 3 small diameter lead screws. That will tend to cause the screws to bow which will in turn cause some lateral shifting of the bed as they rotate. I think it would be better to hang the bed from the screws and put the motors at the top of the Z axis.
Long, thin, end-supported guide rails will tend to flex if there's any lateral force on them (from bowed lead screws), allowing the bed to shift, which will show up in prints as poor Z axis quality. It would be better to use fully supported rails that will be less likely to flex. That would require adding more t-slot or some rigid panels to the frame.
If you can't get a decent smooth slot cut in the bed you can screw on a piece of metal that will serve the same purpose. A piece of U channel stock or even two separate pieces of metal arranged so they are parallel can replace a milled slot.
-
First of all, those linear rods are way too small for that length. I would suggest running at least 20mm rods for that distance to get acceptable stiffness.
if you dont want to do that, i would suggest moving the rods maybe 50mm closer to the lead screw in the center, this will cause the bed to rock less along the axis of the two leadscrews.Another possibility is to leave the rods there and buy another leadscrew + motor and mount them right next to the linear rods. this will also reduce the flexing of that bar where the current leadscrew is installed in.
How flexible is that bar anyway? it looks like the heavy bed could easily get that bar to flex
And i agree with Mark, the leadscrews would be better off hanging. However, they should really be mounted on a fixed side, screwed into an axial ball bearing which can take the axial load.
It has been a thorne in my eye for quite a while already that these cheap chinese kits use the stepper motor (sometimes even with a flexible coupler) as an axial bearing. If you press a little too hard on the shaft, it pops out.
The motors would be OK at the bottom if the leadscrews would be rigidly mounted at the top. -
I'm revisiting this, I had to take a break to finish school. As the opinion seems to be that the T8 lead screws are to small in diameter I am thinking that I will replace them with 3 T12x2 single starts using 12mm pillow flange blocks to secure them to the top frame and perhaps use the existing 10mm linear guides for additional alignment. So in the picture above it would be a T12x2 on each corner on the near side (perhaps with a 10mm linear rod in between them?) and a T12x2 in the center on the other side with a 10mm linear rod in the existing locations in the photo. I am hoping that will be sturdy enough to adequetly support the bed.
Another question I have is can a Duet 2 Ehternet support 1X, 1Y, and 3Z axis's with 1 extruder or do I need to add a Duex 2 or 5? If I need to add a Duex I may just switch to a 6HC in standalone mode with my 7" PanelDue.
-
@TLeTourneau said in Remounting my print bed:
Duet 2 Ehternet support 1X, 1Y, and 3Z axis's with 1 extruder
6 drivers needed for that config. Duet 2 Ether has 5. Therefore, needs expander, or Duet 3. Which has six.
Me, personally, I'd go D3+Pi all the way...
-
@Danal said in Remounting my print bed:
@TLeTourneau said in Remounting my print bed:
Duet 2 Ehternet support 1X, 1Y, and 3Z axis's with 1 extruder
6 drivers needed for that config. Duet 2 Ether has 5. Therefore, needs expander, or Duet 3. Which has six.
Me, personally, I'd go D3+Pi all the way...
Thanks for the reply, I kind of thought so.
I need to do some research to determine what the advantages are to the D3+Pi vs the D3 in standalone mode as I already have the 7" PanelDue that I can use with it in standalone mode.
-
At this time, PaneDue support is somewhat limited if you also have a Pi. A different tradeoff: A Pi is the only way to do WiFi (stand alone is wired Ethernet only).
It is a tough call... and I realize a lot of people really like their Panel. For me, it is Pi all the way. Way, way, too many things that Pi can do...
For example, I'm developing scripts that auto-align a multi tool printer. Requires the Pi. https://github.com/DanalEstes/DuetPython And a general interface to allow almost anything to be done in Python on the Pi. https://github.com/DanalEstes/PythonDSF (DSF = Duet Software Framework)
-
Well, for cost savings I ordered a Duex 5 to use with my existing Duet. I'm going with the 3 T12x2 lead screws, now I'm just trying to figure out how to mount the bed. I think I see what you're saying about mounting the bed using U channel, I may be able to mount the bed to some small pieces of 2020 too. The ball screws I have seem to slide on that surface alright. I''l have to see what I can figure out, all of the parts will be here in a few days. I also ordered a Hemera and a Wham Bam magnetic print system to try out.
-
Strange question but what c channel size would you guys recommend for the ball head screws? It looks like the most common would be 5/16" (8mm) which is actually 8.7mm across internally or 1/4" (6mm)? The ball head measures 8.7mm across so I am leaning towards the 5/16" but I thought I'd see advice first.
Thanks in advance!
-
How are you planning to implement the kinematic mount? Will the channel be on the bed plate or on the support(s)?
Are you making a Maxwell or Kelvin type?I saw someone's design that put the spherical head screws in the bed plate and put the slot for the pitch adjuster on the lifter attached to the guide rail bearing block. The slot was made from two pieces of round steel mounted in a printed plastic block. They were lifting the bed with 3 screws and using auto tramming.
-
@mrehorstdmd said in Remounting my print bed:
Maxwell or Kelvin type
I'm had attempted to implement and am shooting for a Kelvin type tetrahedron-vee-flat. I was not able to machine a smooth channel/groove for the two constraint point in my build plate and am wondering if affixing a c channel to the bottom of my build plate for the two constraint point will alleviate that issue. I plan on using that in conjunction with triple Z auto bed leveling.
-
@TLeTourneau Do you have a drawing or CAD model of it?
How will you mount a heater on the bed plate if there's a U channel there? -
The heater is inset 25mm from the edge of the bed on all sides.
This is the front which is the single constraint:

This is the right rear which is the triple constraint:

This is the left rear which is the double constraint and the one I had the problem with creating a smooth channel. I'm hoping that mounting an U channel here will help with the issue.

-
@TLeTourneau OK, so the right rear screw is the reference, the left rear is the pitch adjuster and the front center is the roll adjuster. I see springs on all 3 screws. I assume they are there to keep the screw upright because they fit loosely in their holes. That means the entire bed plate is standing on 3 wobbly screws. That isn't going to be good for print quality.
You really want the screws to be threaded into something that will hold them tightly and prevent wobble while still allowing them to be turned for adjustment purposes. I used PTFE blocks for that. The blocks can be screwed down tightly, and using slightly undersized holes for the leveling screws will allow them to roll their threads into the PTFE. The leveling screws won't wobble, and that means the bed won't wobble. PTFE is good for this because it won't melt, no matter how hot you run the bed, and the screws can be turned easily. Nylon won't work because the friction is so high you won't be able to turn the leveling screws (I tried). There's a reason they use nylon in nylock nuts! You can find a small, inexpensive PTFE bar or block on ebay if you shop carefully and compare the price/weight of the different offerings.
This is how I mounted the screws in UMMD:
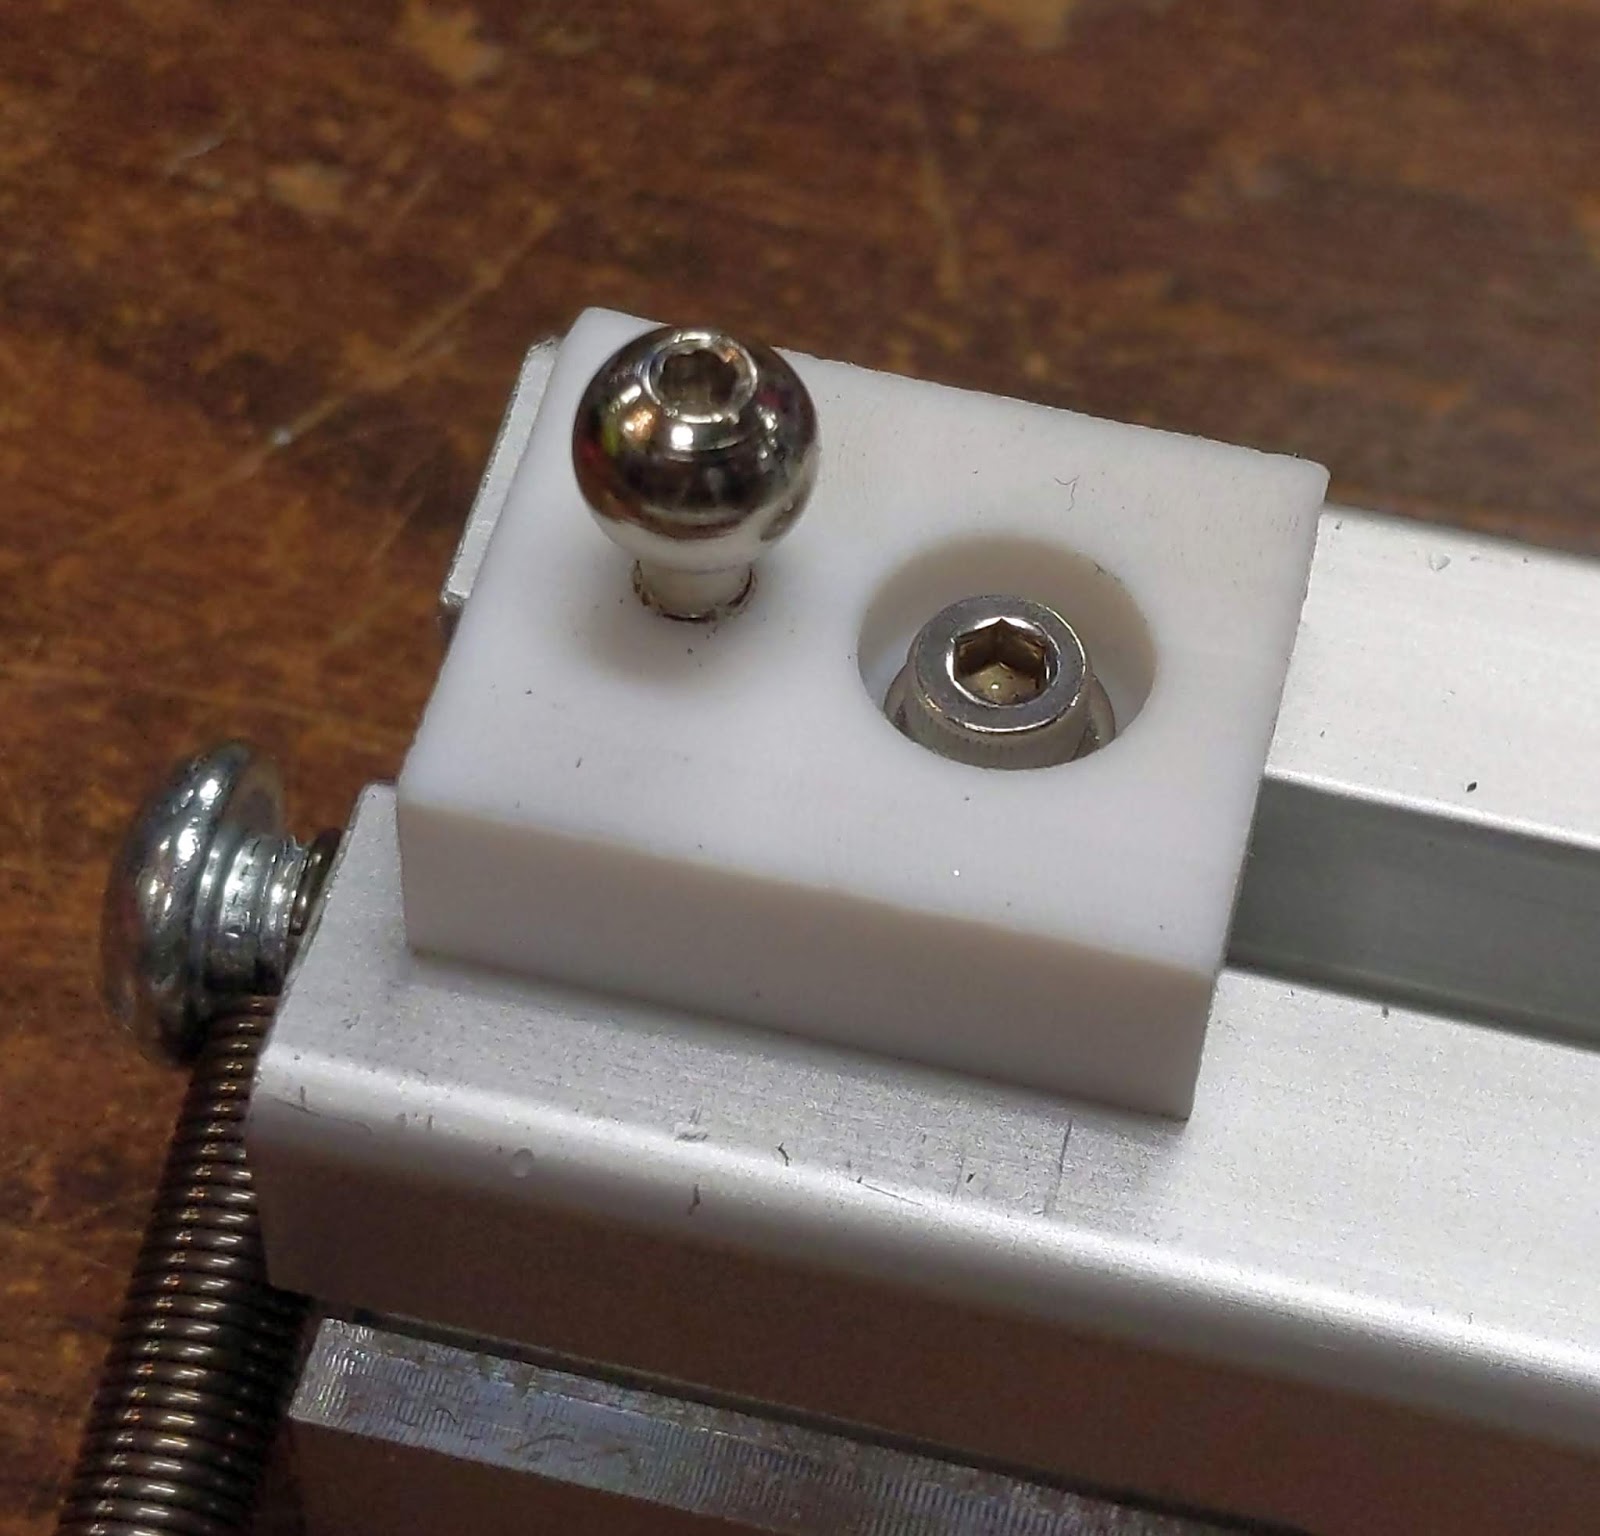
A single t-nut and screw hold the PTFE block on the t-slot, and the leveling screw threads into the PTFE. The PTFE blocks have antirotation tangs on the bottom that fit into the t-slot. If you can't cut tangs into the blocks, just mount them using 2 screws and t-nuts.
Cutting a short slot in the edge of the plate can provide the needed constraint at the pitch screw. Otherwise a short piece of C channel screwed to the bottom of the bed plate should work OK. The bed plate is only going to expand 0.5 mm or so, so you don't need a long slot for the leveling screw head to sit inside.
-
@mrehorstdmd said in Remounting my print bed:
PTFE bar or block
Yeah, I tried finding some when I built it out the first time and struck out. I'm going to give it another try. I really appreciate the responses!
-
@mrehorstdmd said in Remounting my print bed:
Nylon won't work because the friction is so high you won't be able to turn the leveling screws (I tried).
Do you think derlin would work? My brother can get derlin in the sizes that would work.
-
@mrehorstdmd said in Remounting my print bed:
I saw someone's design that put the spherical head screws in the bed plate and put the slot for the pitch adjuster on the lifter attached to the guide rail bearing block. The slot was made from two pieces of round steel mounted in a printed plastic block. They were lifting the bed with 3 screws and using auto tramming.
Jubilee does this. Works very well.
-
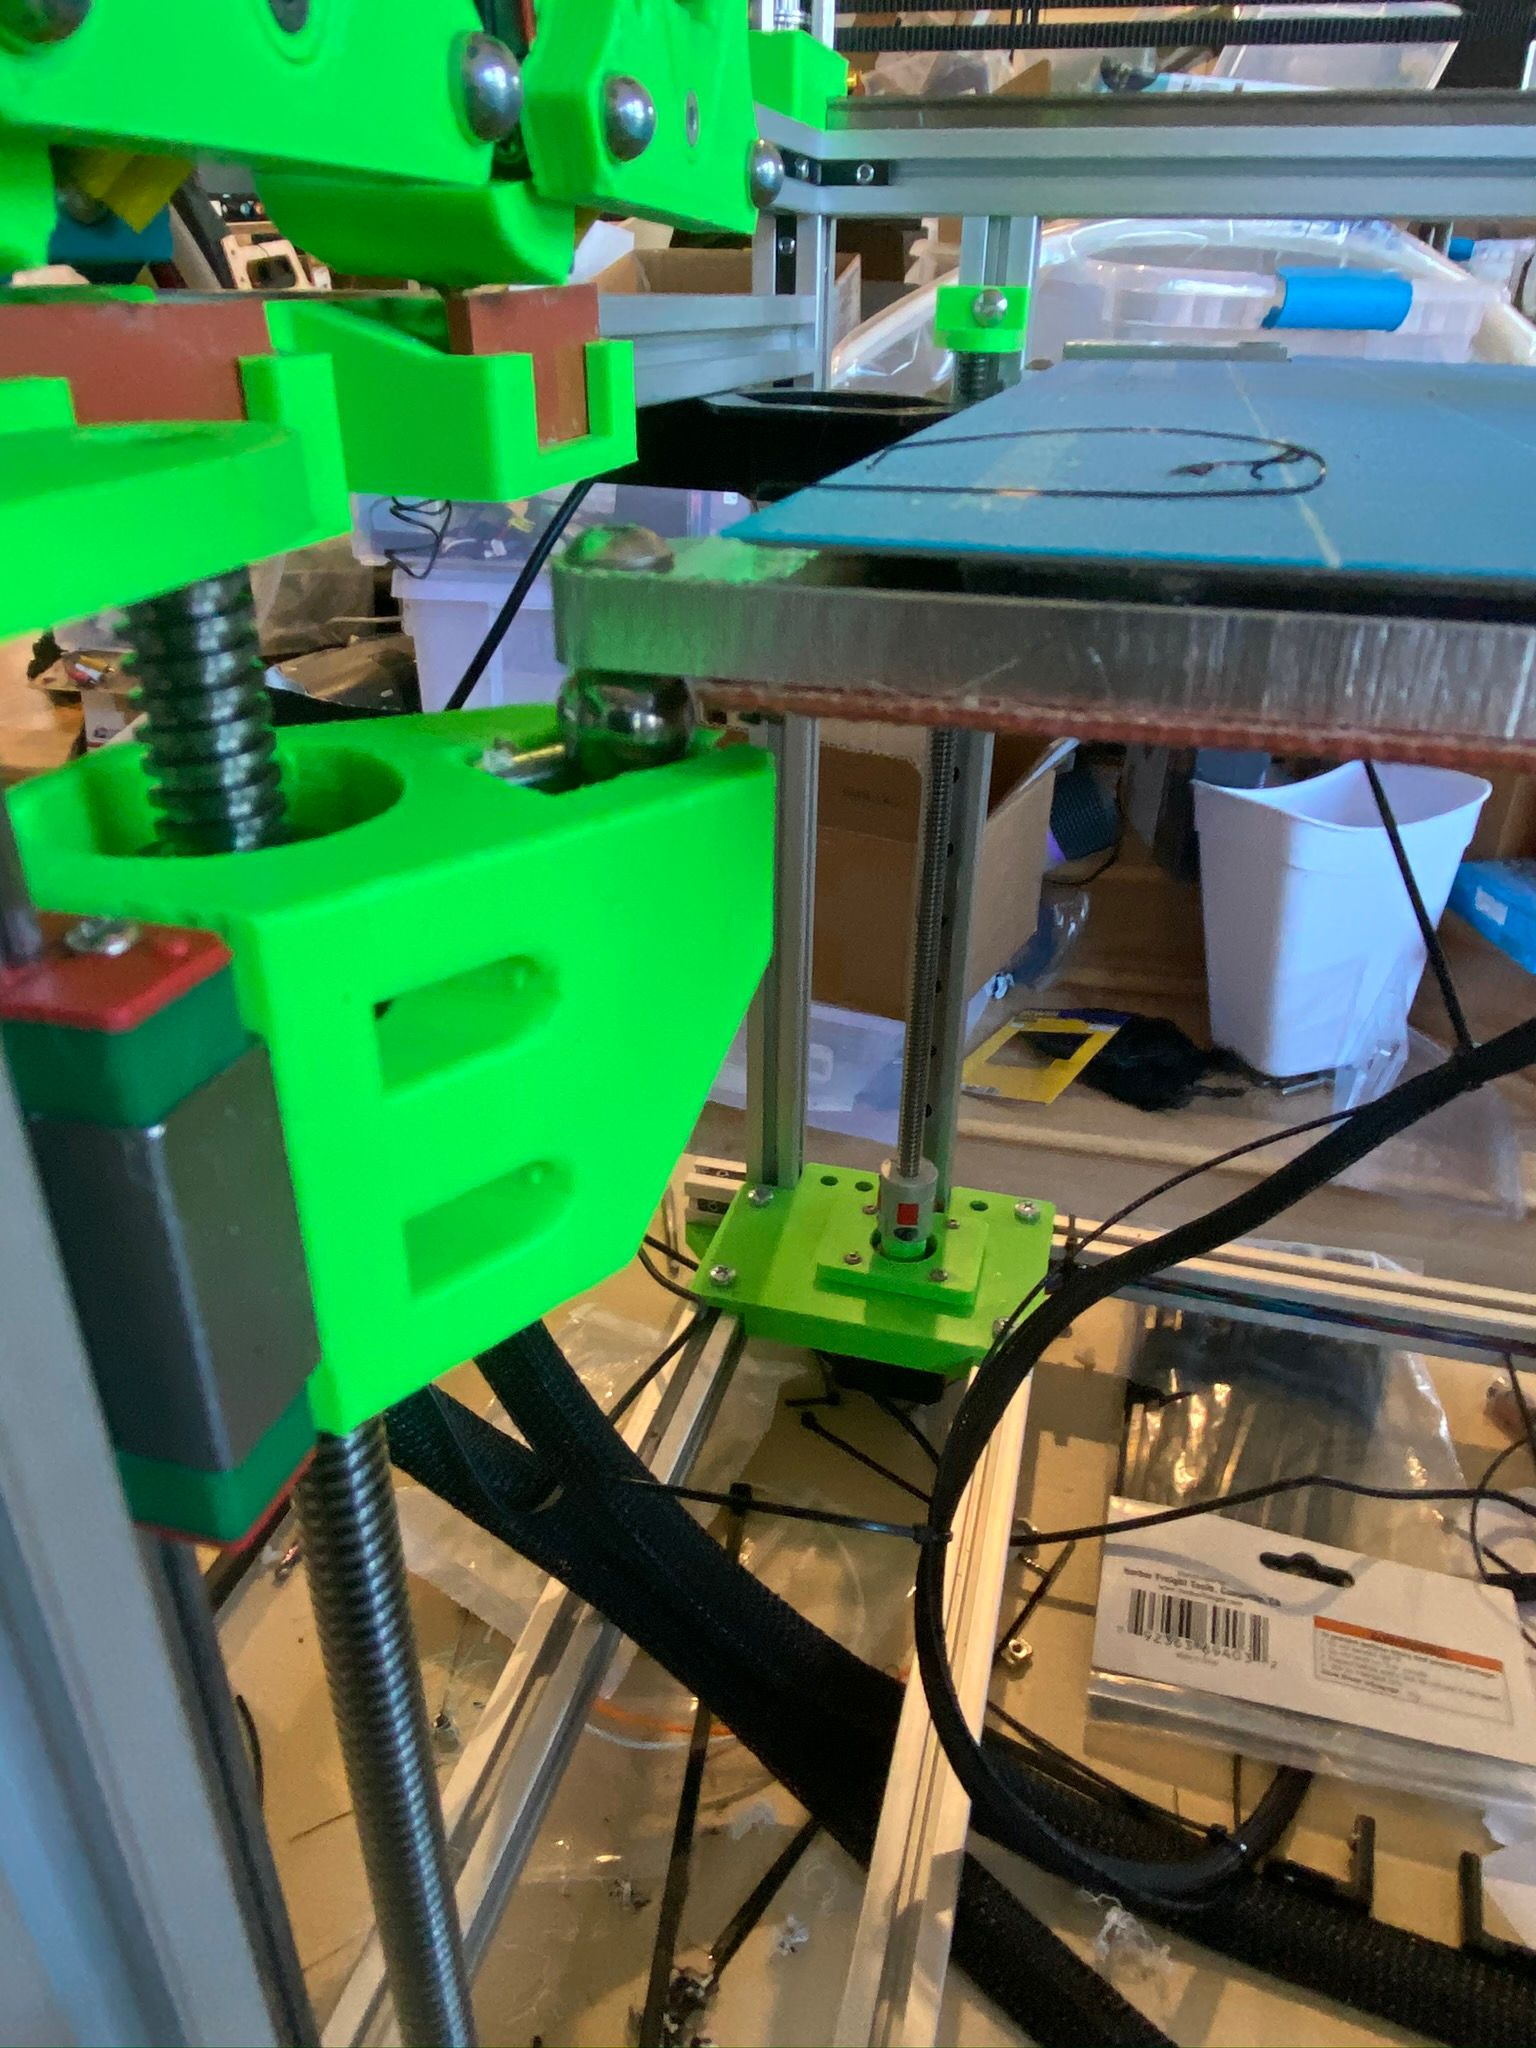
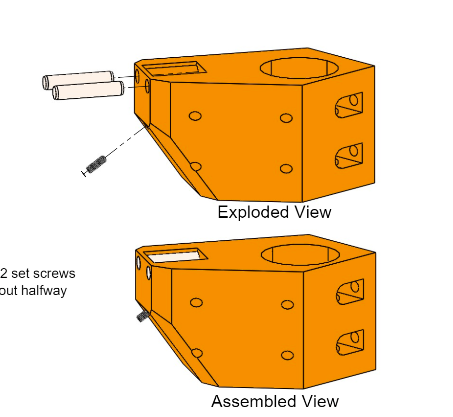
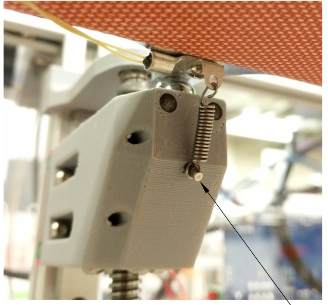
-
@Danal That's the one!
-
@Danal
That is very nice, now I wish I had thought to have tabs machined into my build plate! Looking at that design I'm wondering if I'll need the 12mm linear rods. I'm going to have 3 T12x2 lead screws, 2 on the outside edges of the build plate on one side and one in the center on the other side. The build plate is attached to a relatively solid frame mode of 2020 and aluminum bar shown in the first and thirteenth posts. The aluminum bar is being replaced with a 3/8"x1-1/2" piece of 6061-T6511 aluminum bar to minimize flex.
 -
@TLeTourneau It's just aluminum. You can cut it with many types of saws, including a hack saw. Machining is not required...